
In this lab, we will be integrating AEM with Adobe Analytics and Adobe Target. In doing so, we will leverage Adobe I/O and Launch, by Adobe. We will use Adobe I/O as it is the new centralized hub for integrations into Adobe's products and technologies. We will use Launch because tag management enables marketers to easily connect and manage their Experience Cloud and third-party solutions without developer intervention.
Integrating these solutions will provide us with the following value:
We have configured this lab environment for you so that you have everything you require to complete these exercises. If you would like to walk through this lab again at home, we have provided a section at the end that covers how to configure these prerequisites in your own environment. To go through these pre-requisites, you will need access to:
If you do not already have a lot of experience with the solutions, do not worry, our teaching assistants are here to help. Additionally, we have provided you with some basic guidance for getting around that you may find helpful.
We have added browser shortcuts to Chrome for the Experience Cloud solutions that we will be using today. You can also access our Experience Cloud account directly by pointing your browser to https://summit2019l725.experiencecloud.adobe.com.
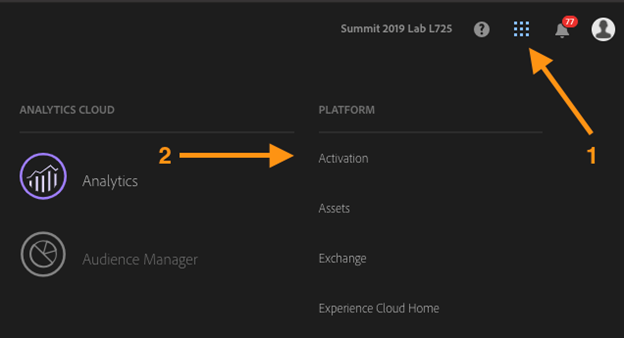
Throughout the lab, we will often switch between Experience Cloud solutions. To access the solution switcher from any of the SaaS-based Experience Cloud solutions, click on the solution switcher icon.
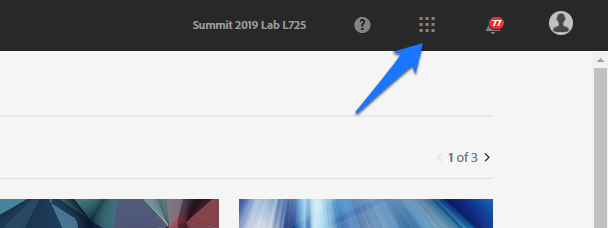
Note that Experience Manager is not connected to our other solutions through the solution switcher. Thus, Experience Manager is not illuminated in our SaaS-based solutions and our SaaS-based solutions are not illuminated in Experience Manager.
During the lab, we will be accessing Target and Activation. All other options can be ignored.
We have installed two different Experience Manager environments on your lab machine: an author environment and a publish environment. The author environment is where we will author our content and configure our integrations. Our authored content and configurations will be _published,_activated,or replicated to our publish environment. These three terms are all synonymous. The publish environment in turn will serve our authored website.
At any time, you can access these environments in your web browser by using the provided bookmarks or directly at http://localhost:4502 for the author environment and http://localhost:4503 for the publish environment. When prompted to login to the author environment, you may use Experience Manager's default username and password: admin and admin.
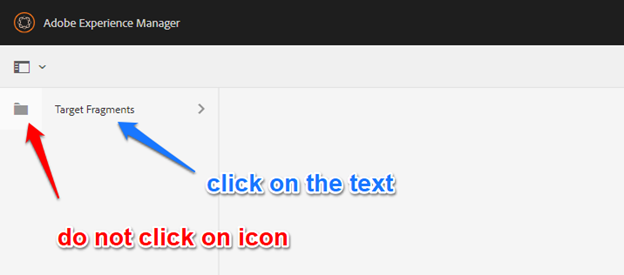
Whenever you are in one of Experience Manager's consoles and would like to access the central menu, just click on the Adobe Experience Manager icon in the top left of your screen or accessing http://localhost:4502/aem/start.html.
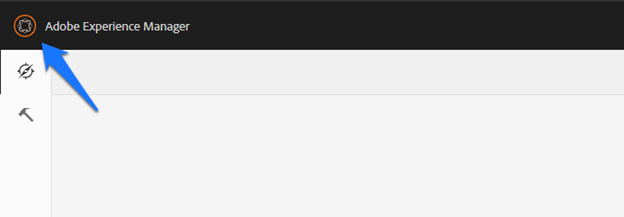
NOTE - This will be referenced a lot throughout this lab.
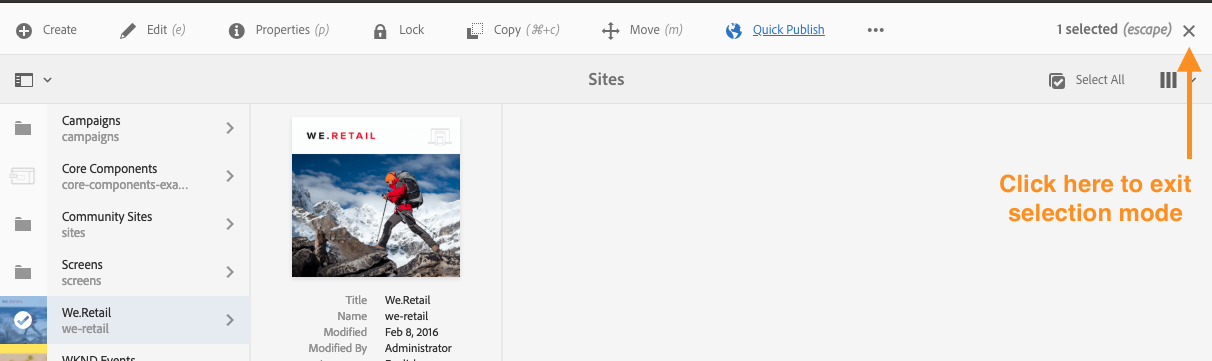
If you currently have an item selected in one of the Experience Manager consoles, it is possible that you will not be able to see this icon. In these cases, you can click on the "X" icon in the top right of your screen to deselect all items and dismiss the contextual menu that runs across the top of the screen.
Experience Manager's consoles provide several views of your content. In most of our exercises, we have shown how to complete the activity using list or column view. If your view does not match our instructions, you can change your view.
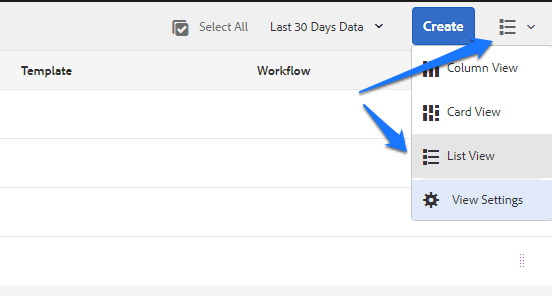
In the current Experience Manager console, you will see an icon in the top-right that matches your current view.
At any time, you can click this icon to choose one of the other views that is available.
Experience Manager provides a feature called omnisearch that is useful for navigating the system. In many steps throughout the lab, rather than clicking to navigate to a location, you can click on the magnifying glass in the top bar and type the location that you would like to navigate to. This may come in handy if you have gotten lost and are trying to find a particular screen or console. For example, rather than clicking on Tools > Cloud Services > Adobe Launch Configurations to navigate to the Launch configurations, you can click the magnifying glass, type Adobe Launch Configurations, and click on the link that is returned.
In this lesson, we will review the configurations that have been implemented in preparation for this lab. This will allow you to understand the important role that Launch plays in our Experience Cloud deployment. We will be looking at various settings that have been put in place in preparation for this lab, but since we are all sharing an environment, we will not be updating any of them.
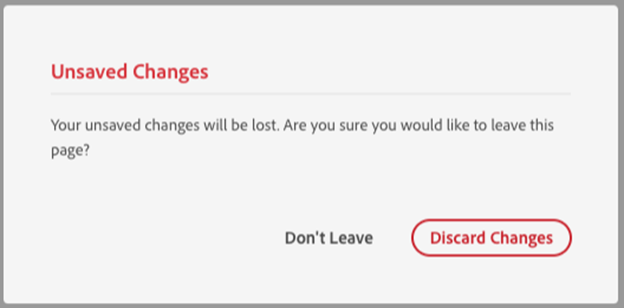
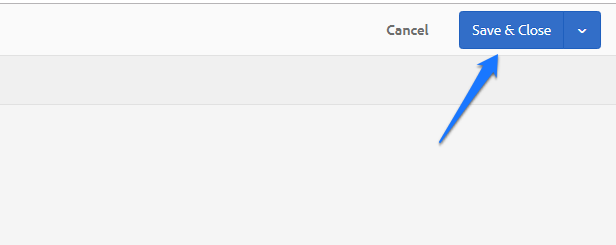
As you close each screen, you may be prompted that you have unsaved changes. In these cases, please choose to Discard Changes.
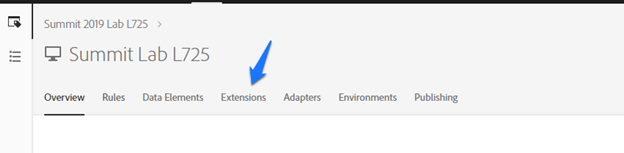
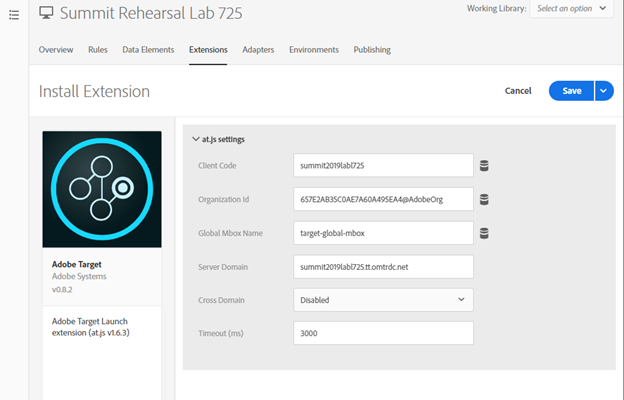
One of the biggest differences that Launch has introduced from its predecessor, DTM, is the concept of extensions. Adobe has provided extensions for each of the Experience Cloud products that we implement in Launch, but third-party partners can also implement extensions for their products, much like an App Store for your website. This decentralization is powerful in that it allows Adobe's teams and partner ecosystem to scale independently of the Launch team. In this exercise, we will review the extensions that have been installed for you.

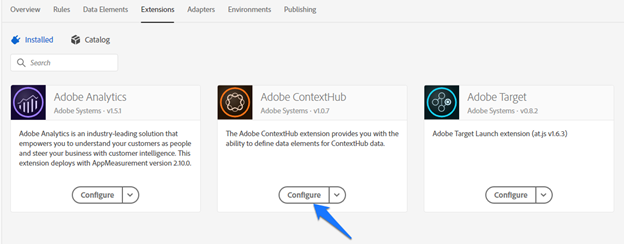
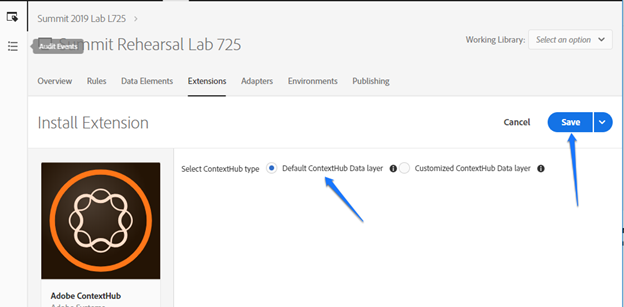
Note that we are using the Default ContextHub Data layer. This is the default data layer that is provided by Experience Manager. However, if our customer has a custom data layer, we can use this extension to map it as well – even if they aren't using Experience Manager.
Click Cancel.
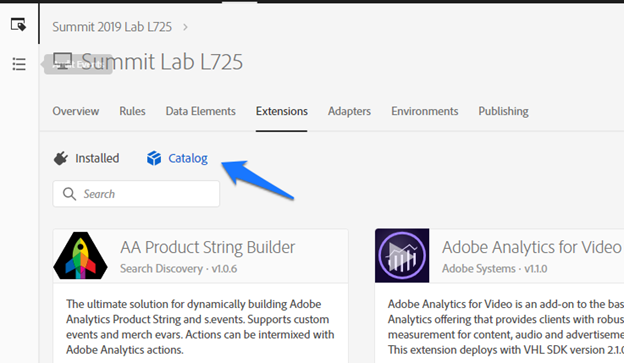
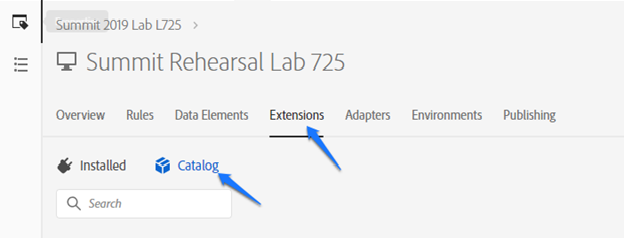
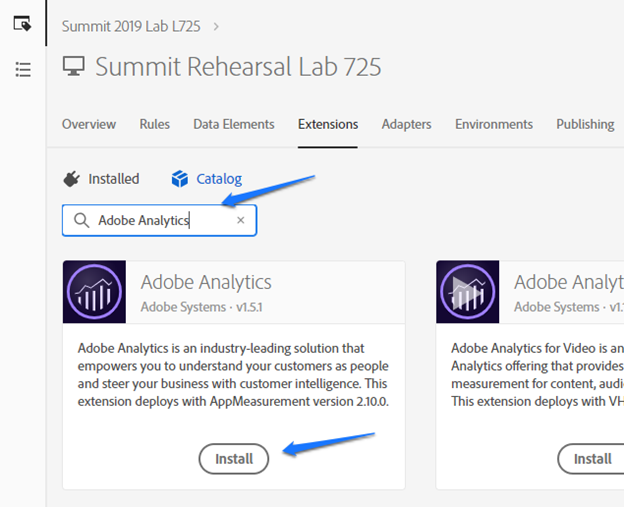
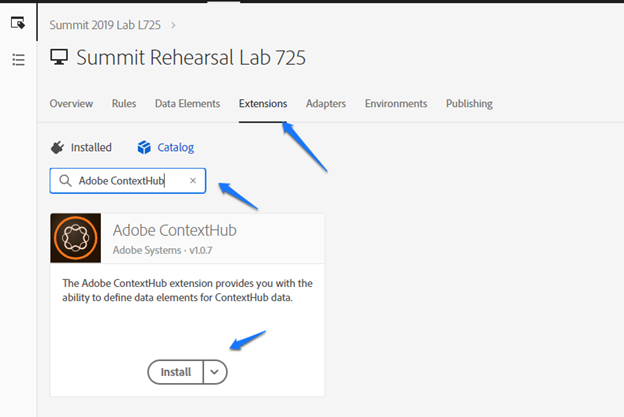
Click the Catalog icon to switch to the extension catalog.
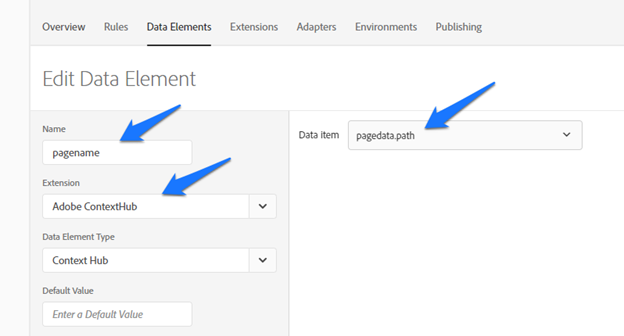
Launch allows us to map values from our data layer to data elements. These data elements are available throughout the Launch UI in various extensions and rule editors. This helps ensure consistency in our implementation and ease of use for users. In this exercise, we will review the pagename data element that we have created.

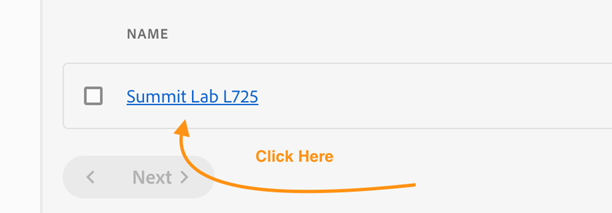
Click on the link for the _pagename_ data element.
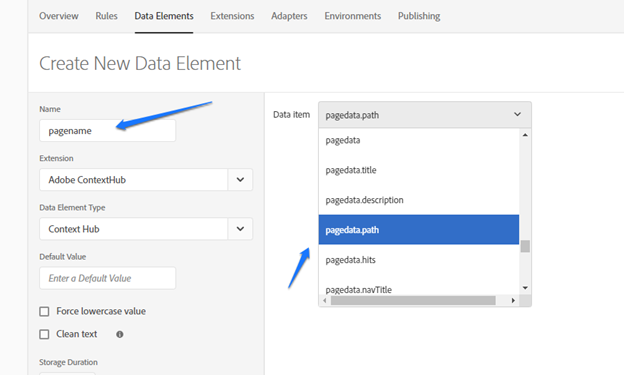
Note that we have used the Adobe ContextHub extension to map the value from pagedata.path to our pagename data element. This extension makes it easy for us to access our data layer for mapping to our data elements. Take a look through the values that are available in the Data Item field. Note that it contains all of the values that are exposed in the default AEM Context Hub.
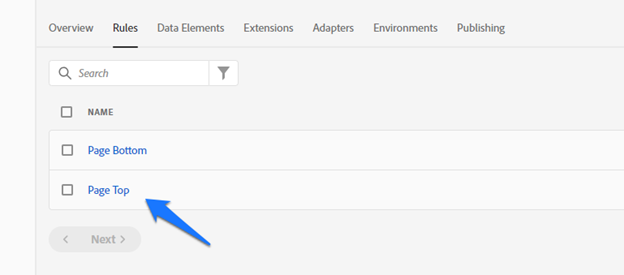
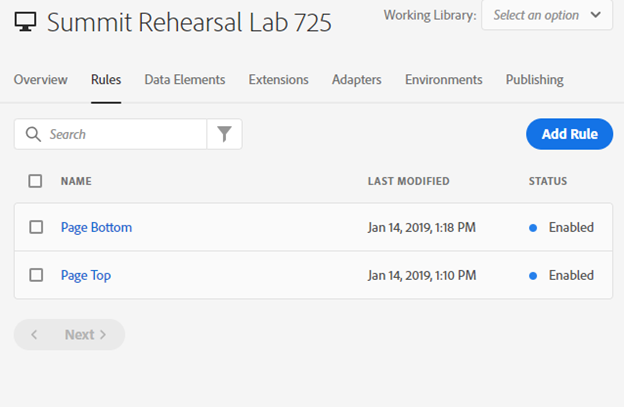
Installing the Target and Analytics extensions does not help if we do not actually send our Analytics beacon and fire our Target mboxes. This is where Rules come into play. We have set up two rules for this lab environment:
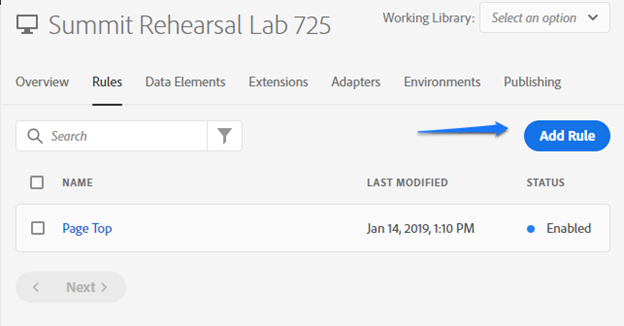
In this exercise, we will look at the rule editor and inspect the two rules that have been created for this lab.
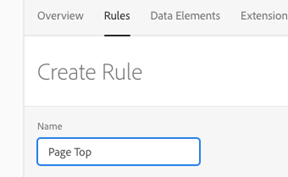
Click on the Rules tab.
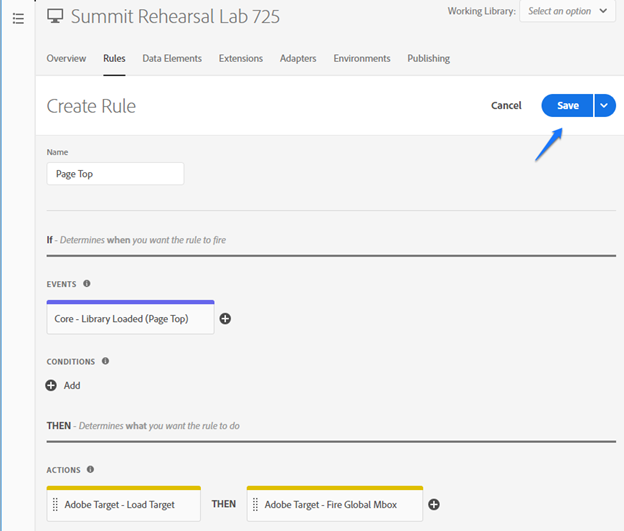
Click on the link for the Page Top rule.
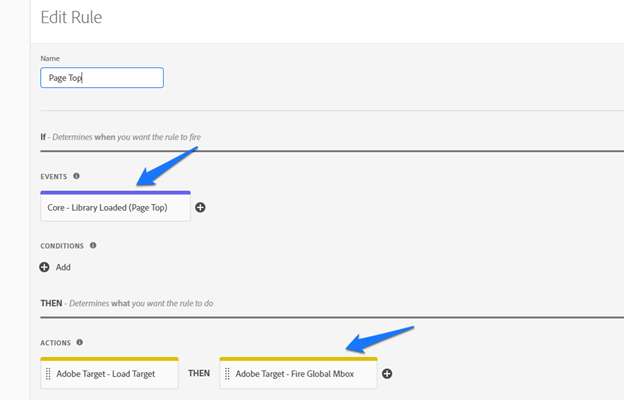
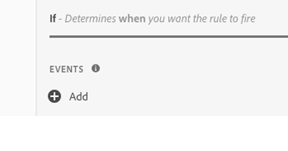
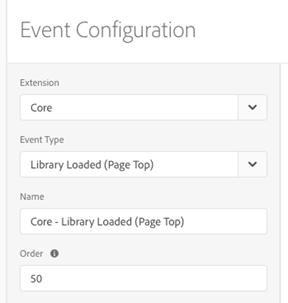
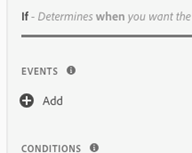
Note that the If section of the rule editor contains an event called Library Loaded (Page Top). This means that our rule will fire immediately after the Launch library is loaded at the top of the page.
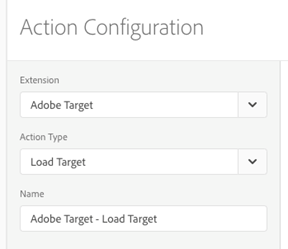
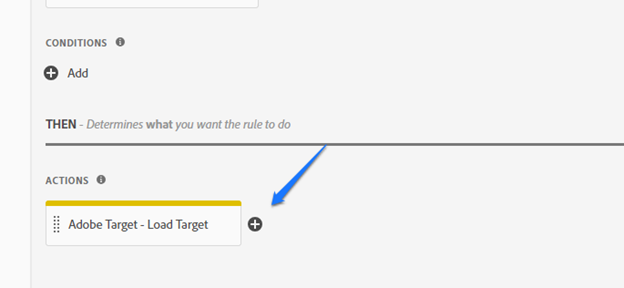
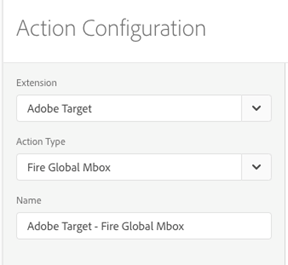
In the Then section, note that we are executing two actions: Load Target and Fire Global Mbox. These actions load the Target at.js library, fire the global mbox, and reveal our hidden page content. We recommend hiding page content until the Target global mbox has fired to prevent "flicker".
Click Cancel.
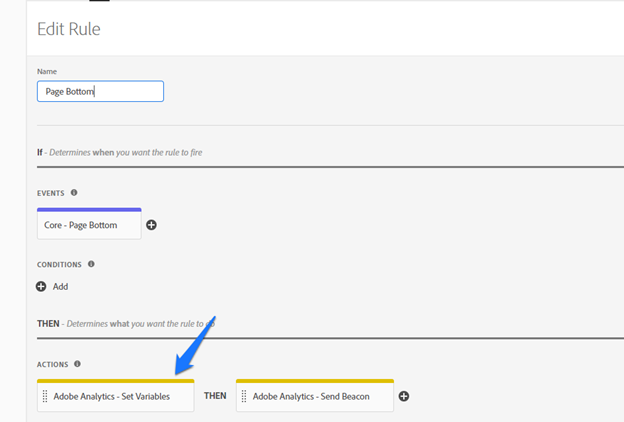
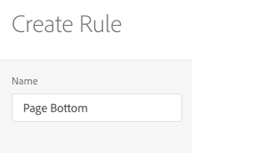
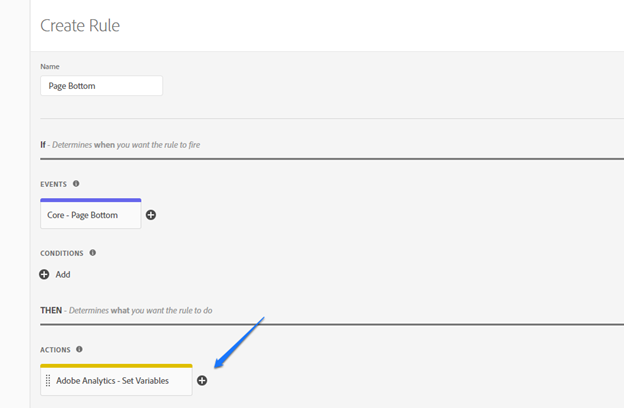
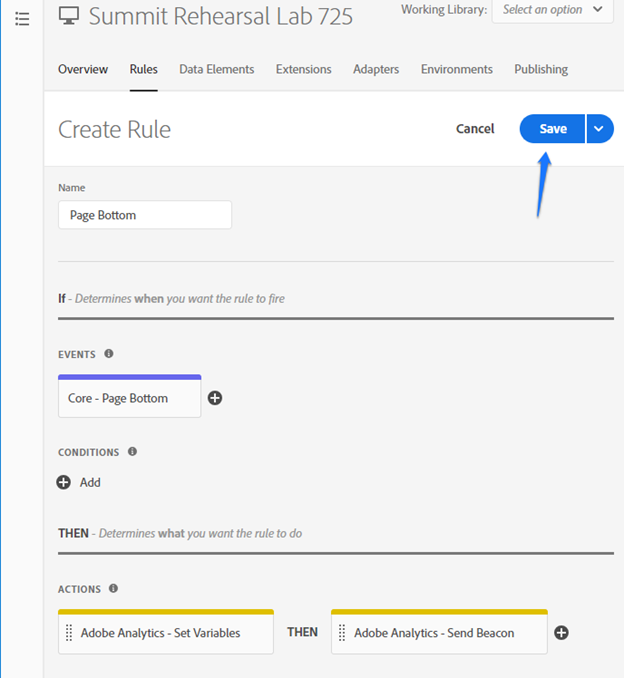
Click the link for the Page Bottom rule.
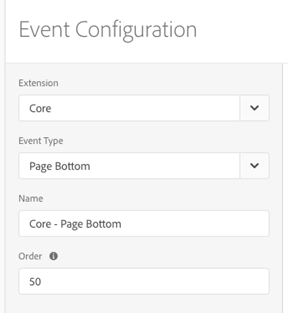
In the Events, note that we are executing this rule at the bottom of the page.
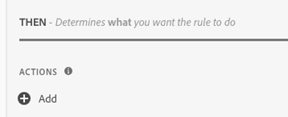
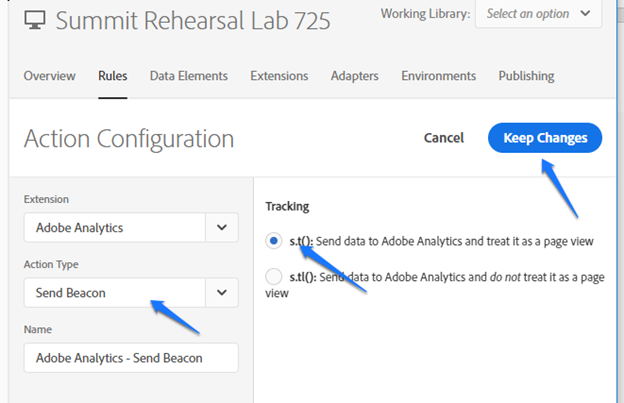
In the Actions, note that we are executing two: Set Variables and Send Beacon.
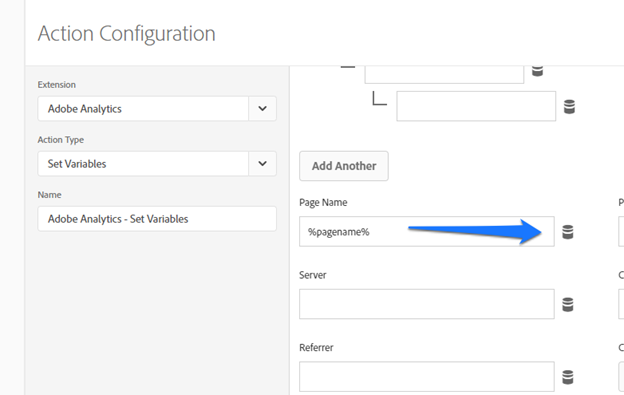
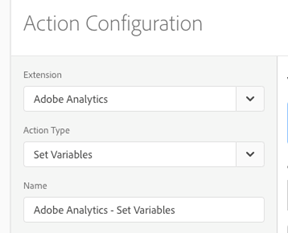
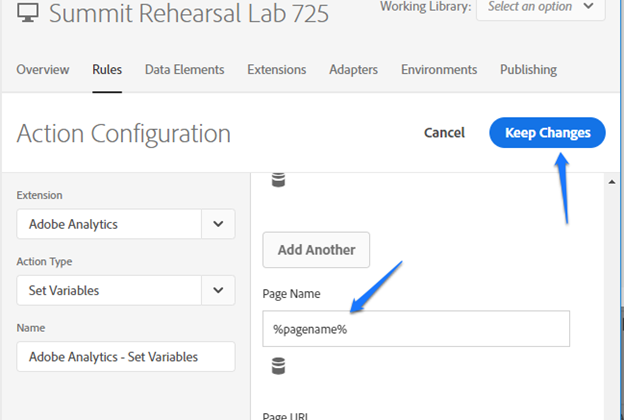
Click on the Set Variables action. Be careful not to click on the X icon as this will remove the action.
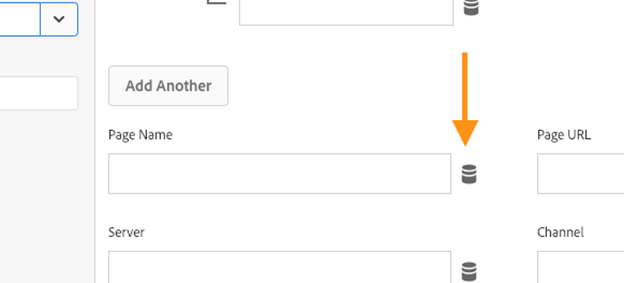
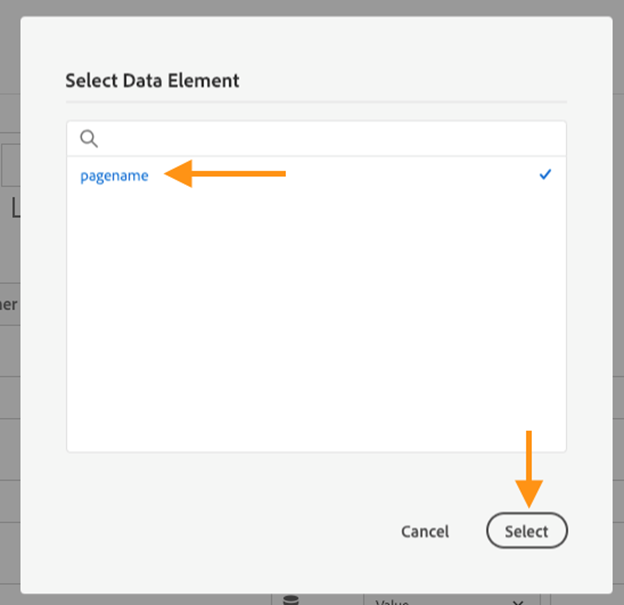
In the Action Configuration screen, scroll down in the right pane and locate the Page Name variable. Note that it has been set to %pagename%. This refers to the data element that we previously configured.
Click on the data icon to the right of this field.
In this lesson, we will configure Experience Manager to integrate with Launch, which will allow us to deploy the Analytics and Target configurations from the previous chapter to our site. In preparation for this lab, we have pre-configured an Adobe I/O integration with a public key certificate from your local Experience Manager environment. We will use this configuration to connect our Experience Manager environment with Adobe Launch.
In this section, we will leverage the Adobe I/O integration that was previously created to create an Adobe Launch Configuration for our site.
Navigate to the AEM Author environment by pointing your browser to http://localhost:4502 or by using the shortcut provided in Google Chrome.
Log in with admin as both the username and the password.
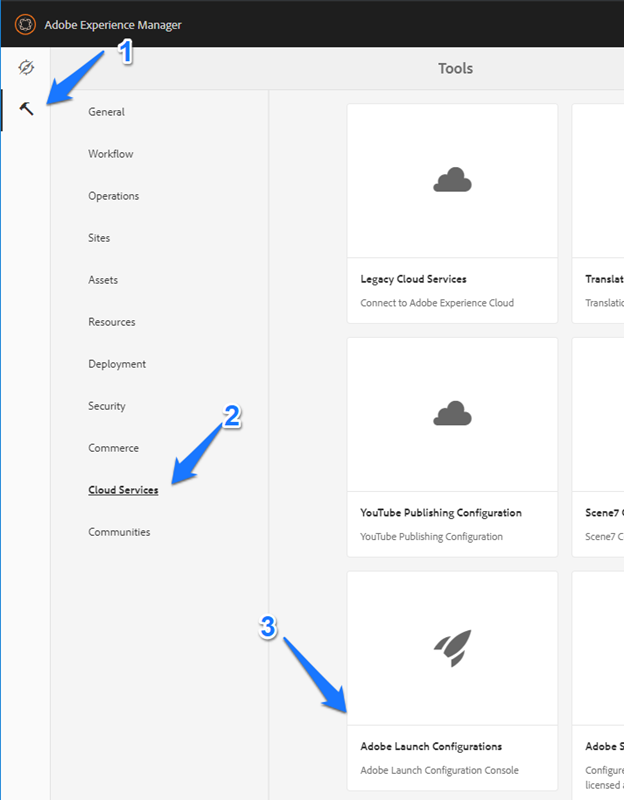
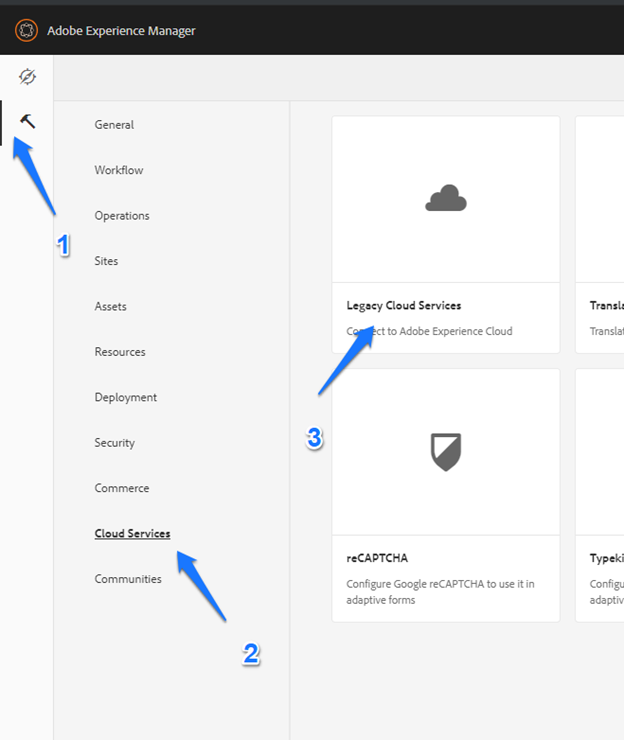
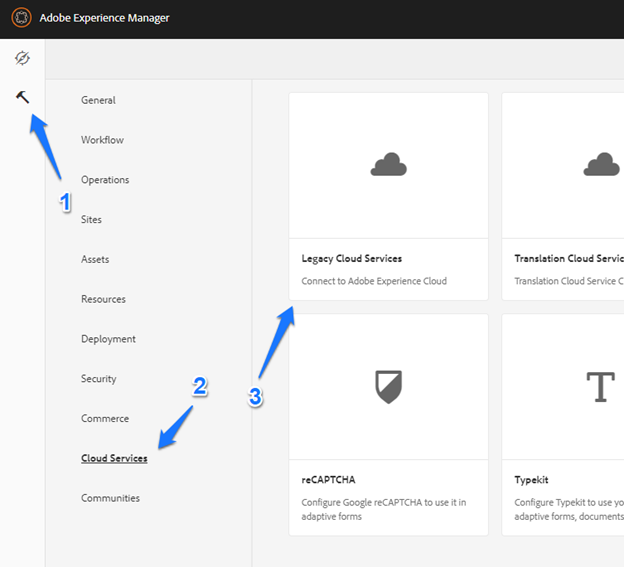
Click the Tools icon, followed by the Cloud Services menu item, followed by the Adobe Launch Configurations card.
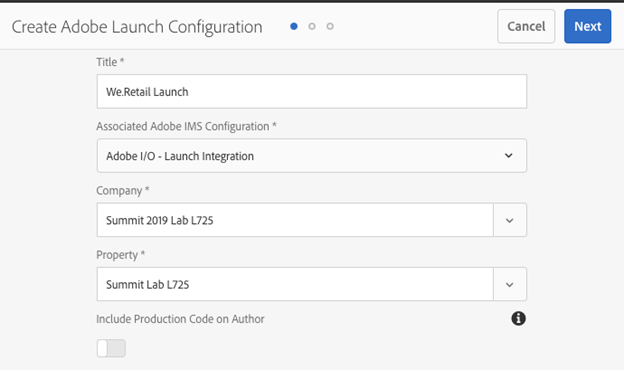
Fill in the following values. Note that the Company and Property fields are dynamically loaded from Launch, so you may need to wait a second for values to appear.
a. Title: We.Retail Launch
b. Associated Adobe IMS Configuration: Adobe I/O – Launch Integration
c. Company: Summit 2019 Lab L725
d. Property: Summit Lab L725
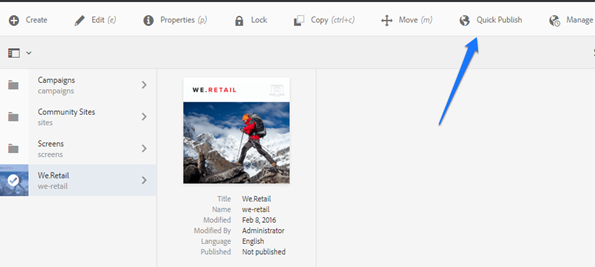
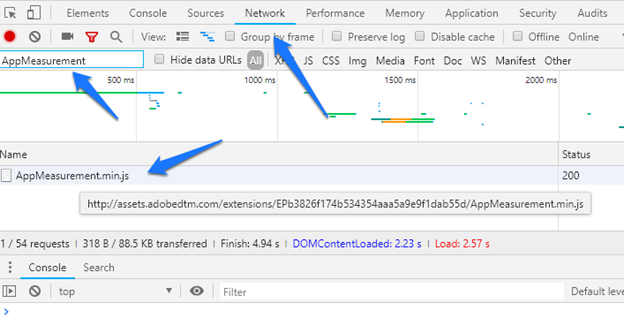
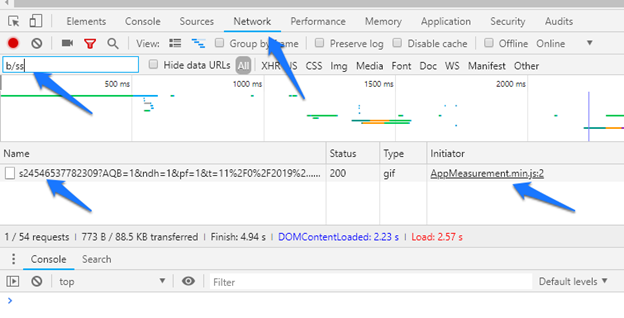
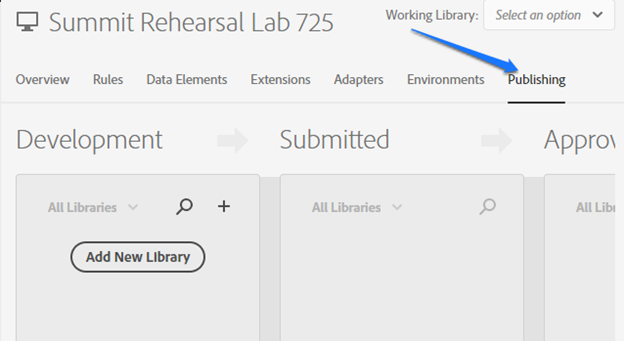
In this exercise, we will publish the integrations that we have configured and validate that we are able to see the Analytics and Target libraries on our site.
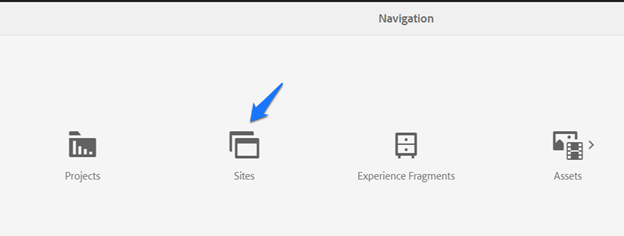
In Experience Manager, click the Adobe Experience Manager icon to return to the home screen.
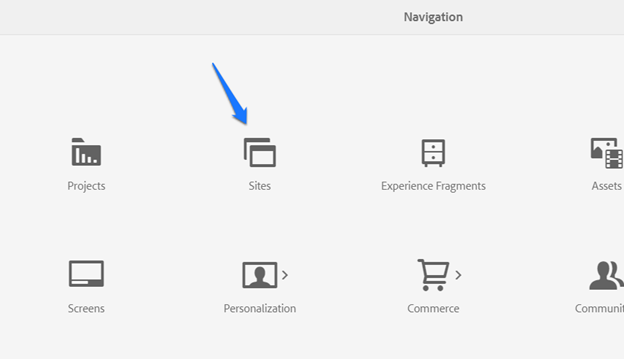
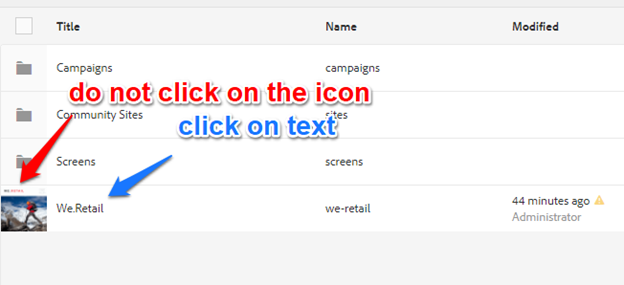
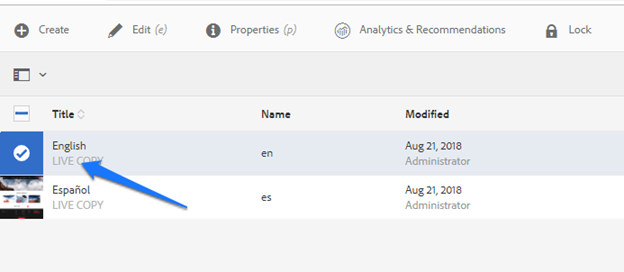
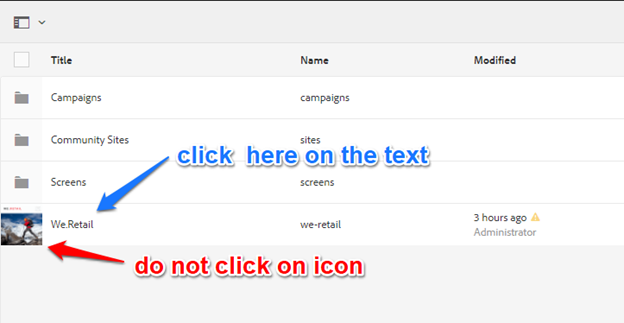
Click the Sites icon.

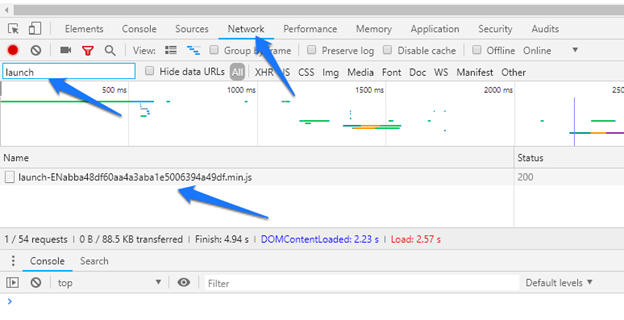
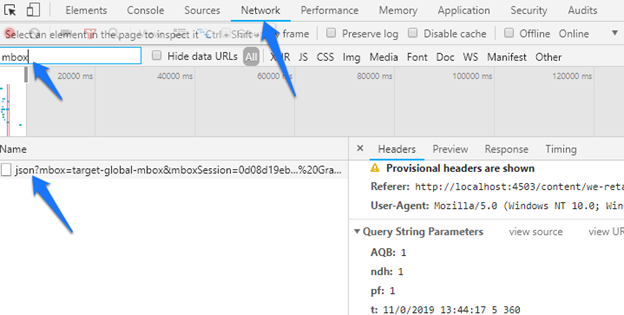
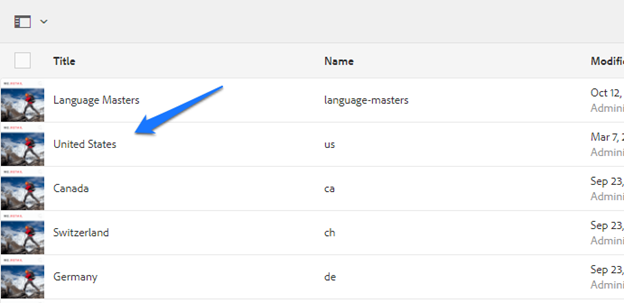
Open a new browser tab and open your Experience Manager publish environment by pointing your browser to http://localhost:4503. You should be redirected to http://localhost:4503/content/we-retail/us/en.html.
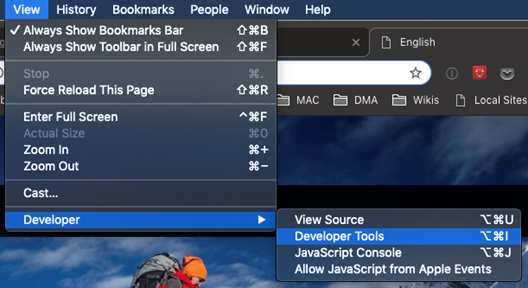
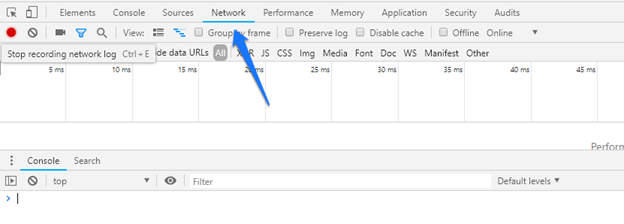
From the OS Chrome menu, select View, Developer, Developer Tools.
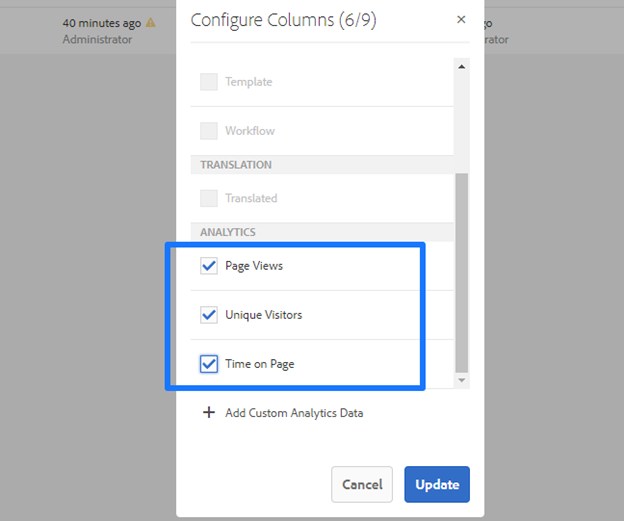
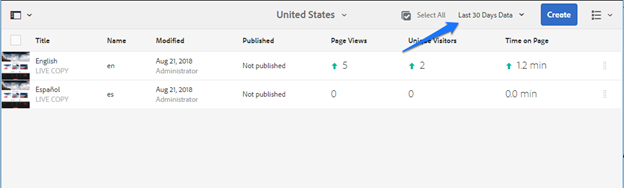
Configure AEM to import Analytics data.
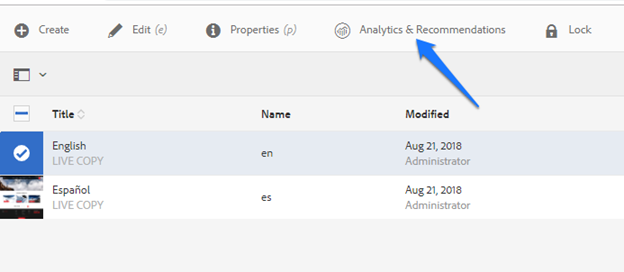
View Analytics data in the Experience Manager UI.
In this lesson, we will implement Content Insights. This feature allows us to import Analytics data directly into Experience Manager. This allows authors, even those who do not have Analytics logins or training, to see important performance data about their content directly in the CMS.
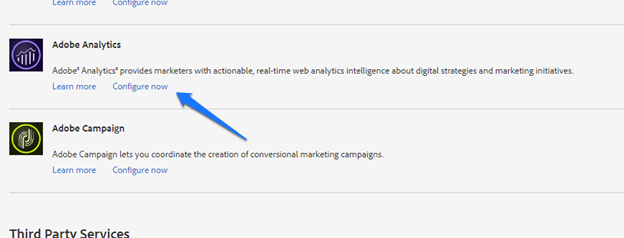
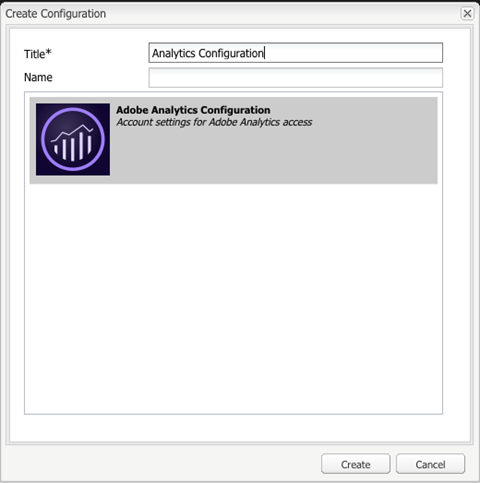
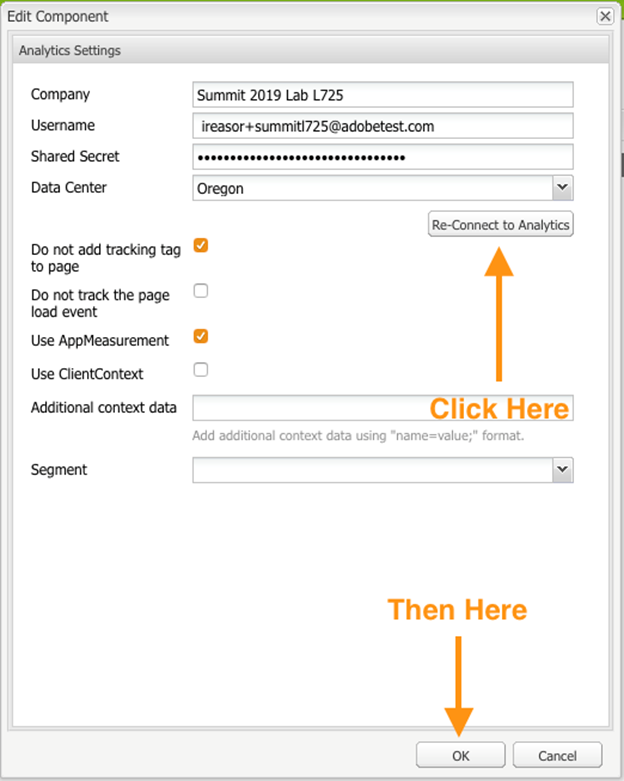
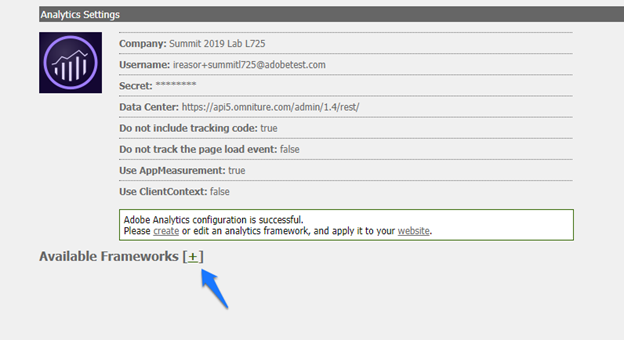
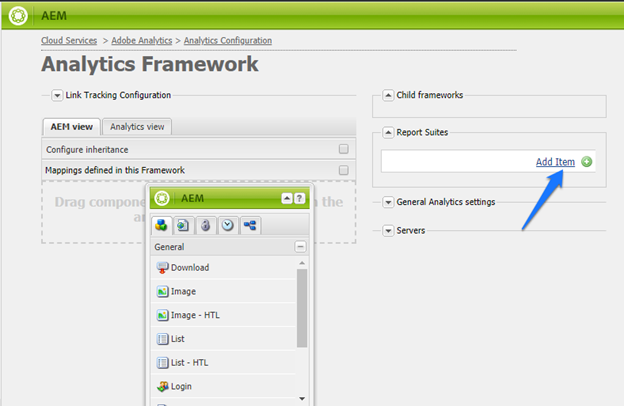
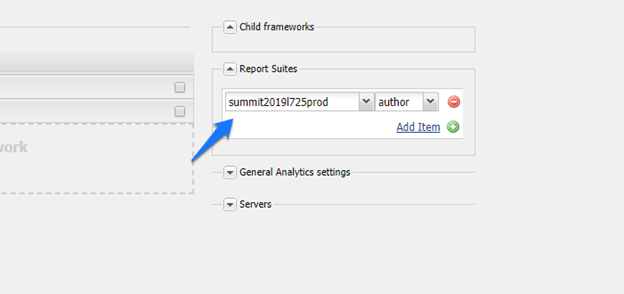
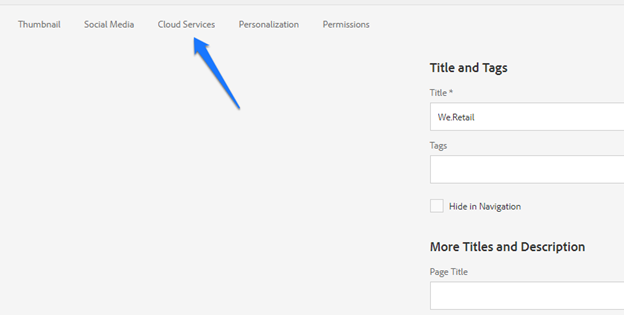
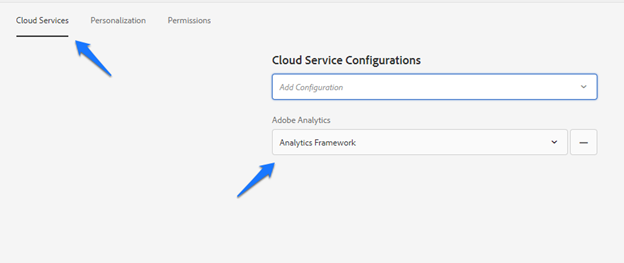
In this exercise, we will configure the Analytics legacy cloud service to enable importing the impression data and apply it to the We.Retail reference site. It is sometimes confusing as to why we would be implementing both the Launch integration and the Analytics integration. This is because the Launch integration controls the client-side loading of the Analytics library and tracking of impression data while the Analytics integration controls the server-side import of reporting data from Analytics. For this reason, we will select Do not add tracking tag to page when configuring the integration to tell AEM that we are managing the tracking tag through a tag manager.
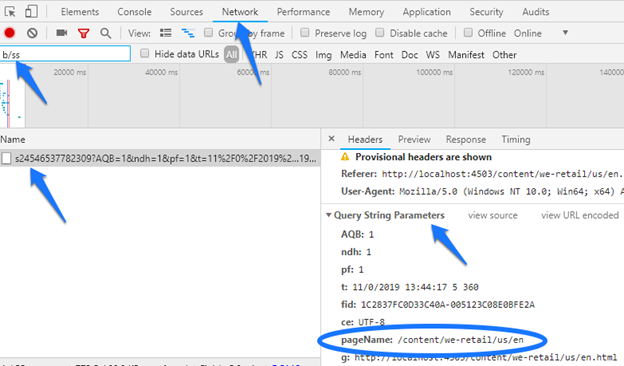
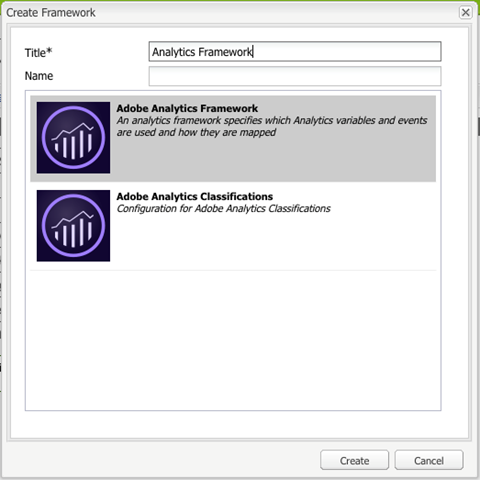
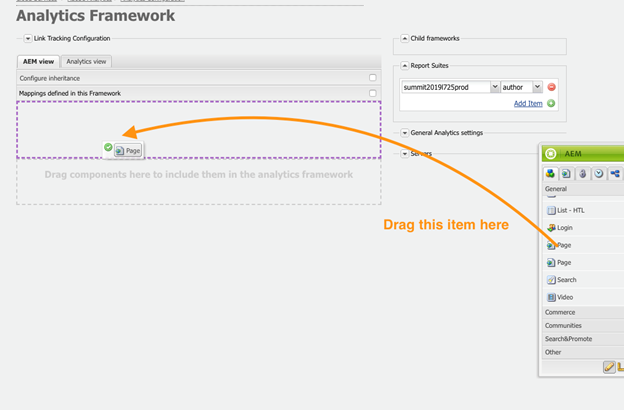
When configuring the integration framework, note that we will be mapping the pageName property from Analytics to the pageData.path CQ property. This matches the configuration that we made previously in Launch. This tells AEM how to determine which page it should apply the imported impression data to. If you have a different way of tracking the pageName in Analytics, you may need to implement a custom Analytics Page Name Provider Service, but that is beyond the scope of this lab.
a. Company: Summit 2019 Lab L725
b. Username: ireasor+summitl725@adobetest.com
c. Shared Secret: 9fa70a3724f6c9fb2393353a8738c8a7
d. Data Center: Oregon
e. Do not add tracking tag to page: Checked
f. All other fields can be left with default values
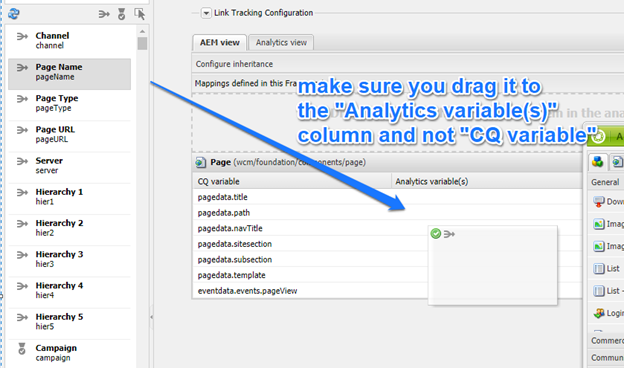
When you have successfully mapped the variable, it will look like:

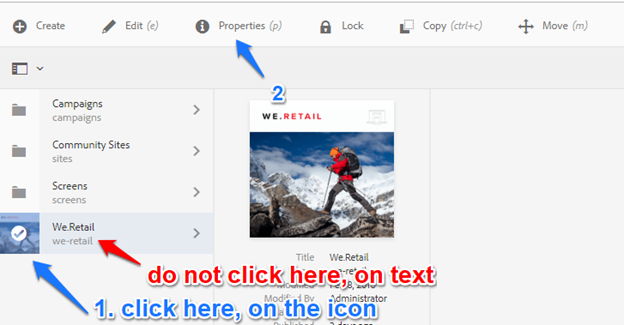
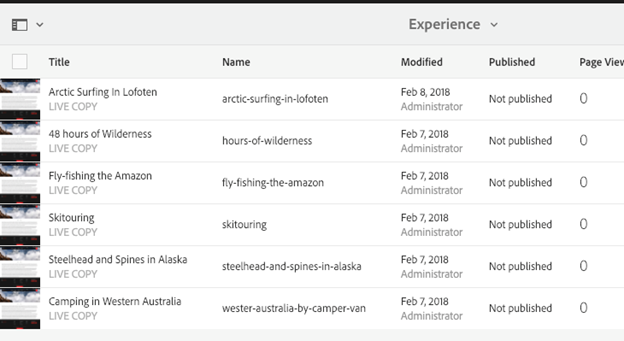
In this exercise, we will attach the cloud service we have created to the We.Retail site. This will allow Experience Manager to import impression data for these pages from Analytics.
Open a new browser tab and load Experience Manager (http://localhost:4502).
Click on Sites.
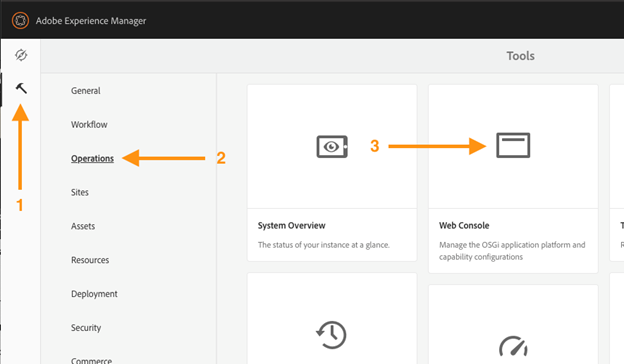
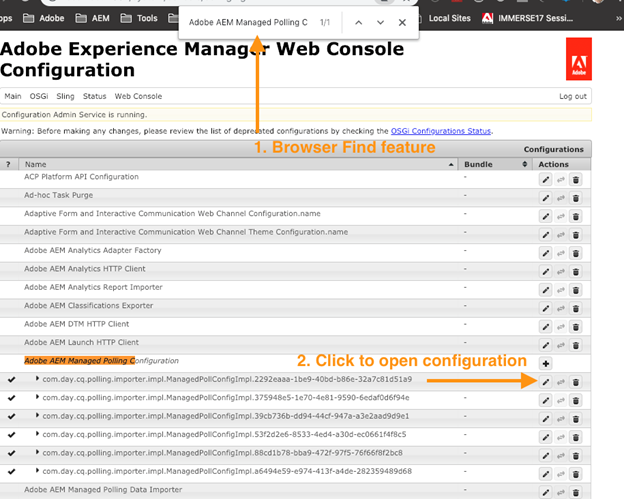
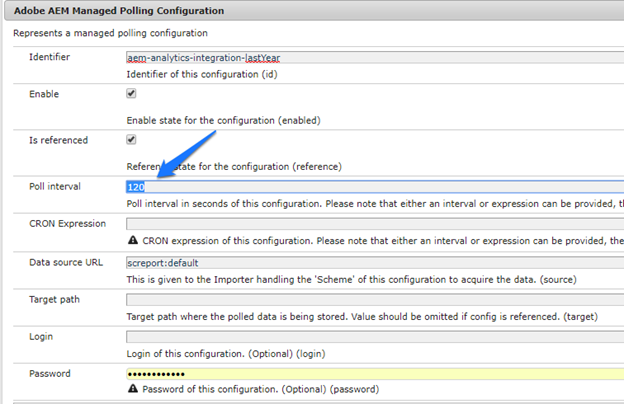
Asset Insights will poll your Analytics environment on a schedule and download new report data whenever this time is reached. By default, new data will be imported every 12 hours. Since we would like to see our impression data while we are still in this lab, we will configure our environments to import data much more often than this.
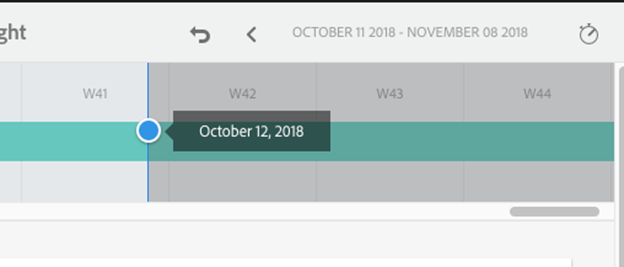
In this exercise, we will view the imported content insight data.
Close any open windows and point a new browser window to your AEM author environment at http://localhost:4502.
Click on Sites.

Experience fragments are groups of one or more authored AEM components that can be reused across experiences. In this lesson, we will be publishing these fragments to Target for use in the Visual Experience Composer (VEC). This allows customers to achieve consistency in experiences between their content authoring and site testing and optimization teams and increase the velocity with which their testing and optimization team operates.
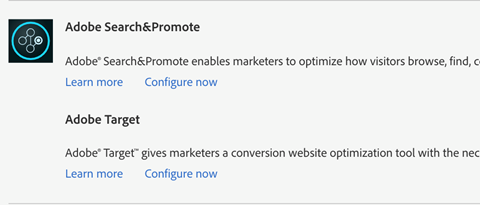
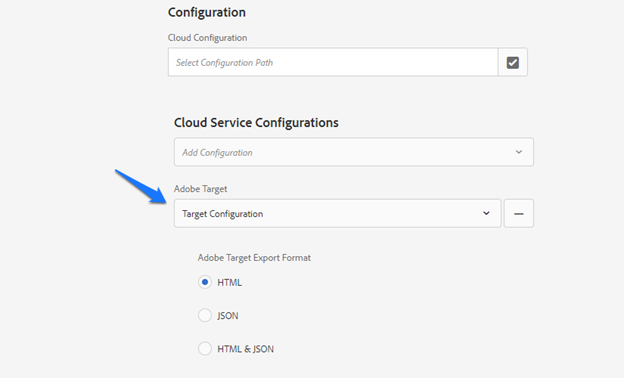
In this exercise, we will configure the Target legacy cloud service to enable the export of experience fragments. It is sometimes confusing as to why we would be implementing both the Launch integration and the Target integration. This is because the Launch integration controls the client-side loading of the Target library and personalized experiences while the Target integration controls the server-side export of experience fragments to Target. For this reason, when configuring the integration, we will select Use Tag Management System to deliver client library to tell AEM that we are managing the delivery of AT.js through a tag manager.
a. Client Code: summit2019labl725
b. E-Mail: exptargeting@adobe.com
c. Password: Adobe_05
d. API Type: REST
e. Use Tag Management System to deliver client library: true
f. Leave all other fields as default values
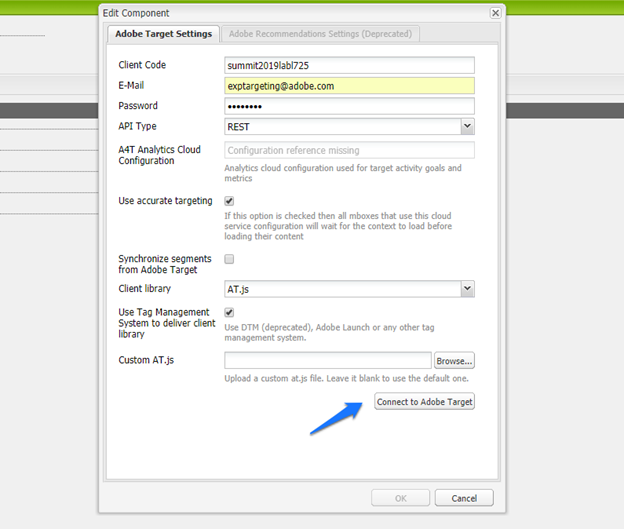
Click Connect to Adobe Target and then click OK.
Close this browser tab.
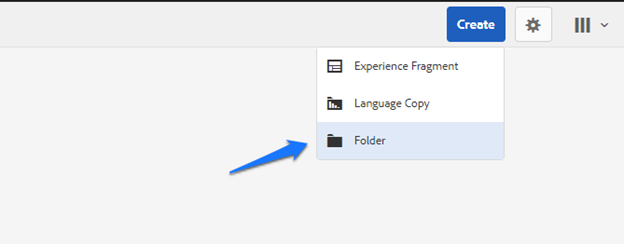
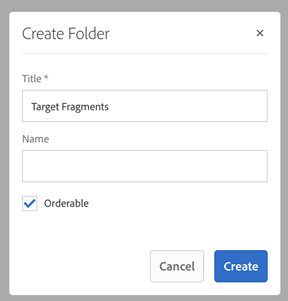
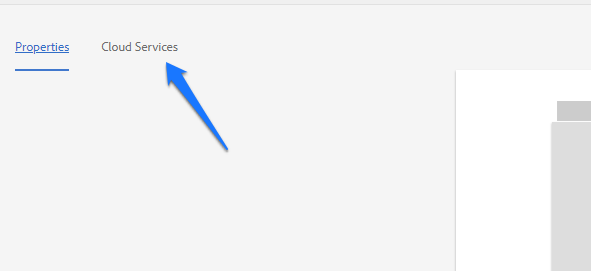
In this exercise, we will create a folder to house our experience fragments and attach the Target cloud service configuration.
Open a new browser window and point it to your AEM author environment (http://localhost:4502).
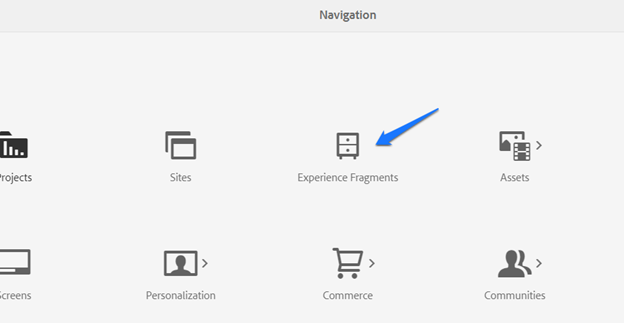
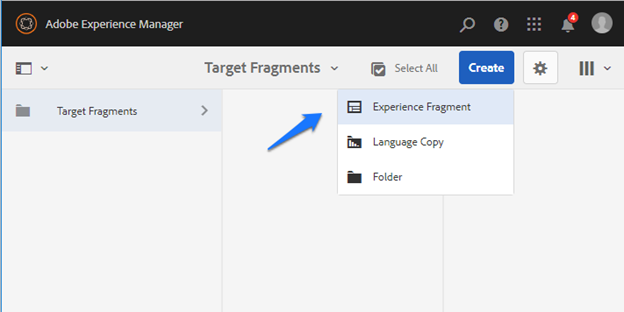
Click on Experience Fragments.
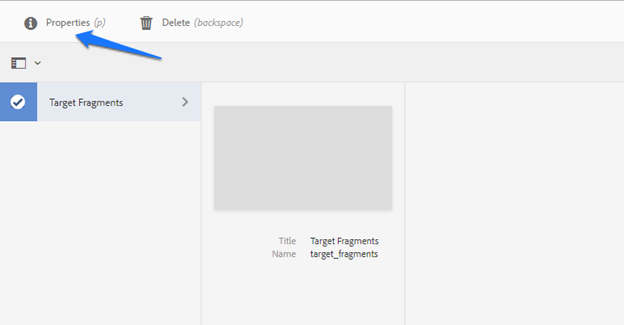
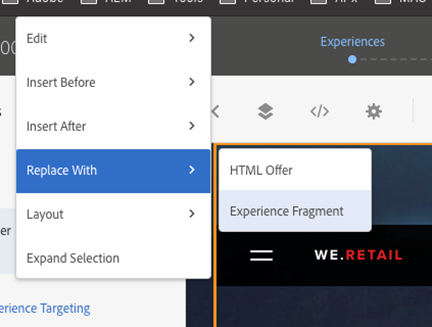
In this exercise, we will create an experience fragment. While we will be publishing the fragment to Target for use in the VEC, these fragments can also be used on pages in AEM Sites, published to social media networks, or served RESTfully to sites or applications that are served from other platforms.
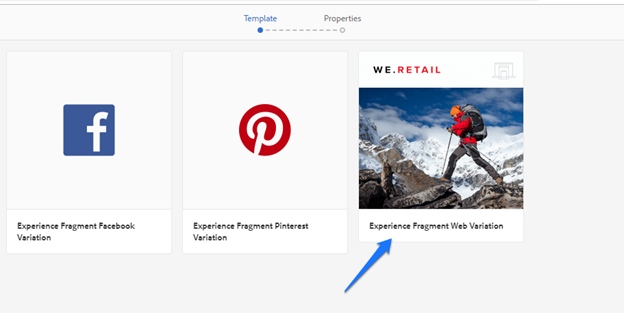
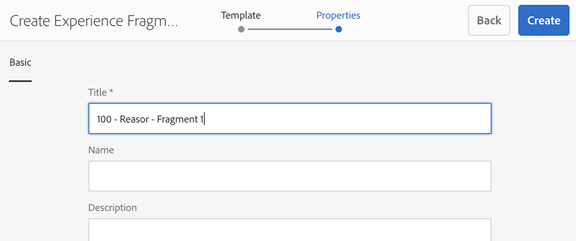
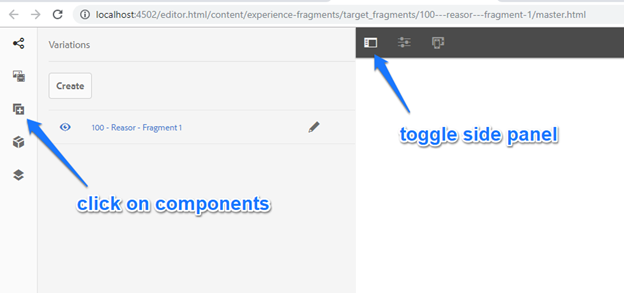
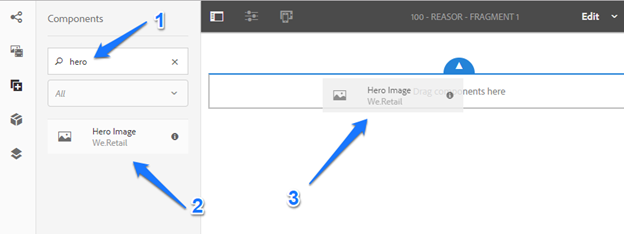

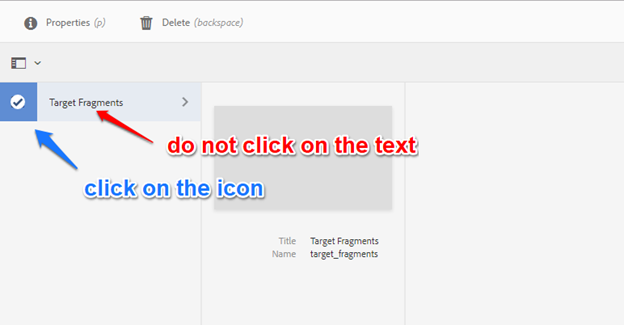
You will see:
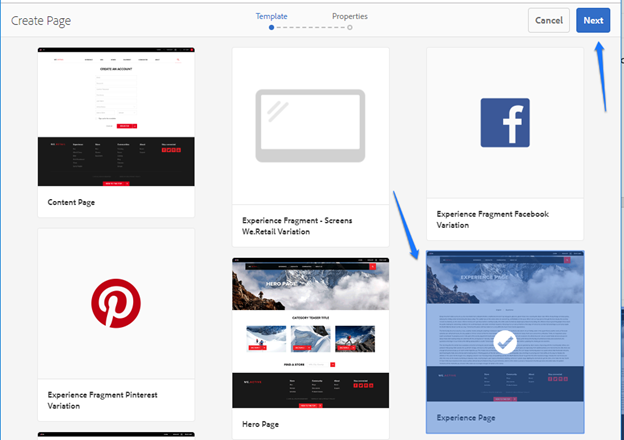
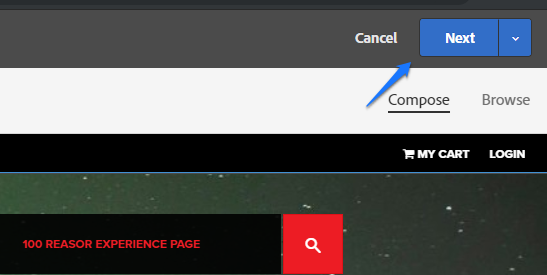
In this exercise, we will create and publish a page in AEM to test our Experience Fragment with. This is so that each student can test on their own page, eliminating any possible collisions that would occur if we had multiple Target activities targeting the same page.
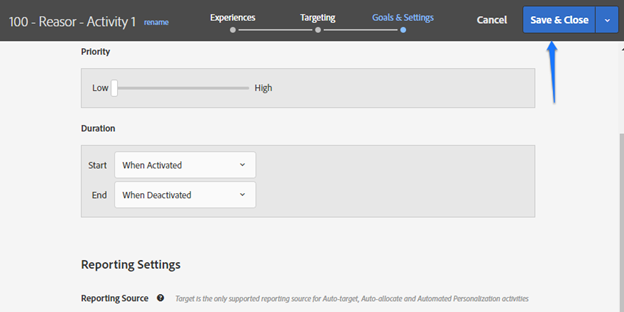
Your screen should look like this illustration:
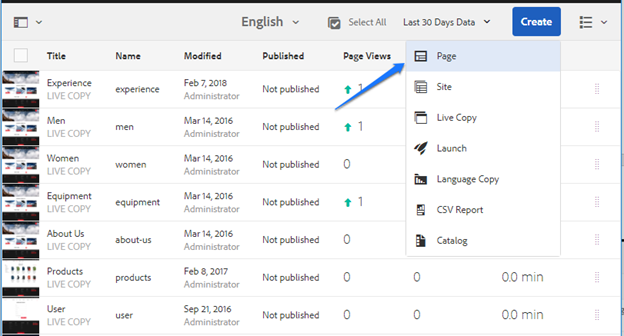
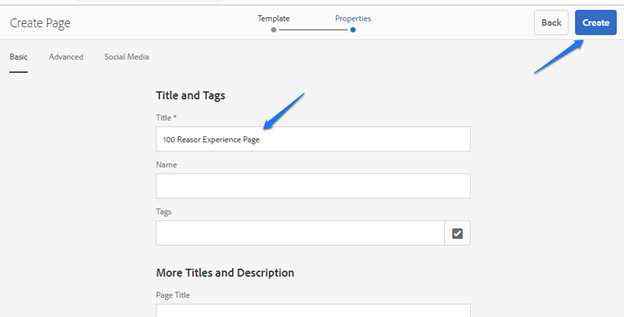
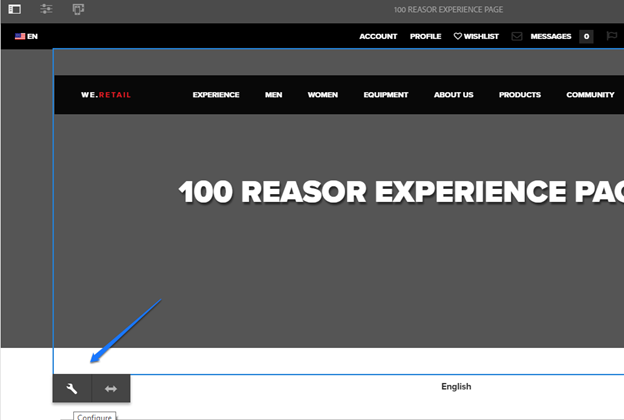
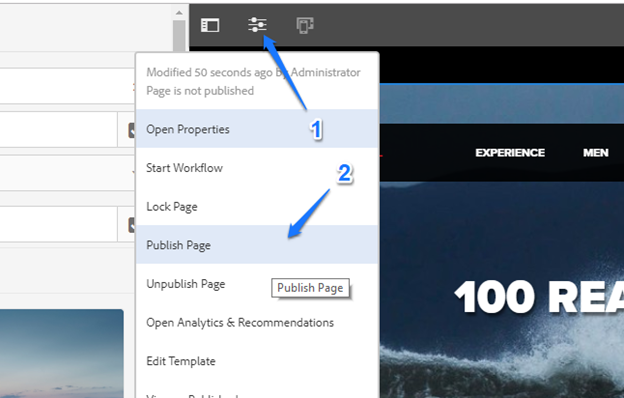
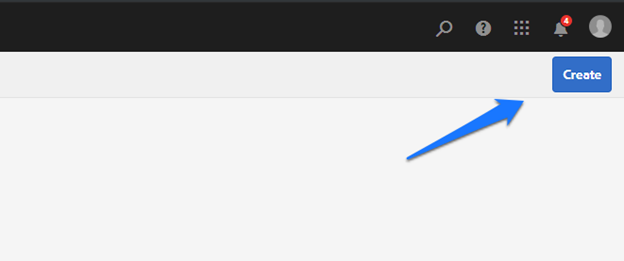
Click the blue Create button, then click Open.
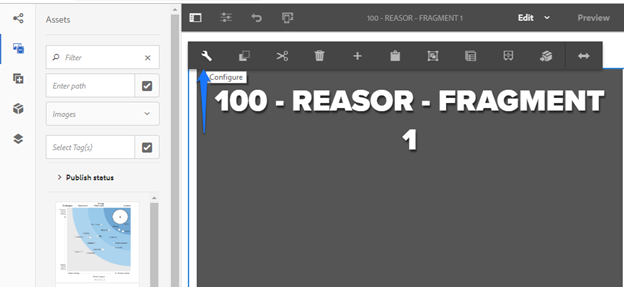
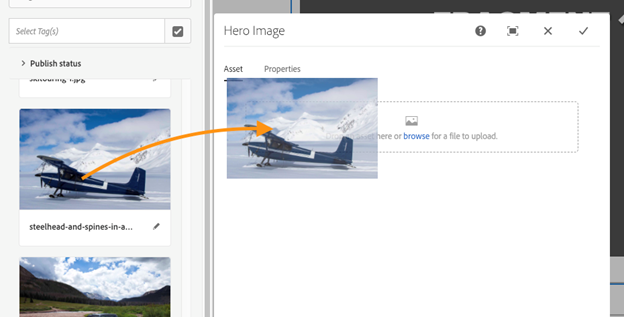
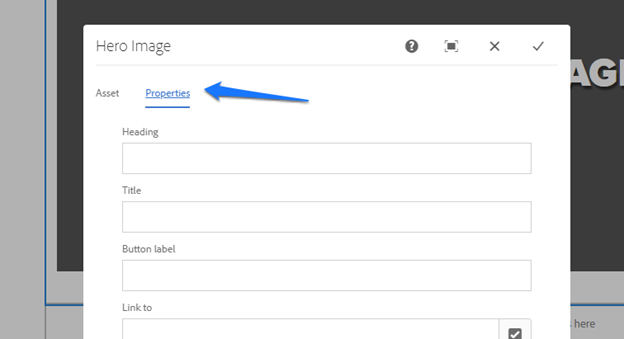
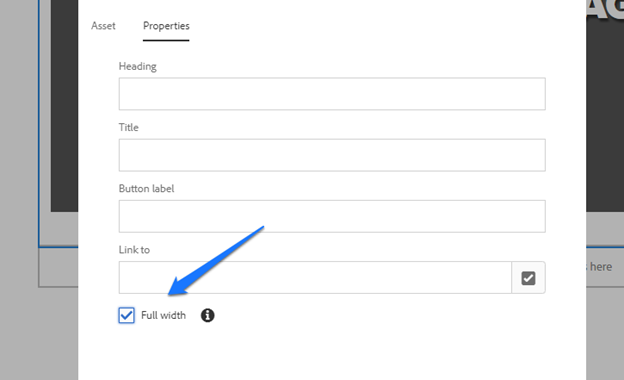
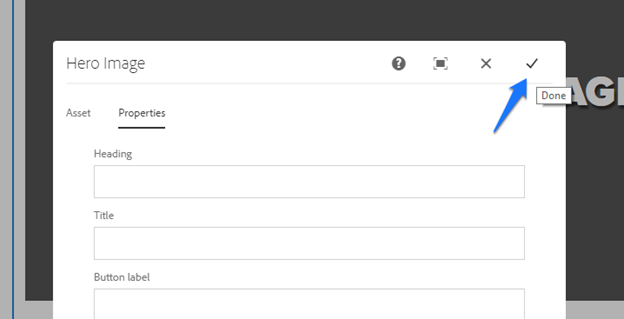
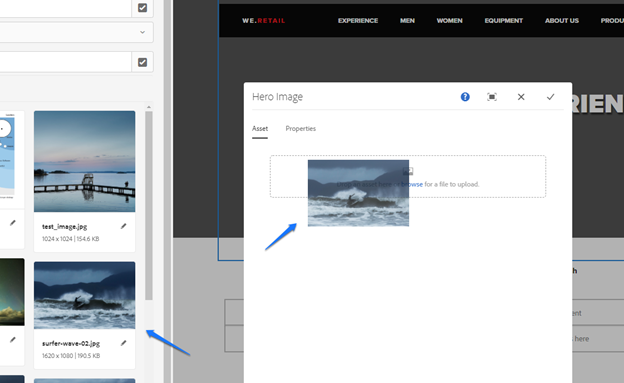
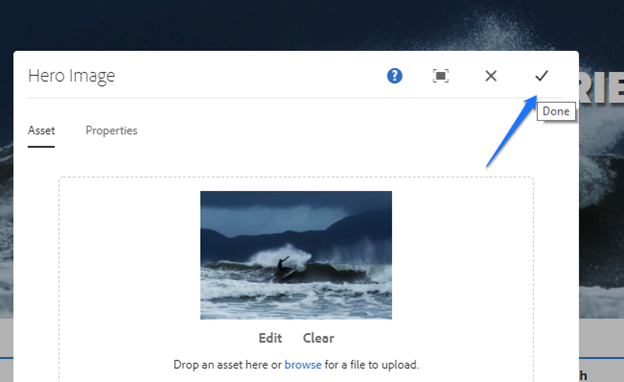
Click on the Hero Image component and then click the Configure icon.

To test that your page has published properly, copy the URL from your web browser into a new browser tab. Remove editor.html from the URL and change the port number from 4502 to 4503. For example, if your URL were http://localhost:4502/editor.html/content/we-retail/us/en/100-reasor-experience-page.html, you would change it to http://localhost:4503/content/we-retail/us/en/100-reasor-experience-page.html
If you see your page without the AEM editor, then your page has correctly activated. Leave this page open as we will need the URL for it in our next exercise.

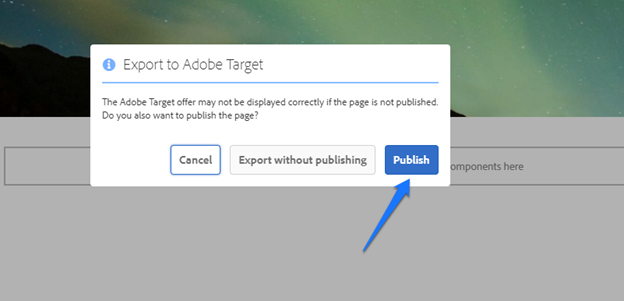
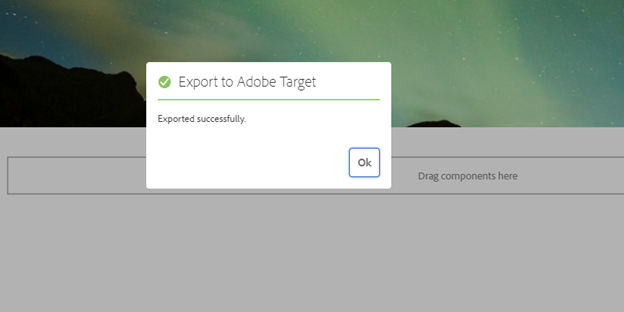
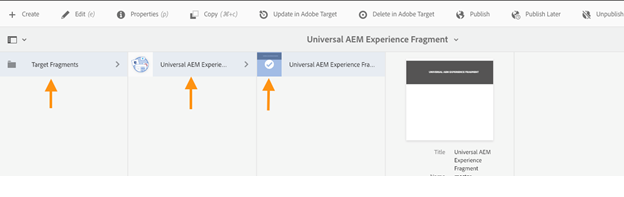
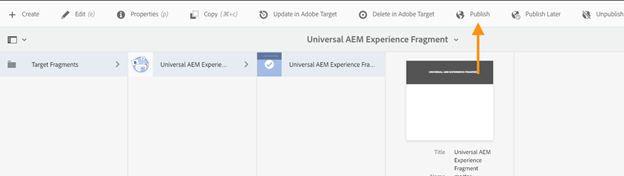
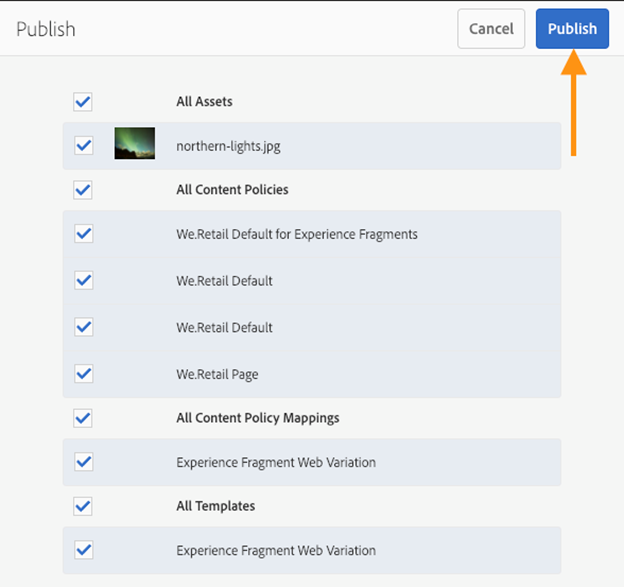
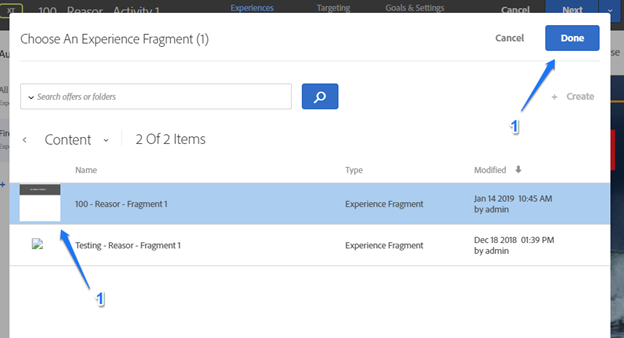
When publishing Experience Fragments to Target, there can often be a delay before the fragment appears. In this exercise, we will search for our Experience Fragment in the Target offer library. If your fragment is not yet present, we will walk through some workaround steps so that you can use a pre-created Experience Fragment to complete the exercises.
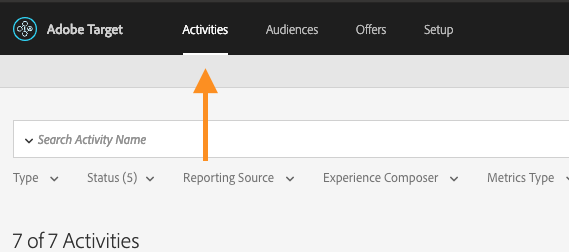
Open your browser and click on the bookmark for Adobe Target.
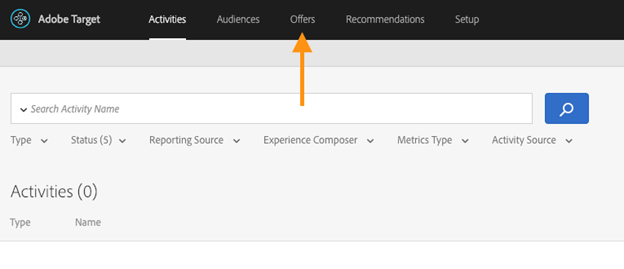
Click on the Offers link in the top navigation.
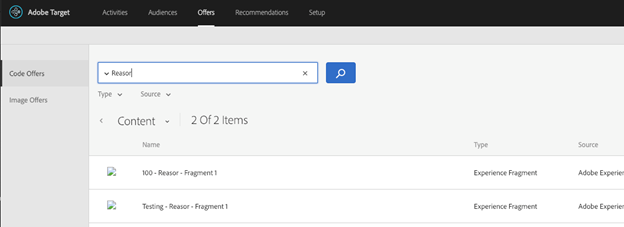
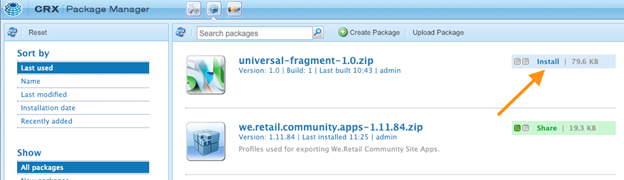
If you see the Experience Fragment listed that you published in the previous activity, feel free to use this fragment in the next exercise. You do not need to continue with the rest of this exercise. If you do not see your fragment listed, please continue with the remaining steps in this exercise to install a “universal” fragment that we have provided.
Open a browser tab for your AEM author environment (http://localhost:4502).
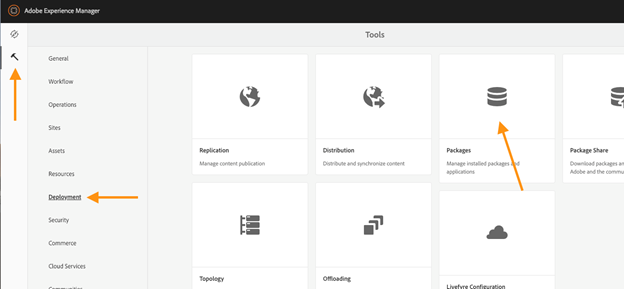
Click on Tools > Deployment > Packages.
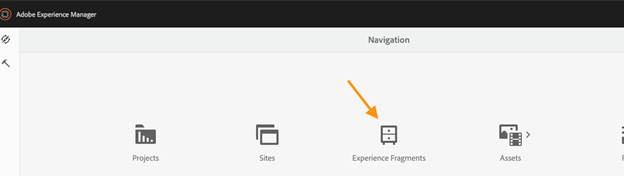
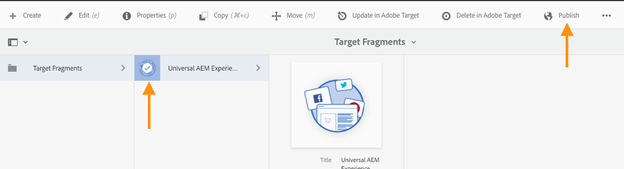
Navigate to the AEM home screen via your browser bookmark or by going to (http://localhost:4502).
Click on Experience Fragments.
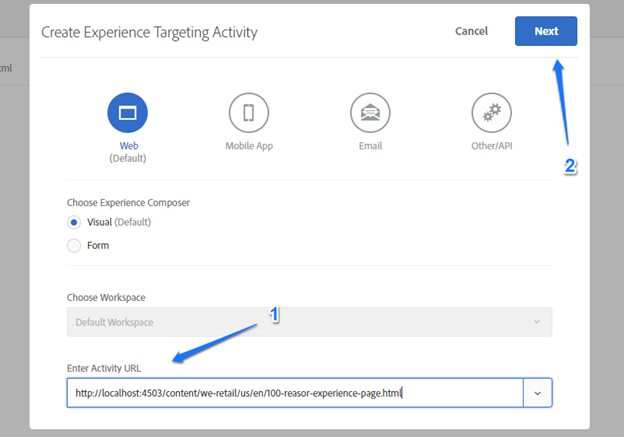
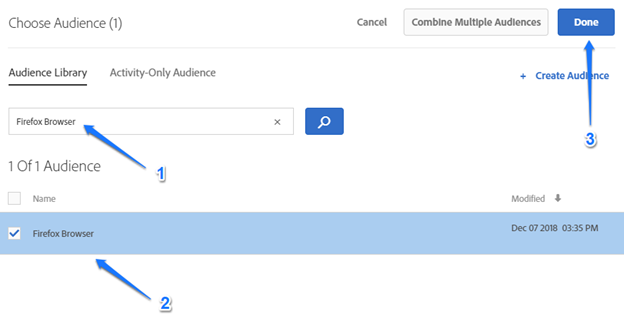
In this exercise, we will log into Target and use the published experience fragment in a Target experience targeting activity. We will use a fairly contrived approach of targeting different content to two different browsers. While this is an easy way to show how this functionality works, in a real-world implementation, you would likely target experiences based on factors such as demographics or past user behavior – often bringing in data from Adobe Analytics or Audience Manager.


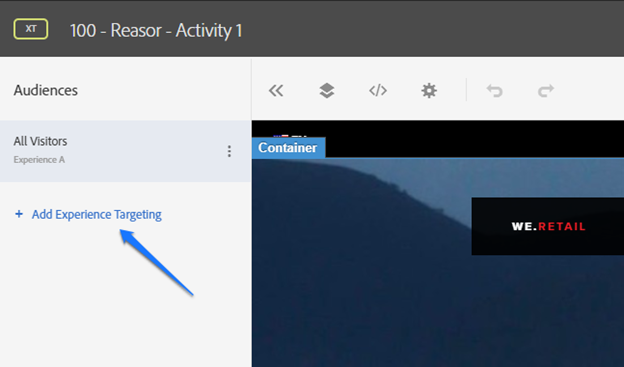
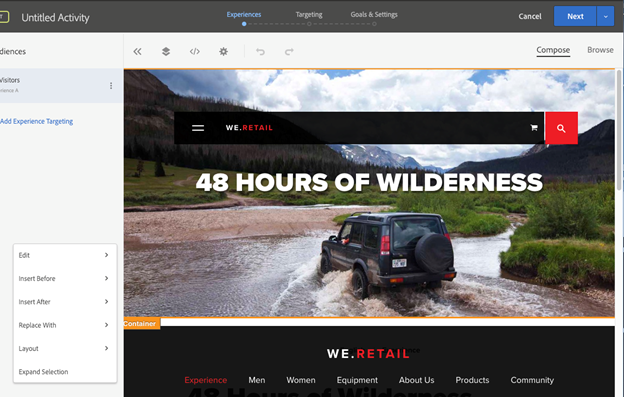
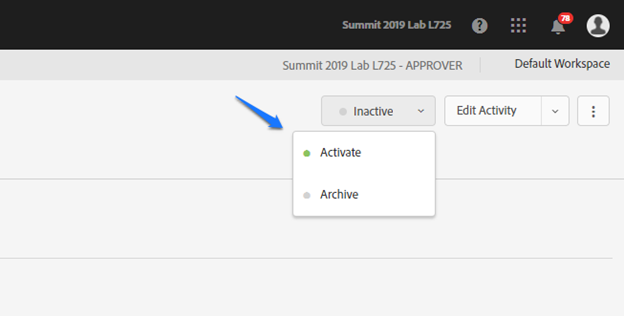
initial selection
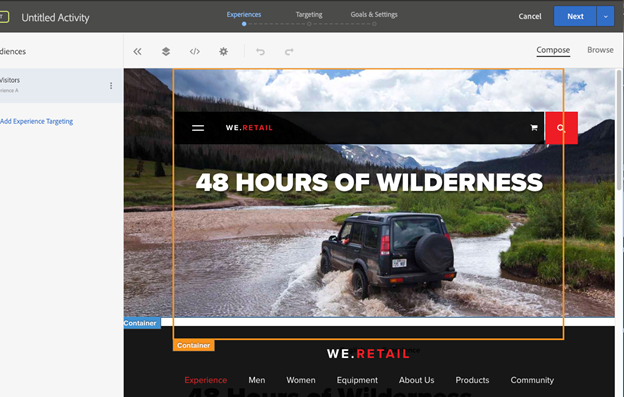
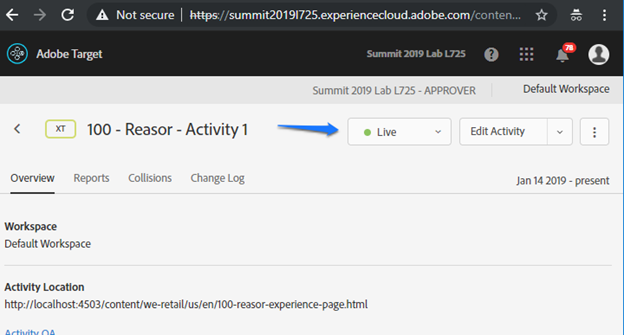
expanded selection
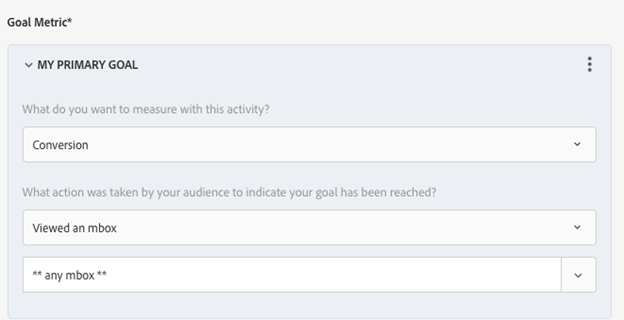
In this section, we will verify that the Target activity we created is working properly on our site.
Navigate to the page that we targeted in the previous exercise with Google Chrome. If you still have the window open, you can just refresh the page. Note that the page looks the same.
Open up Firefox and copy/paste the URL for your test page into it.
Note that the version of your page with the experience fragment is shown.
The following exercises were all performed in advance of Summit to prepare our lab environments. If you would like to go through this workbook at home, you will need to go through these steps to prepare your own environment.
In this exercise, we will create a property in Launch that is specific to our local AEM environments, install extensions for Target, Analytics, and Context Hub, and then configure all three extensions.
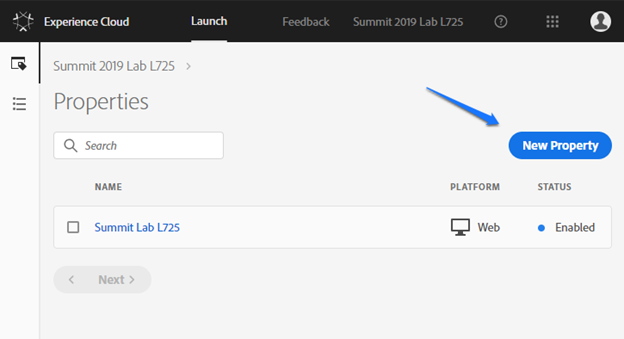
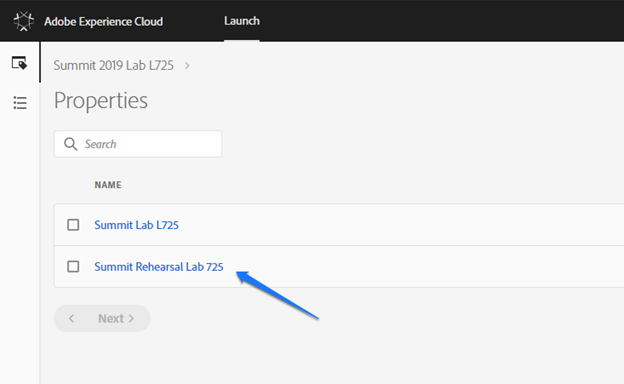
Launch allows us to have multiple properties per account. This allows customers to have separate properties for each of their websites. For the exercises in this lab, you will need to have a property created in Launch. Feel free to use these instructions to create a new Launch property to go through these exercises with or use them with an existing property if you'd like to use this workbook with your existing site.
Log on to your Experience Cloud account.
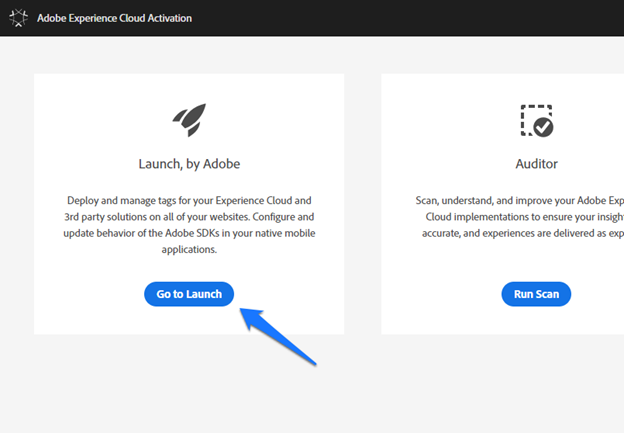
Once logged in, click on the solution switcher and select Activation. You can also access this page directly by pointing your browser to https://activation.adobe.com/

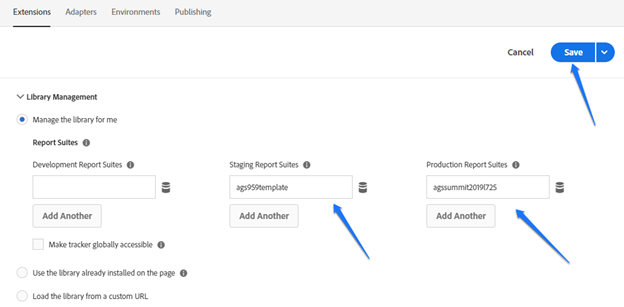
Launch provides us with a catalog of extensions that are developed by Adobe and third-party providers. The catalog can be thought of as an app store for tag management. Here, we are installing the Analytics extension and configuring it with some basic properties.
In this section, we will install the ContextHub extension, which is useful for surfacing data layers in Launch. Note that while we have the option to use AEM's default ContextHub data layer, we can also use this extension to map a custom data layer. Thus, this extension can be used for any implementation, even those that don't leverage AEM.
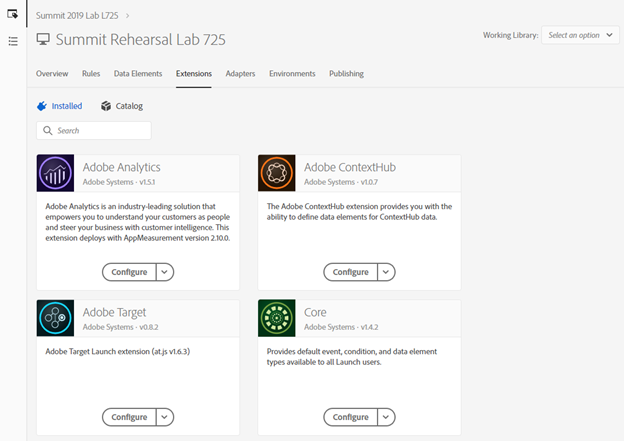
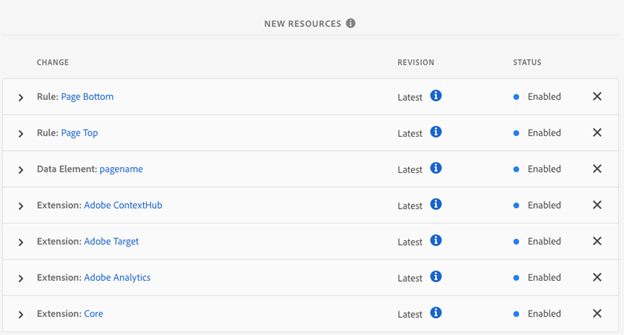
You should now see four cards showing in the Installed view: Adobe Analytics, Adobe ContextHub, Adobe Target, and Core.
In this exercise, we will configure some data elements and rules to map our data layer into Launch and load our Analytics and Target libraries. If you are using an existing Launch property, many of these configurations will already be in place. It is fine to use these existing configurations, but keep in mind when going through the lab exercises that there may be some variation from our steps due to this difference.
In this step, we will be mapping the page path from our data layer to a pagename data element. This will allow us to use the pagename value wherever we like in Launch. As we use the ContextHub extension in this step, note how the Data item field contains all of the values that are exposed in the AEM Context Hub. Had we mapped this extension to a custom data layer, those values would appear here instead.
a. Name: pagename
b. Extension: Adobe ContextHub
c. Data Element Type: Context Hub
d. Data item: pagedata.path
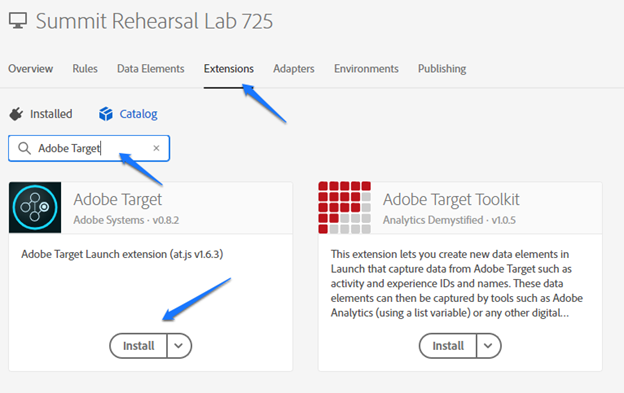
While installing the Target extension made Target capabilities available to us in Launch, it doesn't automatically load Target on our site. To do that, we need a rule. In a real customer implementation, it is likely that this rule would also contain some parameter mapping into the global mBox as well. We will load the Target library at Page Top, which along with body hiding, will allow us to avoid flicker on the page. When configuring the Fire Global Mbox action, note the Body Hiding properties that can be used to hide the body until Target has loaded and determined which experiences to show.

As in the previous section, we will add a rule to load the Analytics library and fire our page load event. It is common to load Analytics at the page bottom, as this allows our page to fully load and our data layer to be fully populated, but we do run the risk of missing some impressions if a user navigates away before the page is fully loaded. For this reason, some customers choose to load their Analytics library at page top as well.
While configuring this rule, we will map our pagename data element to the Analytics page name property. We are mapping this property to illustrate the best practice of mapping a value from a data layer on the page to a Launch data element to the Analytics property. In a real customer implementation, there will be a large number of props and eVars that will be mapped here. They should all follow this practice.
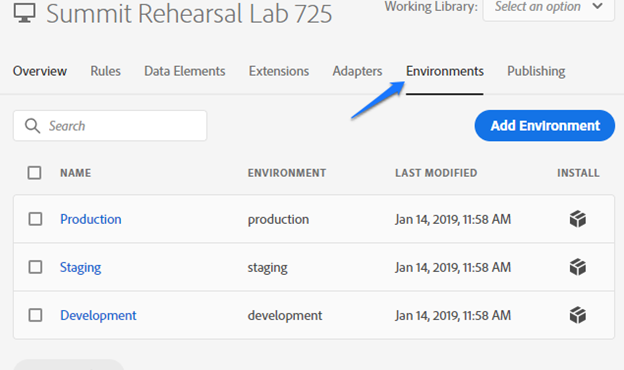
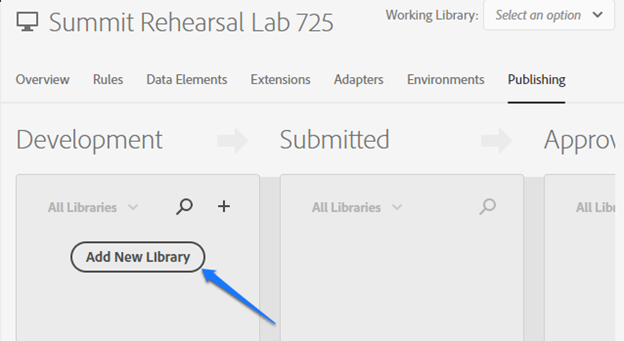
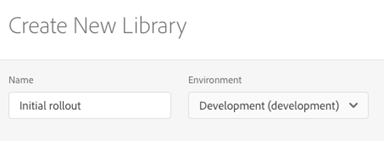
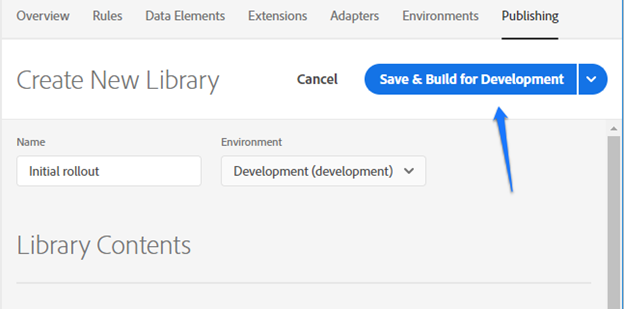
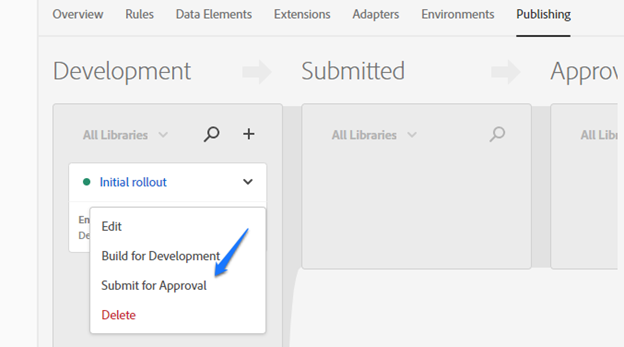
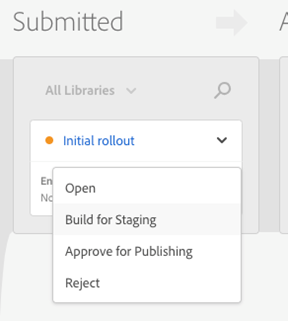
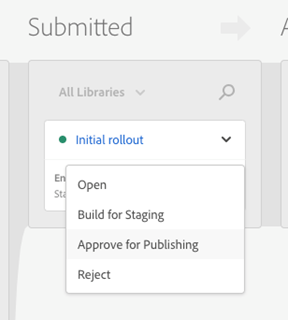
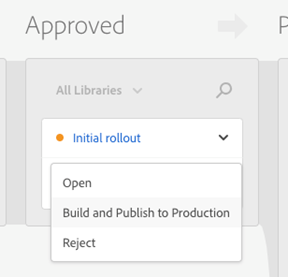
In this section, we will create our environments in Launch and publish our configurations. In DTM, each environment had only two environments: Stage and Production. In Launch, we also get access to unlimited development environments. We will be pushing our code through each of these environments for expediency, but in a real customer environment, and if you are using an existing Launch property, you should fully test your changes in a development and staging environment before deploying any changes to production.


To go through this lab, you will need two AEM environments: an author environment and a publish environment. These instructions assume that you have access to an AEM 6.5 JAR file and a developer license.properties file, but the steps to install AEM may differ slightly based on how your AEM environments have been licensed. For information on downloading an AEM JAR file, please contact your Adobe Account Executive or Customer Success Manager.
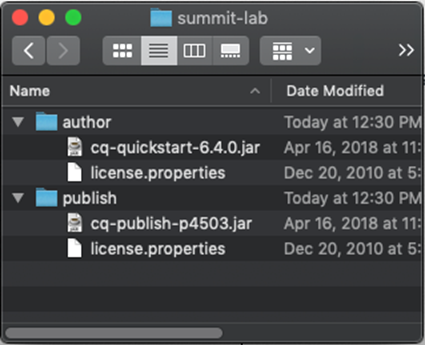
Create a folder to install your AEM instances in. This can be done anywhere on your computer that you would like. Create two subfolders and name them author and publish.
Place your AEM JAR file in the author folder alongside your license.properties file. Place the same JAR and license.properties file in the publish folder, but rename the JAR file to cq-publish-p4503.jar.
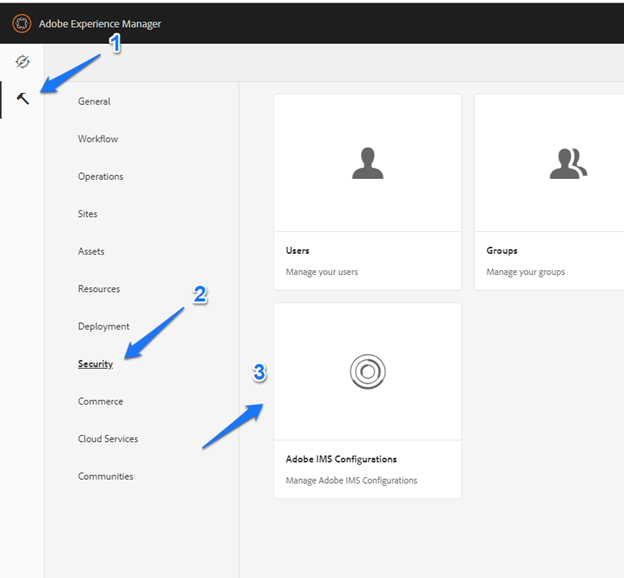
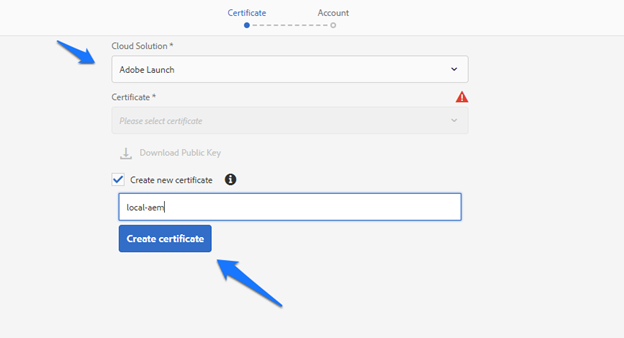
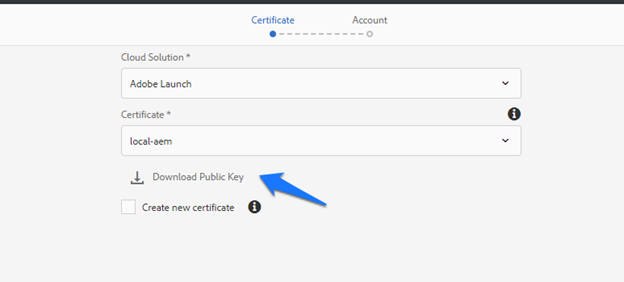
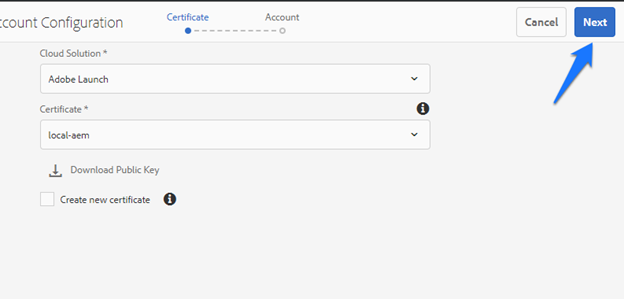
AEM integrates with Launch through Adobe I/O. In this exercise, we will use AEM's IMS configurations to configure a certificate that we will be able to use in Adobe I/O for this integration. This certificate will allow Adobe I/O to authenticate the identity of our AEM instance.
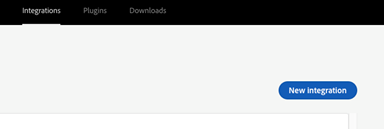
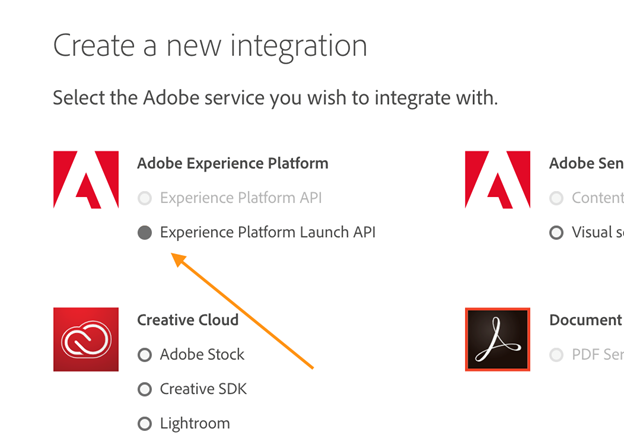
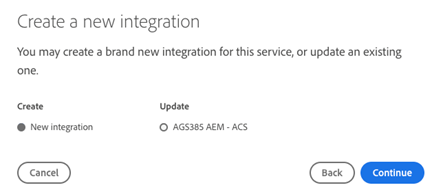
In this exercise, we will create a Launch integration in Adobe I/O.
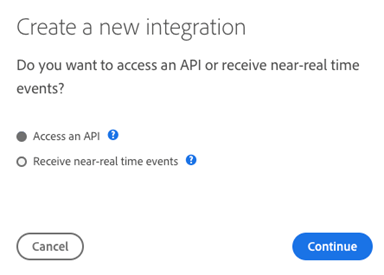
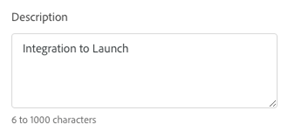
b. Description: Integration to Launch
c. Permissions: Admin
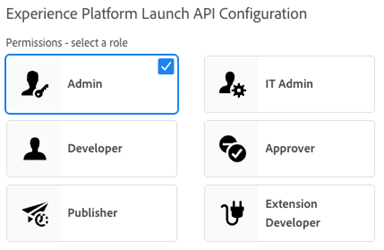
d. Public keys certificates: The certificate that you downloaded from the IMS configuration that we created in AEM.
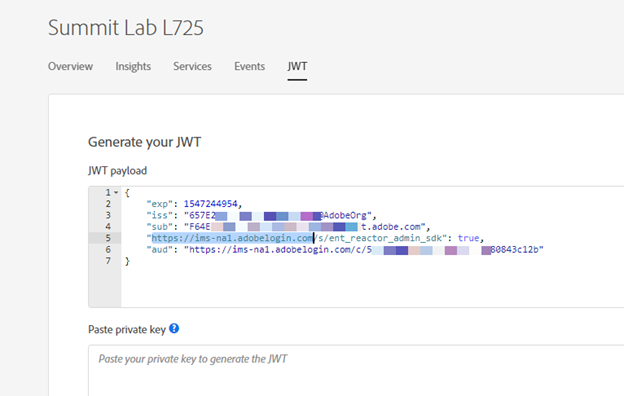
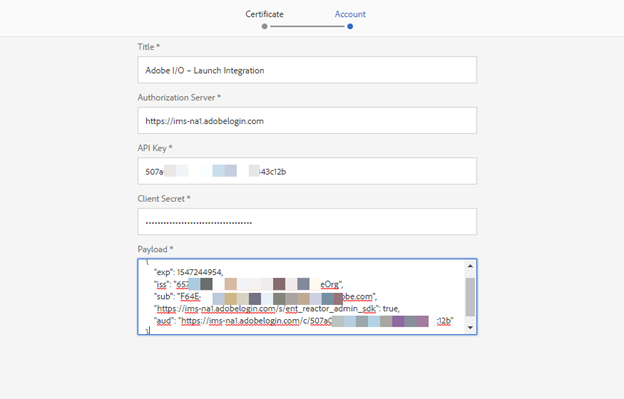
In this section, we will populate AEM with details of the Adobe I/O configuration that we just created. This will tell AEM how to access and authenticate Adobe I/O. In the screenshots below, we have had to obfuscate many of the values for security reasons.
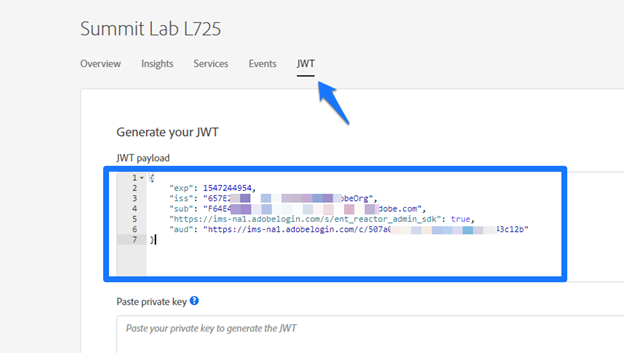
b. Authorization Server: Click the JWT tab in Adobe I/O and copy the server hostname and protocol from the aud property in the JWT payload. We basically want to copy everything after the opening quote mark and before the third slash. In the screenshot below, the authorization server is https://ims-na1.adobelogin.com. See the highlighted string of text below for an illustration of the text that you should copy.
c. API Key: Listed as the API Key (Client ID) in the Overview tab in Adobe I/O.
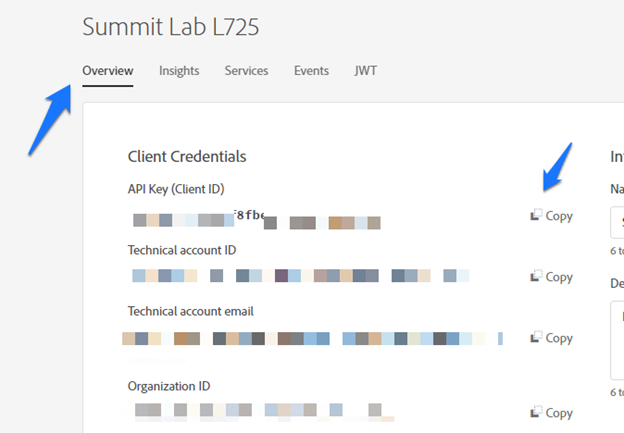
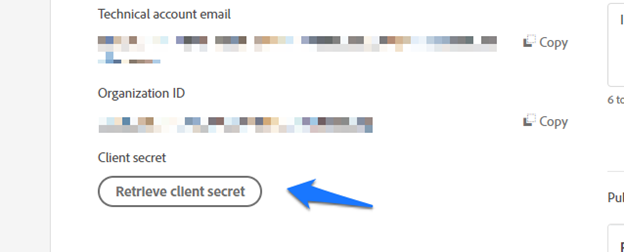
d. Client secret: Click the Retrieve client secret button in the Overview tab in Adobe I/O.
e. Payload: Copy the JWT payload from the JWT tab in Adobe I/O.
You have now successfully completed the pre-requisites for this lab. In doing so, you have learned how to configure Launch for an Experience Cloud deployment, how to install an AEM environment, and how to integrate AEM with Launch through the Adobe I/O console.