
As the evolution of technology leads to the devices which are operated on the cloud, Internet of Things has become uprising field to demand for persoanlized and highly optimized content delivery. This lab is designed to provide detailed understanding on how implementation of Adobe Target platform is done by leveraging server side APIs.
During this lab, we will go through hands-on experience for a React application, which leverages Adobe Target server side APIs. Please note, this application serves as an example implementaion and by no means claims to be the only approach to implement. This is subjected to vary as per base application framework and architecture outlined.
Before you begin, identify your level and set your expectations. This will help you navigate this lab effectively. Please be advised that the lab will likely have more content than what you can finish in 90 minutes and that is all right. These levels and lessons are just a guidance.
What is Server Side Testing
Server Side Testing is a functionality within Target Standard and Premium that allows your applications to communicate directly with Target servers to get optimized and personalized content. Server Side Testing can be accomplished using the Delivery API or the new Node.js SDK.
Figure 1: Server Side Testing 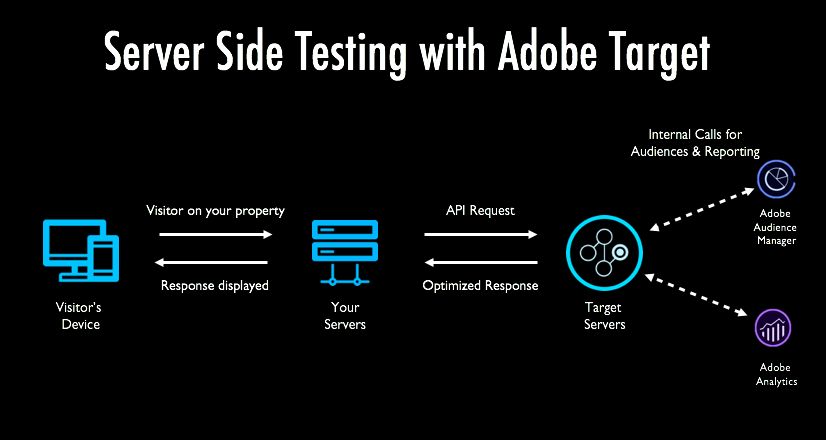
Advantages of Server Side Testing
Client Side Testing Vs Server Side Testing
Following is the basic comparison for client side testing program vs server side testing program
Figure 1: Server Side vs Client Side 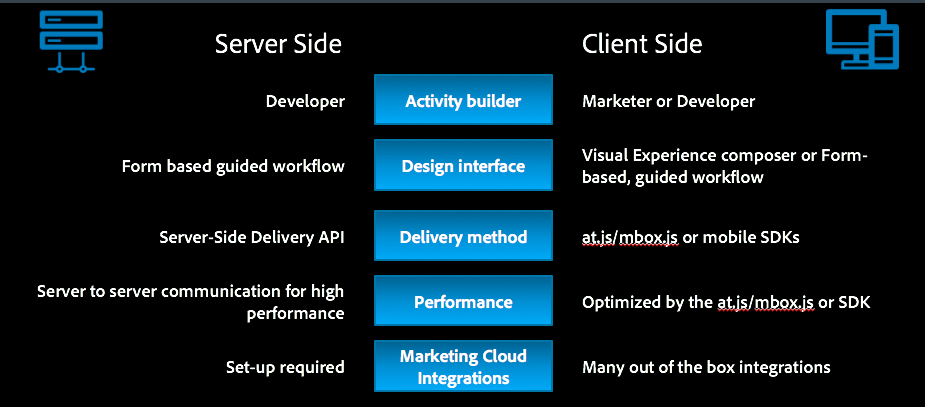
The Node client used in this demo application is a proof of concept and should not be used in your production applications. If you are interested in using Target in a Node.js rendered application, you can install it directly from NPM at https://www.npmjs.com/package/@adobe/target-node-client or reach out to dmehta@adobe.com, ustymenk@adobe.com, or your customer success manager.
This exercise is designed to get you started with all basic setup.
Locate the sample app
We have downloaded demo React app on your desktop with all required files in a single folder. Your folder with content should look like below screenshot:
Select Folder 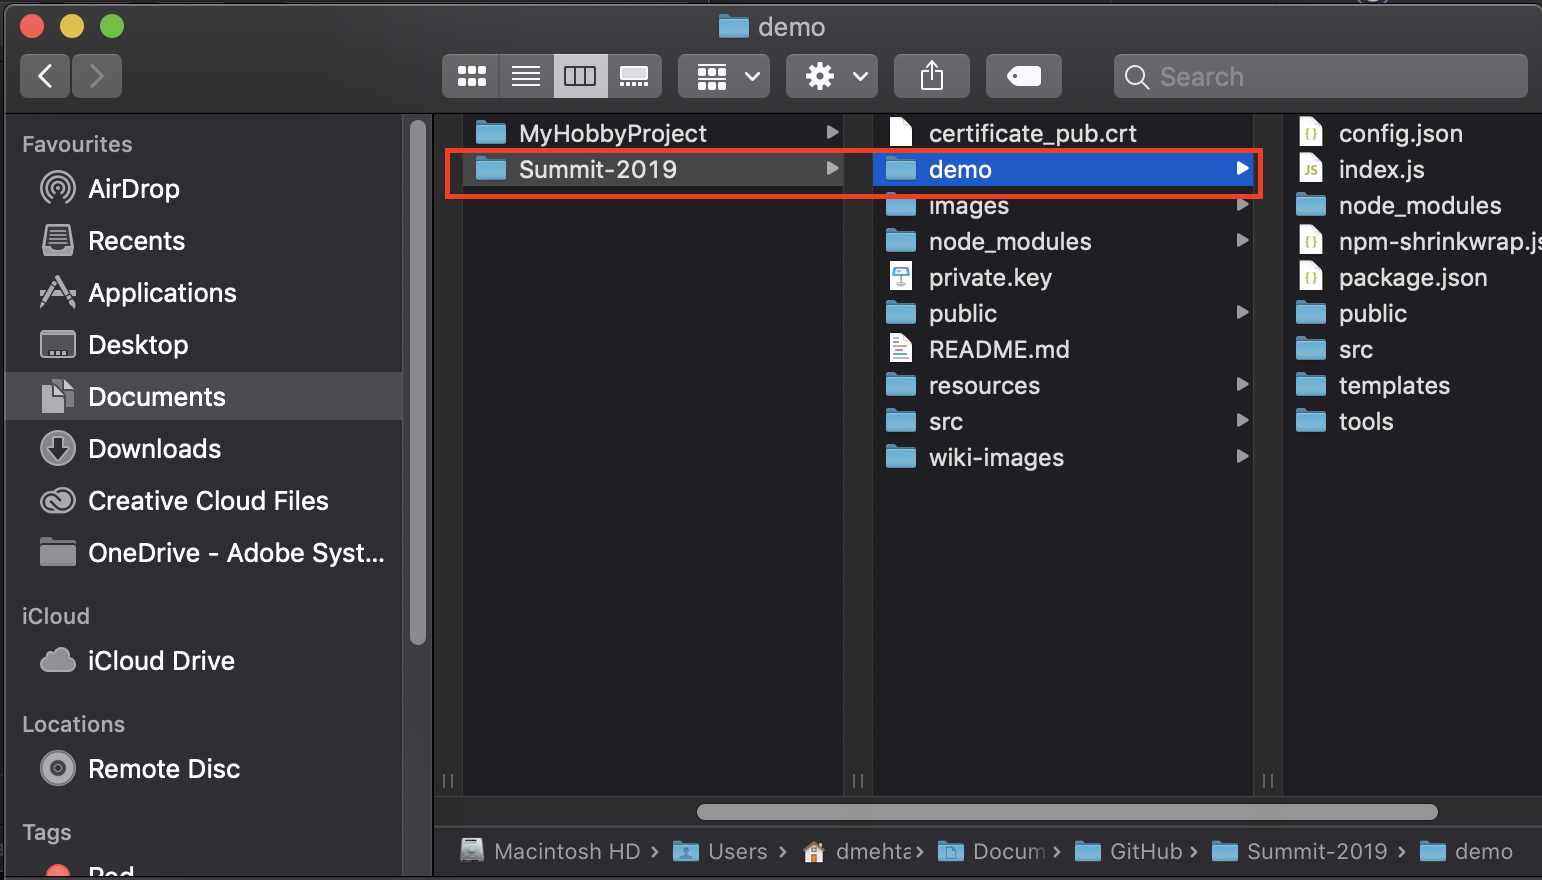
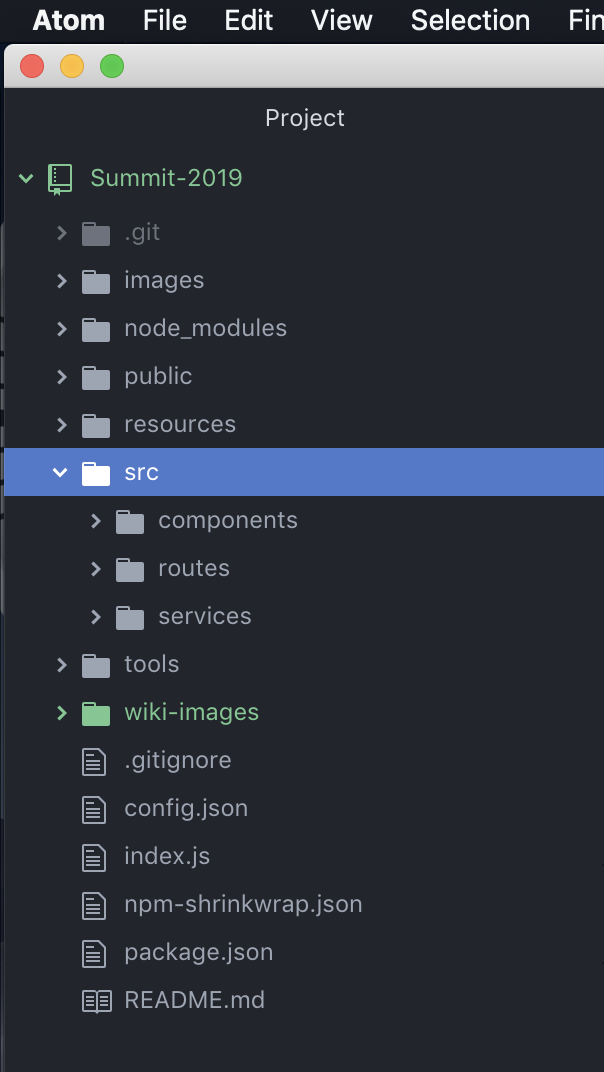
Open Atom editor installed on your system.
You can see that the app code directory is available on your left as per screenshot below.
Code folder
Open Git Folder 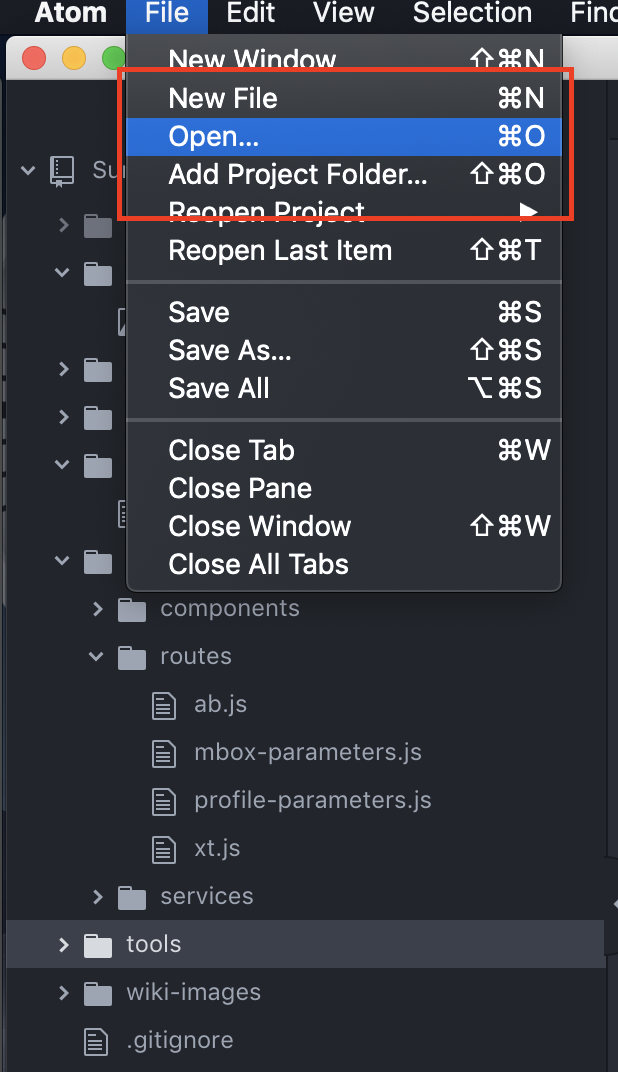
Open Terminal application by clicking the icon. Alternative way to open is to click on the search icon on the top right corner of your screen. This will open the spotlight search. Type 'terminal' in the search box and open the Terminal application.
Once you are inside the Terminal, type cd ~/Downloads/Summit-2019/demo to go to the folder where lab demo app code is available. You can type ls to list the files and make sure you are inside the right folder.
Type npm run www and press enter. You should now see 'Target React Sample App is running on port 5000' as the response.
Run NPM 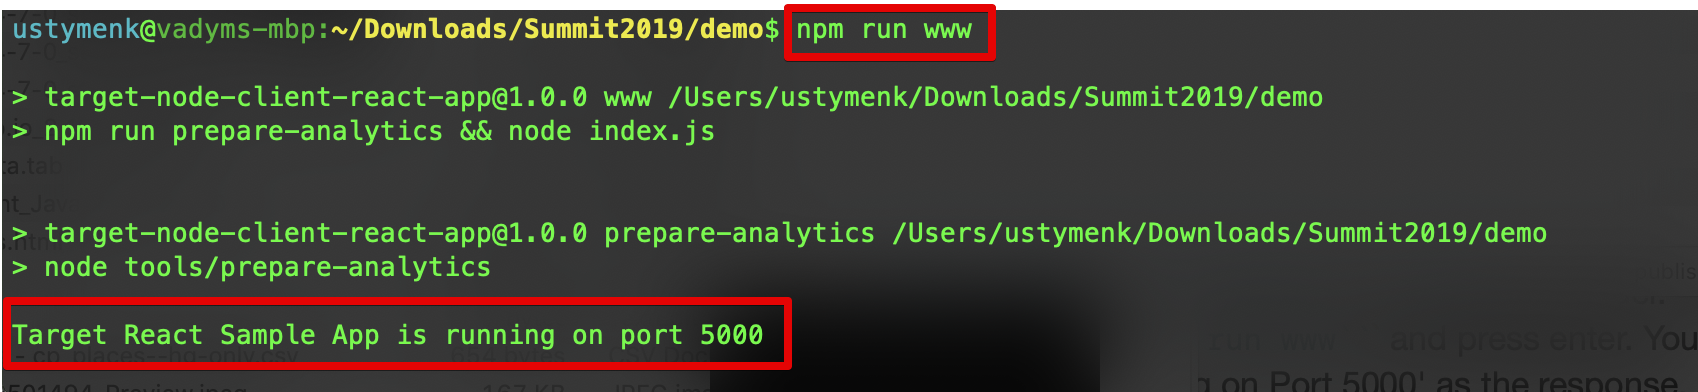
If you are seeing any errors, please notify the instructor or a teaching assistant.
Open http://localhost:5000/ in a new tab and you should see the Node app running in your browser.
Landing Page 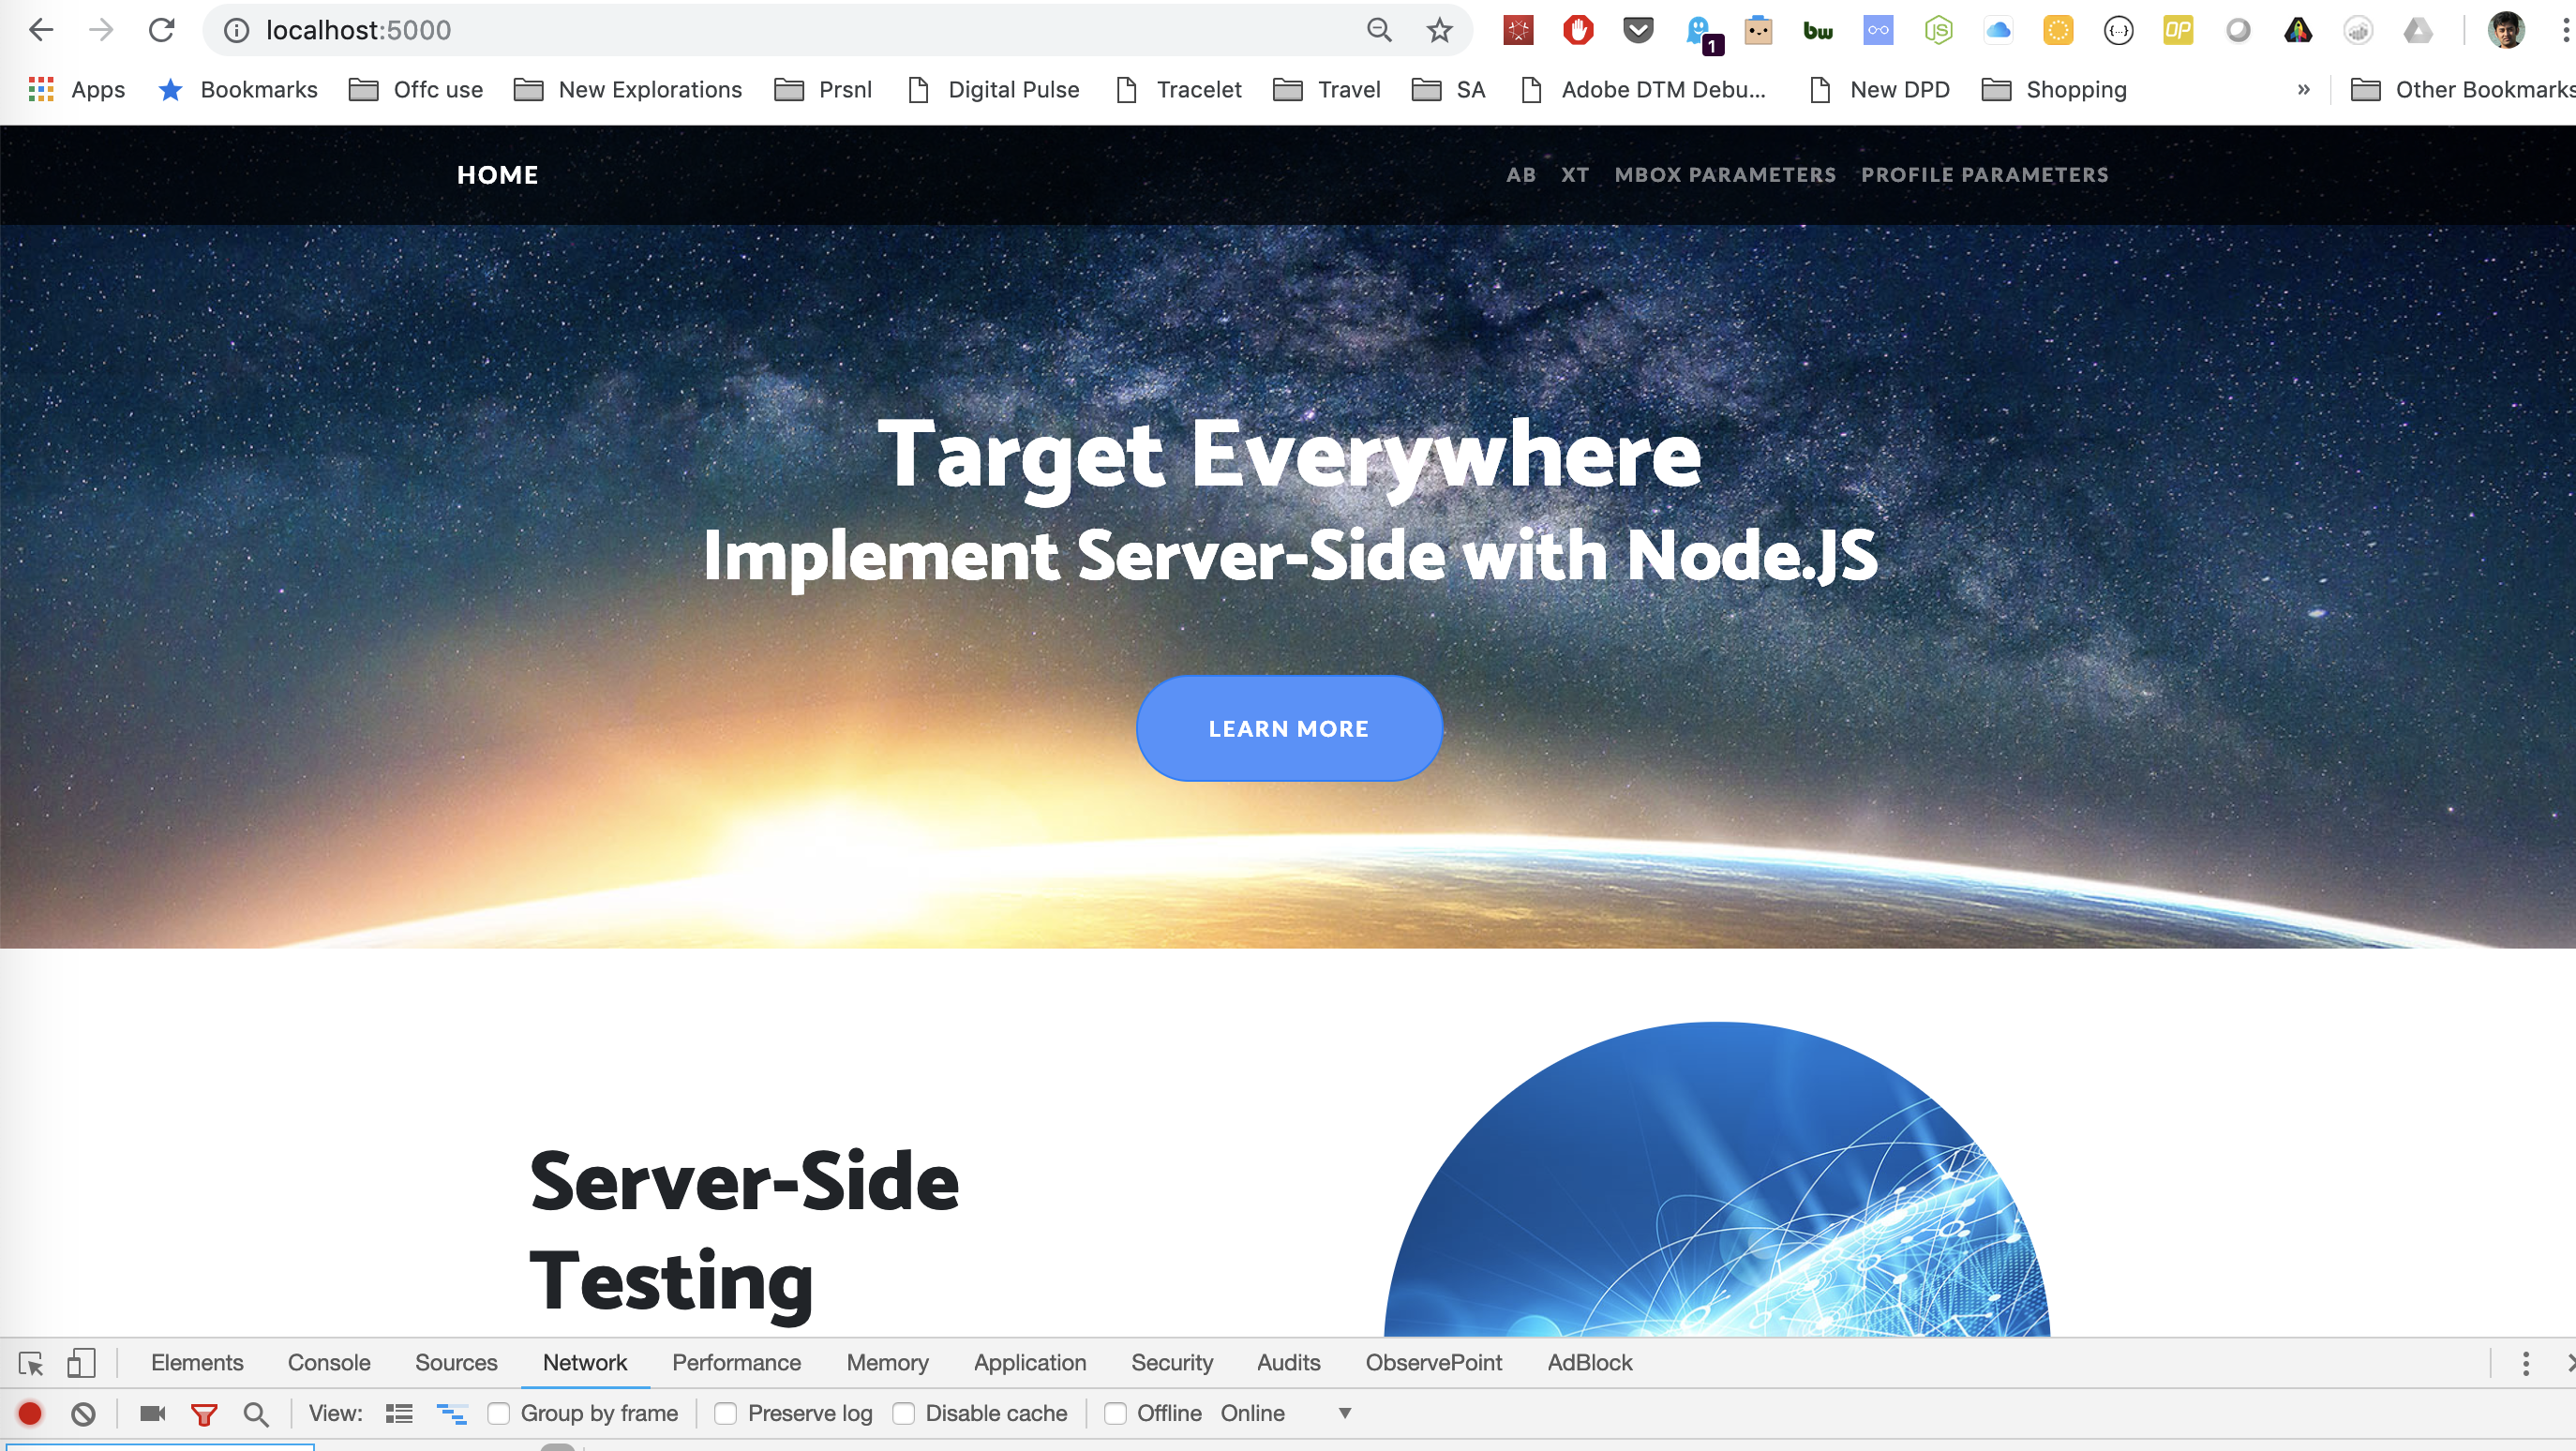
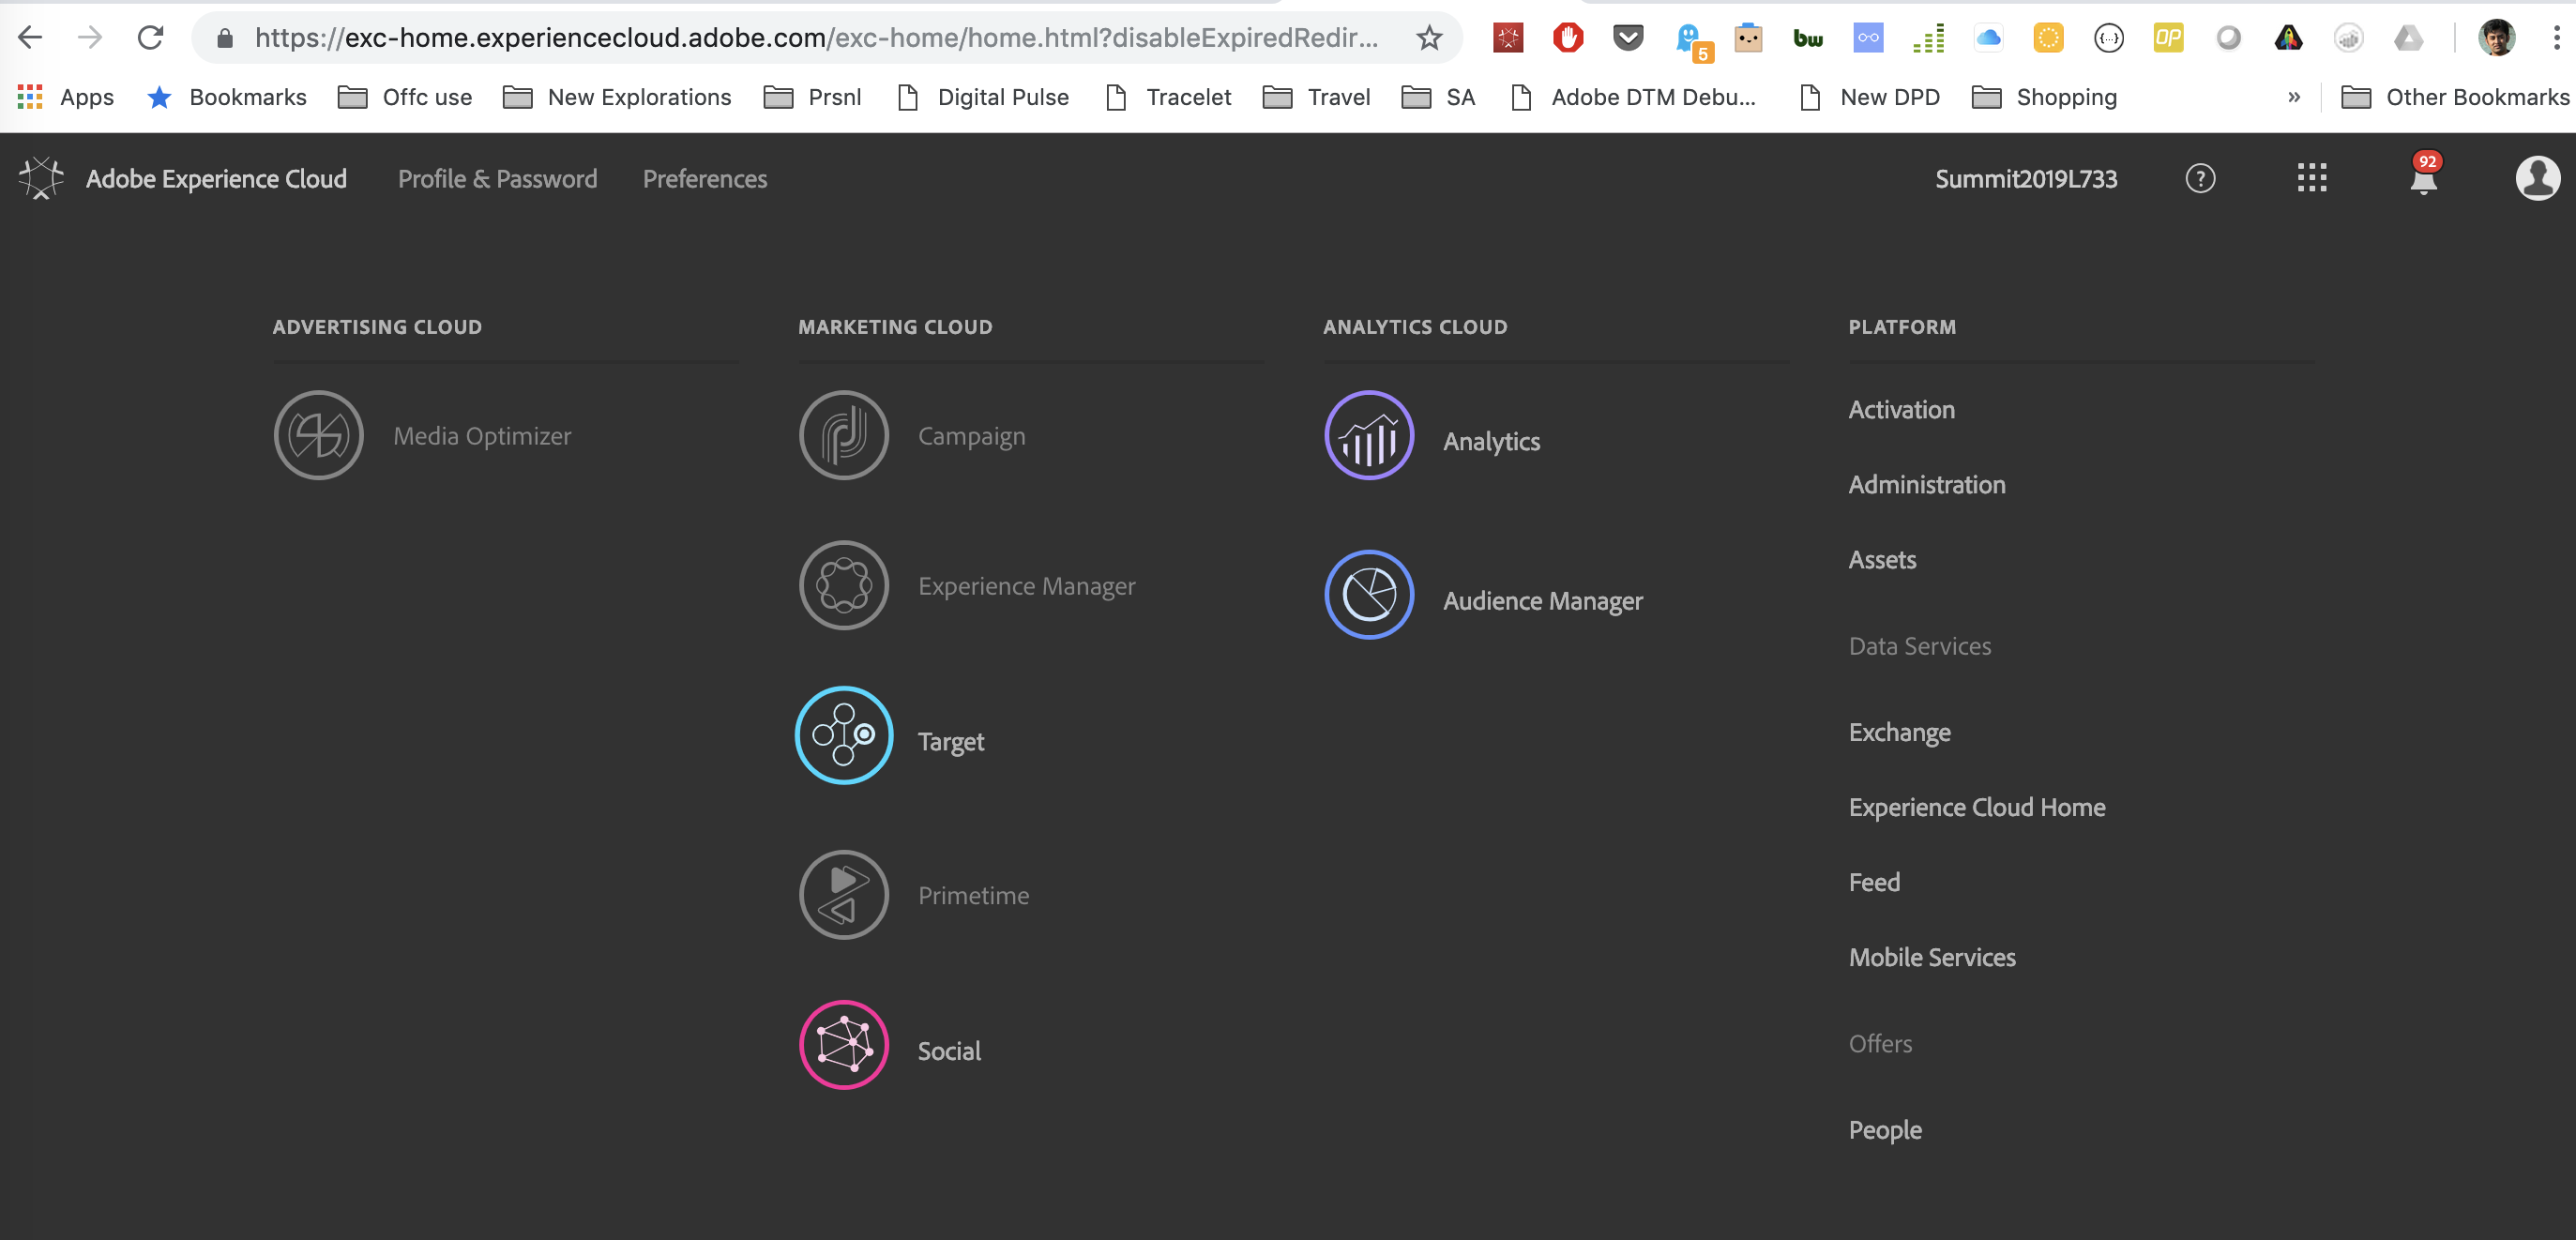
Login to Adobe Target
Organize your windows and tabs
You will be switching between five different windows during this lab. Here is a recommended approach but feel free to organize your windows based on what you find convenient.
Spend a minute or two on getting your windows organized and this will be very helpful for the rest of the lab.
Target Node Client is a Node.js library that simplifies the way you interact with Adobe Target batch delivery API. The library allows you to execute requests against the Adobe edge network and retrieve personalized content that can be used to enhance the user experience. Behind the scenes, the Target Node Client wraps two Adobe Experience Cloud solutions:
If you are interested in using SDK, you can install it directly from NPM at https://www.npmjs.com/package/@adobe/target-node-client.
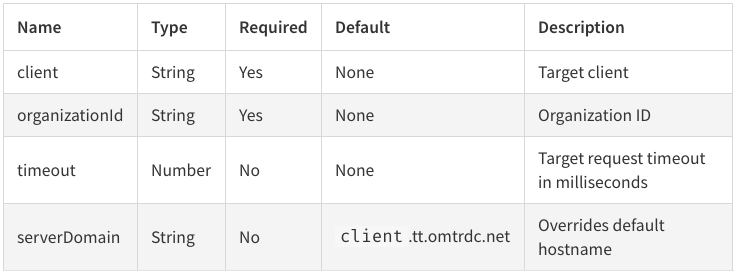
TargetNodeClient.create(options: Object): TargetNodeClient creates an instance of the Target Node Client. The options object has the following structure:

The config object should have the following structure:
Here is an example how you might use the configuration to instantiate the Target Client:
    const TargetNodeClient = require("@adobe/target-node-client");
    const client = TargetNodeClient.create({
        config:{
            client: "summit2019l733",
            organizationId: "1234567890@AdobeOrg",
            timeout: 10000
        }
    });
Once client instance is created we can start firing requests against Adobe Target servers. To do that we have to invoke the getOffers() method passing a data payload object.
TargetNodeClient.getOffer(request: Object): Promise is used to fetch a single offer from Target.
TargetNodeClient.getOffers(request: Object): Promise is used to fetch multiple offers from Target.
Here is an example how you might use the instantiated Target Node Client:
 const request = {
     payload: {
         mboxes: [{
             mbox: "server-side-mbox",
             indexId: 0
         }]
     }};

 client.getOffers(request)
     .then(response => console.log('Response', response))
.catch(error => console.error('Error', error));The Target React sample app has the Experience Cloud ID Service integration included out of the box. The Visitor API service is responsible for:
In the server side scenario, segments from Adobe Audience Manager can be used ONLY after the first hit for a completely new visitor.
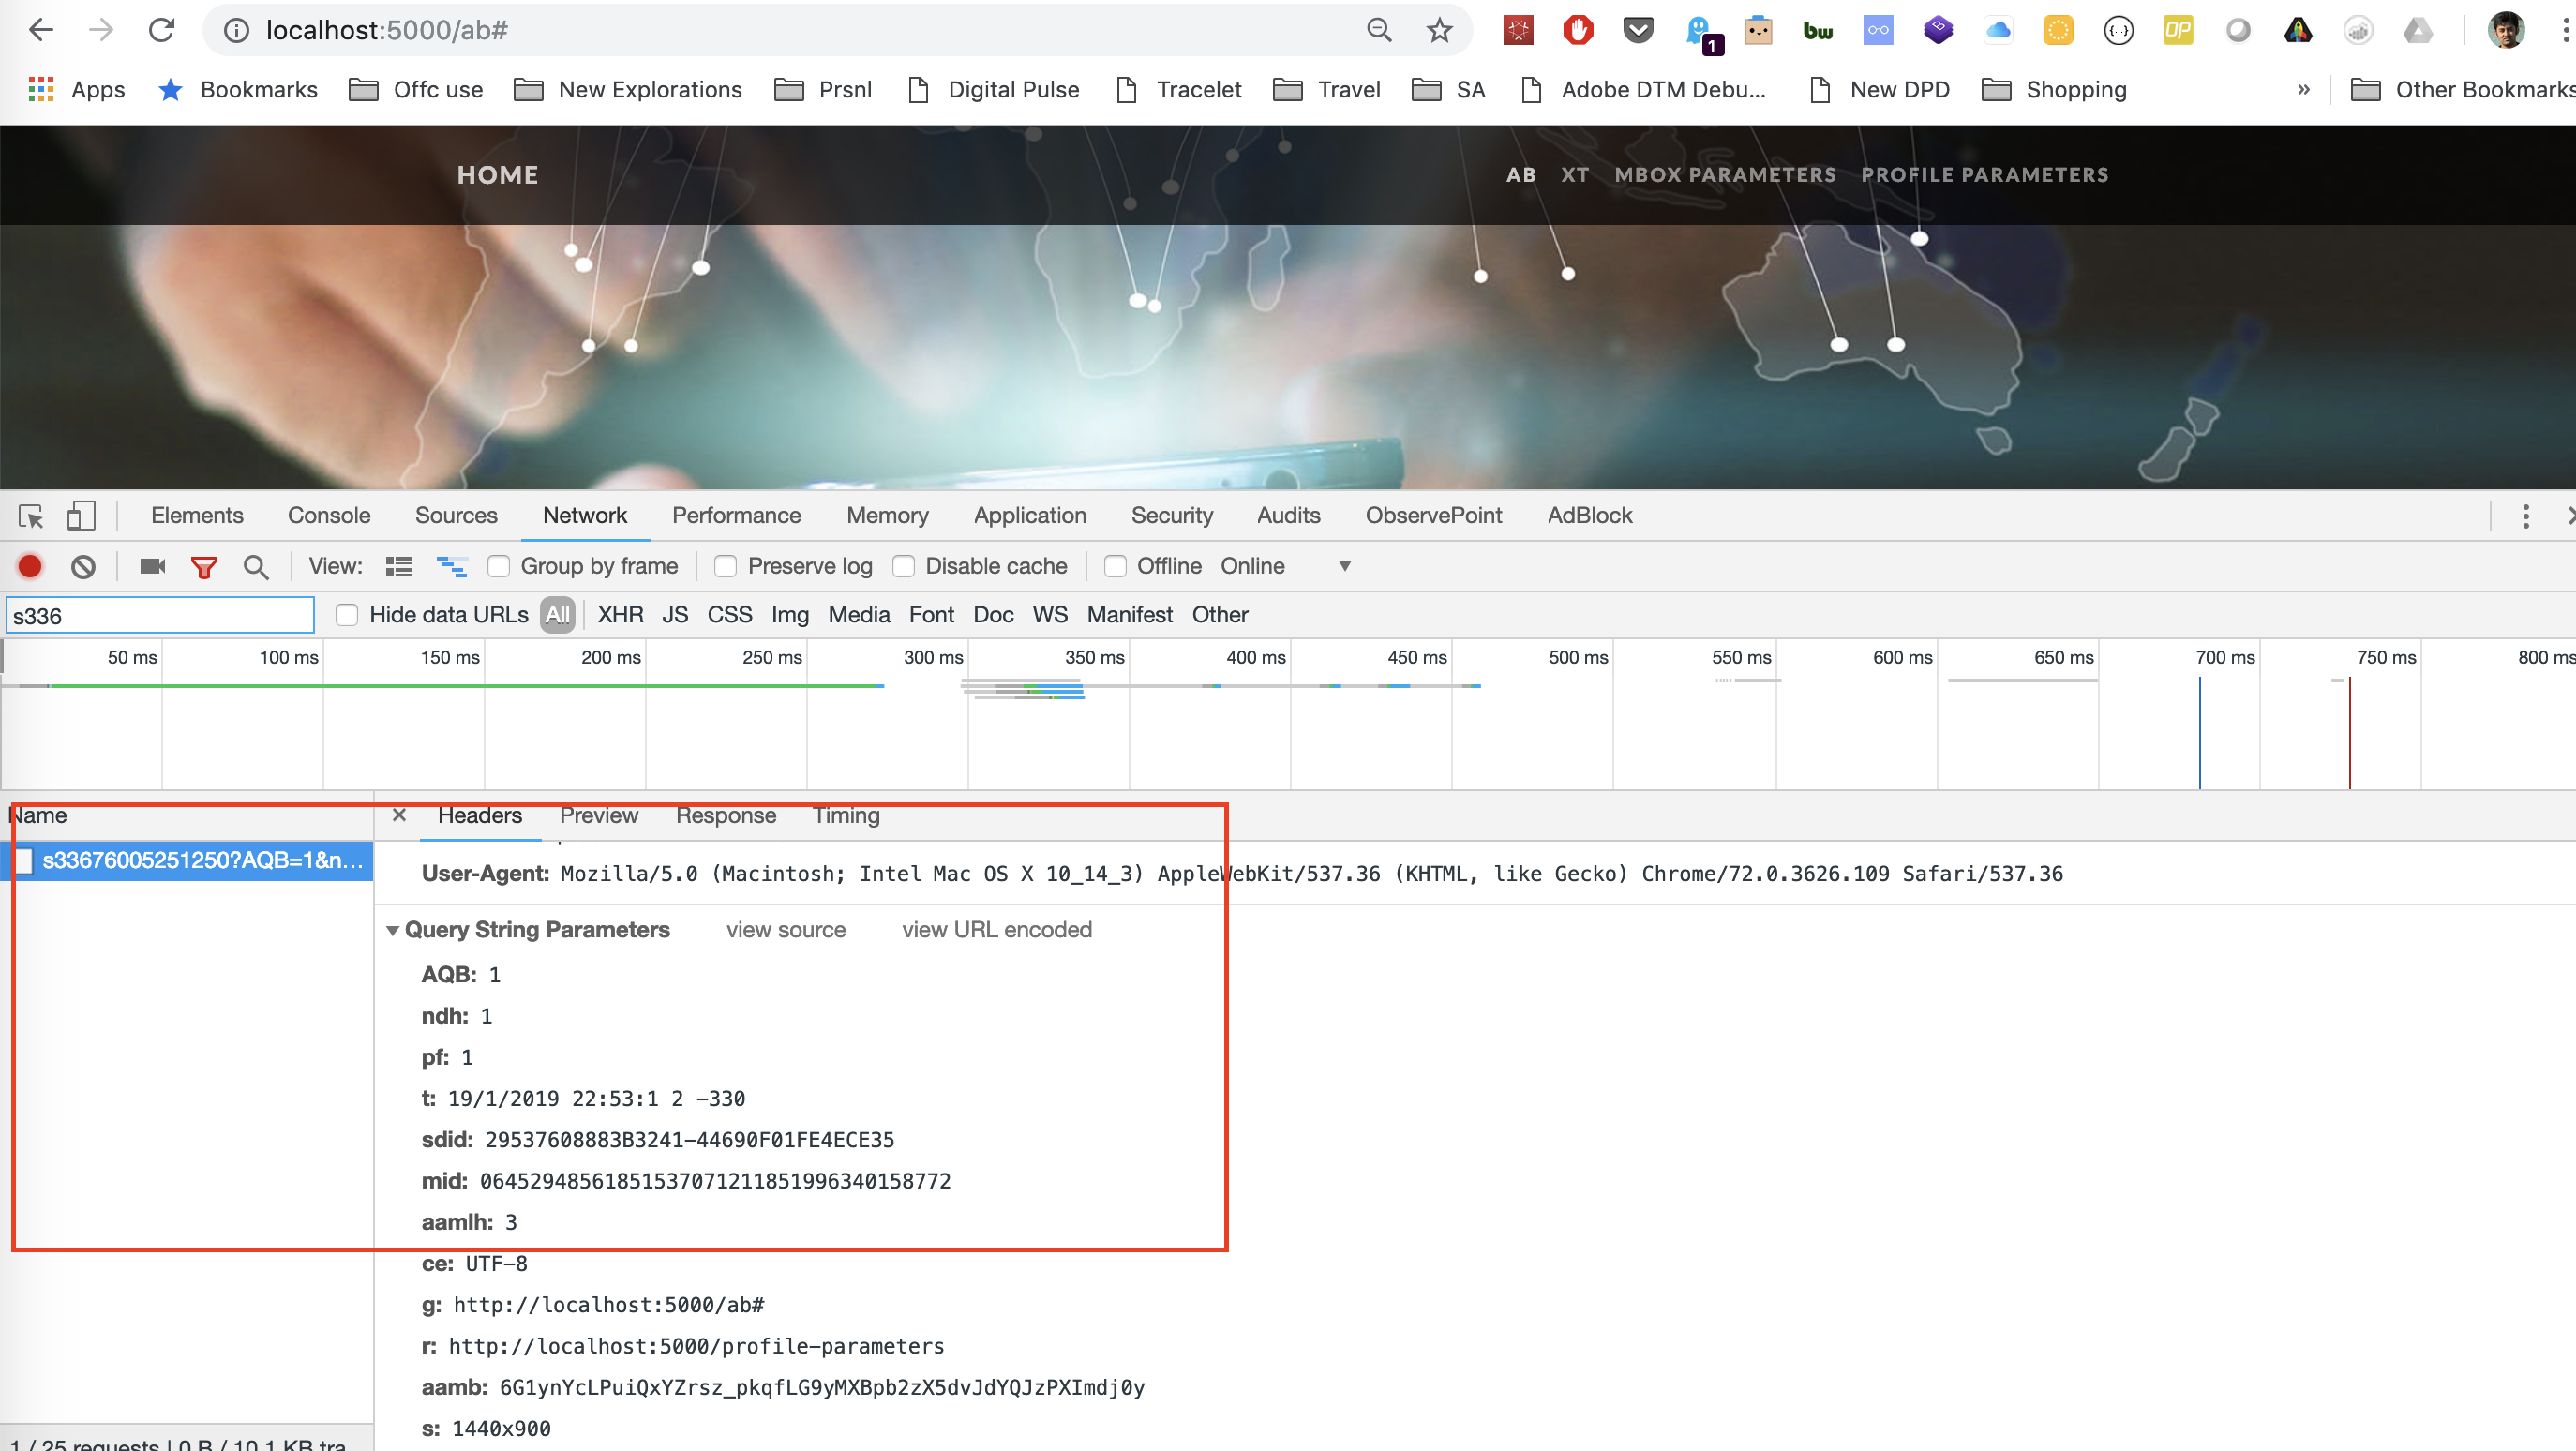
The Target React sample app has the Adobe Analytics integration included for demo purposes. In this particular application we have a hybrid approach, since Adobe Target requests are fired from server side while Adobe Analytics hits are fired from client side.
In order to verify that Adobe Analytics hits are fired, you could open Chrome Developer Tools -> Network tab and search for Adobe Analytics requests. You should see something like this:
We are going to create an A/B test where we will show 2 different banners on the homepage.
Make sure you know your unique user number. Your unique user number is on the paper on your work station. If you don't have one, please inform the instructor or one of the teaching assistants.
2a. Open the editor
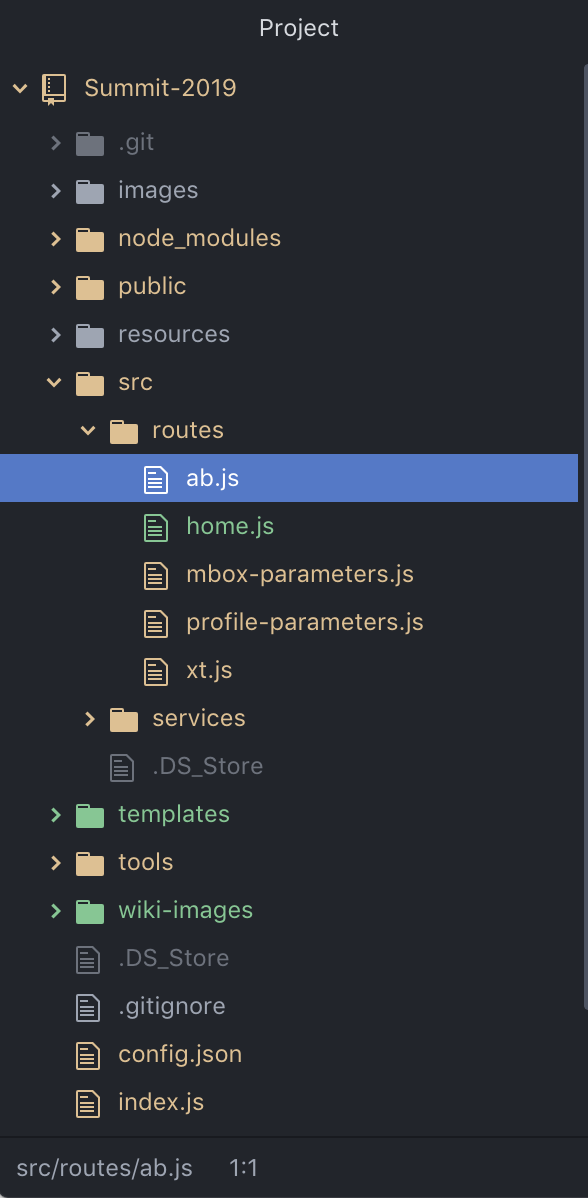
2b. Open the demo folder containing summit code base. Navigate to src > routes > ab.js
Locate File
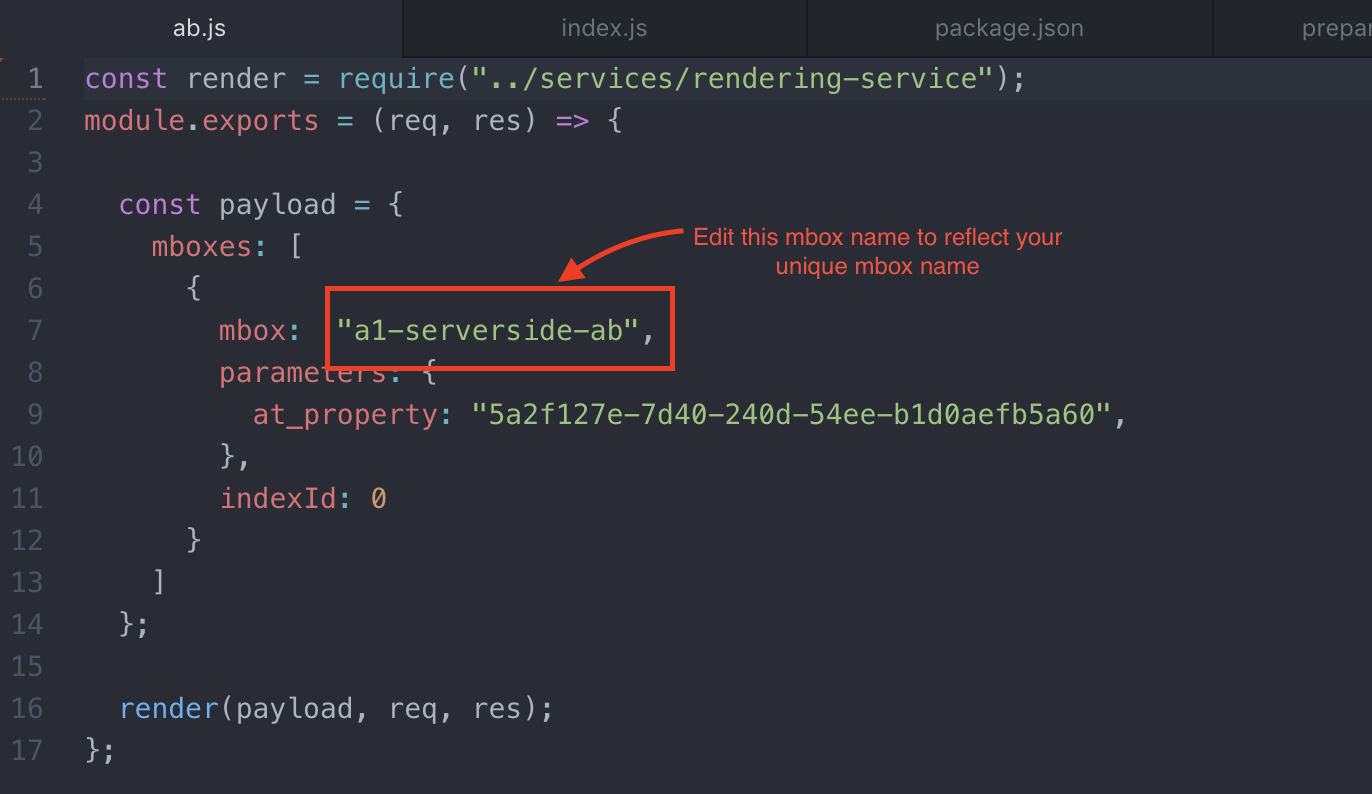
2c. In the ab.js file, a1-serverside-ab is the name of the target location. Replace a1 with your unique user number.
Edit Mbox Name
2d. Hit Cmd + S to save the file.
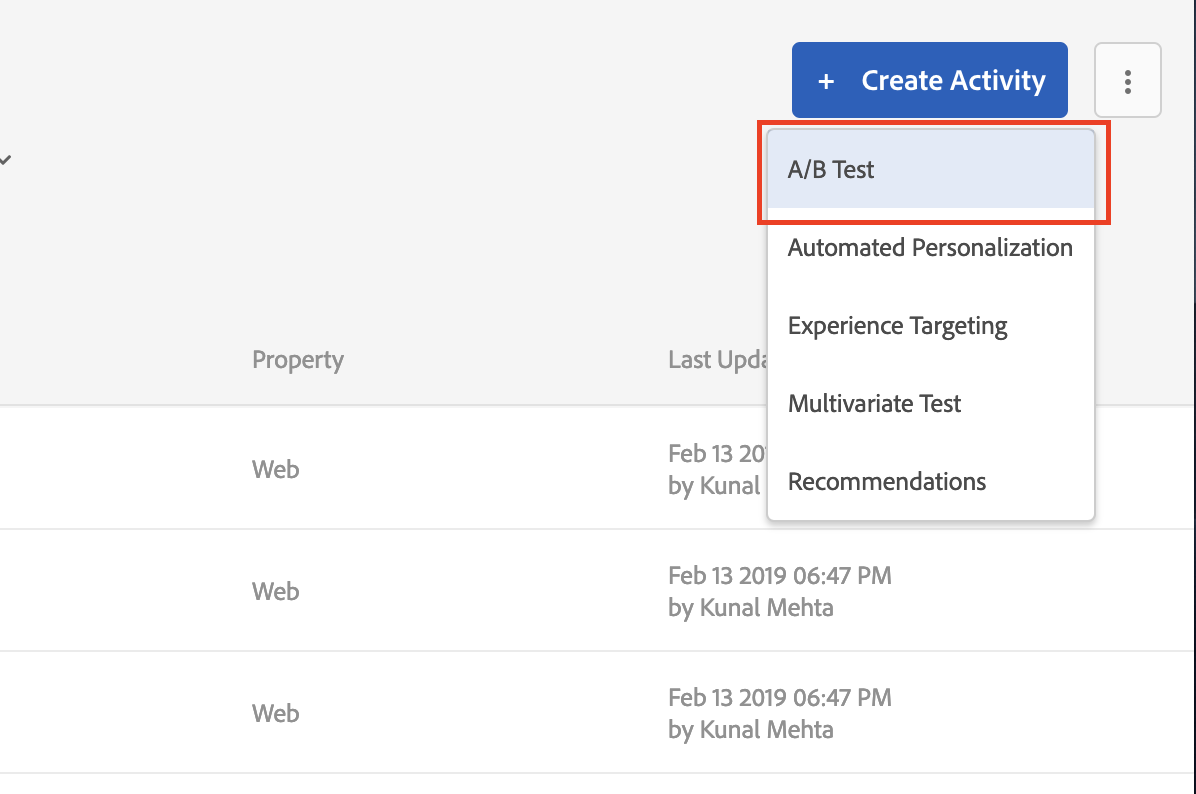
3a. Go to the Target UI.
3b. Click the blue 'Create Activity' button and then select A/B Test
Create A/B
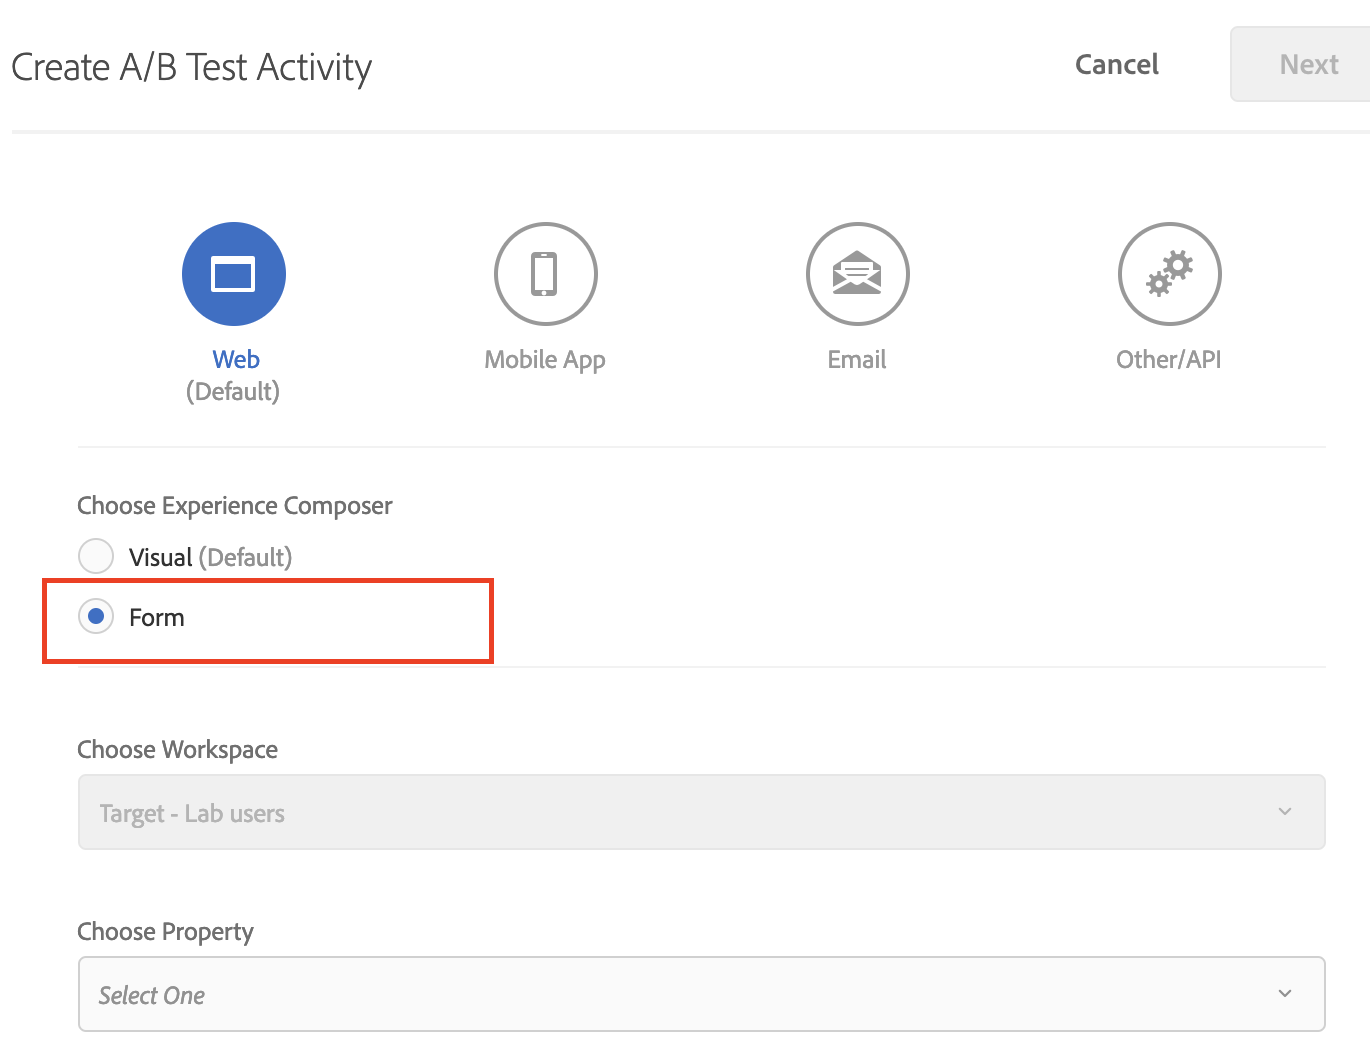
3c. Select the 'Form' option and click Next
Select Composer
3d. Rename your activity. Prefix your activity name with L733 followed by your user number. (Eg: L733-01 AB Test).
Since all the participants are sharing the same account, it is very important to add the prefix (Eg: L733-01) to all your activities.
Rename Activity 
3e. Select or type your location in the box. If your location isn't showing up in the dropdown, that is all right.
3f. Click on the small arrow after 'Default Content' and select 'Change Offer'. This will open a dialog.
Select Offer 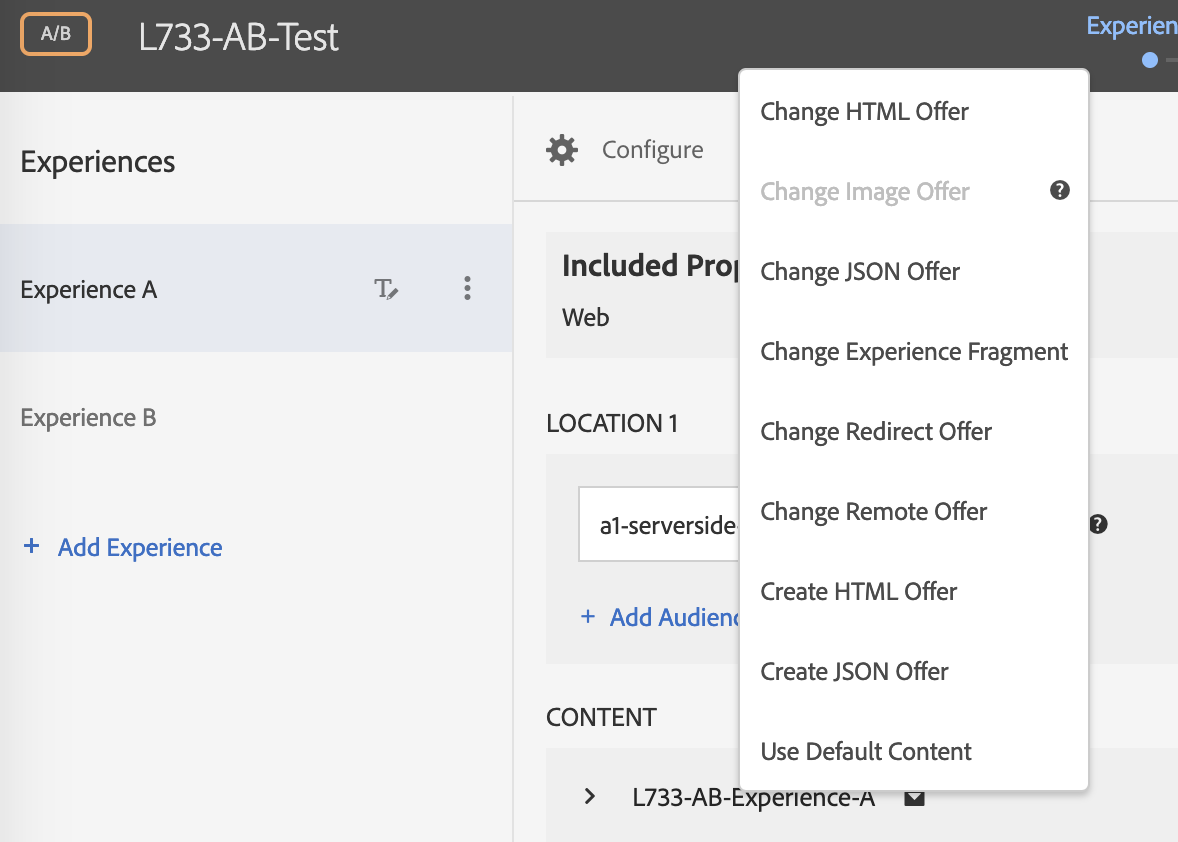
3g. Select the offer titled 'L733-AB-Experience-A' and click Save
Offer Selection 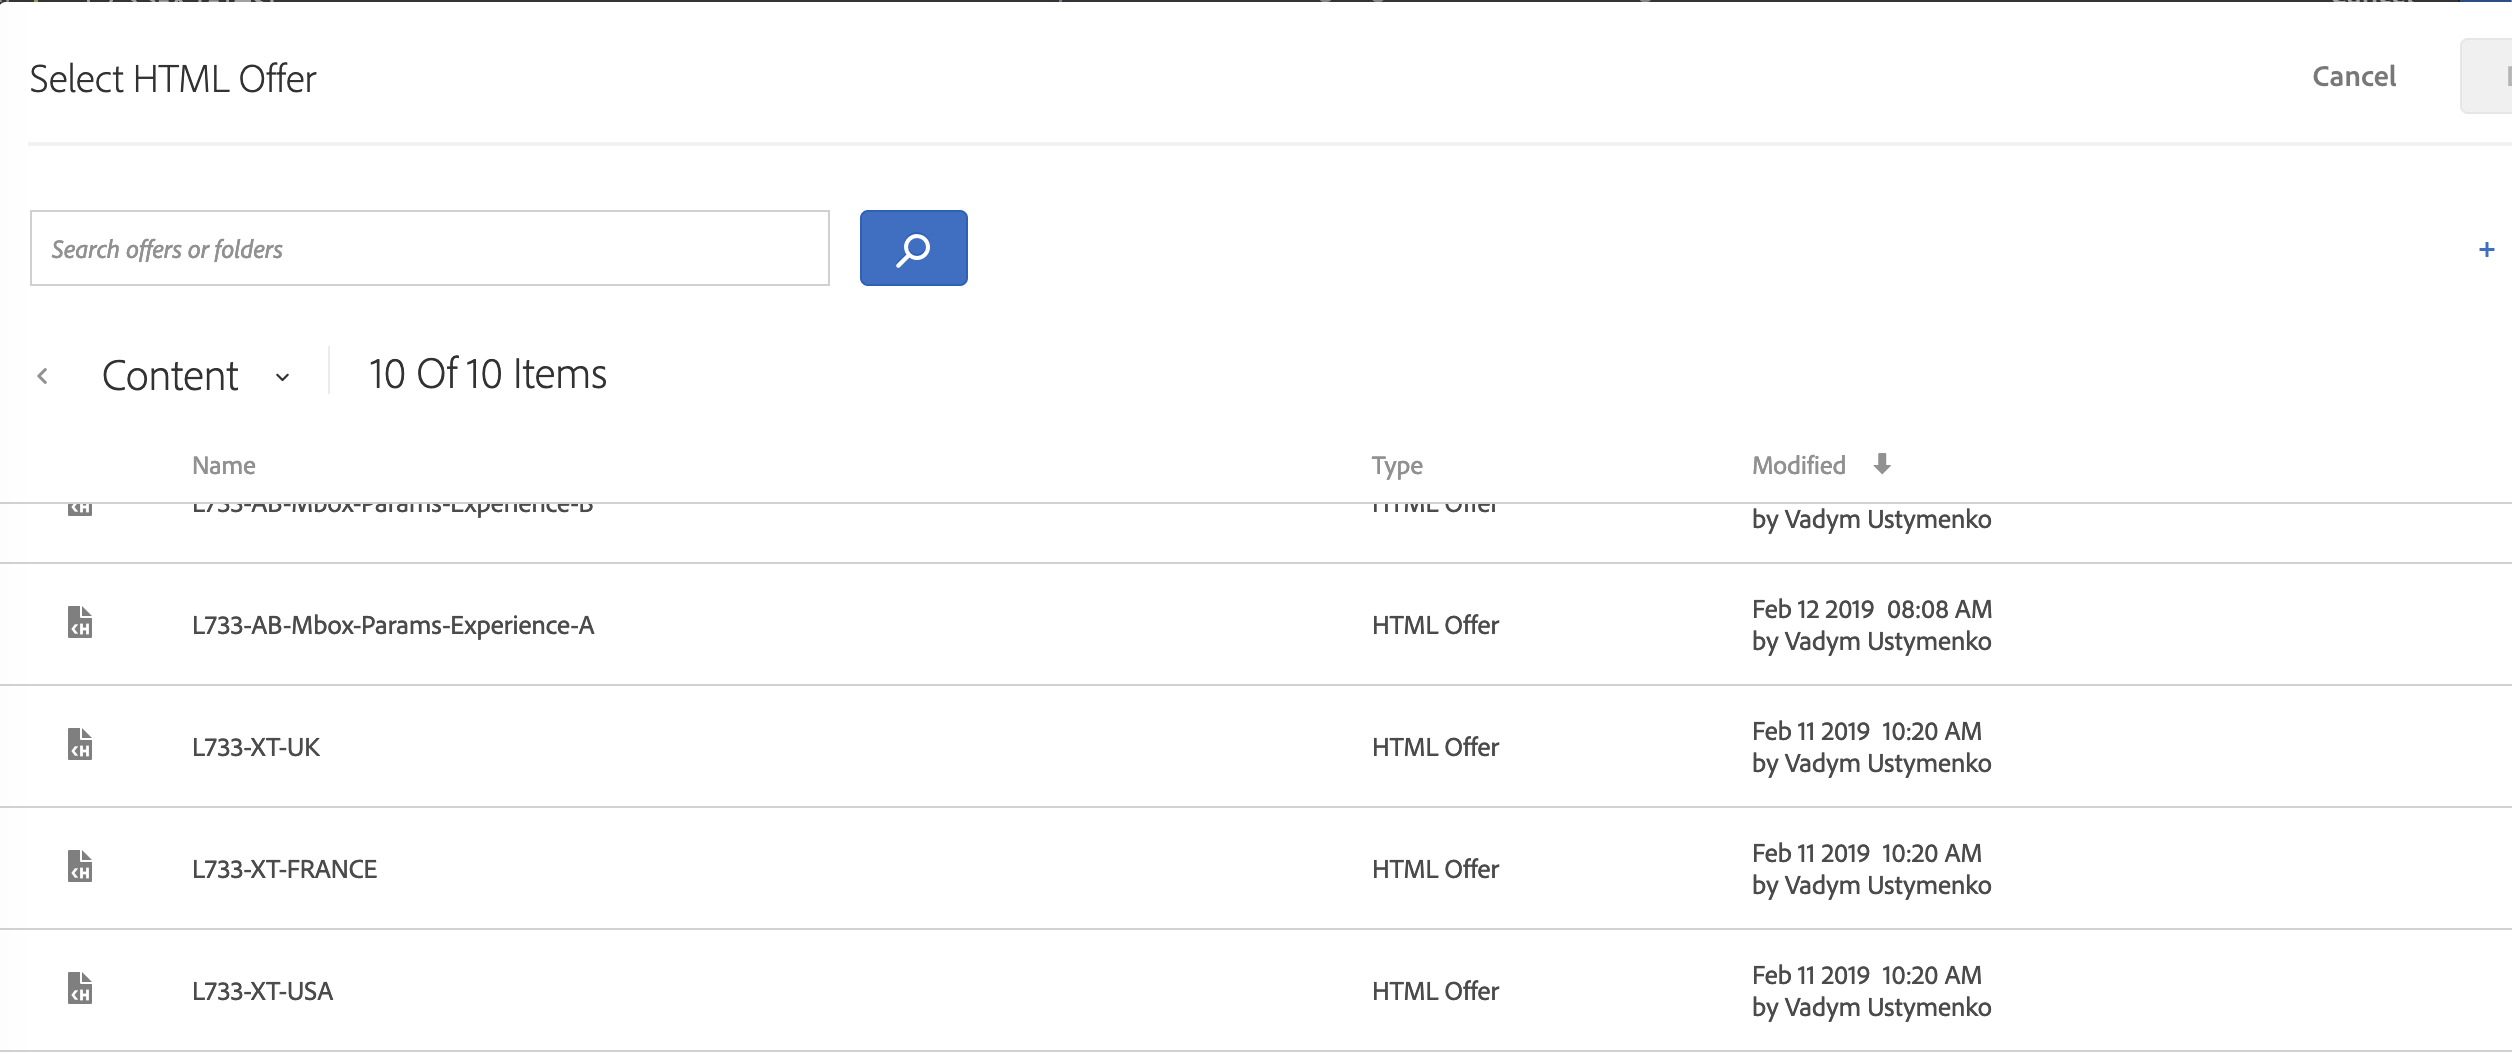
3h. Click on 'Add Experience' and repeat steps 3f and 3g to add your 'L733-AB-Experience-B' experience. After you complete this step, your screen should look like this.
Change Offer 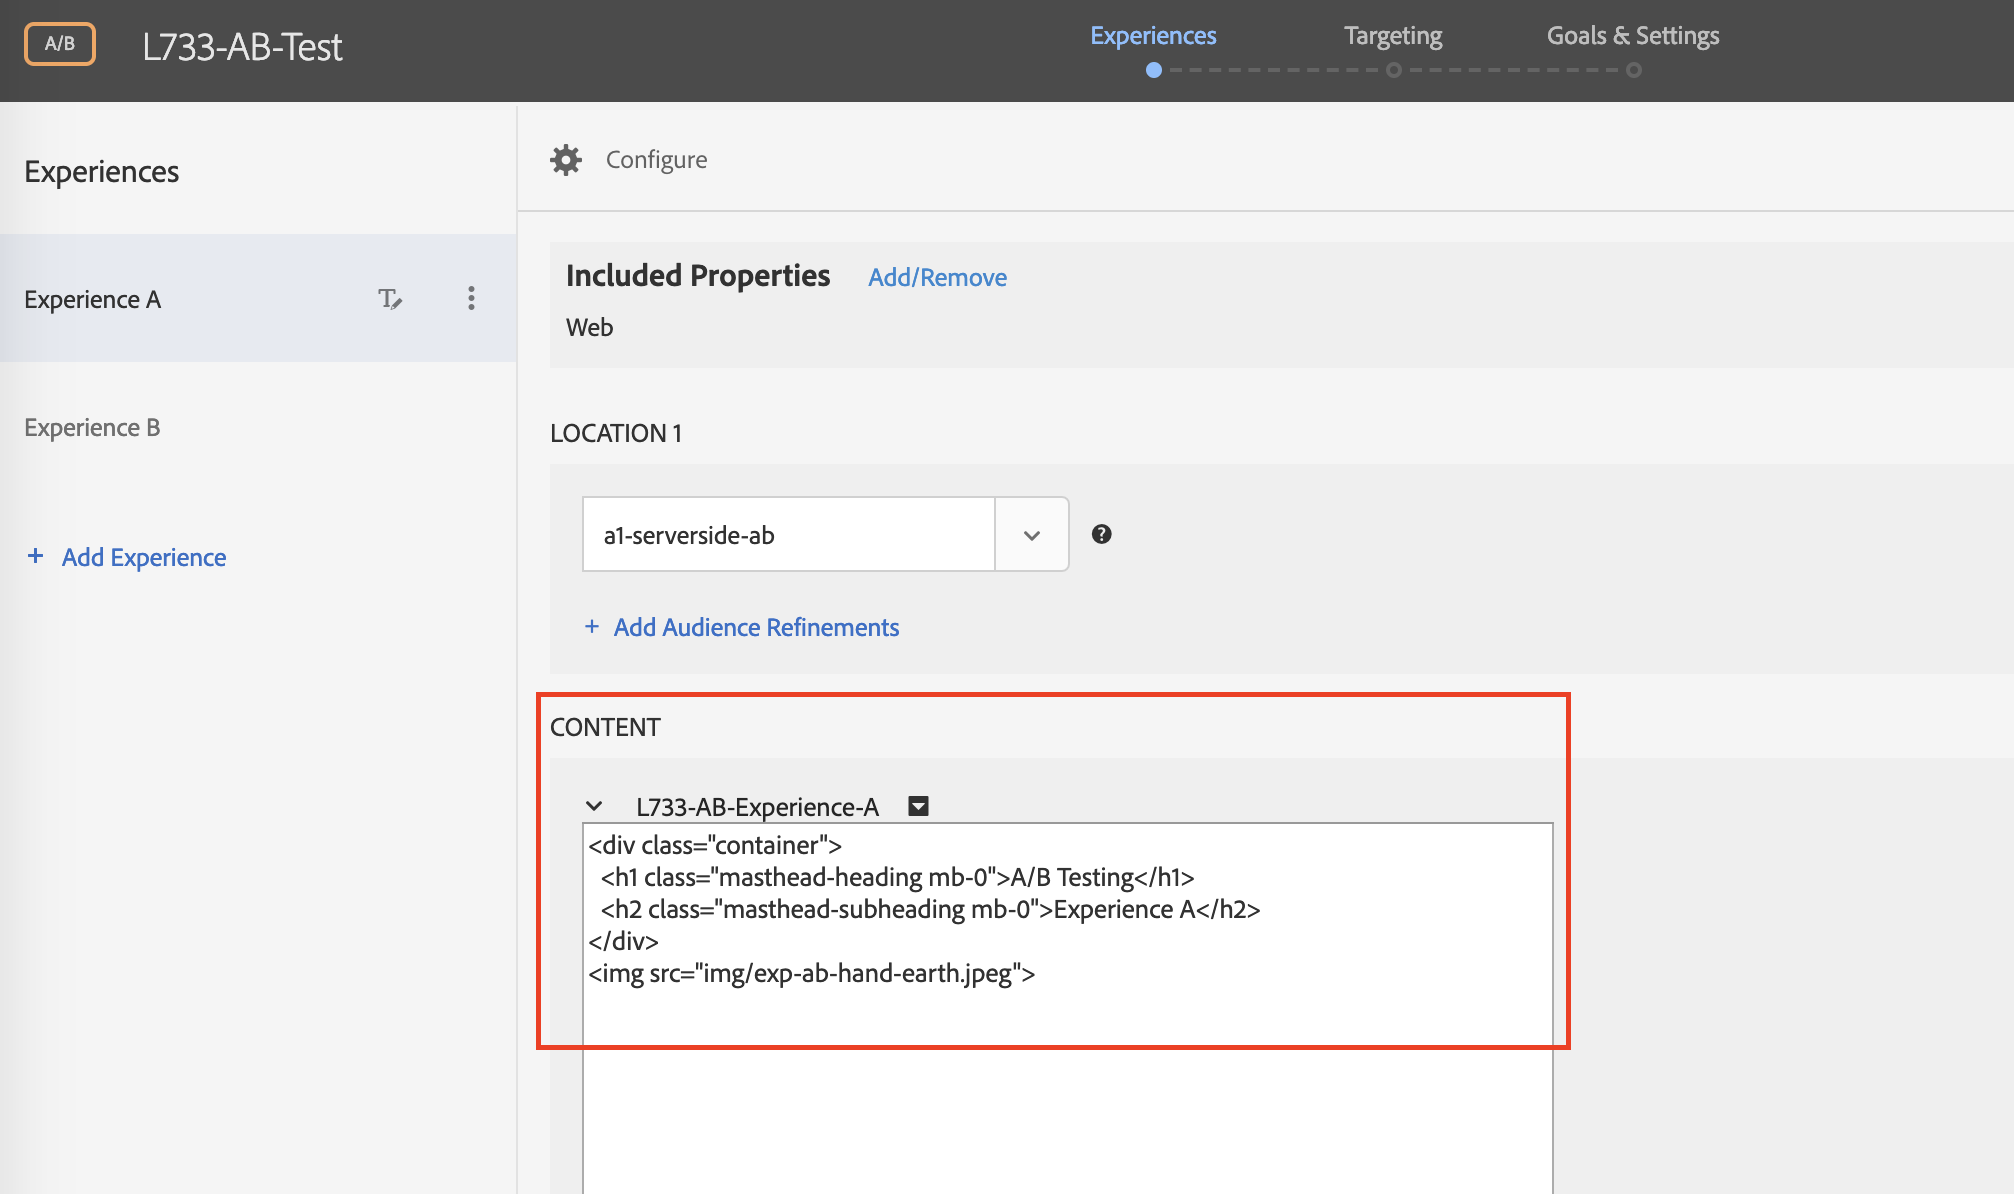
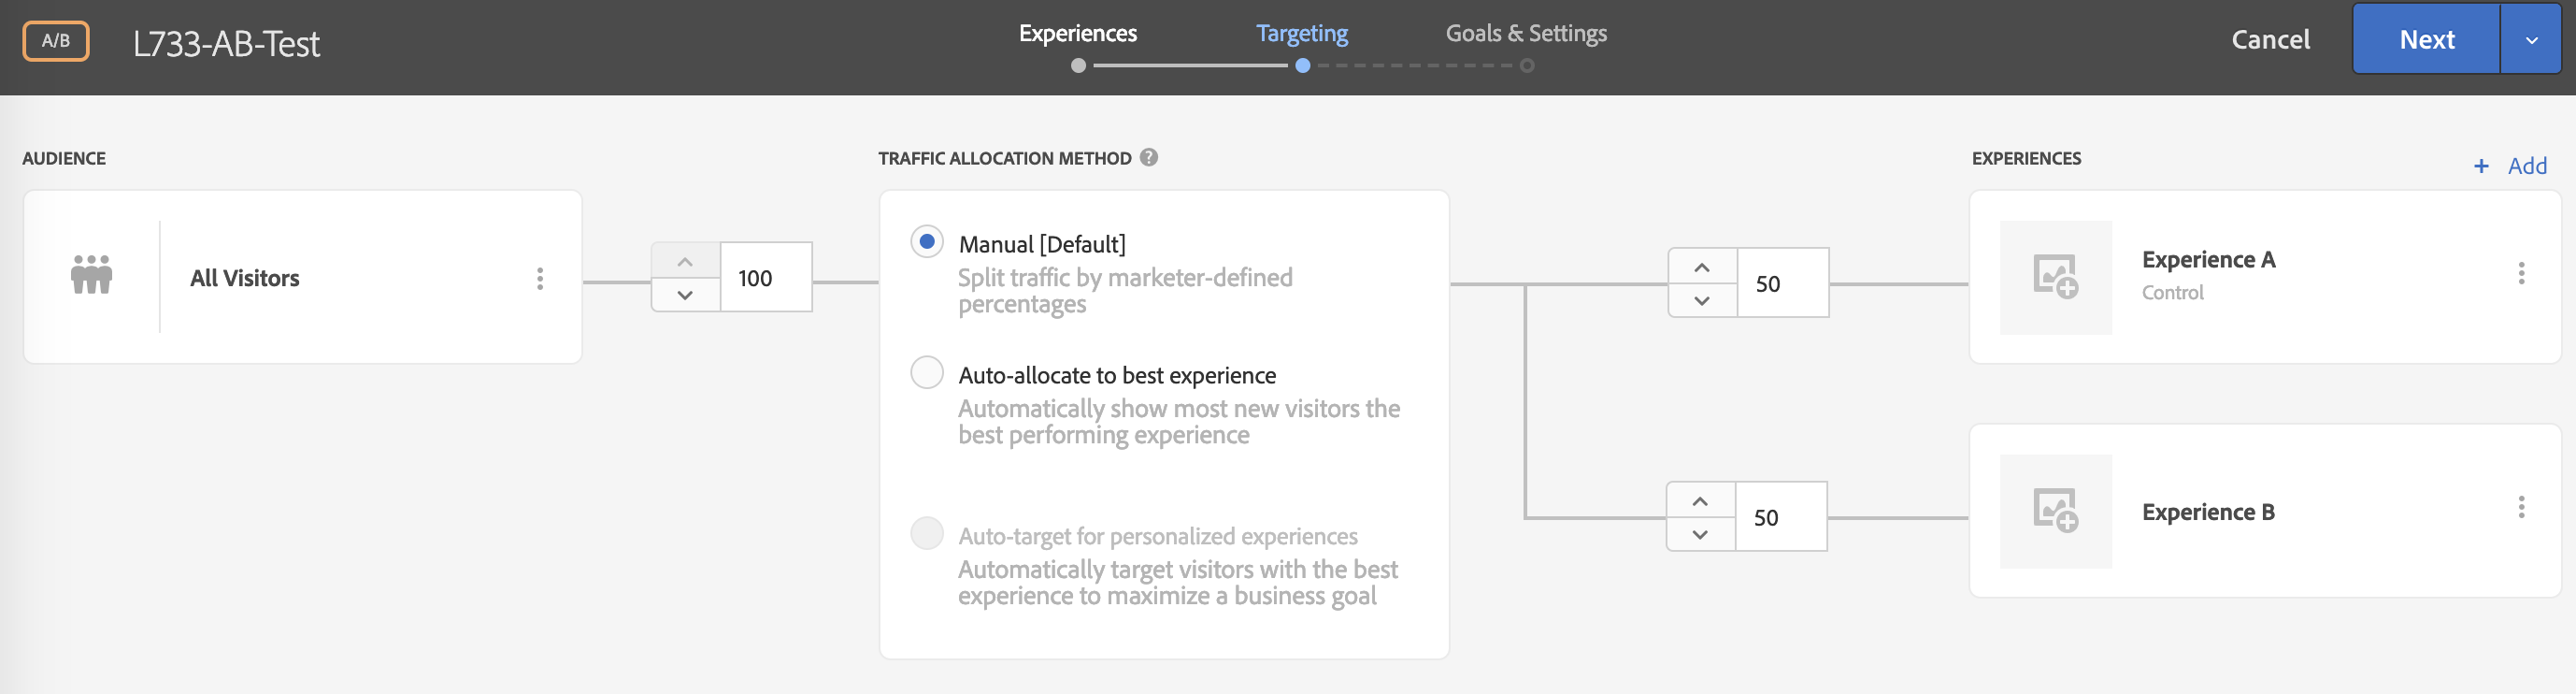
3i. Click 'Next' and review your test setup.
3j. Click 'Next' to go to the Goal & Settings screen. On this screen, select 'Adobe Analytics' as your reporting source, 'Summit2019L733' as your report suite. Under 'Goal Metric', select 'Use an Analytics metric' and then select 'Average time on site' from the dropdown.
Goals & Settings 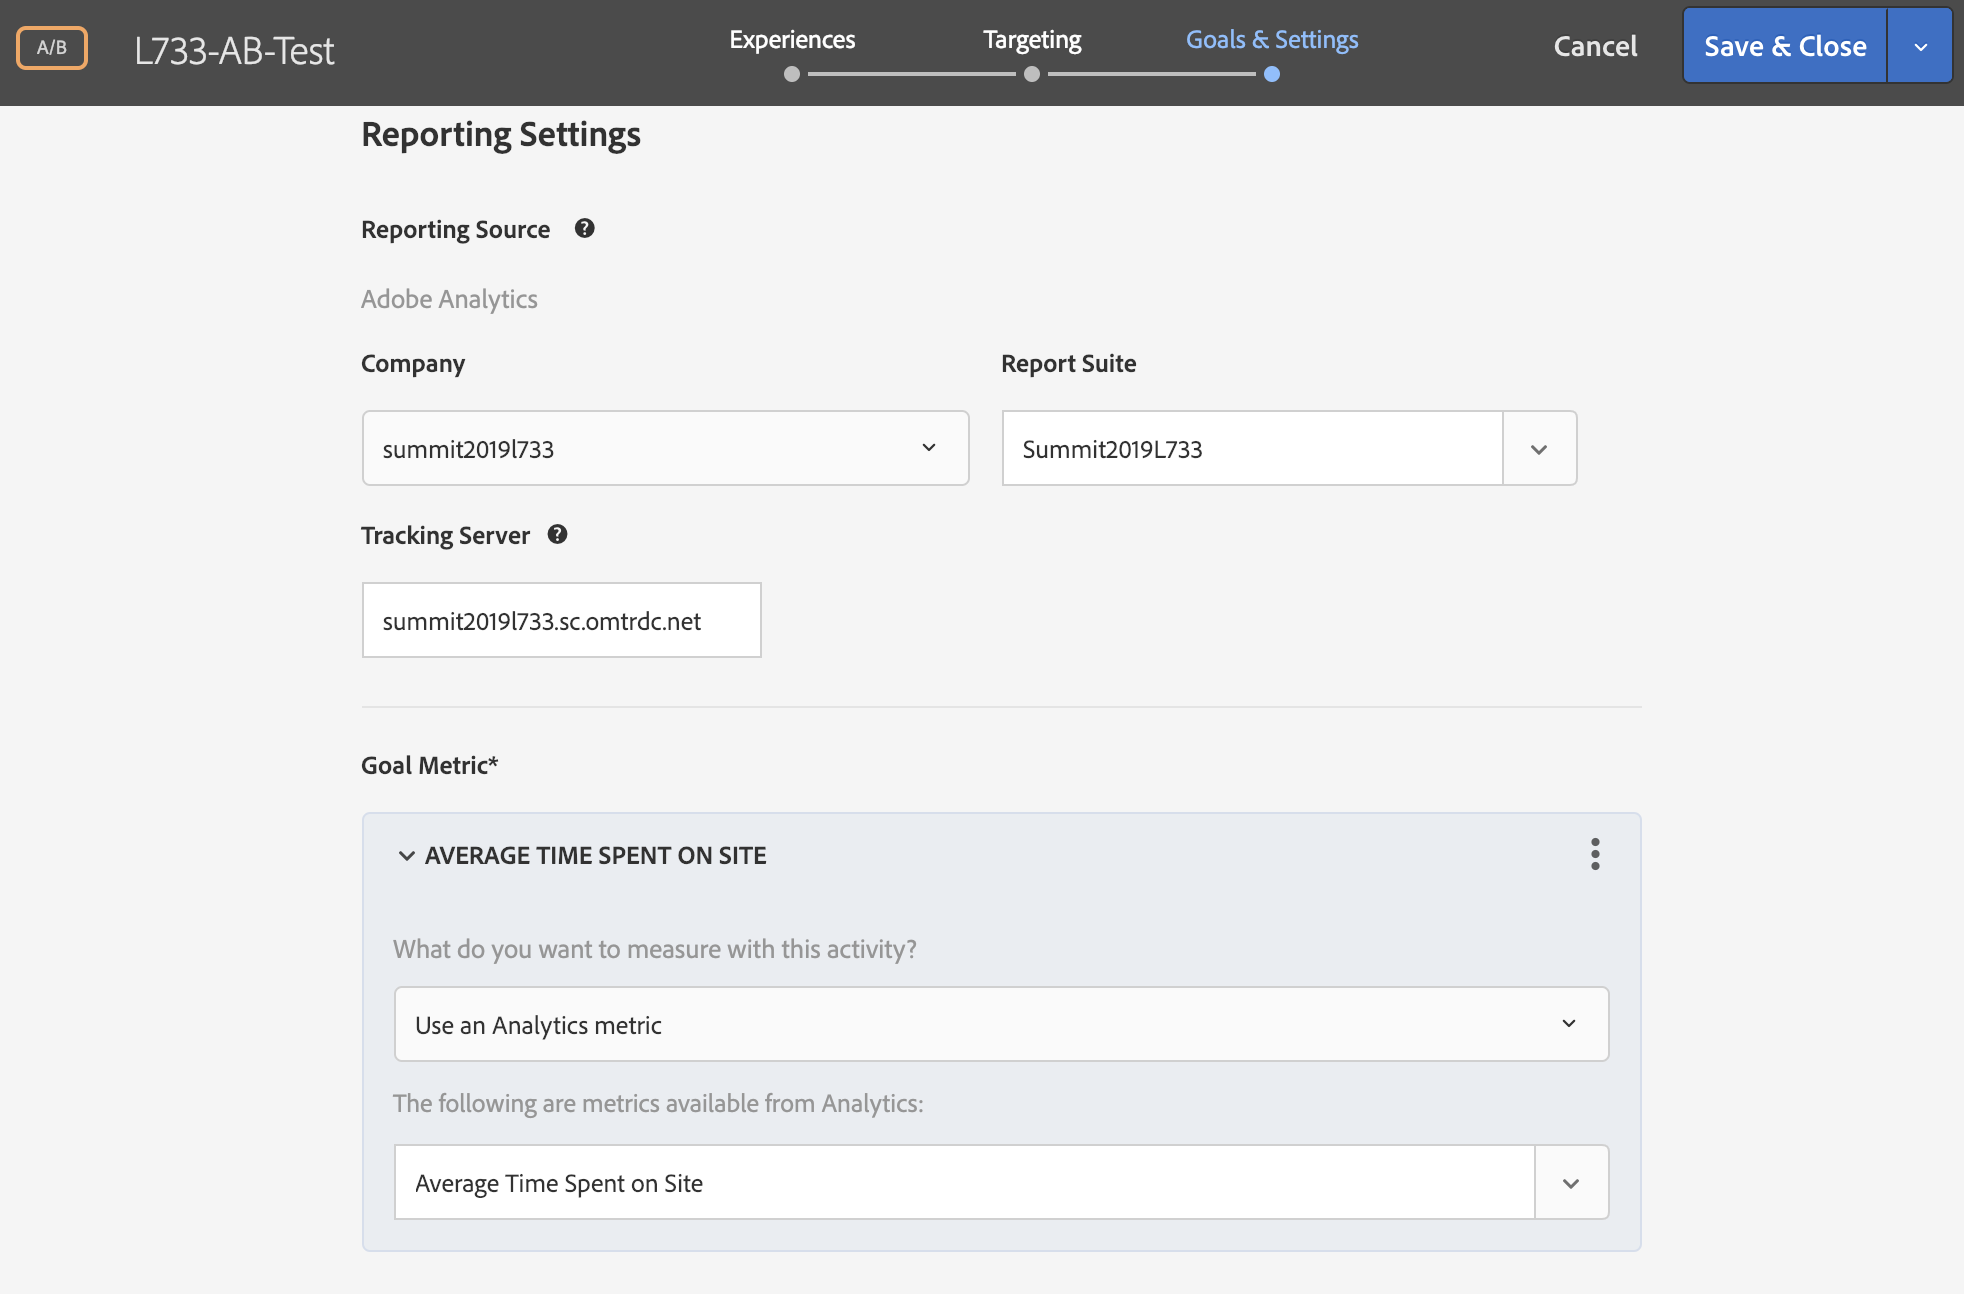
3k. Click 'Save' and wait a few seconds for the activity to sync. Once it syncs, click on Activate

4a. Open your Terminal and press Control + C. The control key is on the bottom left or right corner. This will terminate your current app.
4b. Run the app with npm run www.
Go to http://localhost:5000/ab in your browser or refresh the page if you already have it open.
4c. You should now be seeing one of the two experiences.
A/B Landing Page 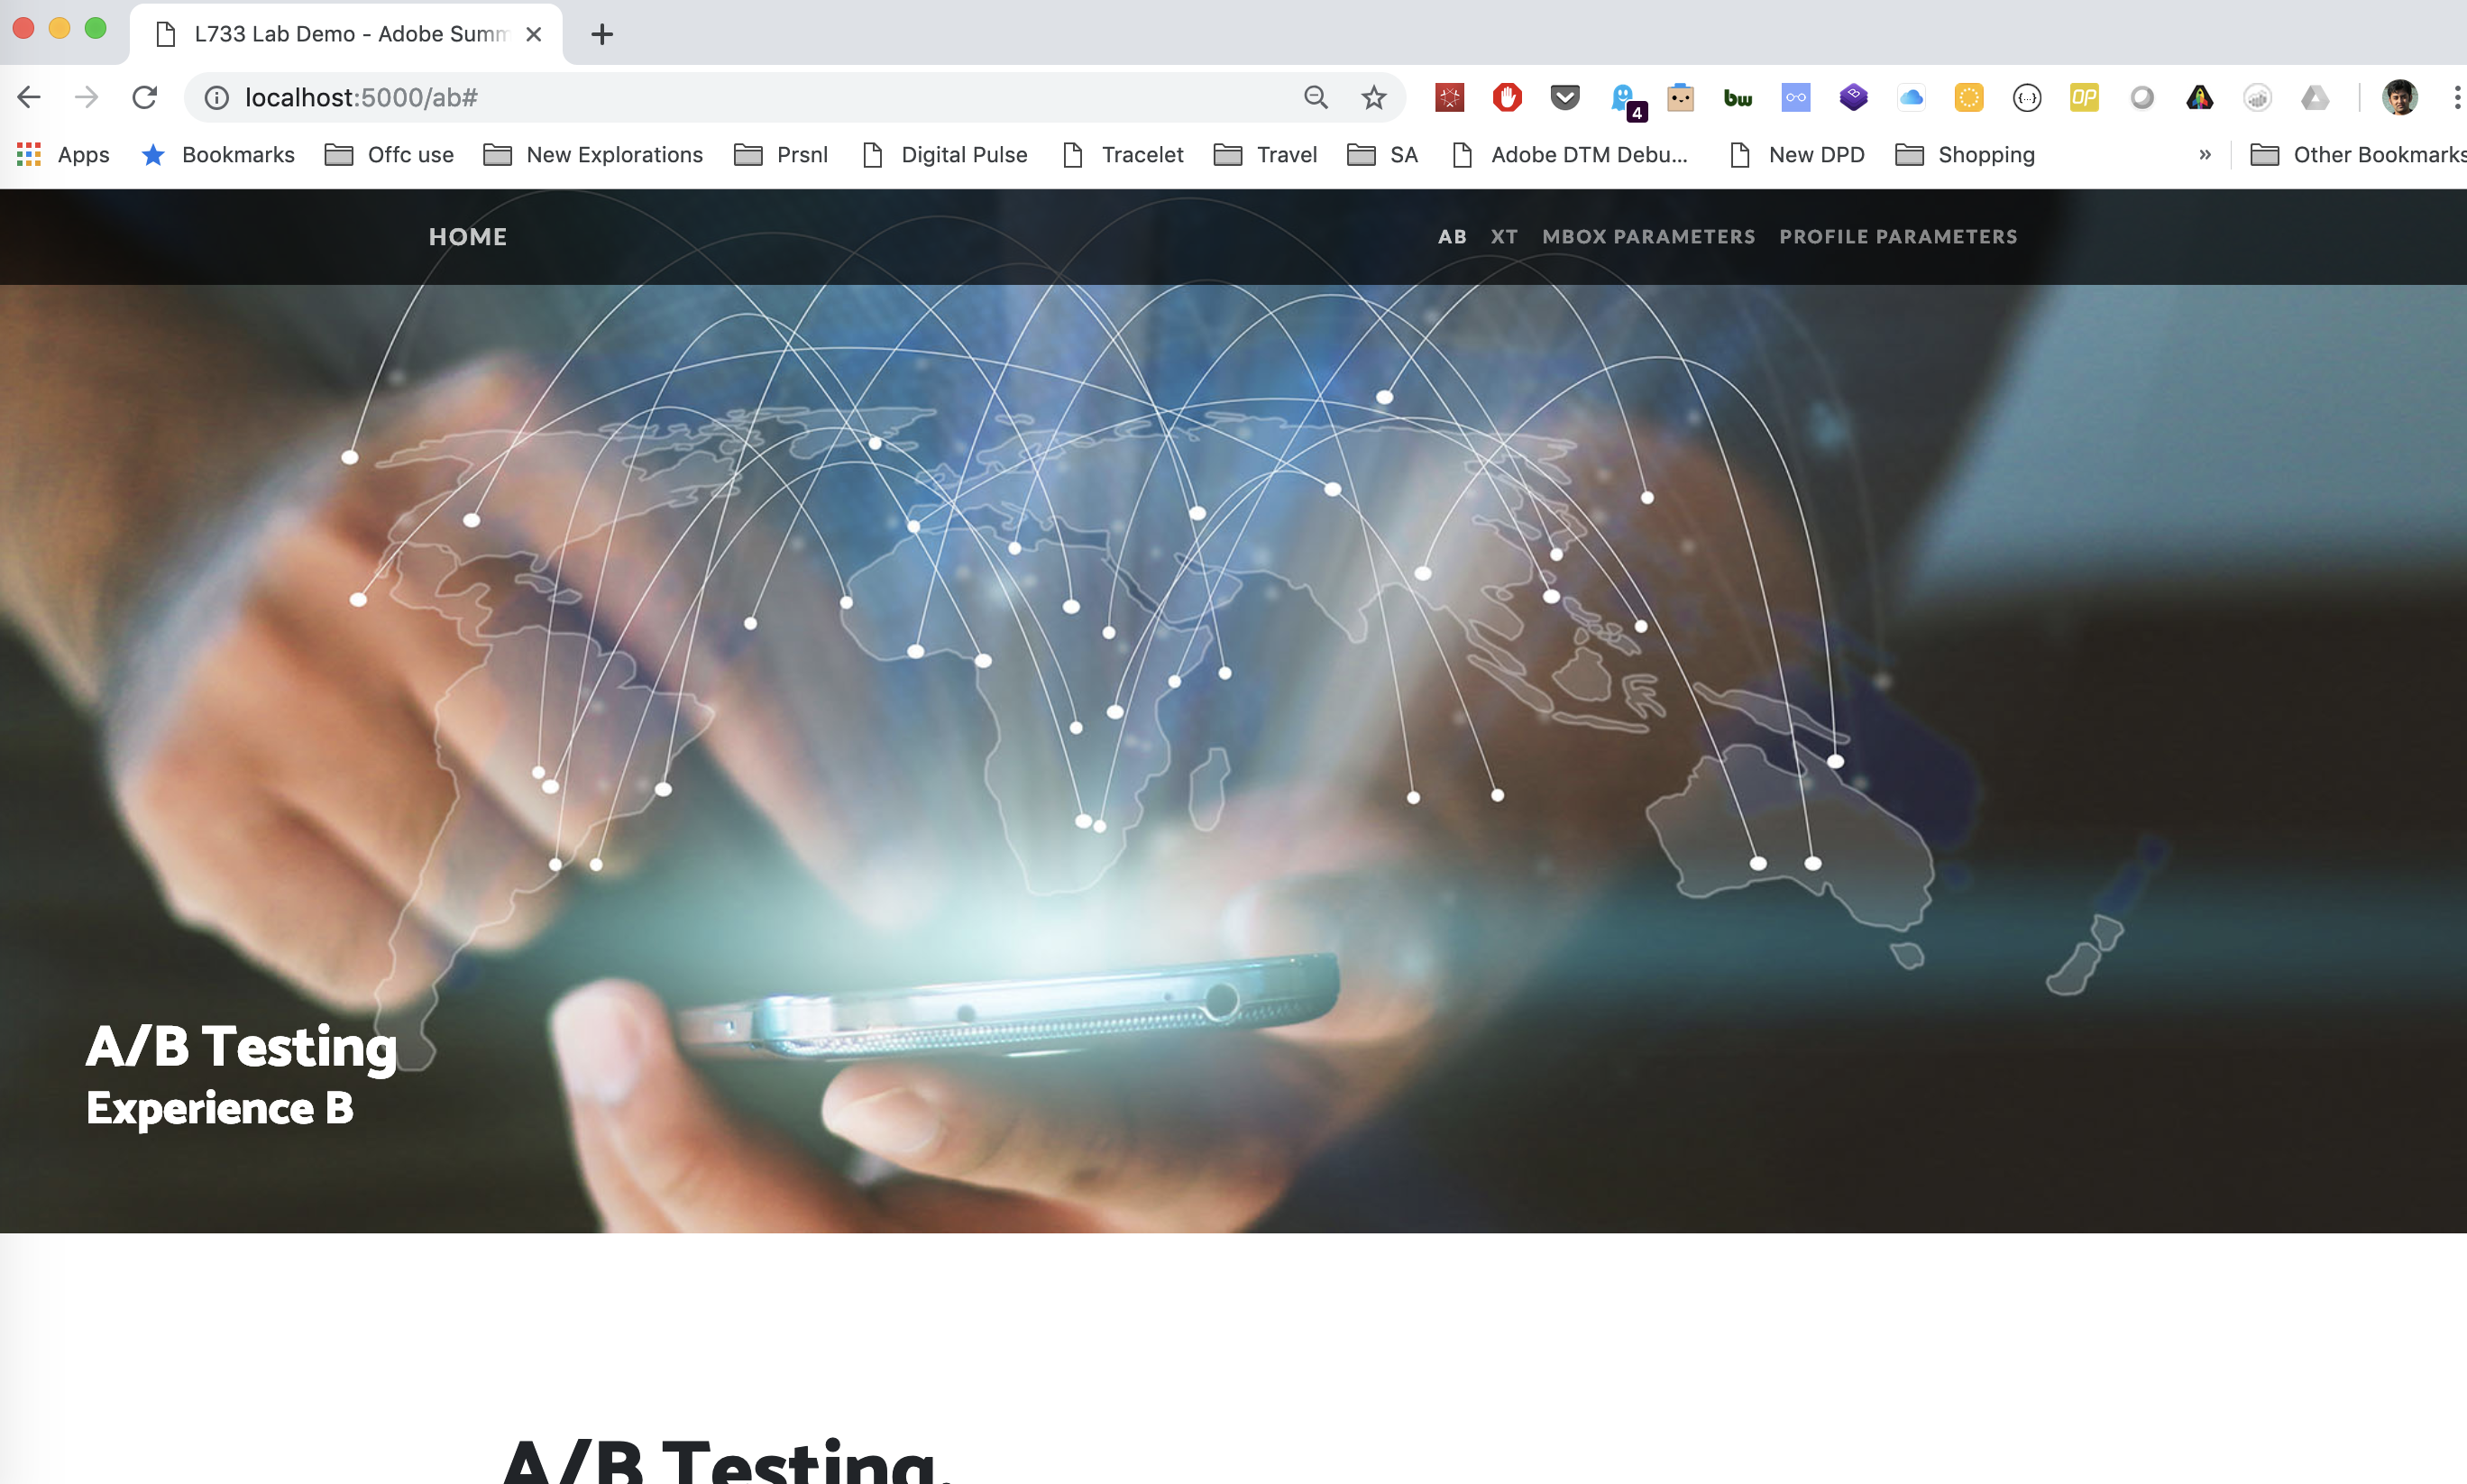
Adobe "Analytics for Target" (A4T) is a cross-solution integration that lets you create activities based on Analytics conversion metrics and audience segments. This integration lets you use Analytics reports to examine your results. If you use Analytics as the reporting source for an activity like we did in the previous lesson, all reporting and segmentation for that activity is based on Analytics data collection.
Step 1 : Open Reports and Analytics in the Adobe Analytics UI.
1a. Go to https://summit2019l733.marketing.adobe.com/content/mac/summit2019l733/target/activities.html.
This will open the Target UI in a new tab.
1b. Click on the switcher icon in the top right corner.
Switcher Icon 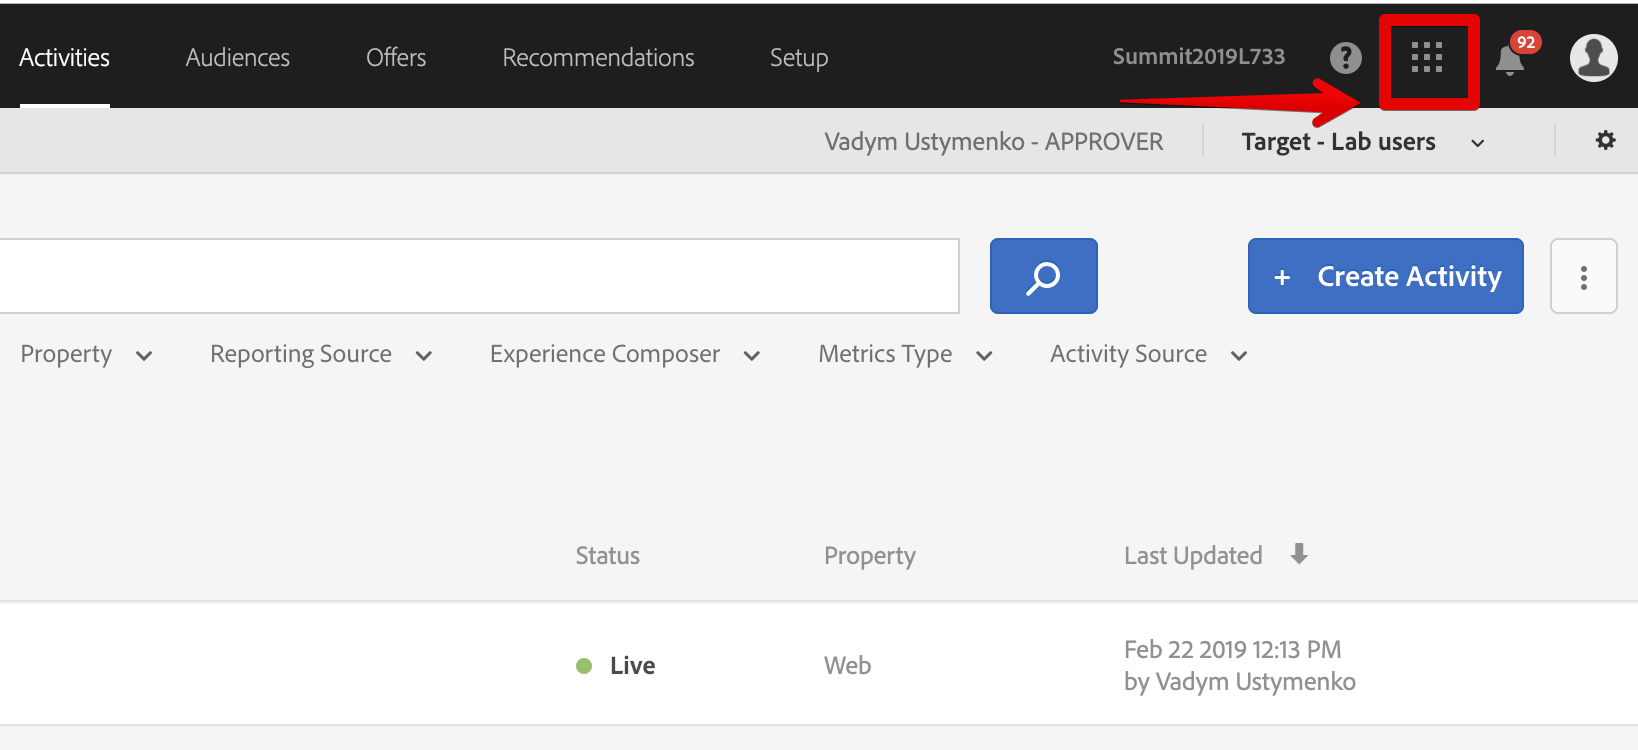
1c. Select Analytics. This will navigate you into the Analytics UI. If you aren't redirected into Adobe Analytics, please try the 1a and 1b again.
Step 2 : Review your test results.
2a. Navigate to the Target Activities report
2b. You might not see the A/B test which you just created. It takes up to 45 mins for your test results to start showing up in the Analytics UI.
2c. Click on one of the tests where you see some unique visitors. You can review the number of visitors, lift, confidence and filter the result by any Analytics segment. You can also view these results in Analytics Workspace.
Since this report suite data is just collecting data from the demo app, it might not be meaningful. The objective of this lesson is for you to understand how to review your test results in Adobe Analytics.
Following is the screenshot of A4T report of A/B Activity:
A4T report for AB Activity 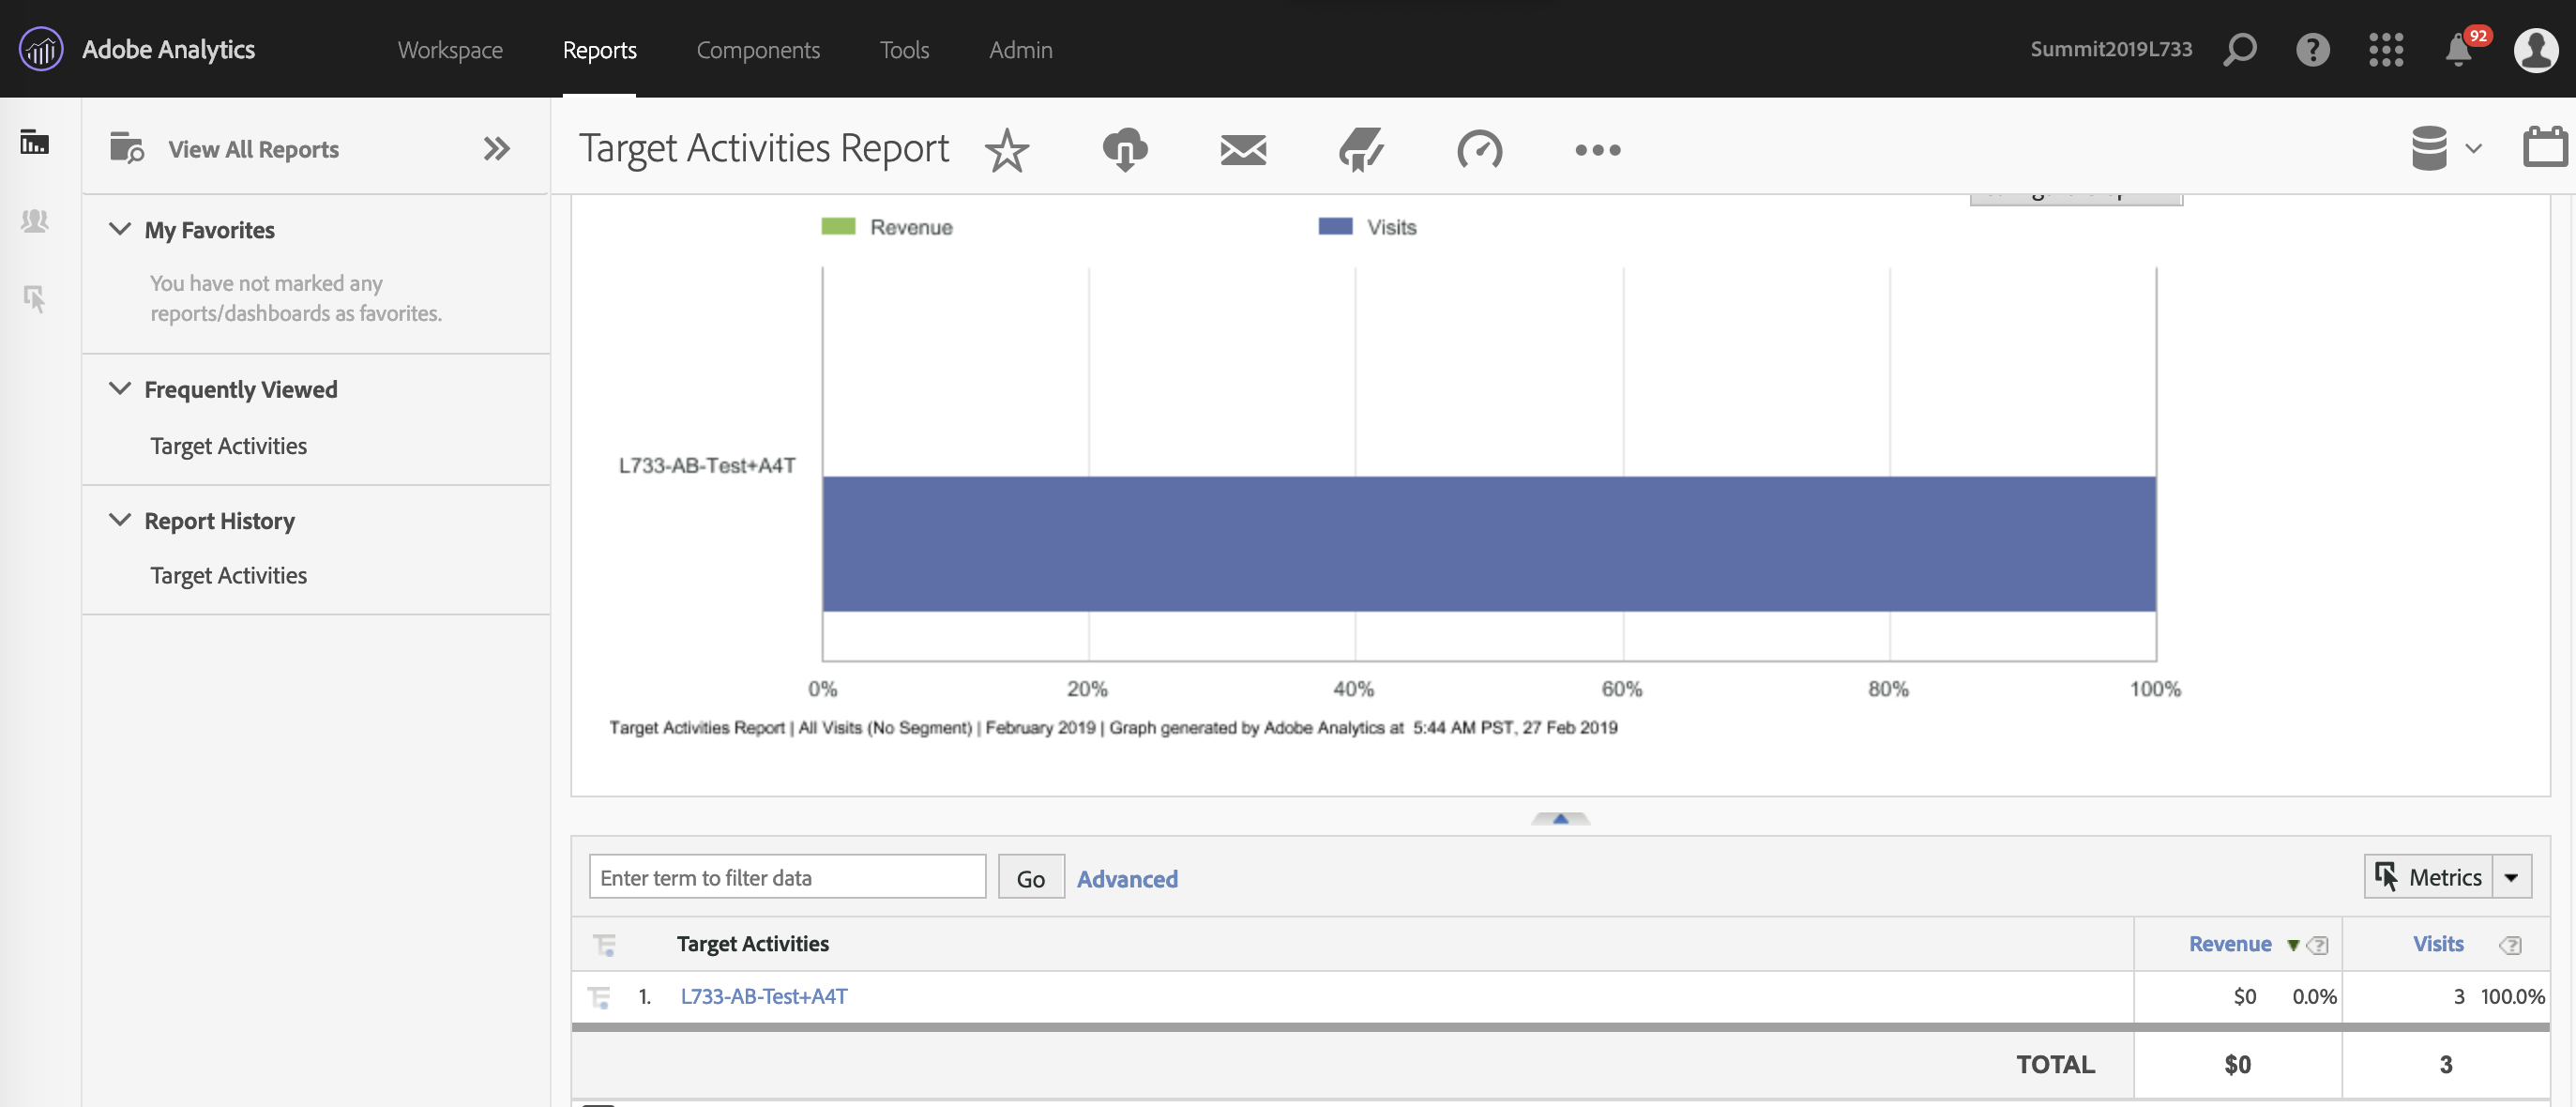
Experience Targeting (XT) is valuable for defining rules that target a specific experience or content to a particular audience. Several rules can be defined in an activity to deliver different content variations to different audiences.
In this exercise, we are going to create an XT activity to show different experiences to users coming from different countries. For example, if you are coming from the USA, you will see the first image and if you are coming from UK, you will see the second image.
Step 1 : Create the Target Location (mbox) in the React app
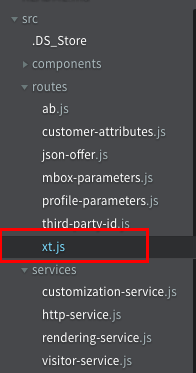
1a. Open Atom editor and navigate to src > routes > xt.js
1b. In the xt.js file, a1-serverside-xt is the name of the target location. Replace a1 with your unique user number.
Select XT
1c. Hit Cmd + S to save the file.
Step 2 : Create your XT Activity in the Target UI - Select your location
2a. Go to the Target UI.
2b. Click the blue 'Create Activity' button and then select Experience Targeting.
2c. Select the 'Form' option and click Next.
2d. Rename your activity. Prefix your activity name with L733 followed by your user number. (Eg: L733-01-XT).
2e. Select or type your location (eg: 01-serverside-xt) in the box. If your location is not showing up in the dropdown, that is all right.
Edit XT 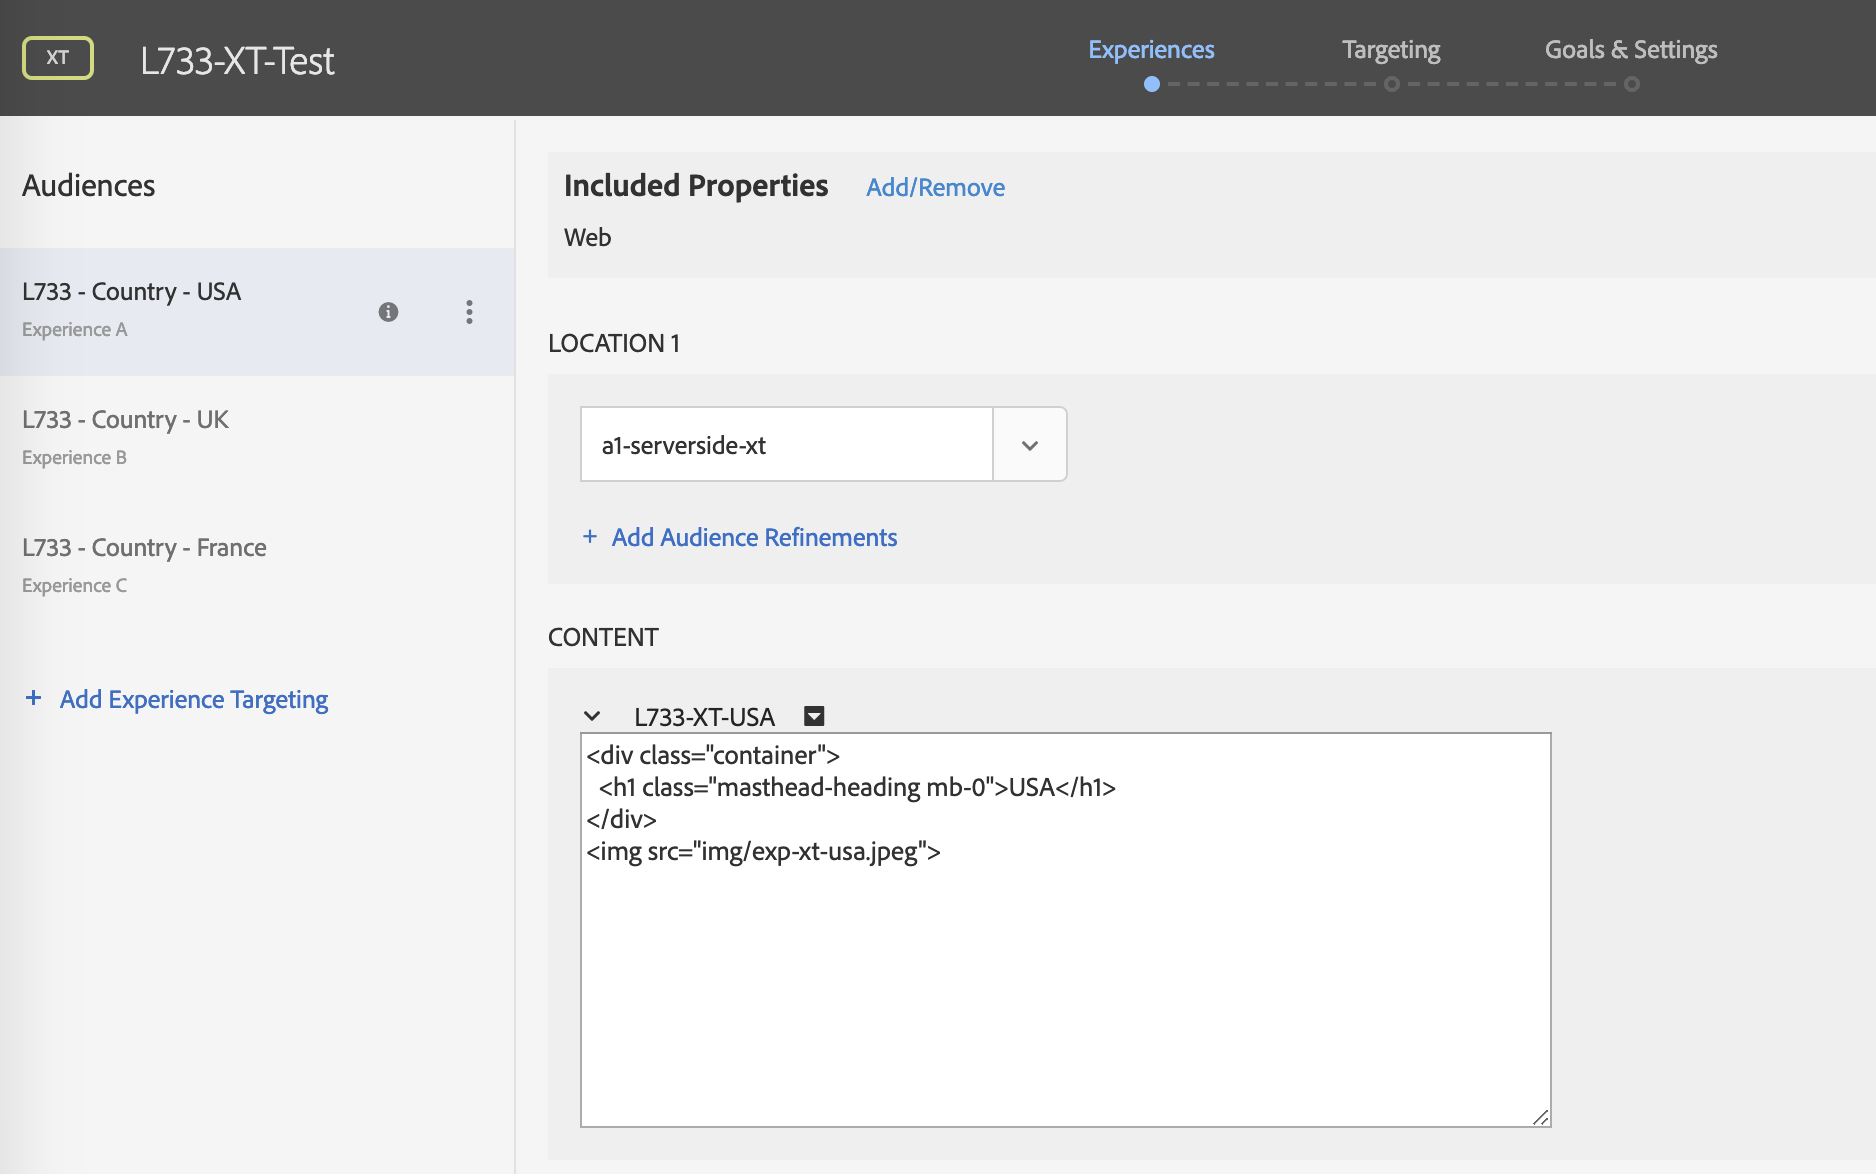
Step 3 : Create your XT Activity in the Target UI - Add your audience and content
3a. Click on the three small dots and select 'Change Audience'. This will open the Audience library
3b. In the Audience library, type 'usa' in the search box. Select the 'L733-XT-USA' audience and click 'Save'.
3c. Click the small arrow after 'Default Content' and select 'Change HTML Offer'. This will open the Offer Library.
Select XT Offer
3d. Select the offer with the title 'L733-XT-USA'
3e. Click on 'Add Experience Targeting', repeat the previous 2 steps and similarly add your UK and France audiences and image offers. After you complete this step, your screen should look like this
Select XT Audience 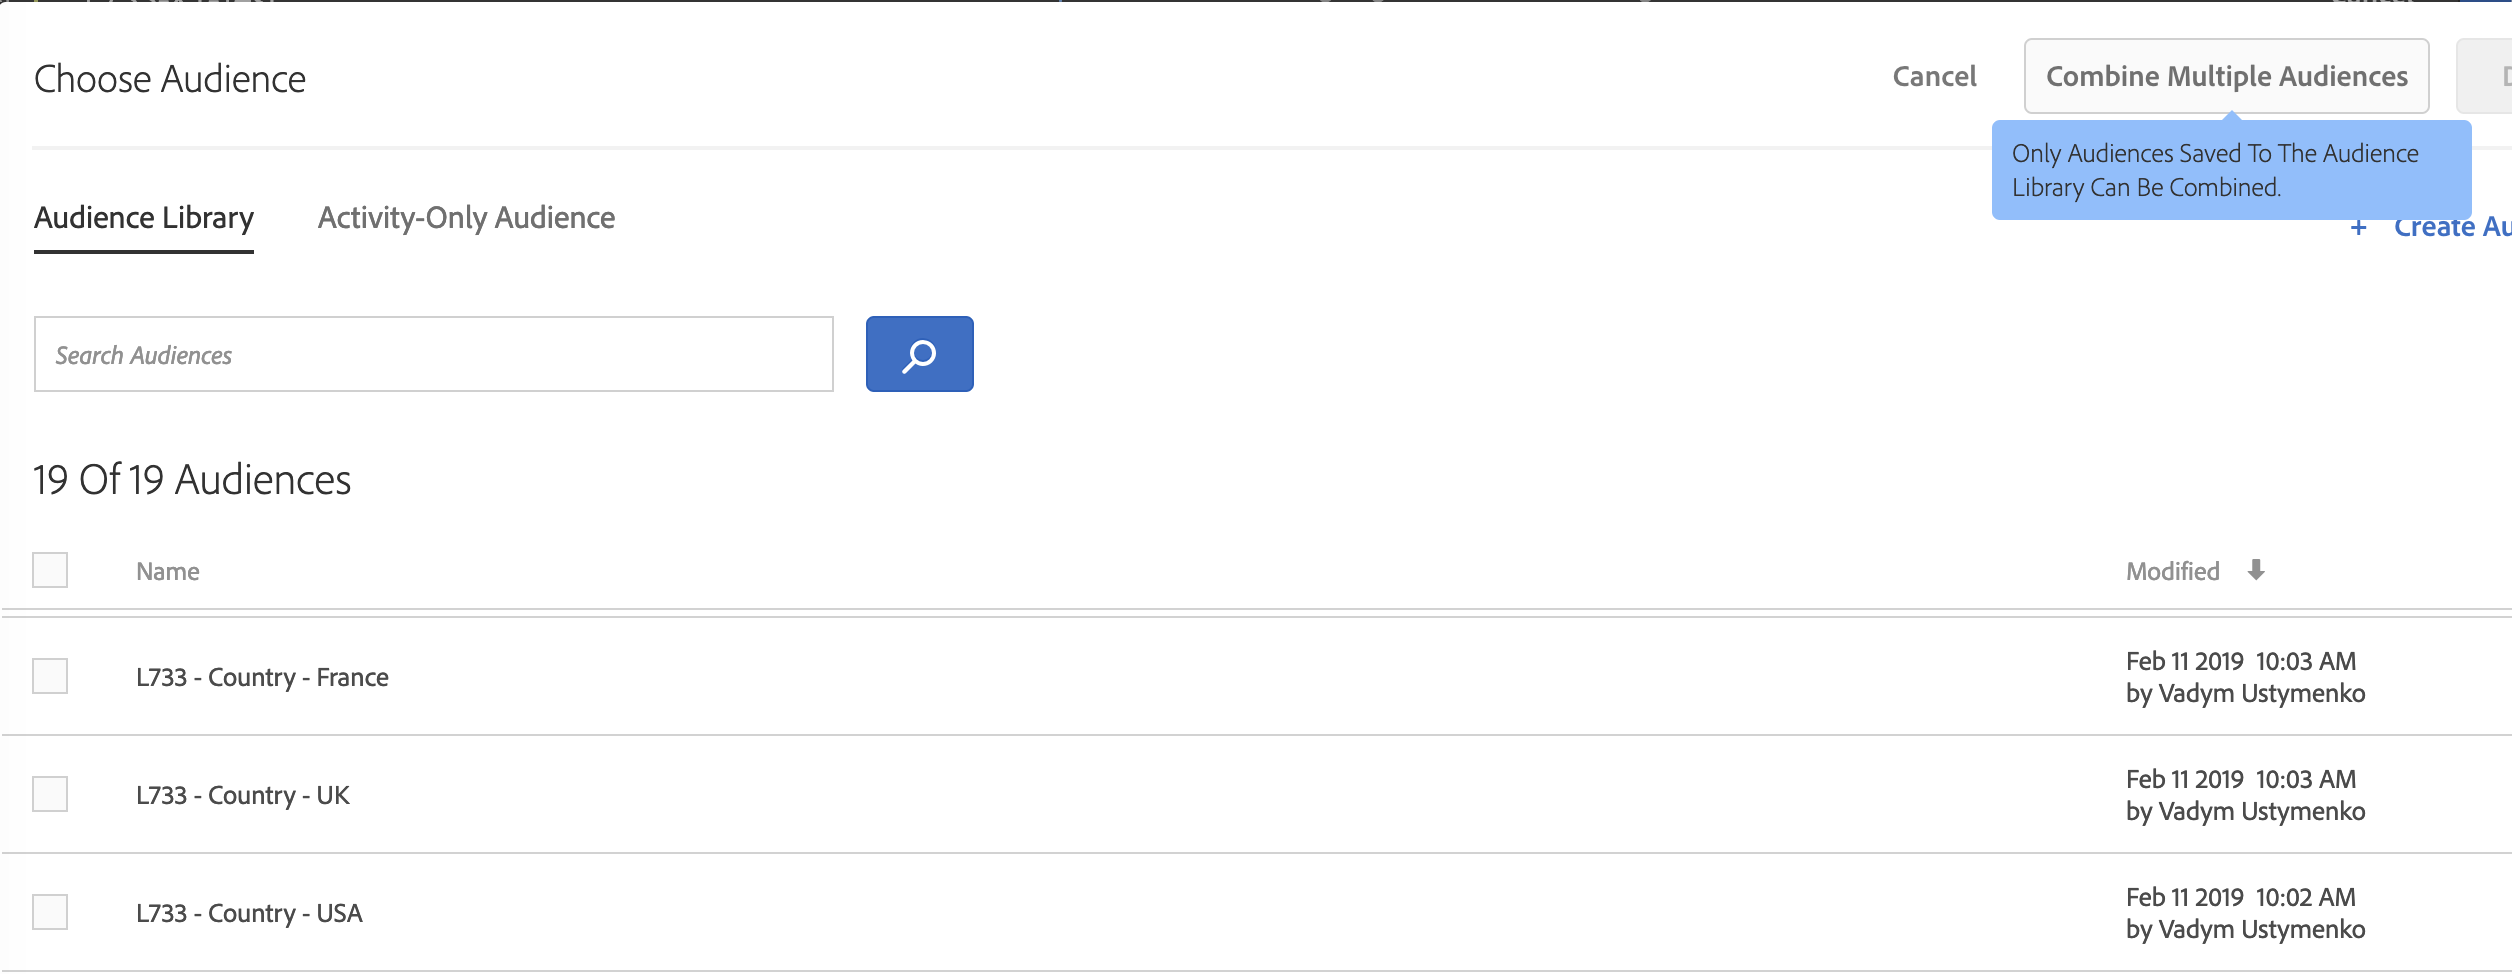
3f. Click on 'Next' and you will be taken to the 'Target' step of the workflow. Your screen should look like this.
XT Targeting 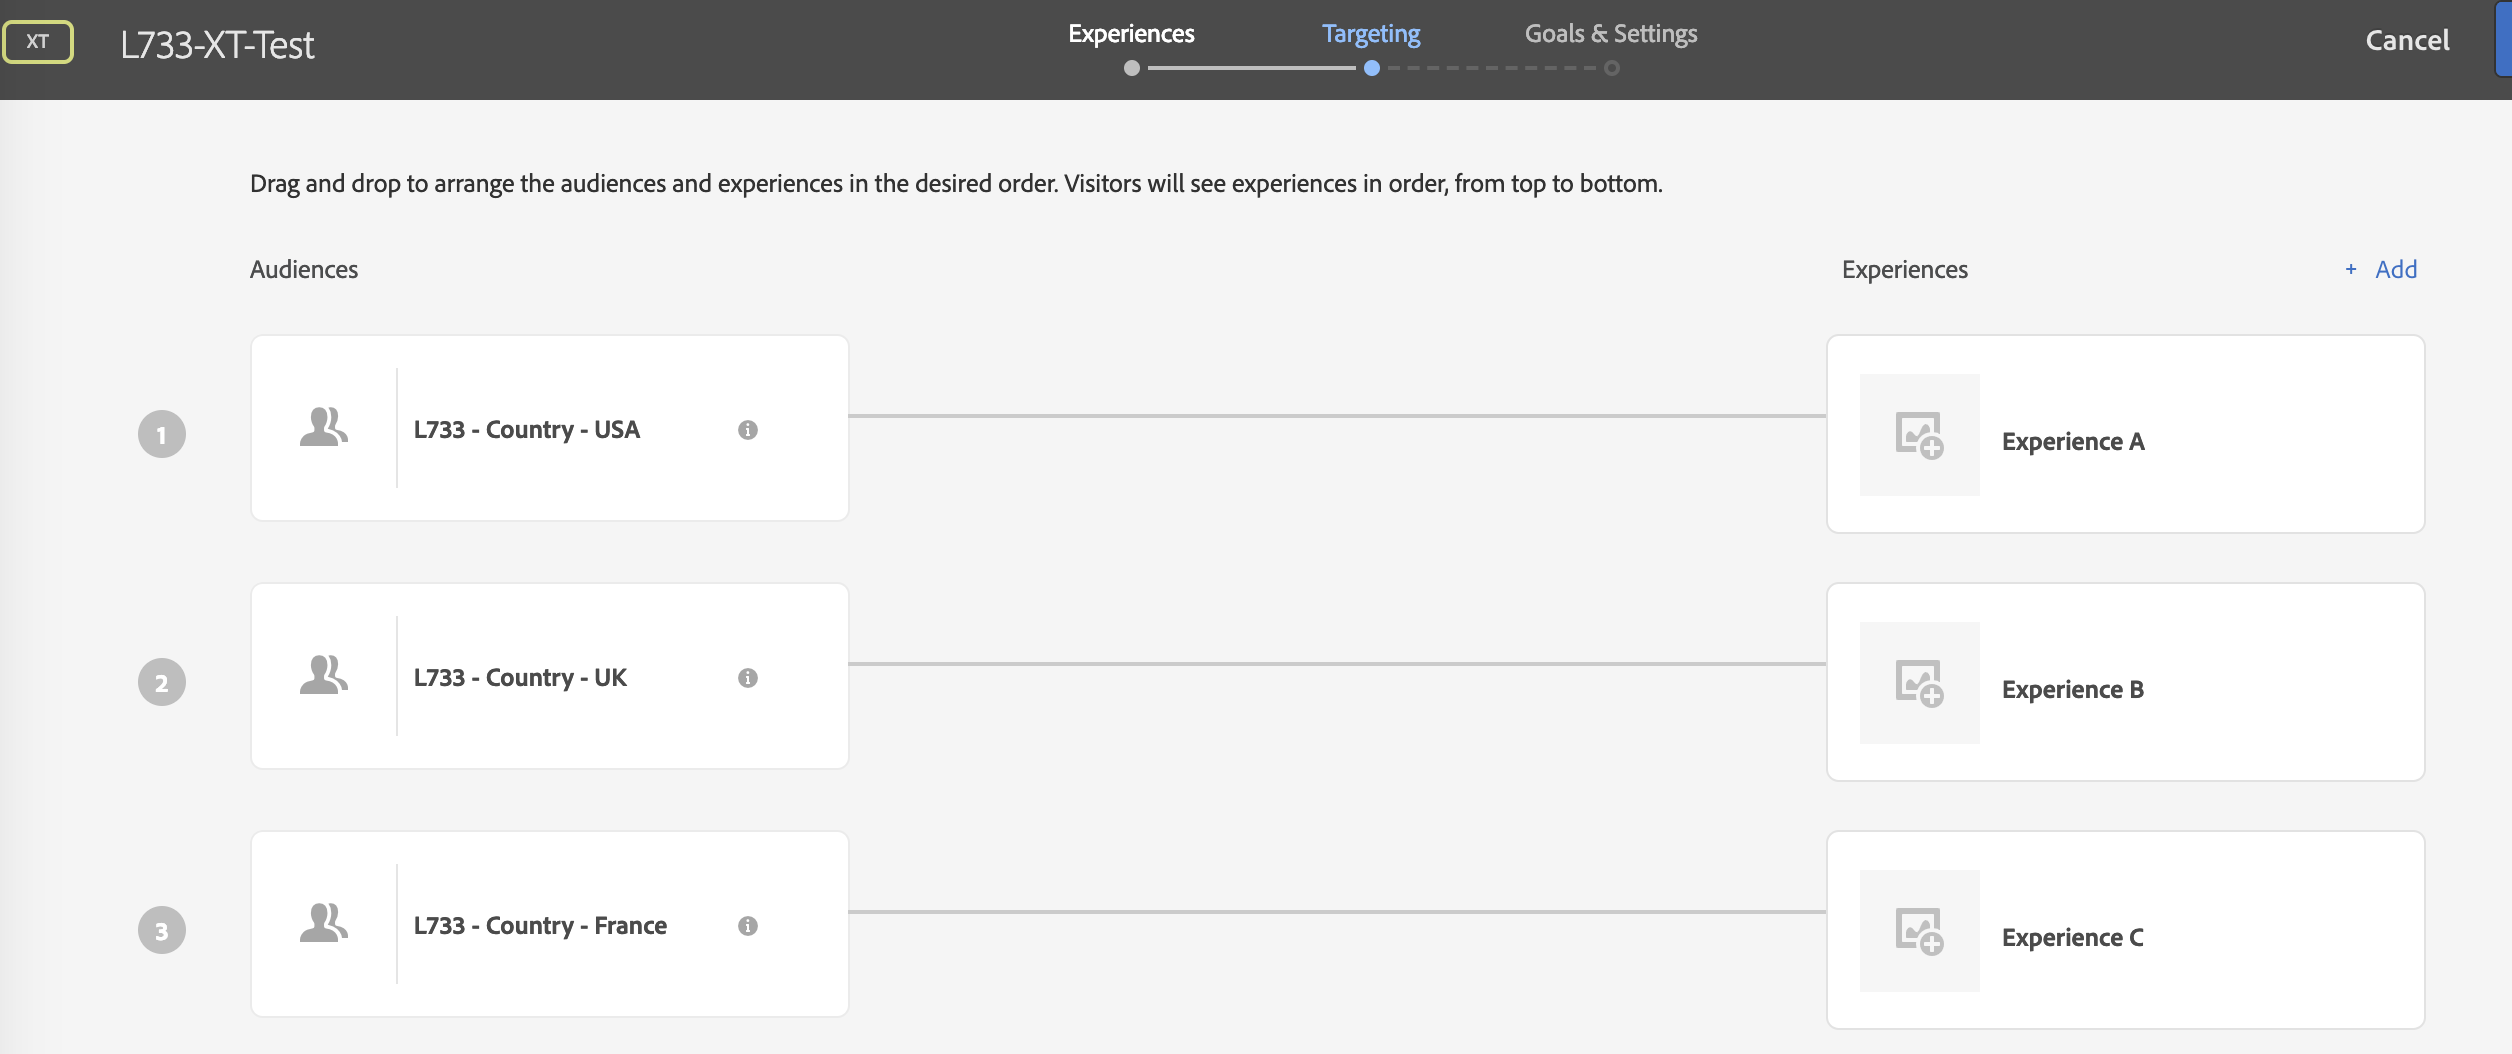
Step 4 : Create your XT Activity in the Target UI - Set up your goal
4a. Click 'Next' to go to the Goal & Settings screen. On this screen, select 'Adobe Target' as your reporting source.
Select Conversion > Viewed an mbox > orderConfirmation
4b. Click on 'Next', wait a few seconds for the activity to sync. Then click 'Activate'
Step 5 : Restart the Node app and verify your XT Activity
5a. Open your Terminal and press Control + C. The control key is on the bottom left or right corner. This will terminate your current app. Look for ^C
5b. Run the app with npm run www
5c. Go to http://localhost:5000/xt in your browser or refresh the page if you already have it open.
5d. You should now be seeing one of the 3 experiences. The app randomly sets your country!
XT Landing Page 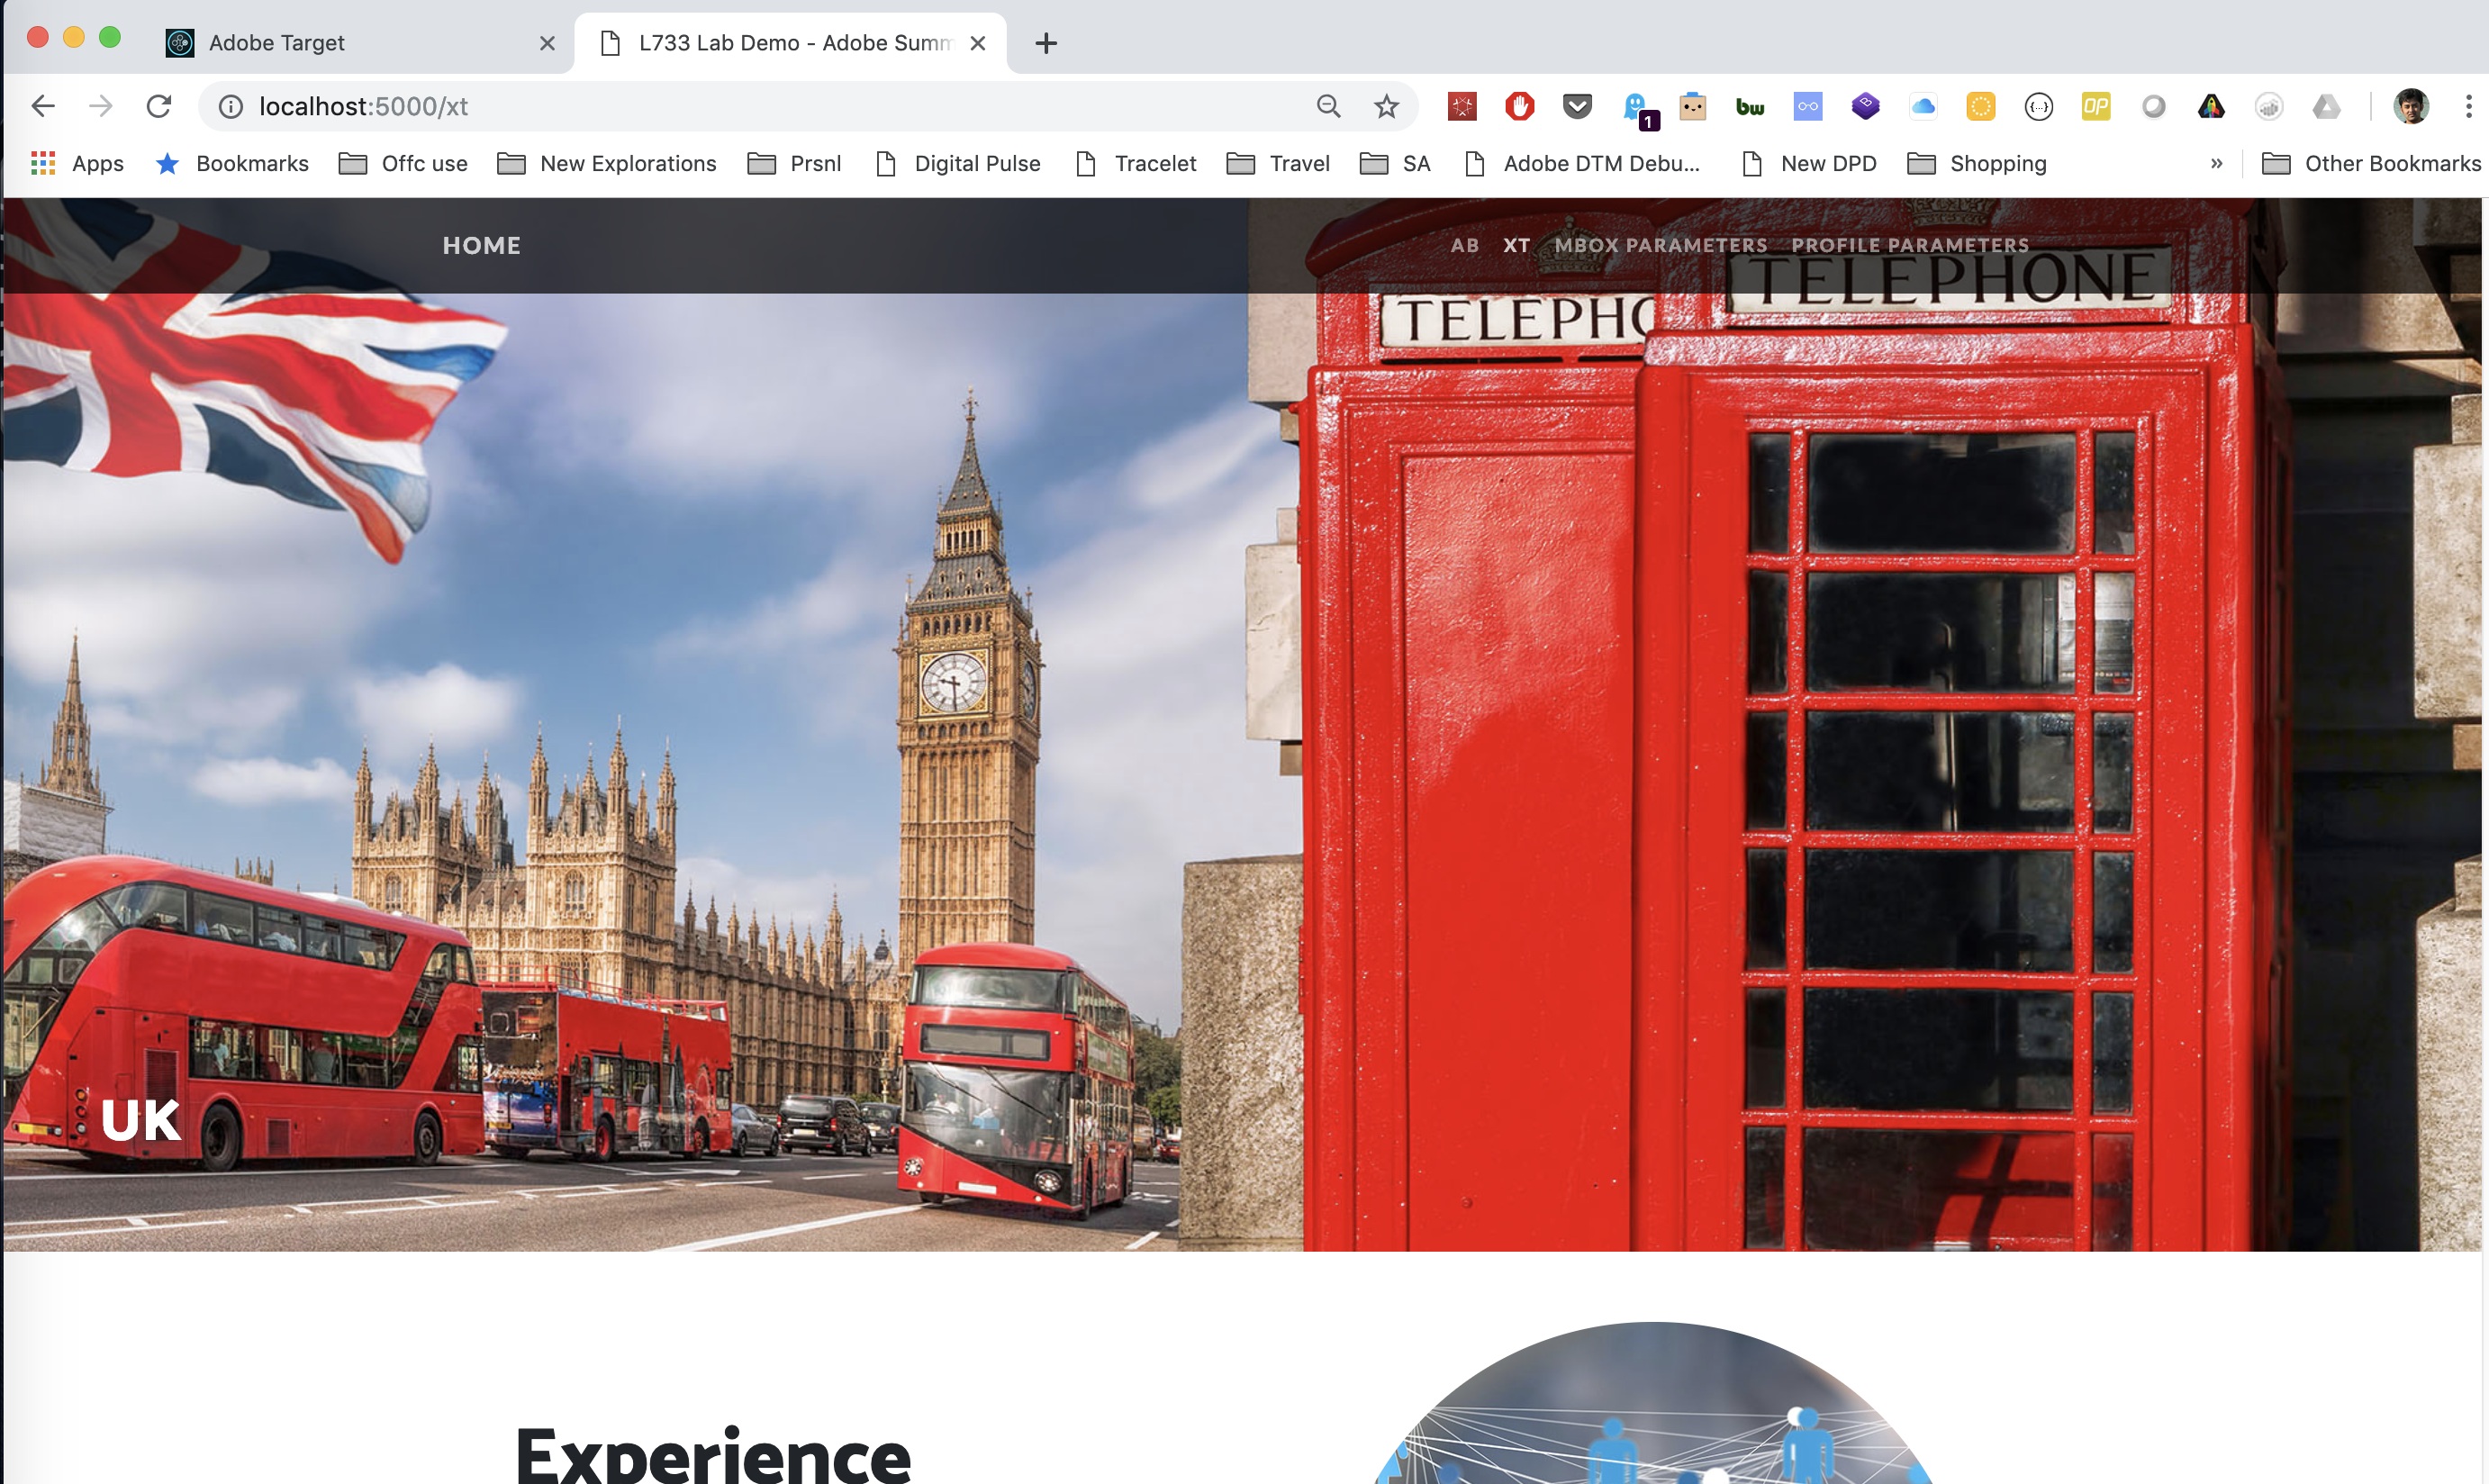
We are going to create an XT activity where we will have two different experiences, depending on profile parameter. The profile parameter will represent a part of the day (morning or evening).
Step 1 : Create the Target Location (mbox) in the React app
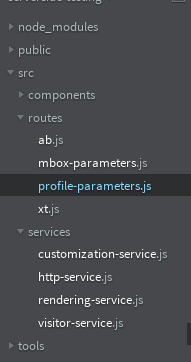
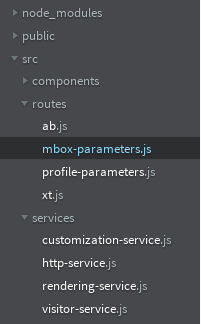
1a. Open Atom editor and navigate to src > routes > profile-parameters.js
Profile Parameters
1b. In the profile-parameters.js file, a1-serverside-profileparams is the name of the target location. Replace a1 with your unique user number.
1c. Hit Cmd + S to save the file.
Step 2 : Create your XT Activity in the Target UI - Select your location
2a. Go to the Target UI.
2b. Click the blue 'Create Activity' button and then select Experience Targeting.
2c. Select the 'Form' option and click Next.
2d. Rename your activity. Prefix your activity name with L733 followed by your user number. (Eg: L733-01-XT-Profile-Params).
2e. Select or type your location (eg: a1-serverside-profileparams) in the box. If your location isn't showing up in the dropdown, that is all right.
Step 3 : Create your XT Activity in the Target UI - Add your audience and content
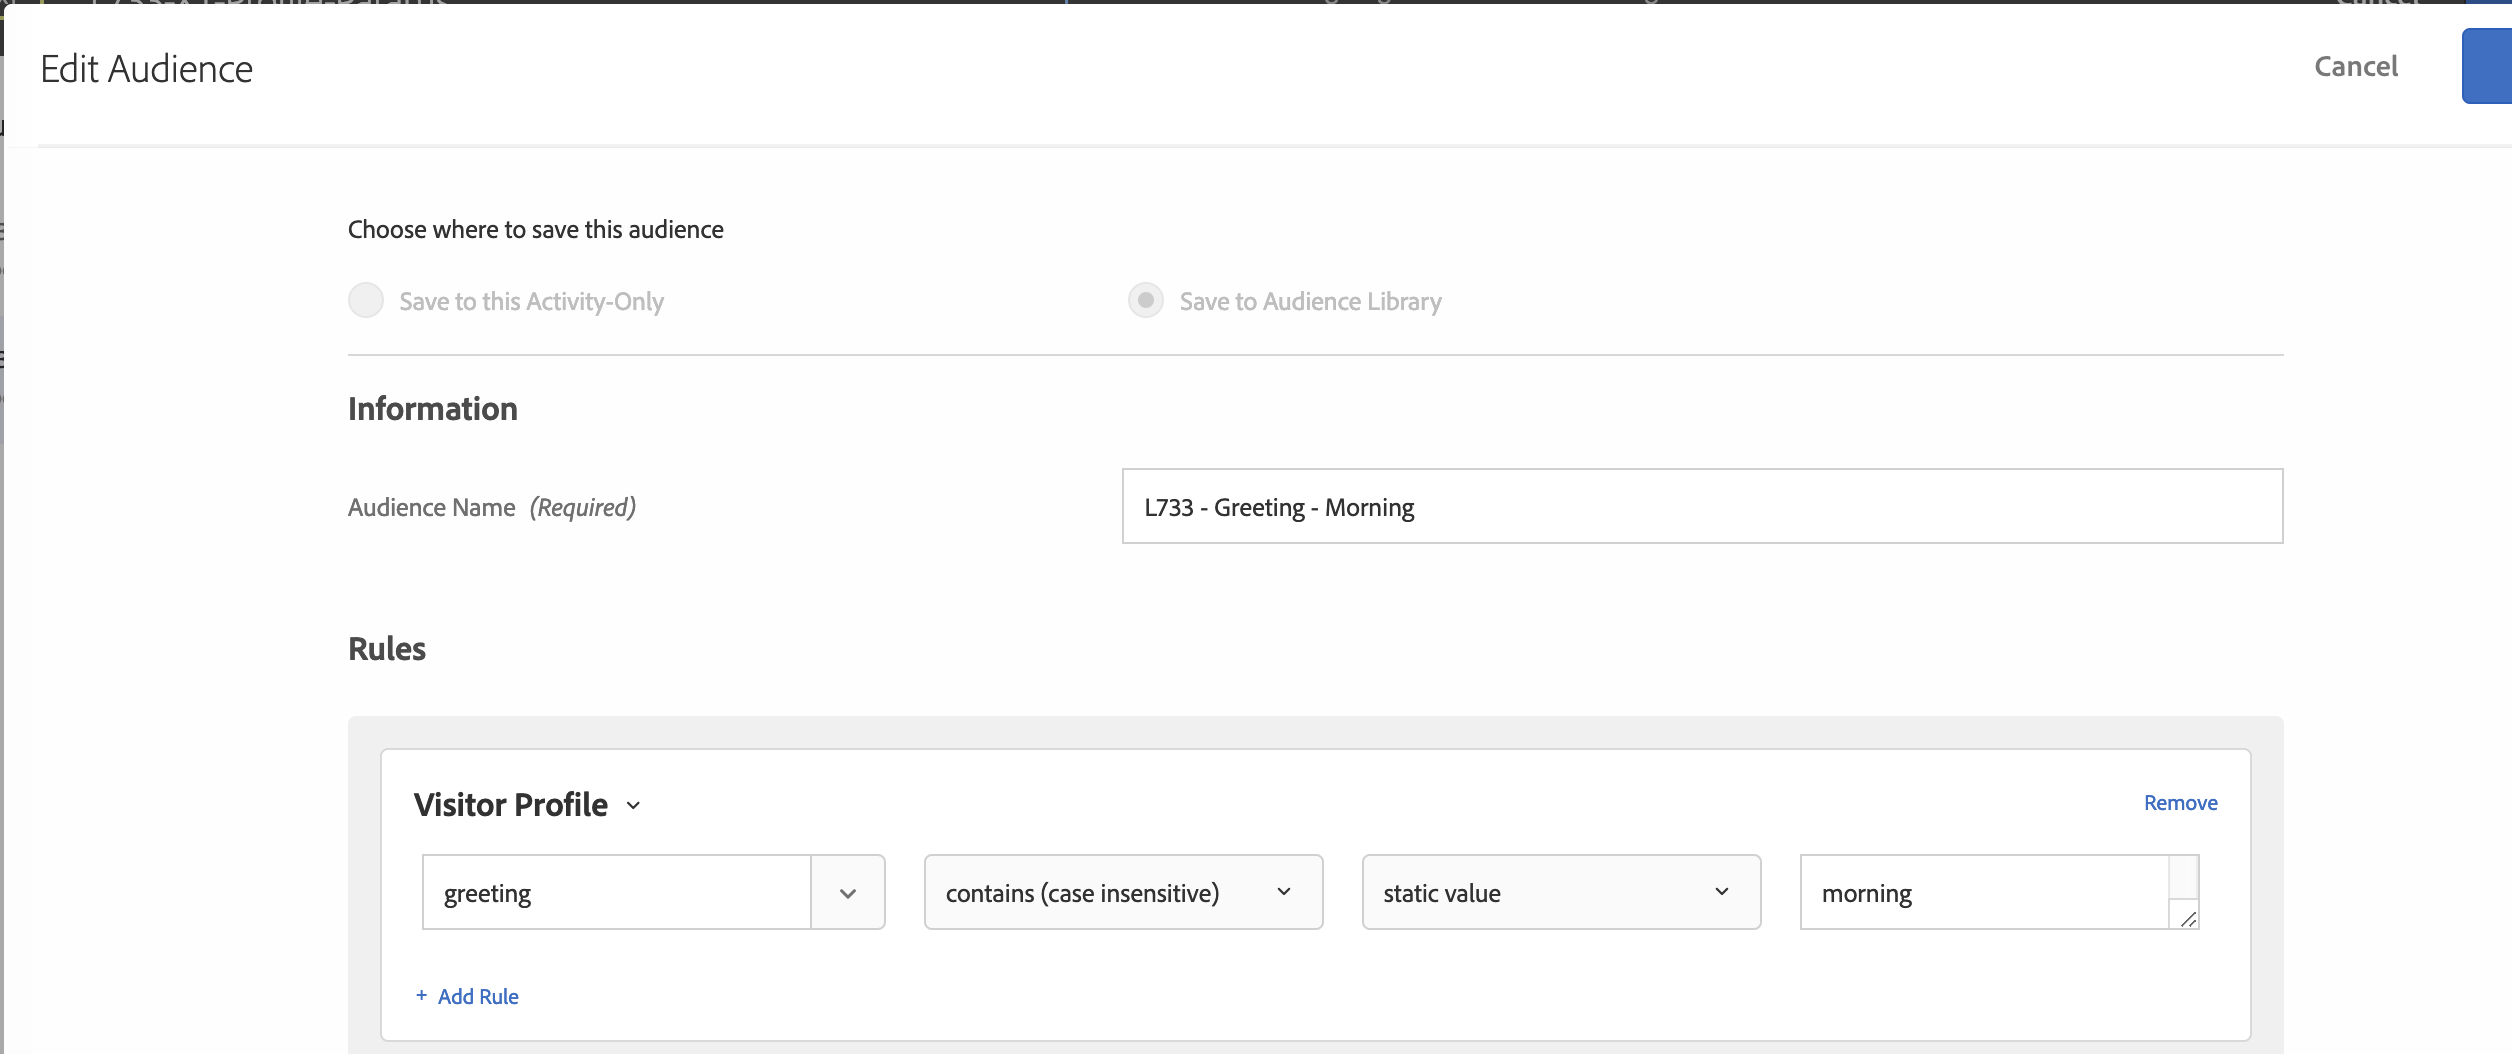
3a. Click on the three small dots and select 'Change Audience'. This will open the Audience library
Change Offer XT 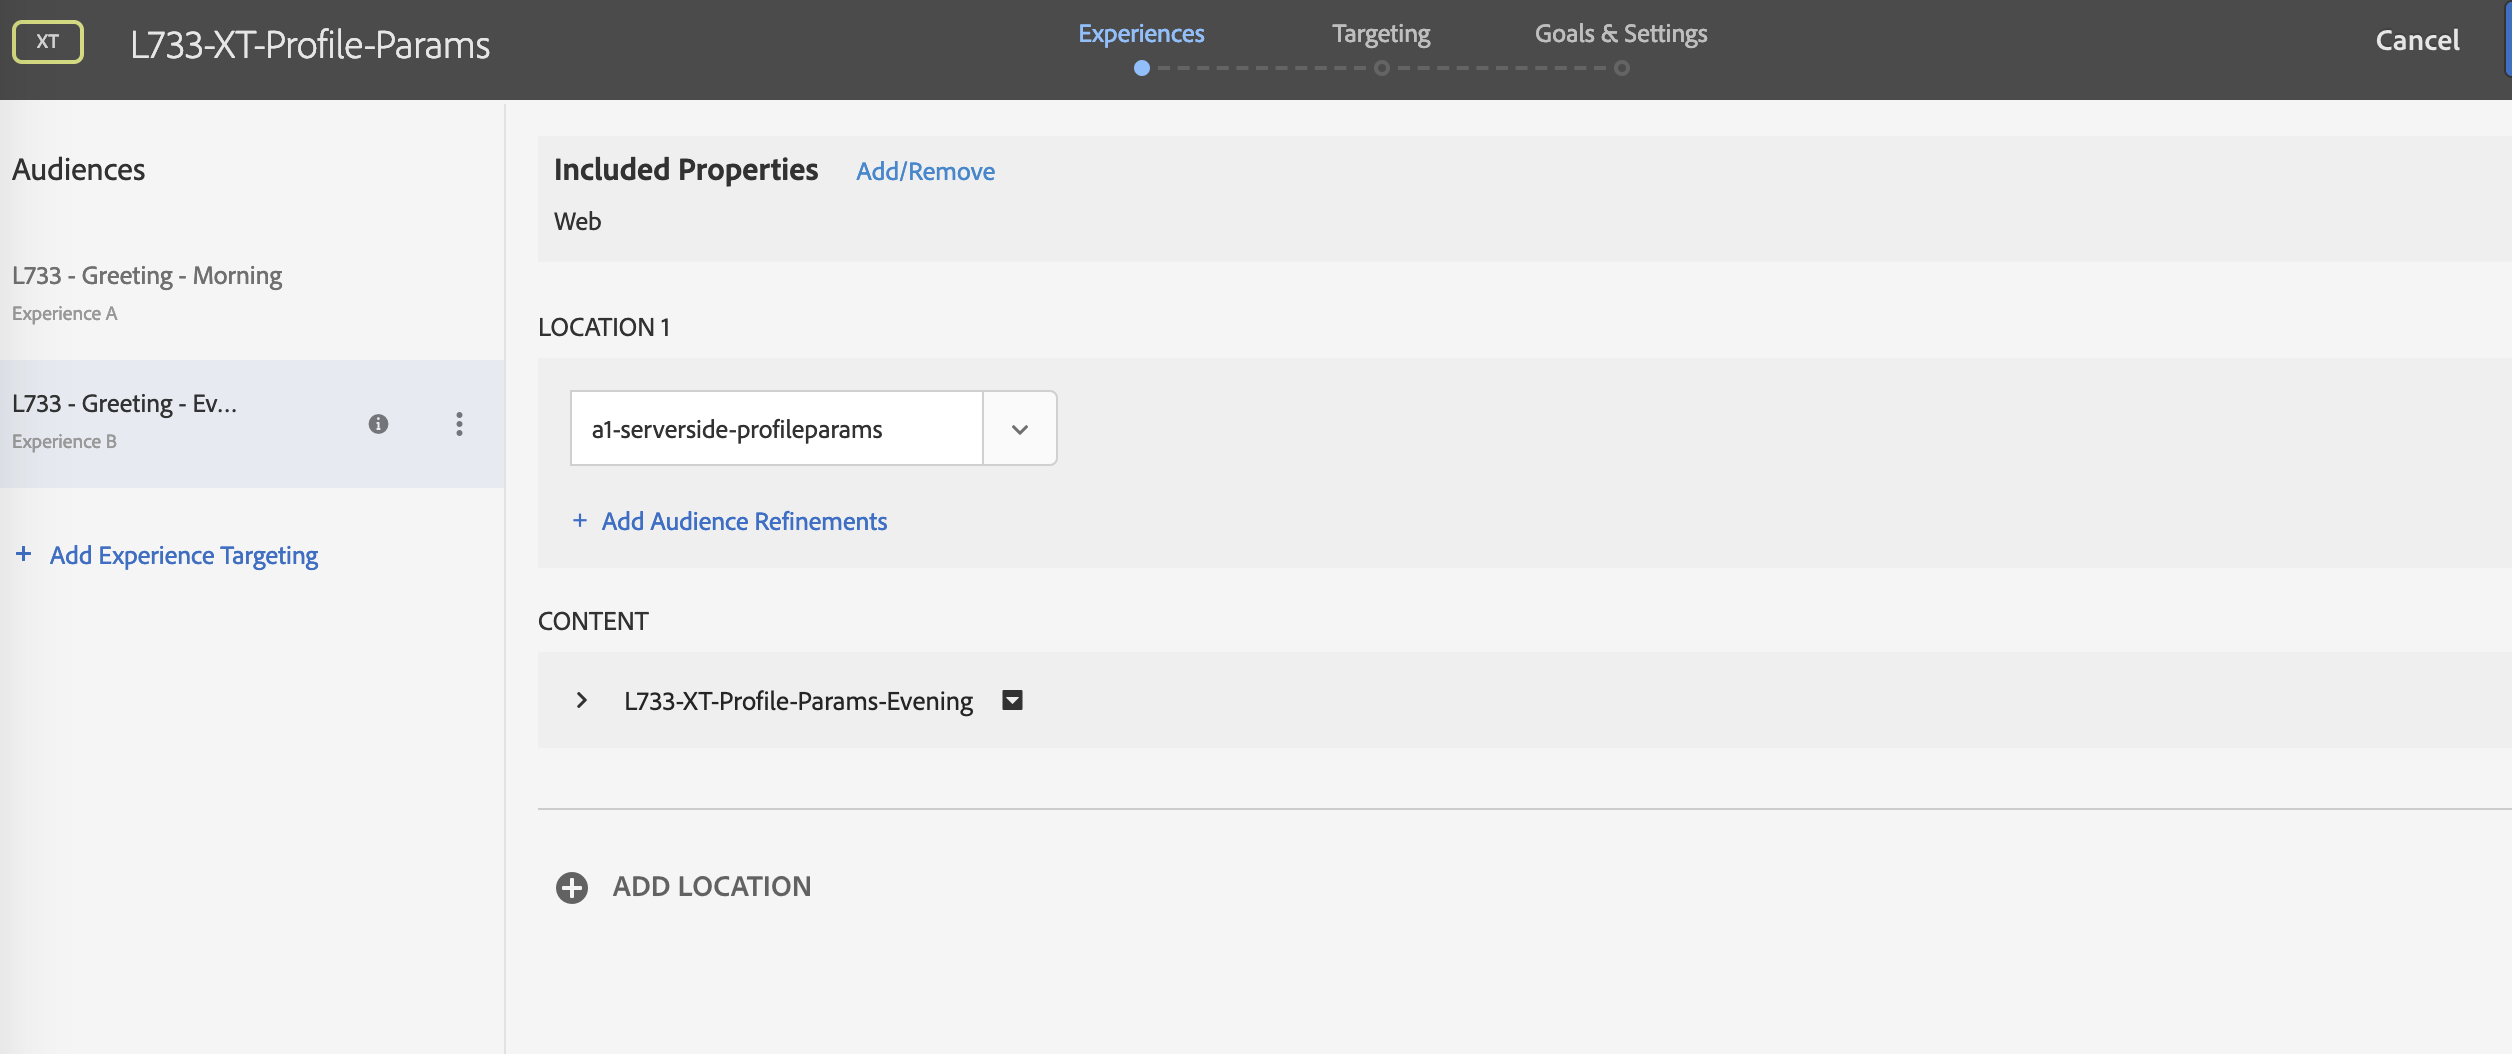
3b. In the Audience library, select the L733 - Greeting - Morning audience and click 'Save'.
3c. Click the small arrow after 'Default Content' and select 'Change Offer'. This will open the Offer Library.
3d. Select the offer with the title 'L733-XT-Profile-params-morning'
3e. Click on 'Add Experience Targeting', repeat the previous 2 steps and similarly add Greeting - Evening audience and offer.
XT Offer 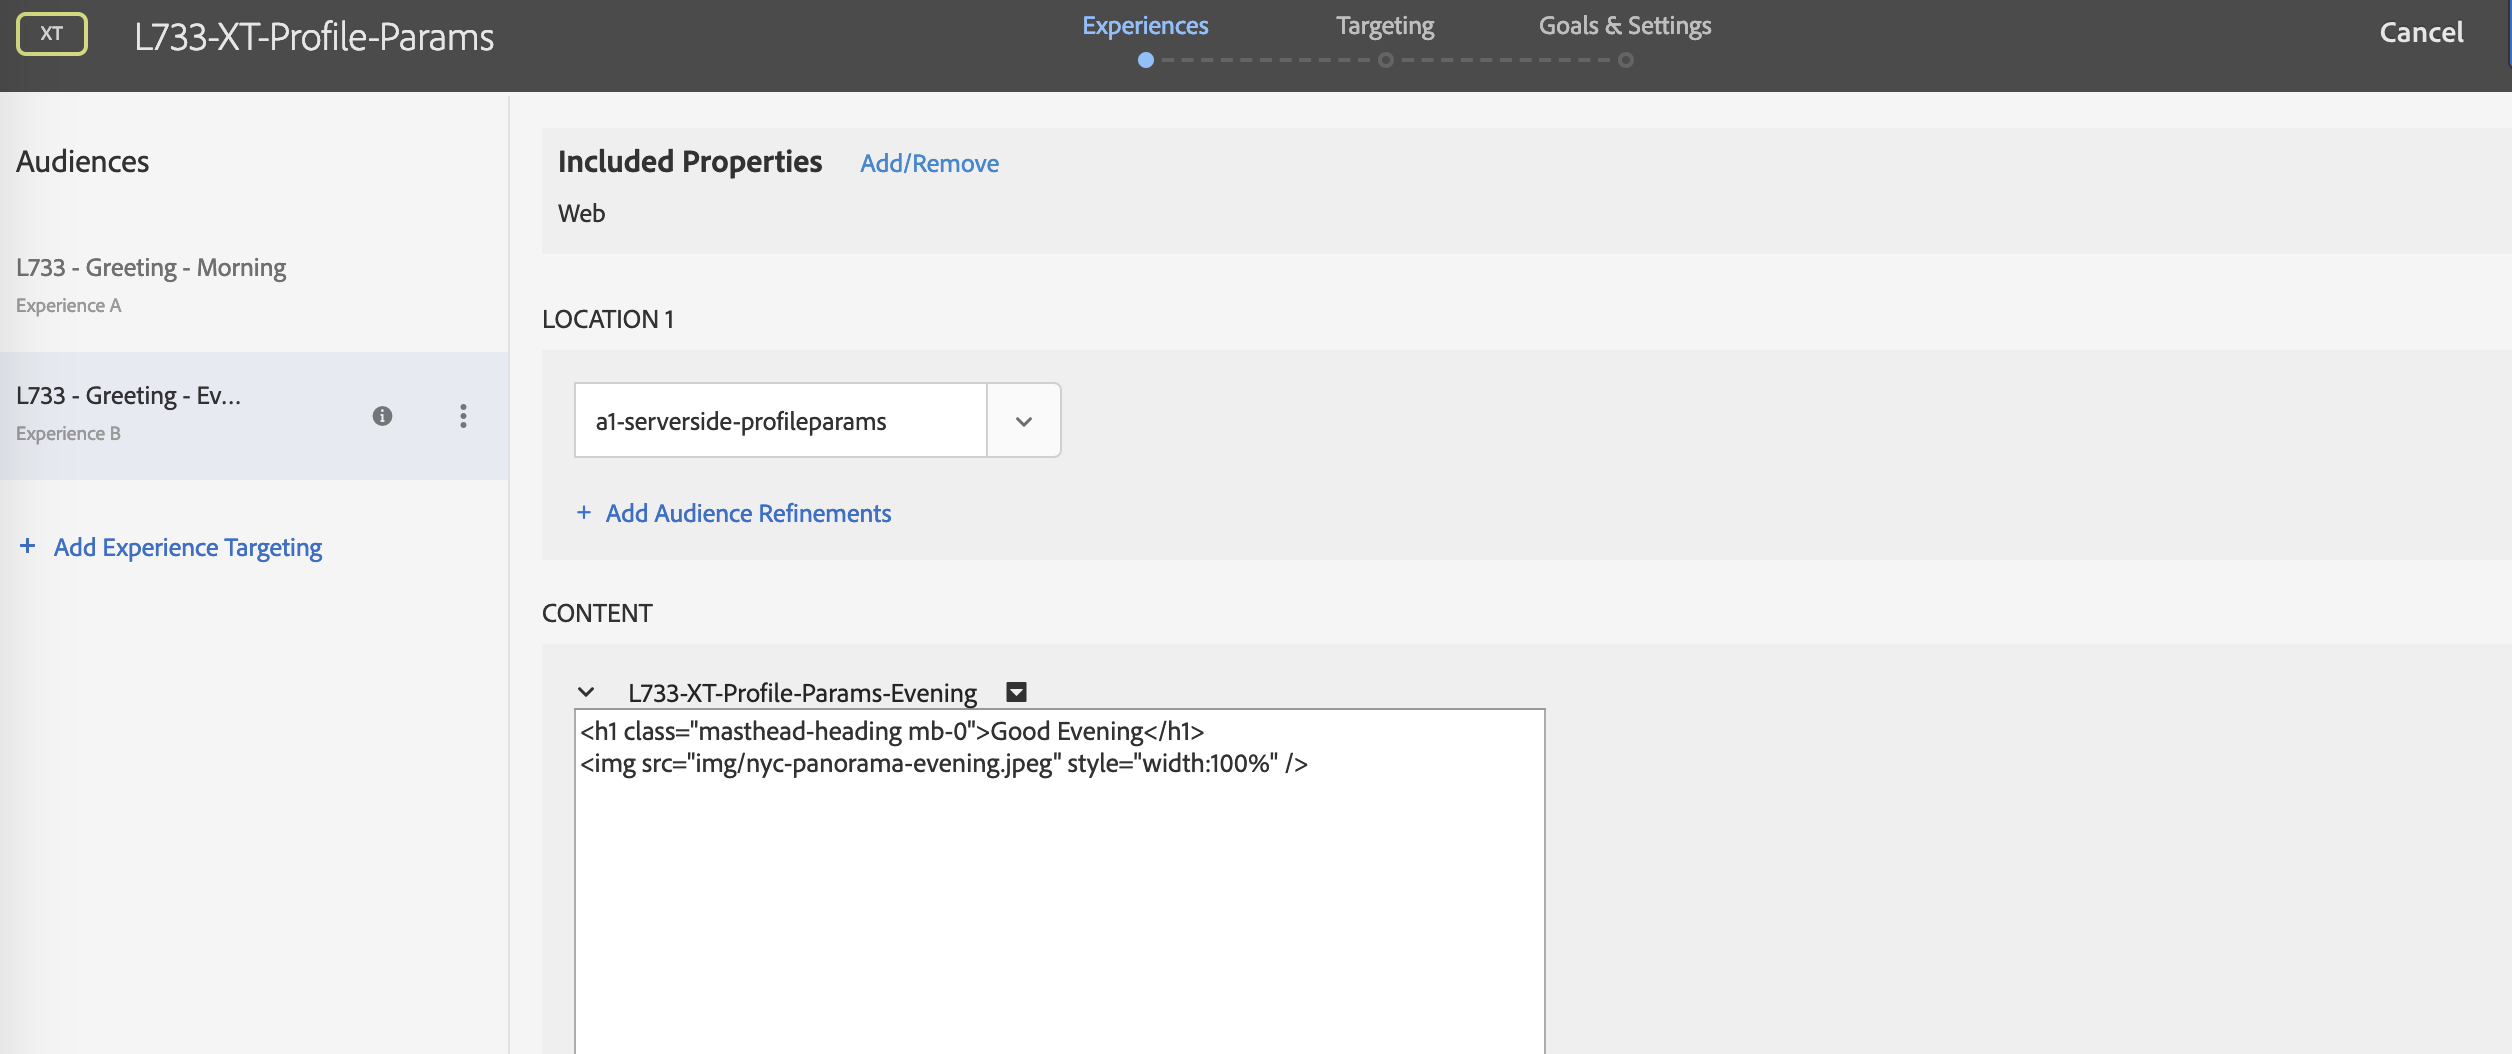
3f. Click on 'Next' and you will be taken to the 'Target' step of the workflow.
XT Targeting 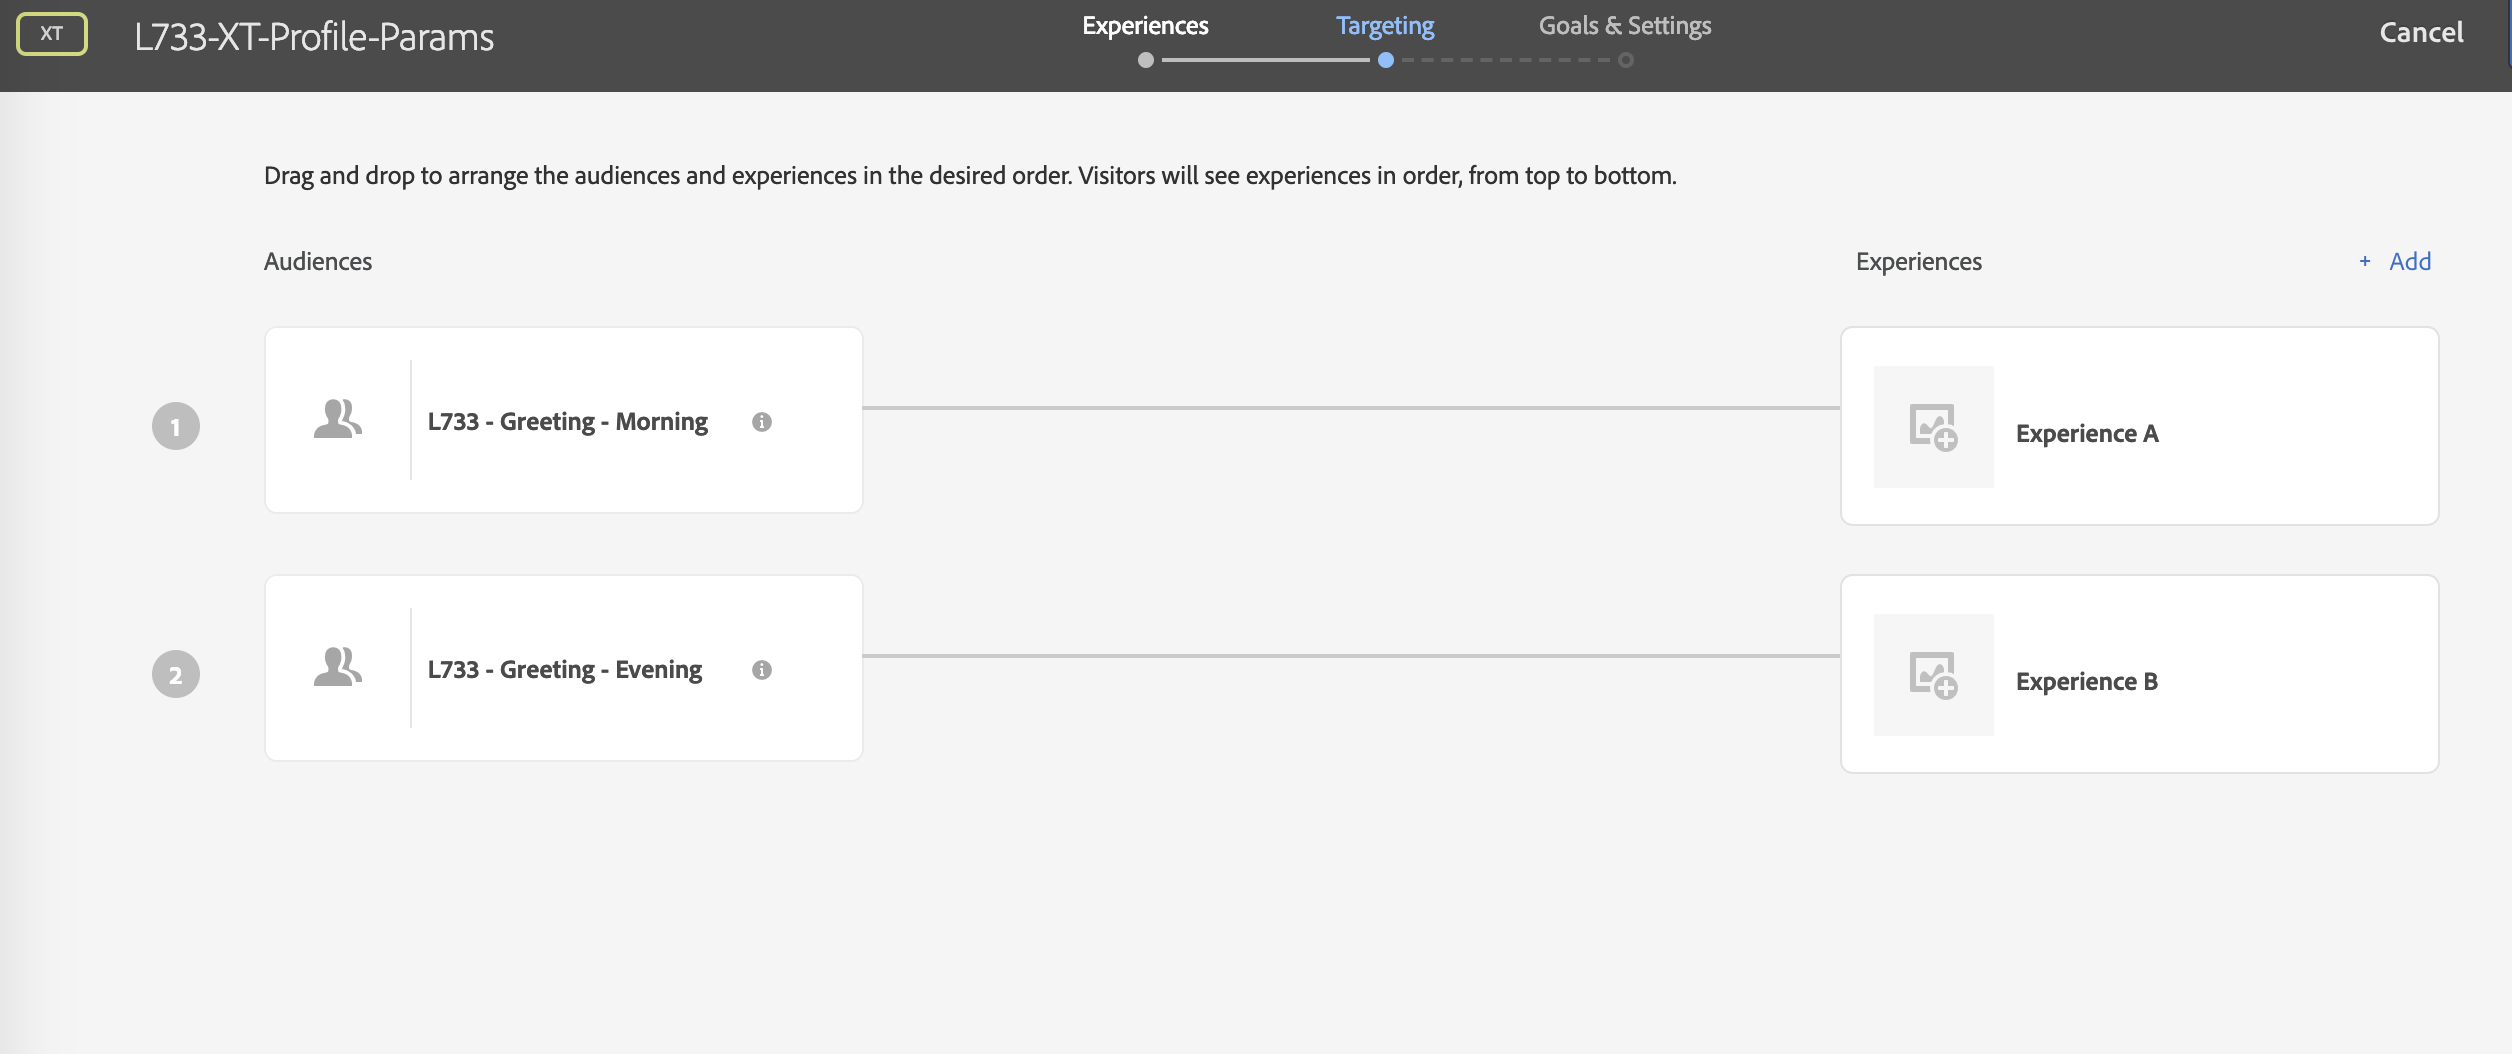
Step 4 : Create your XT Activity in the Target UI - Set up your goal
4a. Click 'Next' to go to the Goal & Settings screen. On this screen, select 'Adobe Target' as your reporting source.
4b. Click on 'Next', wait a few seconds for the activity to sync. Then click 'Activate'
Step 5 : Restart the Node app and verify your XT activity
5a. Open your Terminal and press Control + C. The control key is on the bottom left right corner. This will terminate your current app. Look for ^C
5b. Run the app with npm run www.
5c. Go to http://localhost:5000/profile-parameters in your browser or refresh the page if you already have it open.
5d. You should now be seeing one of the two experiences. For demo in this app, it randomly sets the experience type!
XT Lanidng Page 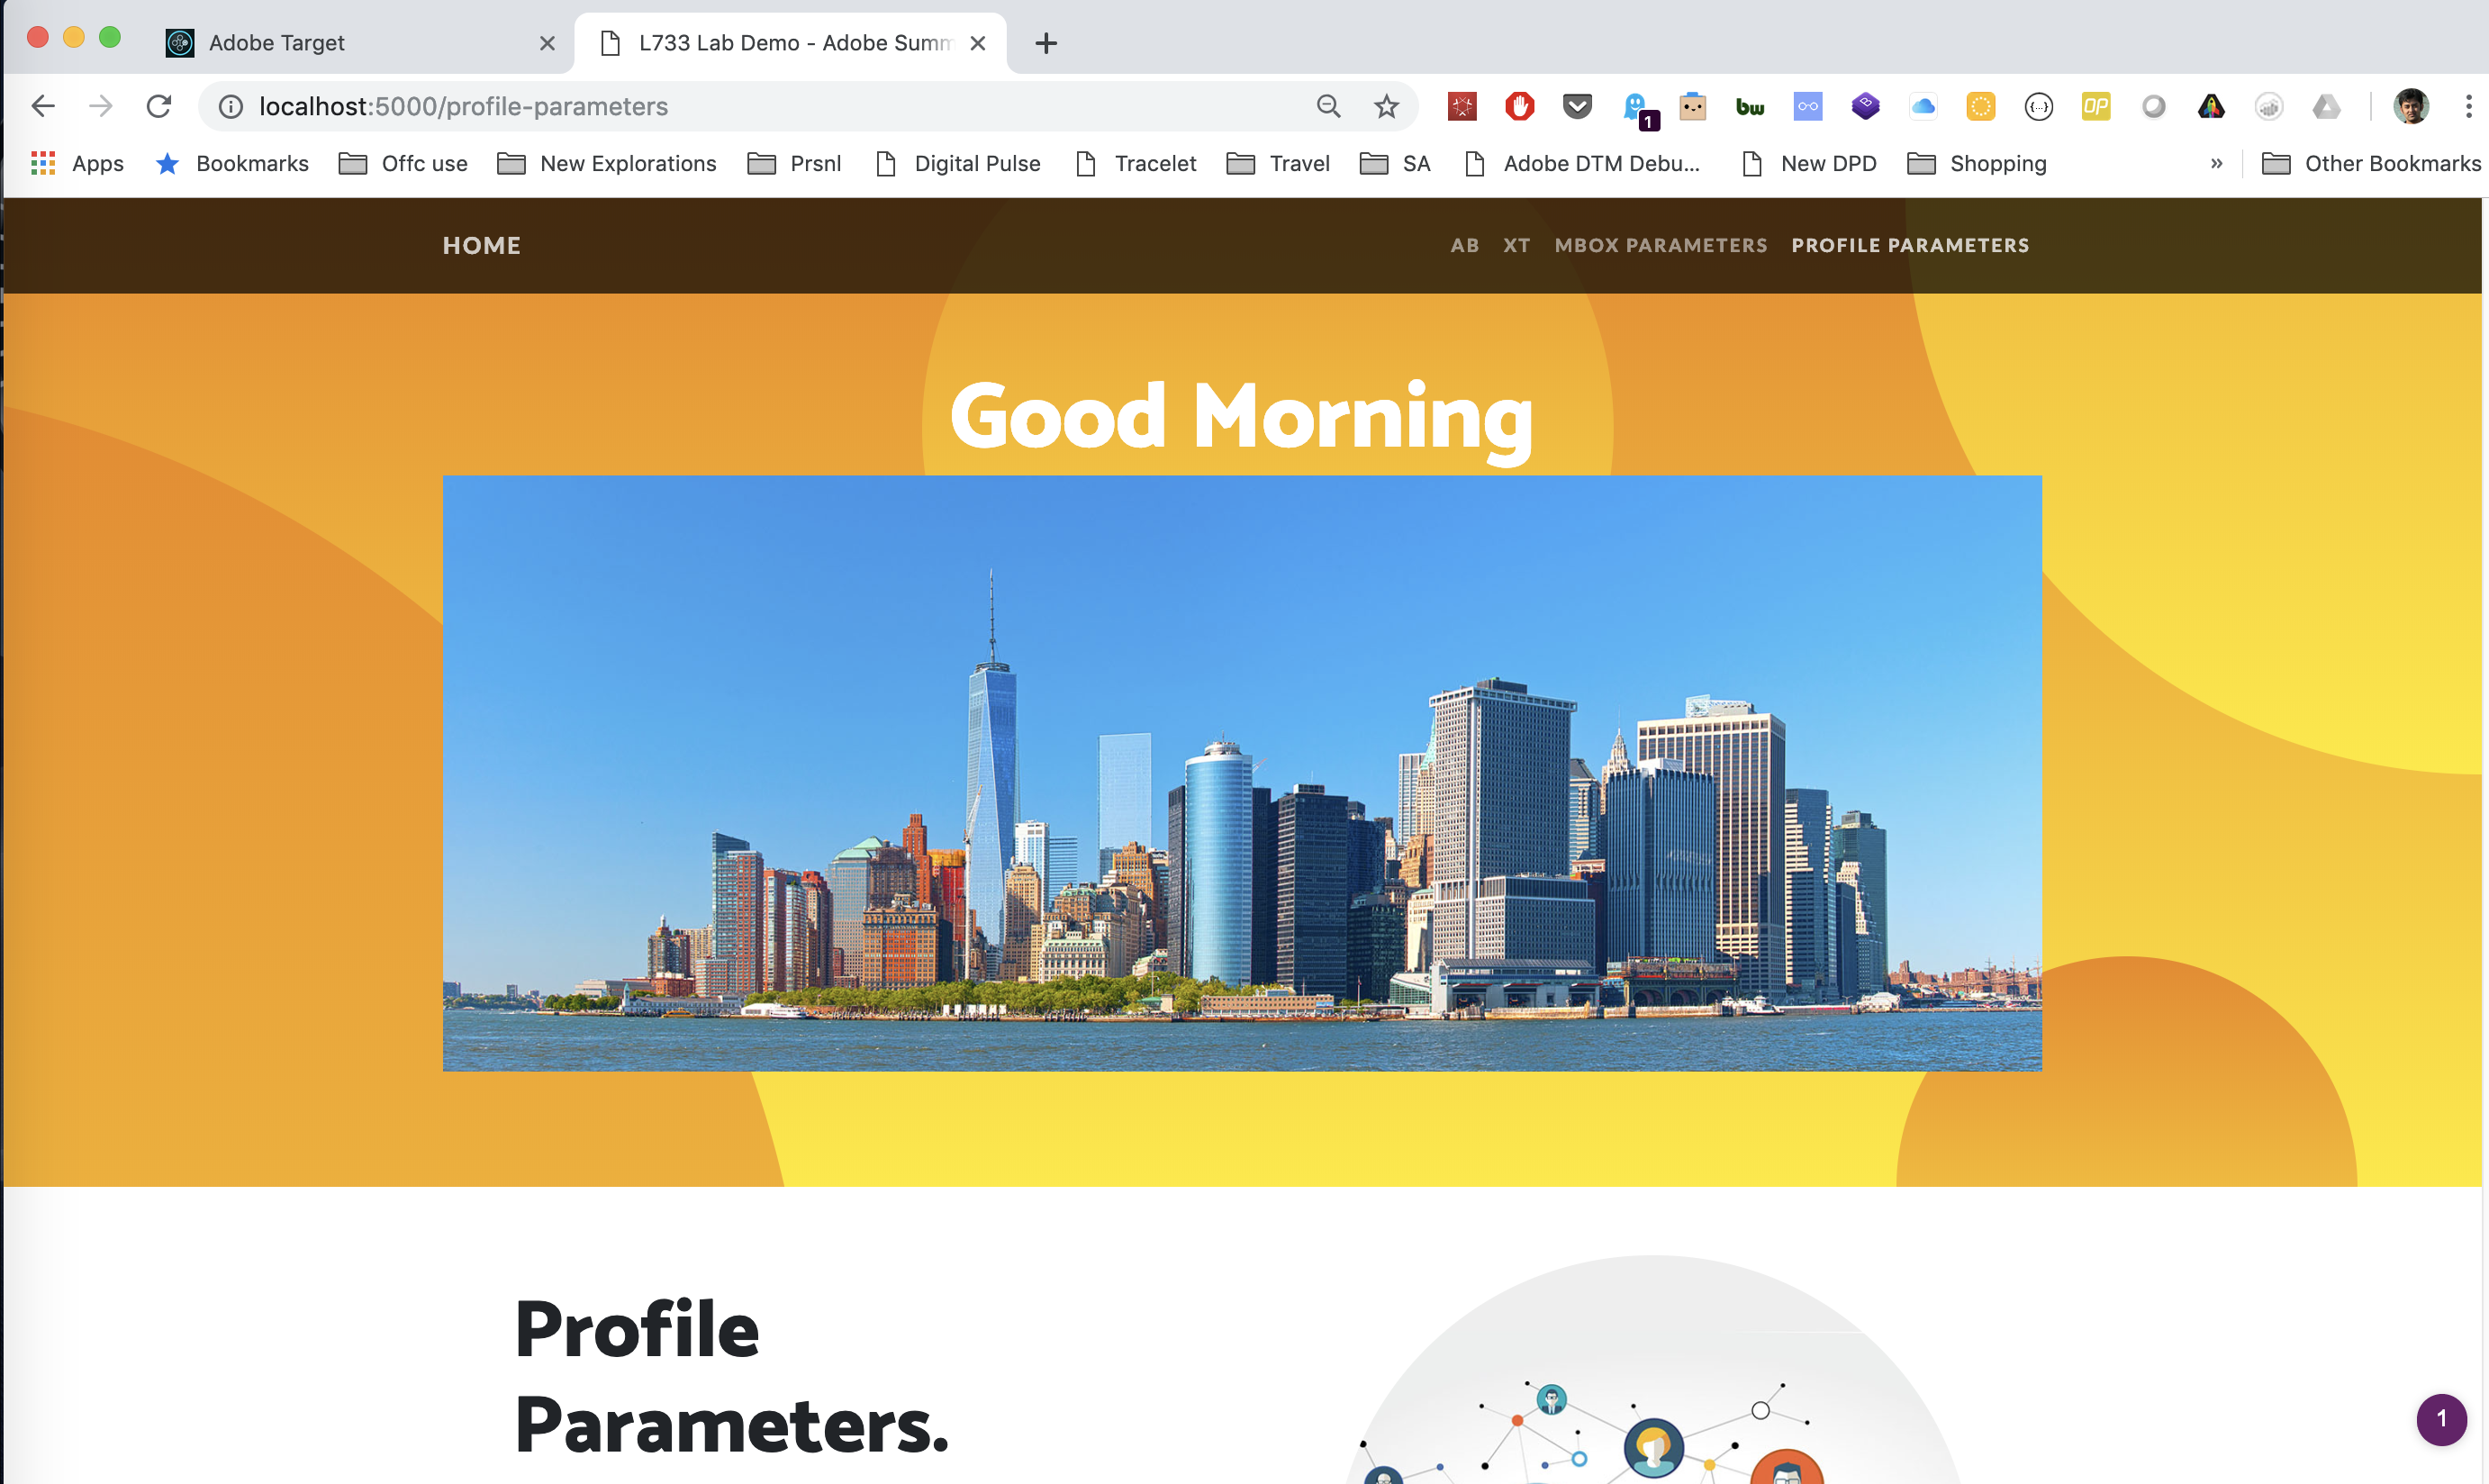
We are going to create an A/B test where we will show 3 different messages on the homepage, depending on cart value. Cart value will be sent to Adobe Target as an mbox parameter.
Step 1 : Create the Target Location (mbox) in the React app
1a. Open Atom and navigate to src > routes > mbox-parameters.js
A/B Activity
1b. In the mbox-parameters.js file, a1-serverside-mboxparams is the name of the target location. Replace a1 with your unique user number.
1c. Hit Cmd + S to save the file.
Step 2 : Create your A/B test in the Target UI
2a. Go to the Target UI.
2b. Click the blue 'Create Activity' button and then select A/B Test
2c. Select the 'Form' option and click Next
2d. Rename your activity. Append your activity with L733 followed by your user number. (Eg: L733-01-Mbox-Params).
2e. Select or type your location in the box. If your location isn't showing up in the dropdown, that is all right.
2f. Click on the small arrow after 'Default Content' and select 'Change Offer'.
2g. Select the offer titled 'L733-AB-Mbox-Params-Experience-A' and click Save.
Mbox Parameter based AB Activity 
2h. Click on 'Add Experience' and repeat steps 3f and 3g to add your L733-AB-Mbox-Params-Experience-B and L733-AB-Mbox-Params-Experience-C experiences.
2i. Click 'Next' and review your test setup.
2j. Click 'Next' to go to the Goal & Settings screen. On this screen, select 'Adobe Target' as your reporting source.
2k. Click 'Save' and wait a few seconds for the activity to sync. Once it syncs, click on Activate
Step 3 : Restart the Node app and verify your A/B Test
3a. Open your Terminal and press Control + C. The control key is on the bottom left right corner. This will terminate your current app.
3b. Run the app with npm run www
3c. Go to http://localhost:5000/mbox-parameters in your browser or refresh the page if you already have it open.
3d. You should now be seeing one of the three experiences.
A/B Landing Page 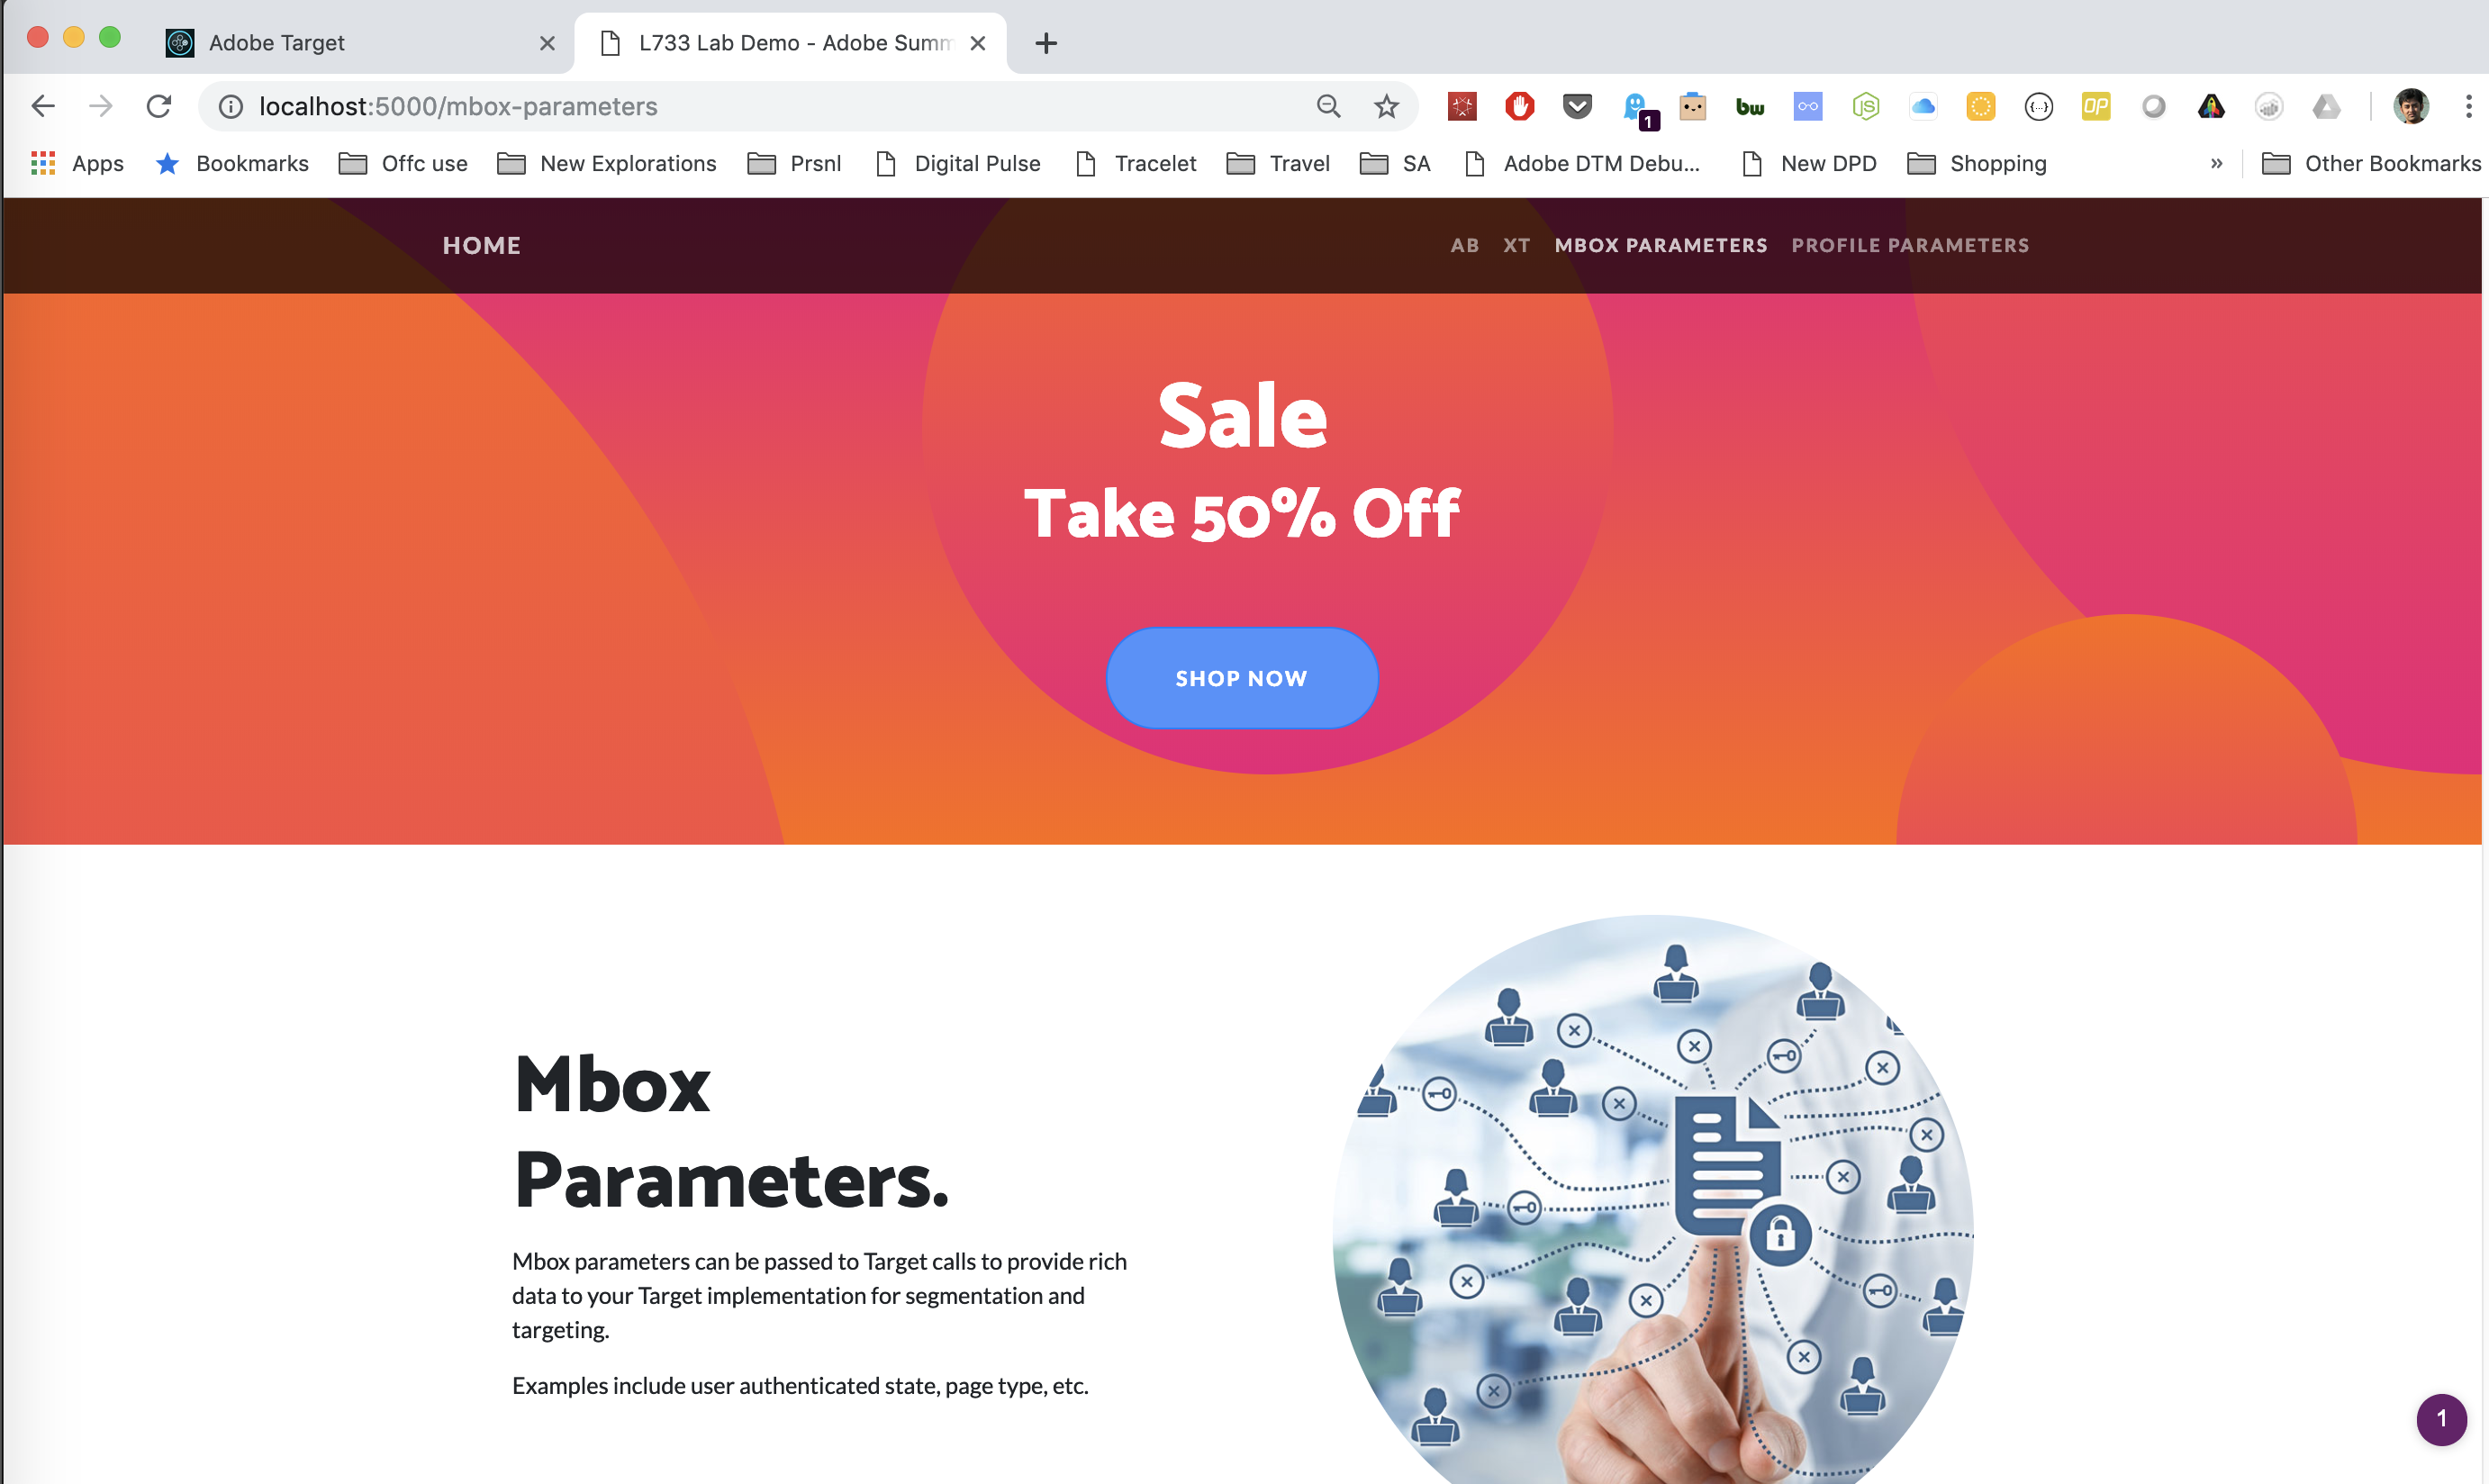
For this lab session, we have pre-configured a Postman package and installed it on your system to go through the demo.
Step 1 : Open the Postman Collection
The Delivery API collection should already be available in the Postman. If you do not see it, it can be imported from the link http://cimage.adobe.com/adobe/target/l733.html
Step 2 : Fire the calls!
This collection has five calls. All calls are preconfigured with the required inputs. The delivery API only accepts POST. Click on the 'Body' tab under the URL to see what is being sent in each call. Feel free to modify the mbox names (to the ones you created) and the inputs.
Adobe.io is Adobe's API gateway and Target is available as an integration service in Adobe.io. You can create an integration and use Target's admin and reporting APIs. For this lab, an integration was created using an admin account. While it is a straightforward and a conventional process using JWT based authentication it is outside the scope of this lab to review those steps. You can find the documentation on Adobe.io for creating an integration, authentication and API reference.
Step 1 : Open the Postman Collection
The Admin API collection should already be available in the Postman. If you do not see it, it can be imported from the link http://cimage.adobe.com/adobe/target/l733.html
Step 3 : Add global variables for postman
Each call requires an access_token and an api key. Add these as globals so you don't have to add it to every call. These tokens should be configured in your Adobe.io console.
Step 4 : Fire the calls!
This collection has nine different API calls demonstrating a range of CRUD APIs for Target. All calls are preconfigured with the required inputs. Feel free to fire the calls and modify it.
Using the additional resources below, try to learn more about Target APIs and create your own integrations with Node.js SDK or the app of your choice.