
By the time you finish reading this sentence, your web architecture could be out of date. The web is moving at a breakneck pace, and technologies are changing constantly and rapidly. Adobe has built a new implementation library from the ground up to support the modern web and help you adapt to the changing times. At.js 2.0 is a JavaScript library developed for Single-page applications but works with any platform and framework. Learn how to take advantage of the next generation of the At.js 2.0 library to streamline your deployment of React and AngularJS.
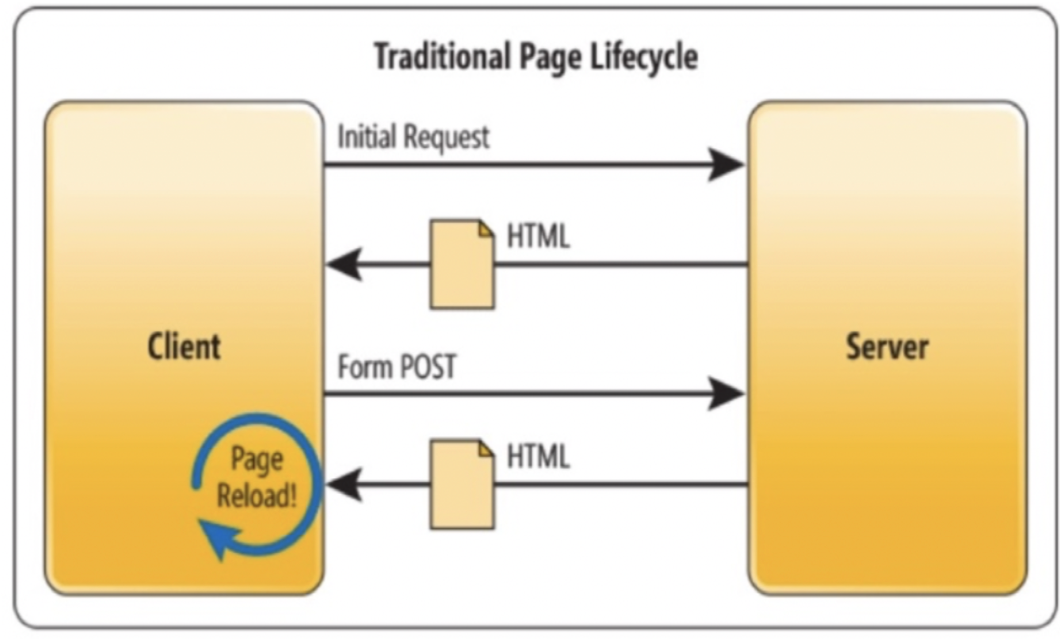
Multi-Page applications are traditional web applications that need to make server requests to render the entire page in the browser via a full page reload every time it needs to display data or new content as a result of user actions. Even though most of the page is consistent and only parts of the page are to be updated, a Multi-Page application must reload the entire page.
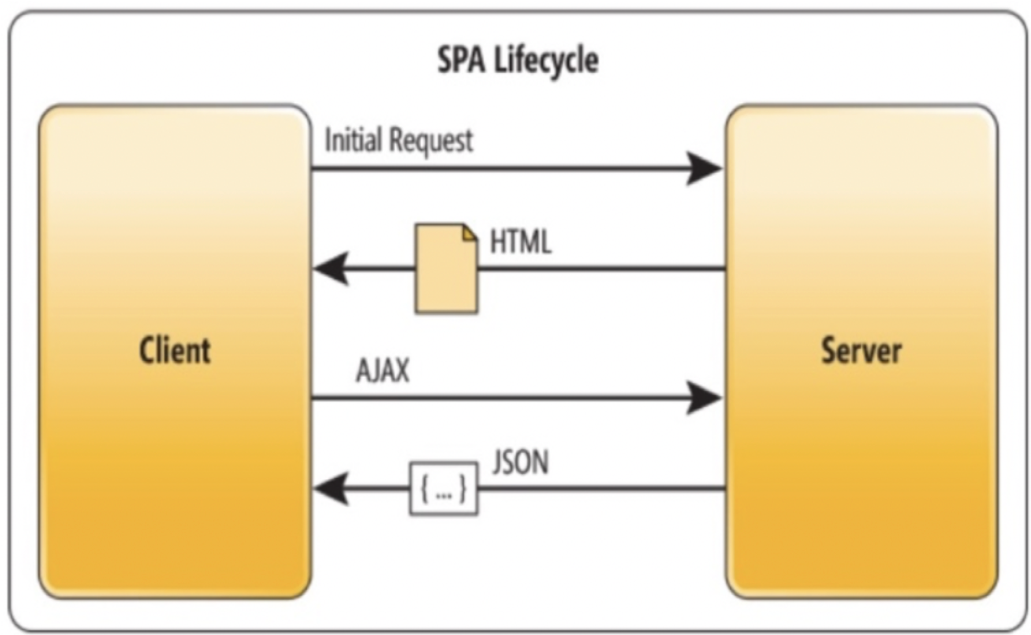
Single-page applications are web applications that load a single HTML page and dynamically rewrite the current page depending on user interactions. Example single-page applications include Facebook, Netflix, Twitter, Gmail, and Pinterest. In a Single-page application, after the initial page load, the server doesn't send HTML any more, but rather as the user interacts with the application, server requests are made to retrieve the data and markup for only the relevant and applicable content without ever needing a full page refresh.
Single-page applications have many benefits over multi-page applications and therefore, the industry is rapidly adopting Single-page application frameworks. Take a look at the NPM package download trends for the most popular Single-page application frameworks.

You can already see that the most popular framework, React, has NPM package downloads in the millions. We will see that in the near future, majority of businesses with an online presence, will have already adopted Single-page applications. So what are the benefits of Single-page applications over Multi-page applications?
Previous versions of At.js worked well with Multi-page applications, since every user interaction resulted in a full page reload. At.js would be included at the head of the HTML page and this allowed it to retrieve offers via a Target backend server call.
However, in Single-page applications, user actions do not trigger a full page reload, but instead only sections of the page would be dynamically rendered and updated. And that introduced a flurry of disadvantages:
Adobe Target is now introducing a new concept called Target Views for Single-page Applications. Target Views can represent the entire page of your Single-page application, or a visual group of elements. A Target View is defined so that a personalization campaign or content can be shown for a Single-page application through Adobe Target.
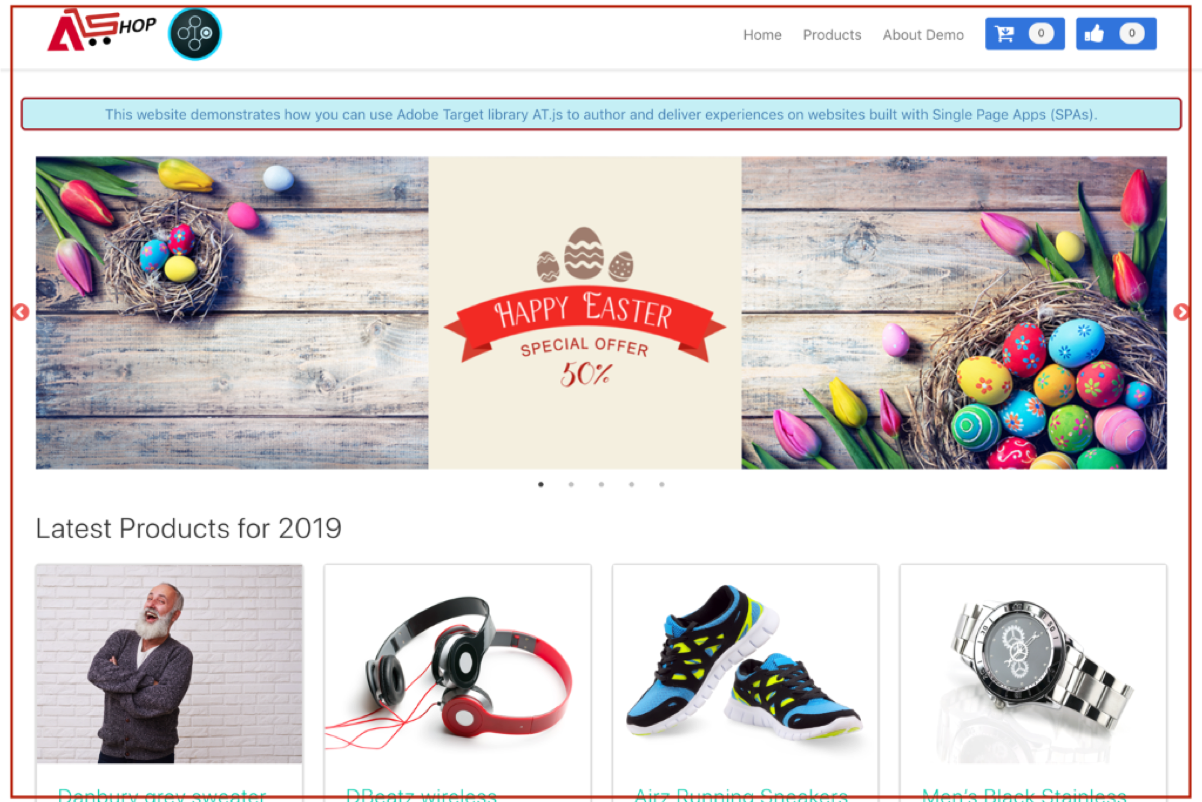
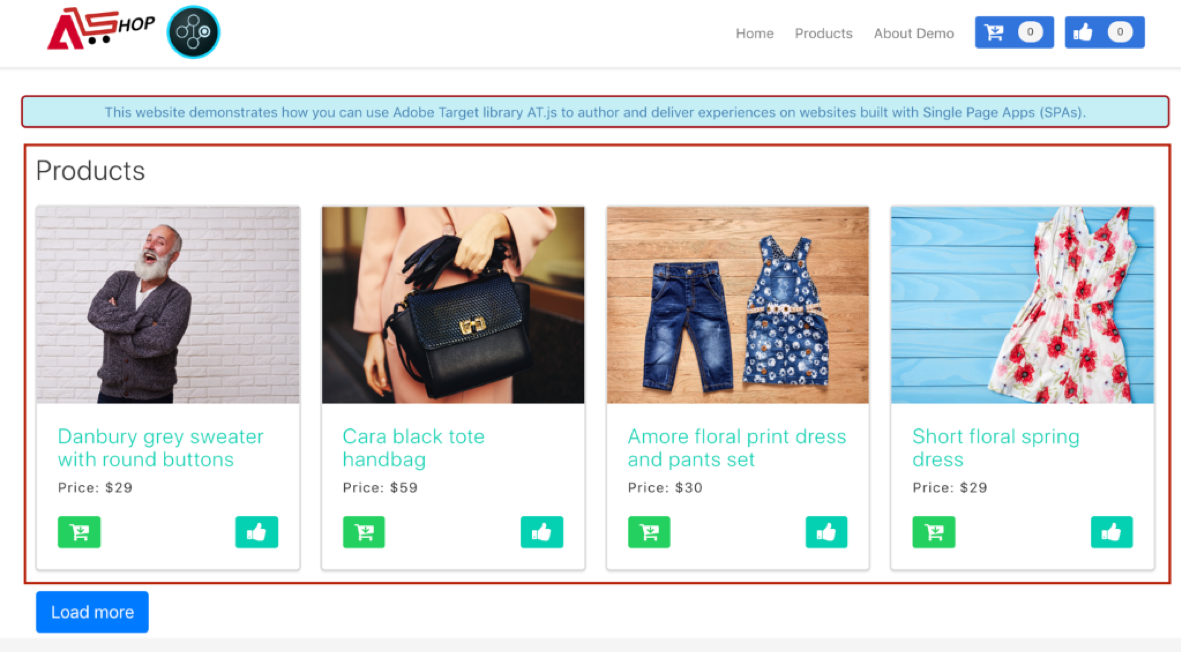
Let's consider a hypothetical e-commerce website called AShop implemented in React.
 https://target.enablementadobe.com/react/demo/
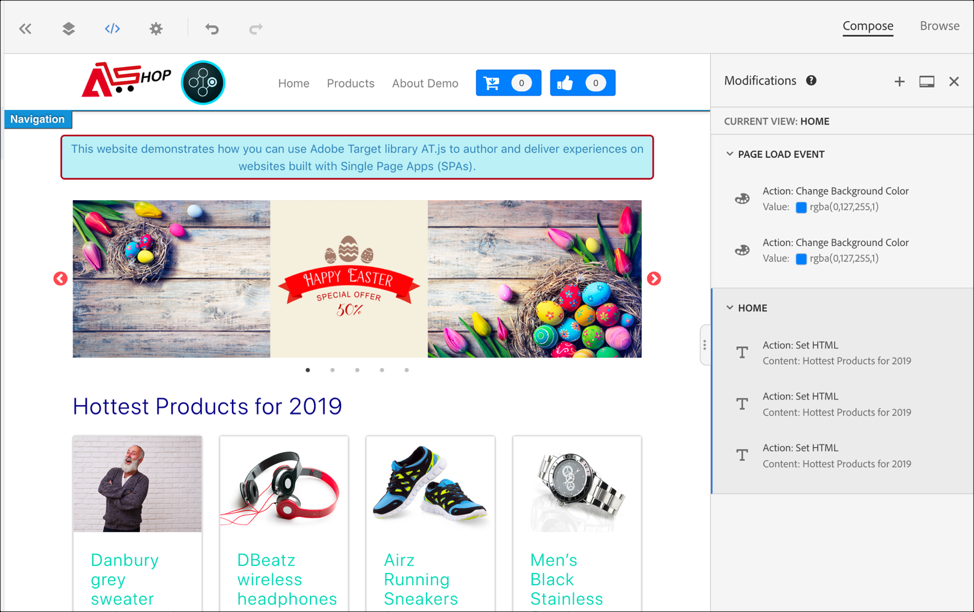
When we navigate to the home page of AShop, we can define the Target View to be the entire home page. We will name this Target View as Home. Naming a view is important and this will be covered in greater detail in the next lesson.
 https://target.enablementadobe.com/react/demo/#/products
We then navigate to the products section to see what kind of products AShop has to offer. The first four products shown in this section can also be categorized as a Target view. In this case the Target view name can be Product Result Page One.
 https://target.enablementadobe.com/react/demo/#/checkout
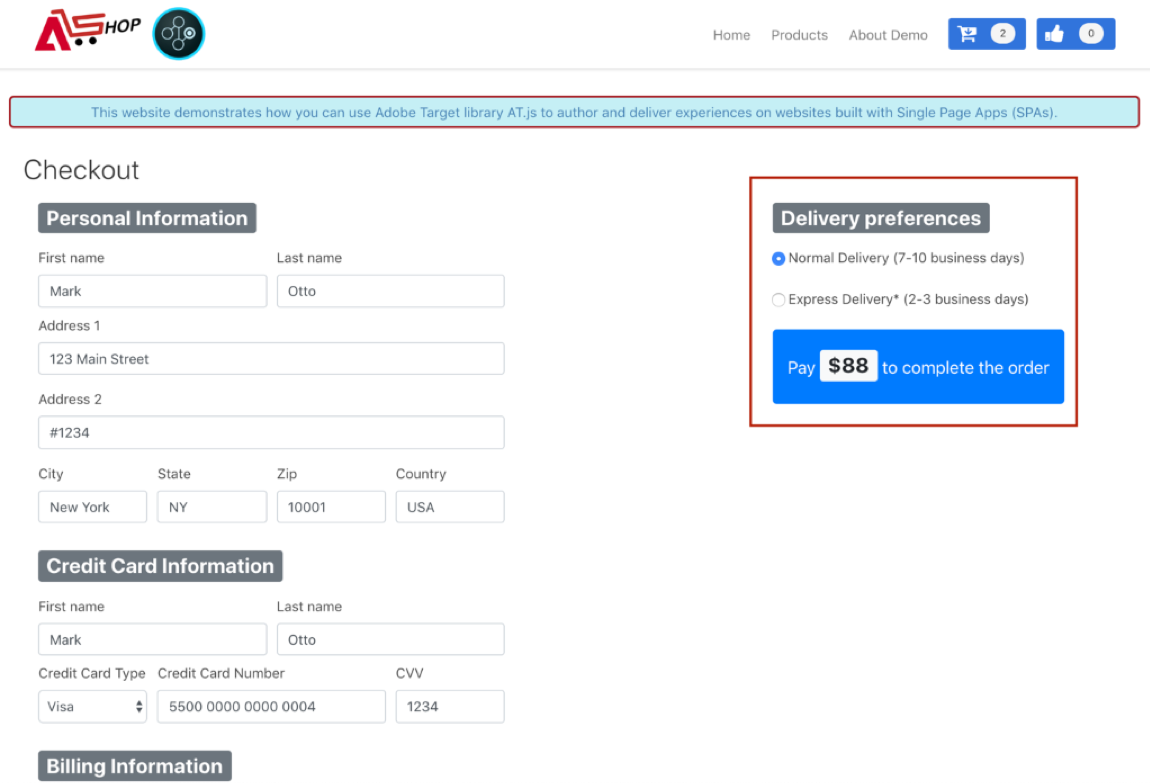
Lastly, we add to cart some products that we want to purchase. In this example, a Target view can be defined at a more granular level to the point of representing a delivery preference radio button. We can call this Target View, Normal Delivery.
npm install
This might take a few seconds to complete.
npm run build
This will run build in watch mode, i.e. will keep listening to any further changes made to project and build automatically. Please DO NOT CLOSE this terminal.
npm run start
This will run the web server at http://localhost:3000. Please DO NOT CLOSE this terminal.
http://localhost:3000
L740+id@adobeeventlab.com. Please make note of your unique user id i.e. id in the email address after + sign. We will use it while creating Target activities with unique name and URL in next exercise.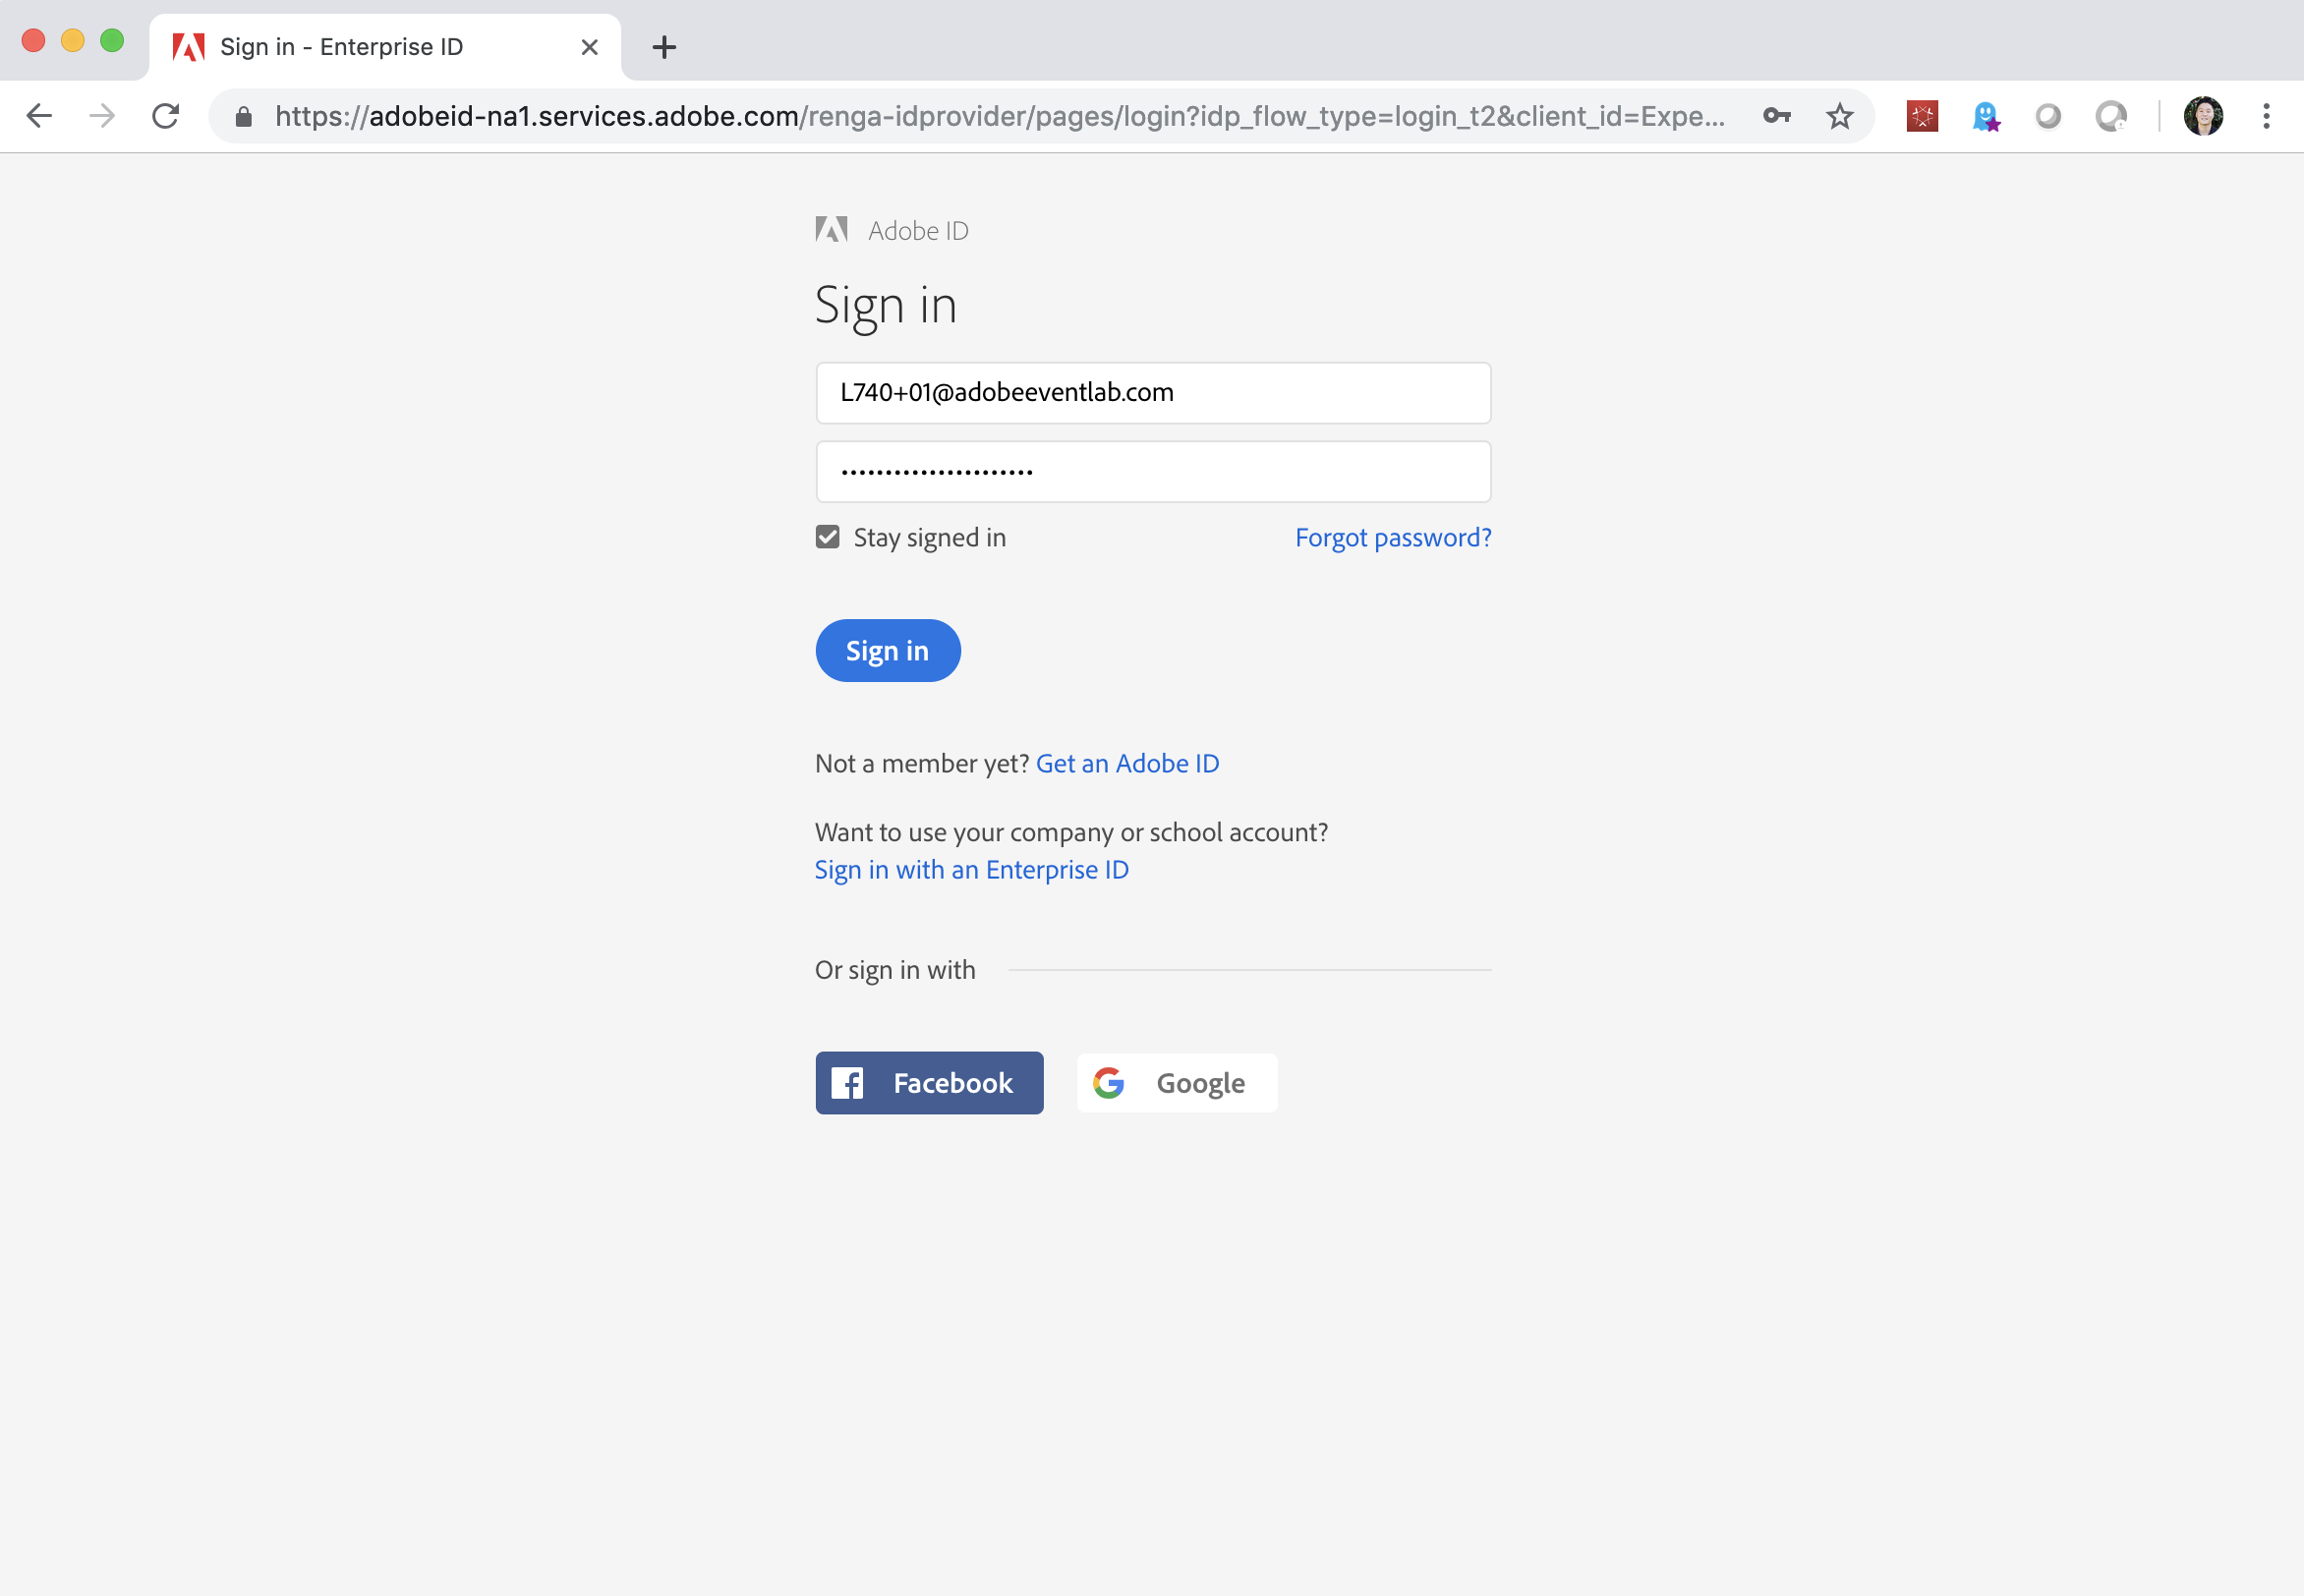
Setup link in top navigation barImplementation link in left panelDownload at.js 2.0.1 button 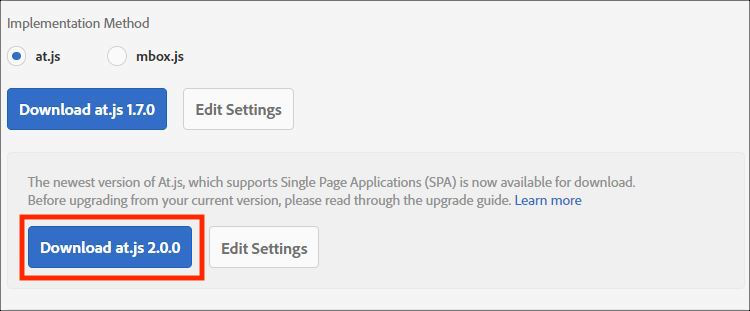
public folder of the website source codepublic/index.html to include at.js library just before <head> tag is closed:<head>
...
<script src="at.js"></script>
</head>
src/index.js filetriggerView function on route change. Add the following piece of JS code below the last import statement in src/index.js:function targetView() {
let viewName = window.location.hash;
// Sanitize viewName to get rid of any trailing symbols derived from URL
if (viewName.startsWith('#')) {
viewName = viewName.substr(1);
}
if (viewName.startsWith('/')) {
viewName = viewName.substr(1);
}
viewName = viewName || 'home'; // view name cannot be empty
// Validate if the Target Libraries are available on your website
if (window.adobe && adobe.target && typeof adobe.target.triggerView === 'function') {
adobe.target.triggerView(viewName);
}
}
const history = syncHistoryWithStore(createBrowserHistory(), store);
history.listen(targetView);Open Adobe Target and go to Activities link from top navigation bar
Click on Create Activity button and select Experience Targeting
Enter Activity URL as: http://localhost:3000/?user=id# where id is <your unique user id>. Click the Next button.
Observe CURRENT VIEW as HOME in Modifications panel on the right
Perform a few customization actions on Home view:
5.1 Change the "Cart" and "Like" buttons on top to a lighter blue color by clicking on these, and then selecting Edit -> Background Color. These modifications should be applied on a "Page Load" event, because we are changing components of the header. So, hover over these actions in the Modifications panel and click the third Move to Page Load Event button
5.2 Change the "Latest Products for 2019" label to "Hottest Products for 2019" with the text color changed to purple, using the Edit -> Text/HTML customization option
Next, perform an action on Product details page:
6.1 Switch to Browse mode by clicking Browse in the top right corner, then click the Products header link
6.2 Click on the second product - Cara black tote handbag
6.2 Switch back to Compose mode by clicking Compose
6.3 Move the Price below Description, by using either one of the Layout -> Rearrange, Layout -> Move or directly editing the Container HTML via Edit -> Text/HTML
Click Next. Note that Experience A will be shown to all visitors
Click Next again to get to the Goals & Settings screen. Set the Primary goal to Engagement and the measure to Page Views and then proceed to save the activity by clicking Save & Close. When prompted, enter the Activity name as SPA shop <your unique user id>
Once the activity is successfully saved, activate it by clicking on the Inactive dropdown and selecting Activate
http://localhost:3000/?user=id#/ in a new browser tab where id is <your unique user id>src/containers/Products.js.handleLoadMoreClicked function to trigger view on new products loading. Replace handleLoadMoreClicked function with the following code:handleLoadMoreClicked() {
const page = this.state.page + 1; // assuming page number is derived from component’s state
this.setState({page: page});
this.targetView('PRODUCTS-PAGE-' + page);
}
targetView(viewName) {
// Validate if the Target Libraries are available on your website
if (window.adobe && adobe.target && typeof adobe.target.triggerView === 'function') {
adobe.target.triggerView(viewName);
}
}Browse, then click the Products header linkLoad More button once, to load the second row of productsComposeInsert After an HTML text fragment saying "Few left, Hurry up!". Customize the added text, by Editing the HTML and setting a red background color and a white text color on the selected text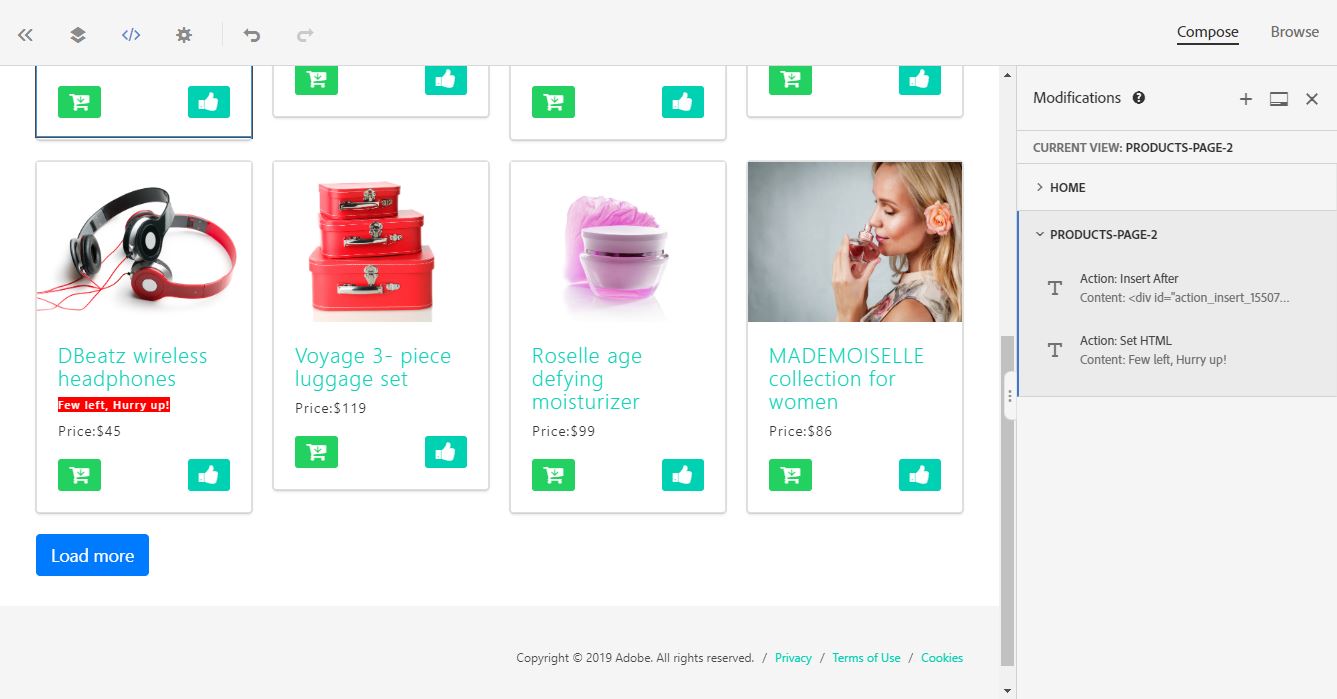
src/containers/Checkout.jsonDeliveryPreferenceChanged function to trigger a Target view when delivery preferences are changed. Replace onDeliveryPreferenceChanged function with the following code:onDeliveryPreferenceChanged(evt) {
const selectedPreferenceValue = evt.target.value,
preferenceKey = Object.keys(DELIVERY_PREFERENCES).filter(key => DELIVERY_PREFERENCES[key].value === selectedPreferenceValue);
this.setState({deliveryPreference: DELIVERY_PREFERENCES[preferenceKey]});
this.targetView('DELIVERY-' + selectedPreferenceValue);
}
targetView(viewName) {
// Validate if the Target Libraries are available on your website
if (window.adobe && adobe.target && typeof adobe.target.triggerView === 'function') {
adobe.target.triggerView(viewName);
}
}Browse, then click the Products header linkCompose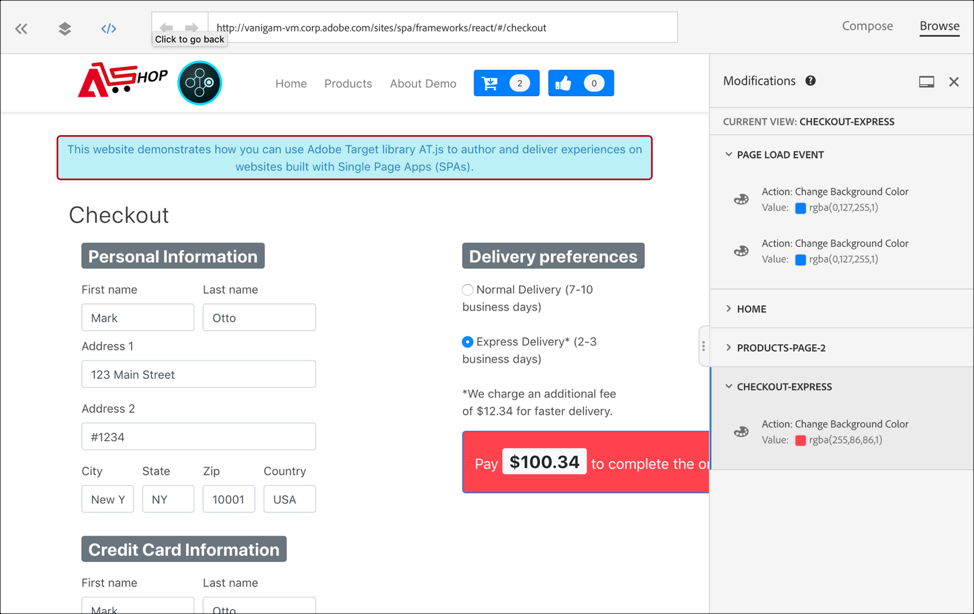
Read through the following additional resources if you are interested in learning more: