
In this lab we will explore the myriad ways Experience Manager can expose its content in a headless fashion. You will learn best practices, and get guidance on which approach is appropriate based on context.
This lesson sets up the software for the remaining lessons. Most should already be installed and ready to execute; but validating its state is important to ensure remaining lessons are successful.
Our Mobile App is built using Apache Cordova technology and utilizes Angular for its JavaScript Framework and Ionic as the HTML5 UI Framework.
You can learn more about these technologies here:
A typical hybrid mobile app stack built on these technologies would look like the image below: 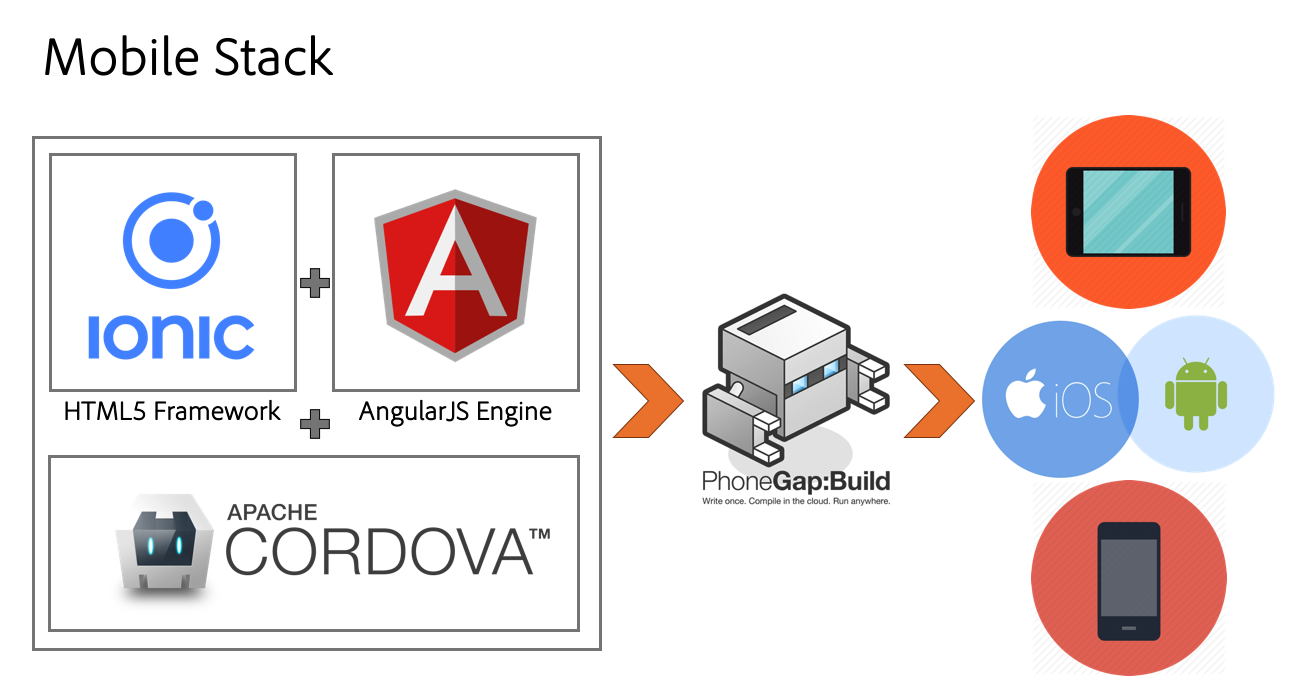
Note: PhoneGap Build is a cloud service for compiling PhoneGap applications. We will not be using it for the purposes of this lab.
Execute these commands to ensure that the code and content package are installed.
Open the Terminal application
Change the working directory to the summit-L763-aem folder:
$ cd ~/Desktop/Summit-2019/summit-L763-aem
$ mvn -PautoInstallPackage clean install

$ mvn -PautoInstallPackagePublish clean install
packages folder:$ cd ~/Desktop/Summit-2019/packages
$ mvn com.day.jcr.vault:content-package-maven-plugin:install -Dvault.file=./L763-Headless-Architecture-1.0.zip

$ mvn com.day.jcr.vault:content-package-maven-plugin:install -Dvault.file=./L763-Headless-Architecture-1.0.zip -Dvault.targetURL="http://localhost:4503/crx/packmgr/service.jsp"
Execute these commands to validate that the necessary software is installed.
Open the Terminal application.
Validate Node version.
$ ionic --version
4.7.1
Follow these steps to run Ionic and preview the mobile app in your browser.
$ cd ~/Desktop/Summit-2019/app
$ ionic serve --lab
Launching the lab should automatically open the browser to the Mobile preview. If it does not, use the bookmark Headless Lab Ionic Preview.
Note: You can pick either iPhone, Android or Windows in the platforms dropdown on the top right of this page and view the app in that flavor. The Ionic Framework automatically attaches the appropriate icons & styling to suit the specific platform.
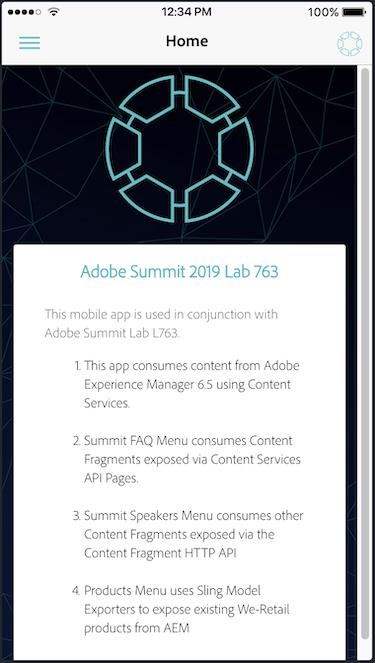
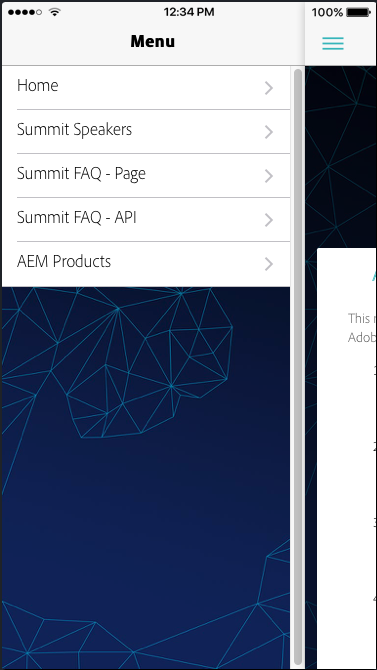
You should now see the mobile app preview with five menu items as shown below:
This lesson covers headless delivery of content fragments built using the Conference Speaker Content Fragment Model (CFM).
Content Fragment Model (CFM) - Content Fragment Models define the structure of content for your content fragments. In AEM 6.5, a content fragment model now allows us to add additional elements to make up a bigger piece of content than just pure text. This helps in creating "content objects" that can then be exposed via Content Services for cross-channel consumption.
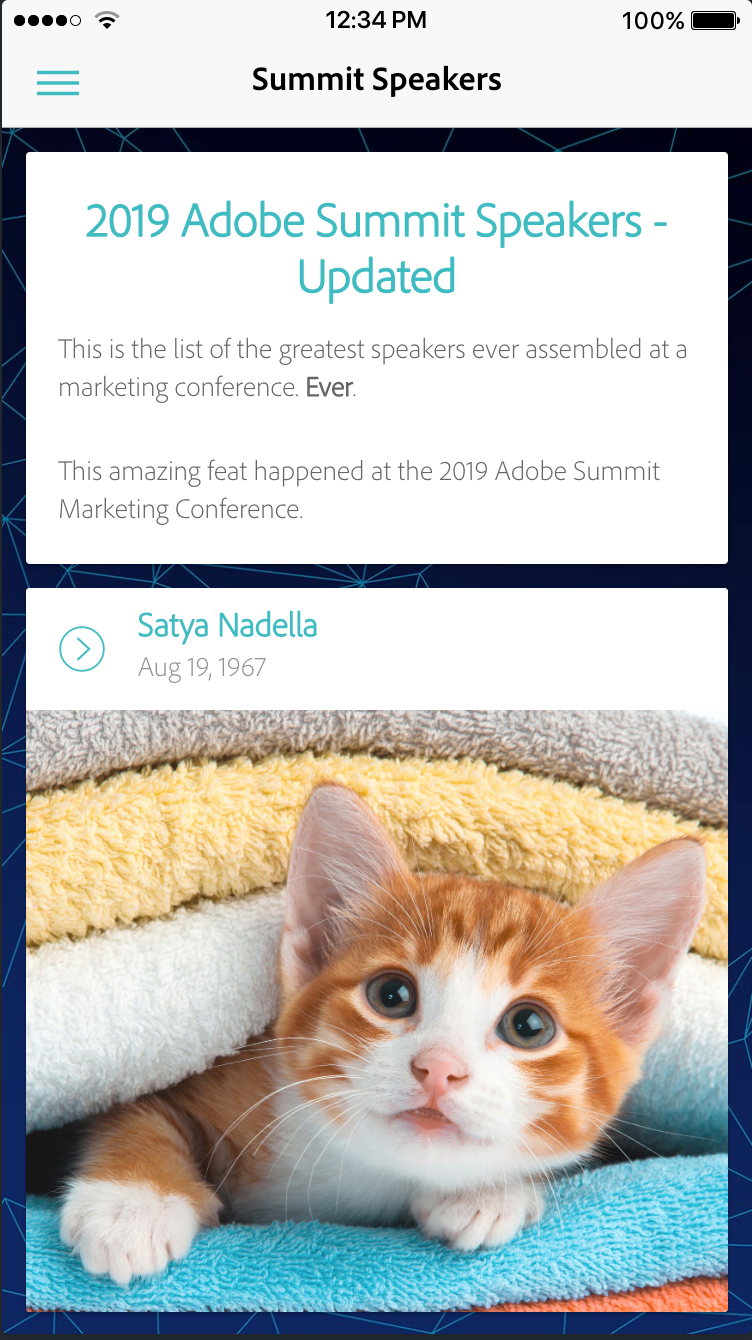
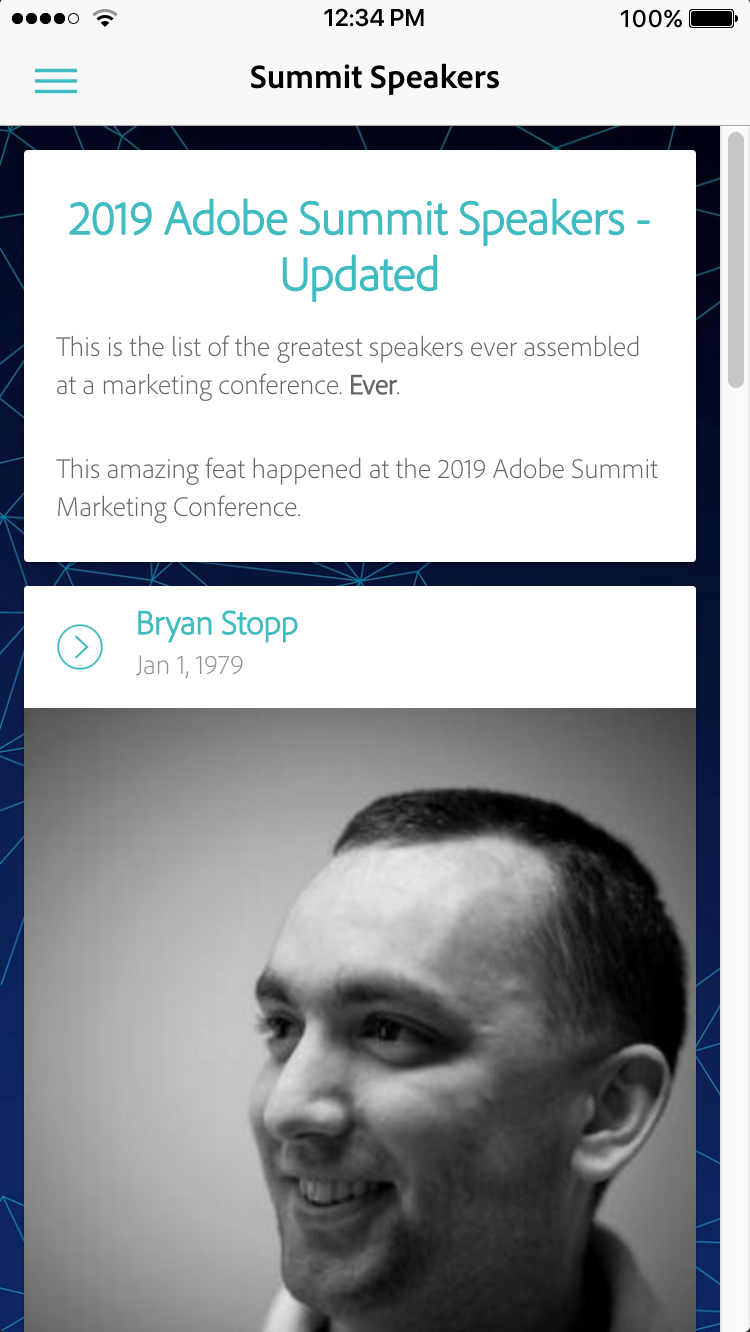
Our Mobile App needs to display a list of conference speakers as shown below in the UX handed to us by our design team.
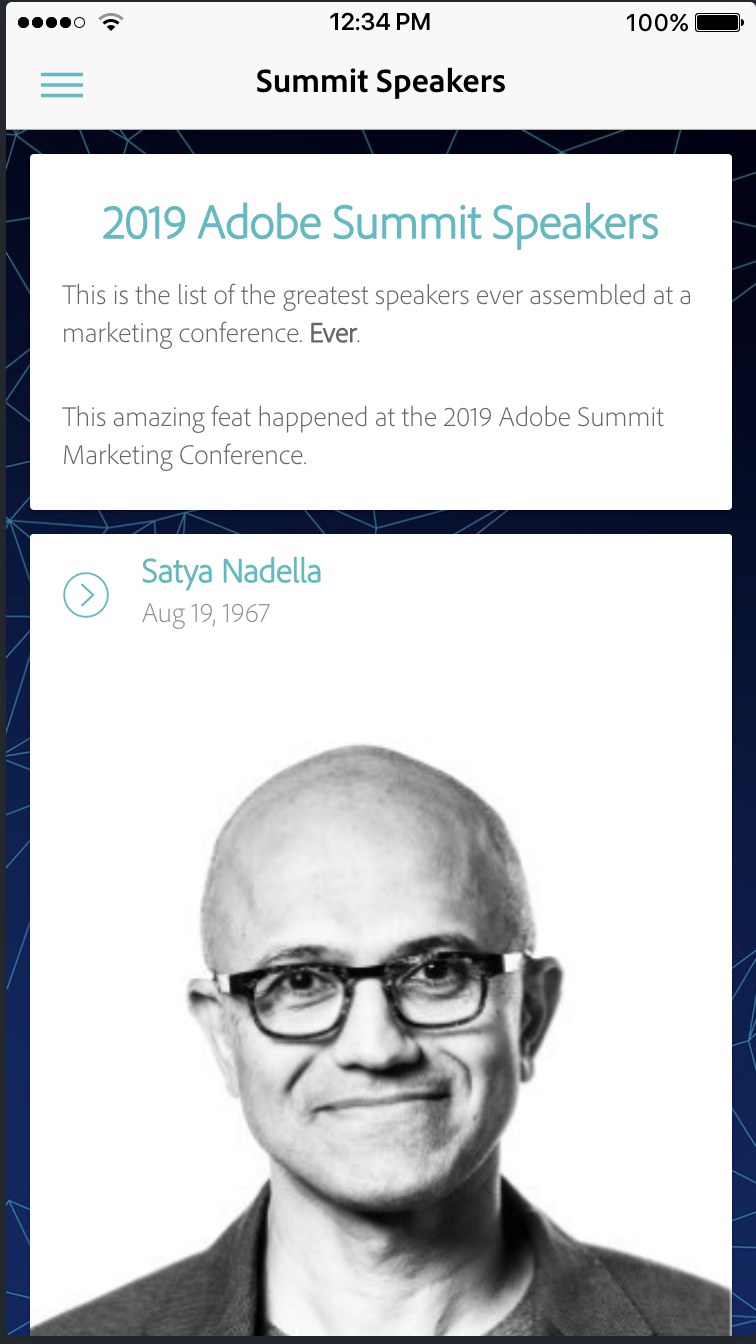
Let's preview the Summit Speakers menu item in the mobile app. Compare this with what you see in the mobile app preview.
Let's take a look at the content in AEM and see how it is built out. We will work our way back from the JSON endpoint that the mobile app points to in AEM and look at how that is built out.
This can be found in Line 18 of config.ts located in the following location from the project code root path:
app/src/providers/config.tsLet's follow this URL and take a look at the JSON on the AEM Publish server
Pro Tip: Adding 'tidy' to the url will make the JSON easier to read if you don't already have browser add-ons to do that for you: http://localhost:4503/content/we-retail/us/en/api/speakers.model.tidy.json
Note that the following pieces of information are being exposed in the JSON:
Note: Even before Content Services existed, AEM was able to expose any content as JSON just by using the default .json extension. (Sling JSON Servlet) exposes a “raw” representation of the node, which can change over time / versions of AEM. In effect, the Sling JSON Servlet is effectively exposing the implementation details, and not necessarily a “stable” JSON API that can be consumed by other applications. Take a look for yourself at the difference between .json and .model.json for this particular page. http://localhost:4503/content/we-retail/us/en/api/speakers.4.json
Let's look at the actual AEM page that exposes this JSON
Note: Just by changing ".html" to ".model.json", we were able to expose all this information in the page in a well-structured JSON that our mobile app (or for that matter, any 3rd party application) can consume. Because we used Core Components on this page, there was no need to build any custom code to make this happen. A business user now has the ability to update this page and change content in the mobile app without writing a single line of code!
Let's update the title of this screen in the app. To do this, we need to perform the following steps:
To make any changes, you need to first be in Edit Mode in the Authoring interface
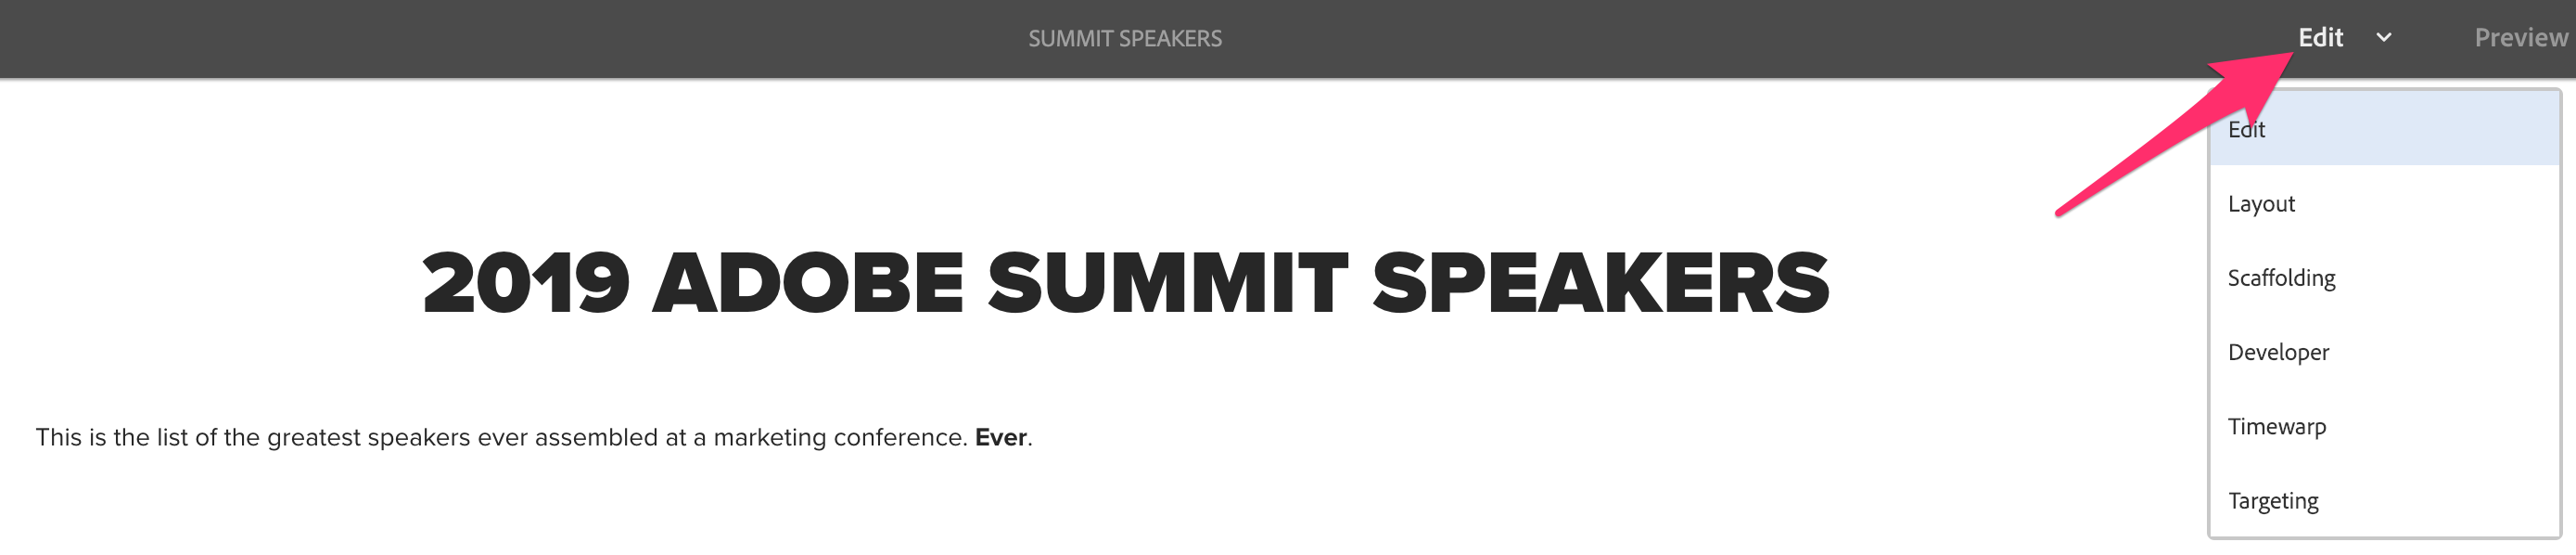
Edit the Title component and update the value with something new.

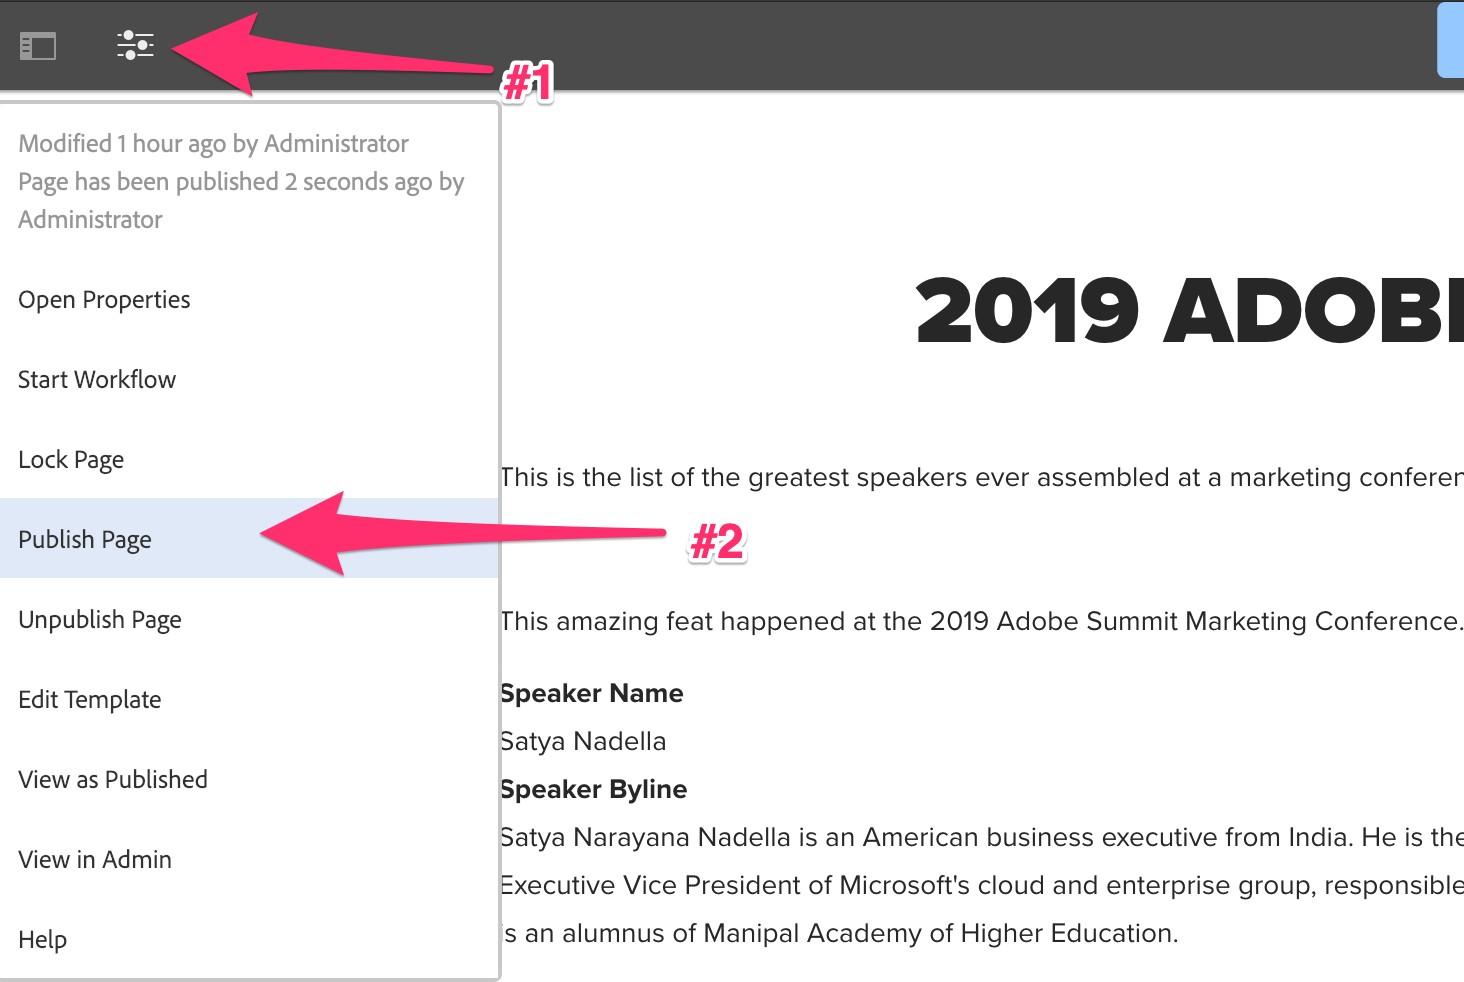
From the top-left menu, publish your changes by clicking on "Publish Page" menu option as shown below:
Pro Tip: Mobile or any 3rd party apps should point to content in the Publish Tier and not Author Tier. Typically, you would have a Dispatcher and a Content Delivery Network on top of the Publish server, but in this lab we are just using the Publish server. We can still leverage all authoring capabilities and workflow before content becomes published like we would for a normal website running on AEM.
Look at the JSON and check if you can find your updated value
http://localhost:4503/content/we-retail/us/en/api/speakers.model.json
Hint: You can search for your updated change in the JSON by using Command + F
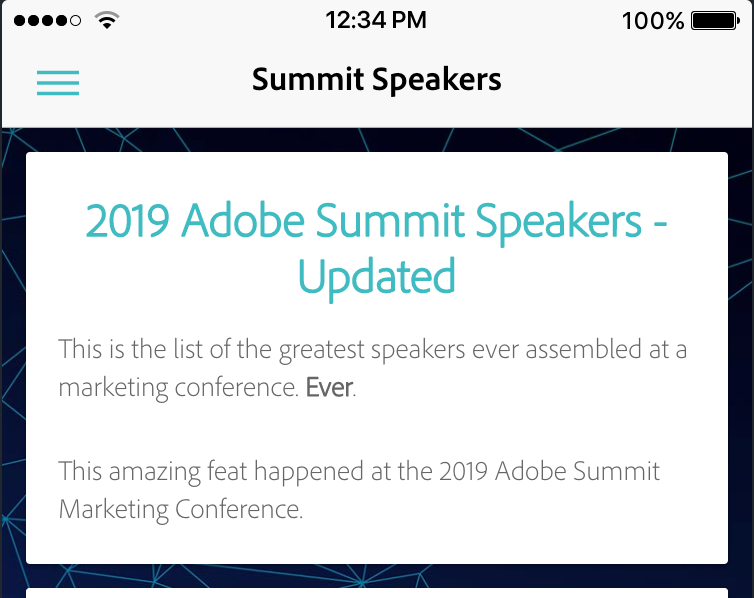
Refresh the mobile app preview and navigate to the Summit Speakers menu item and take a look at your updated value there
Looking at the app preview, we can see that the app is pulling in the following elements from content fragments in AEM:
but it is not using
yet.
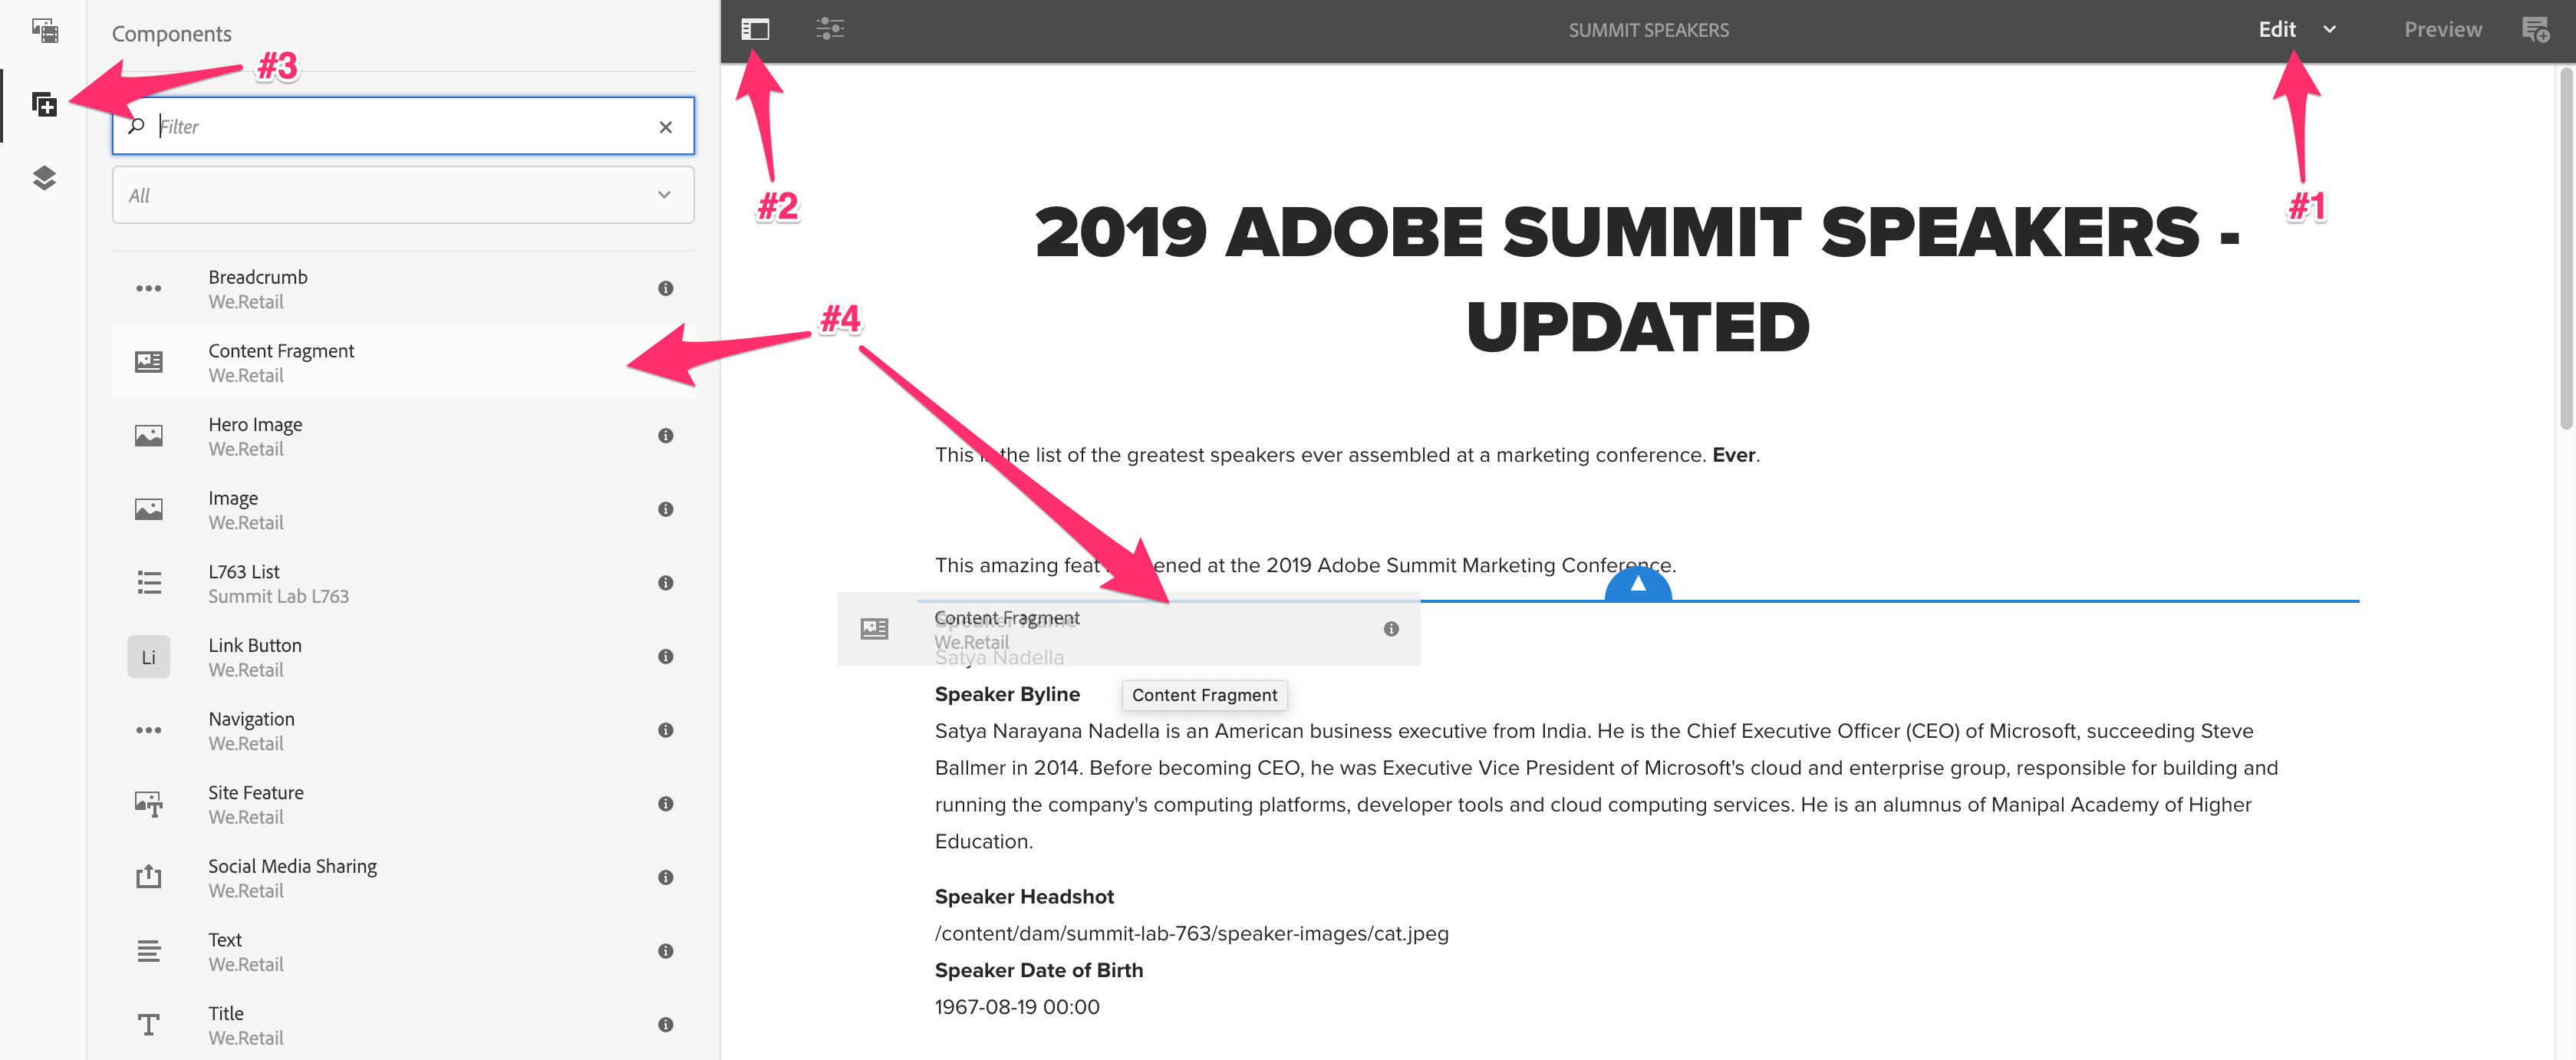
Let's fix the experience and pull in this additional piece of content to the mobile app. To do this, we need to perform the following steps:
This is located in the following location from the project code root path:
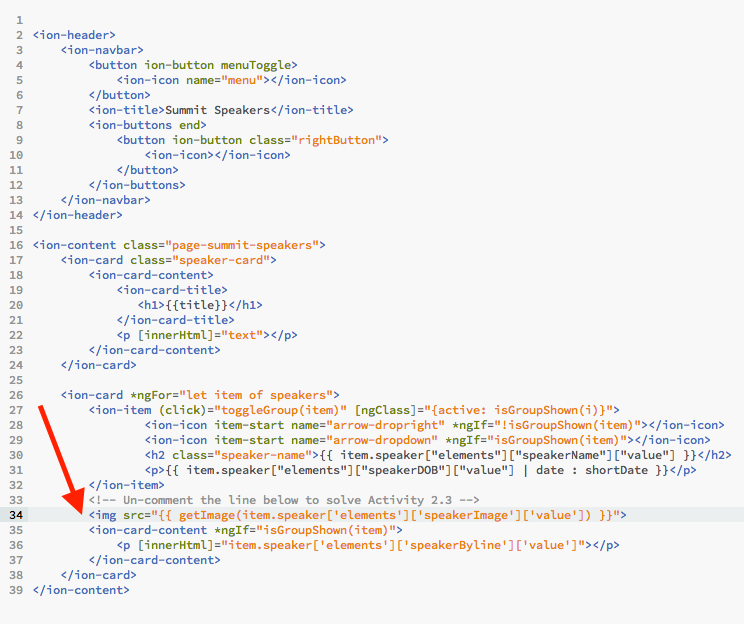
app/src/pages/summit-speakers/summit-speakers.htmlUncomment Line 34. This line of code pulls in the right value from the Model JSON and adds it to the app screen.
Now you should see images show up in the mobile app when you navigate to the Summit Speakers Menu item as shown below:
Despite our personal preference for these images, let's now update the content fragments with the right images of the actual speakers.
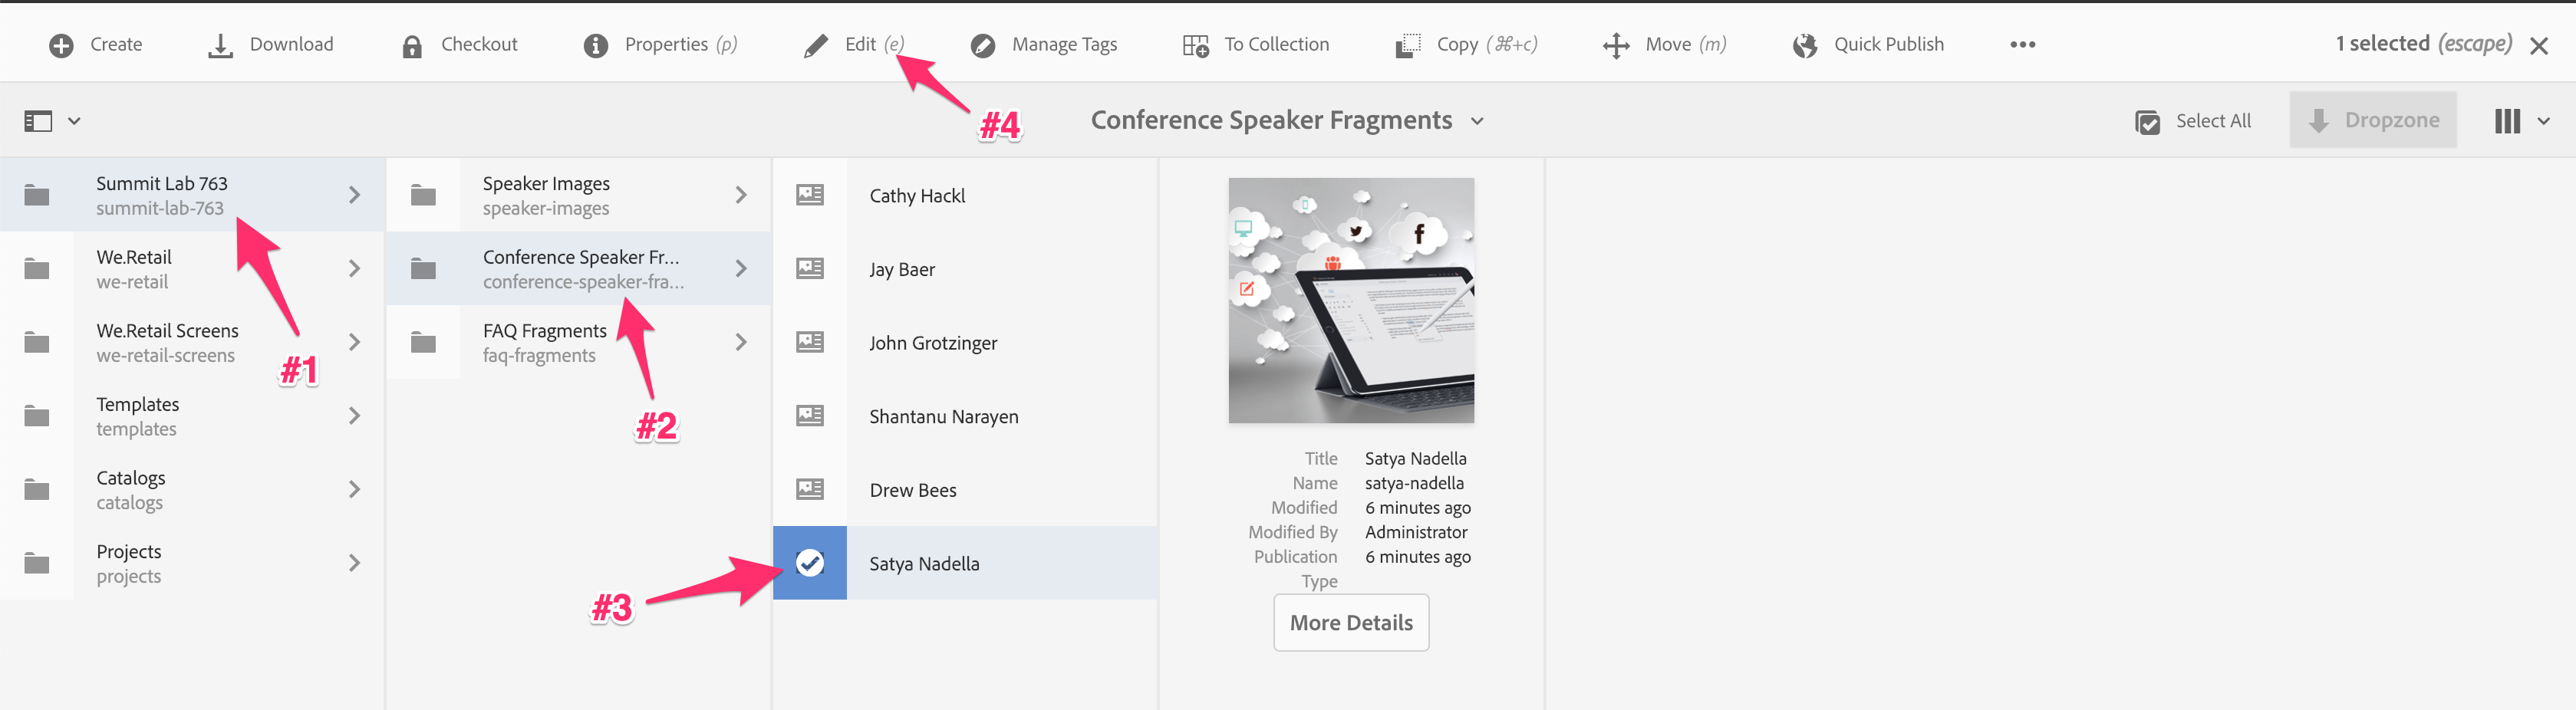
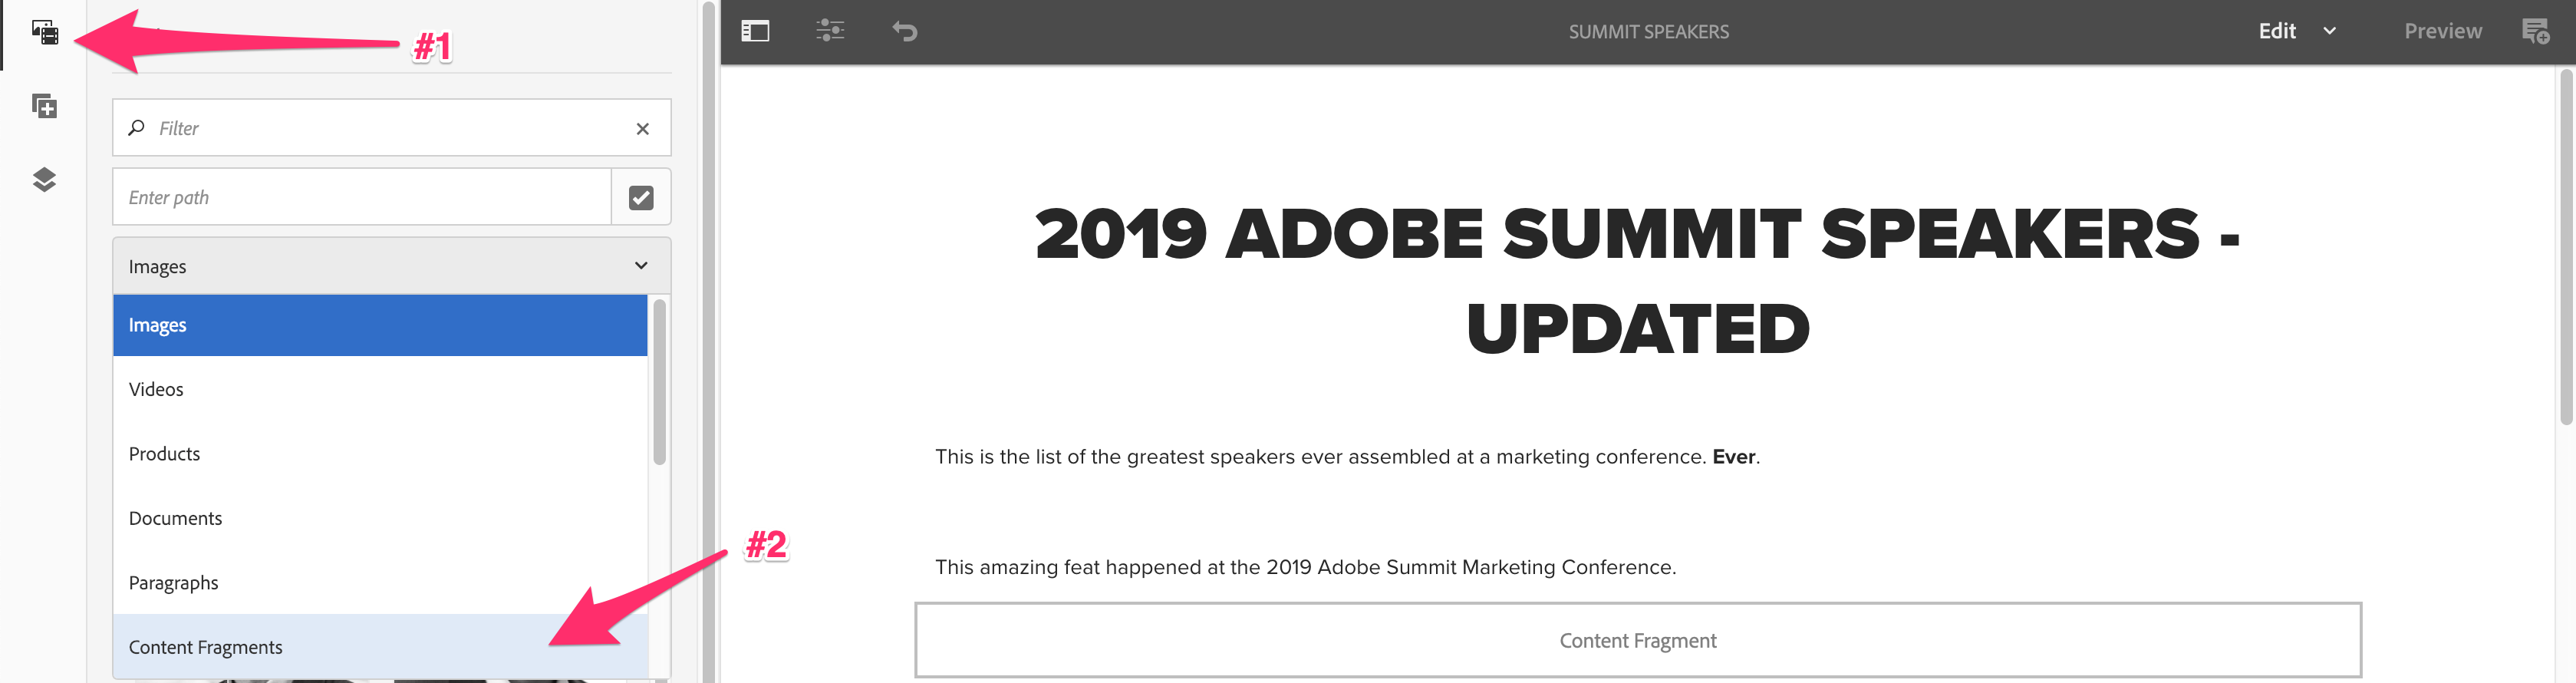
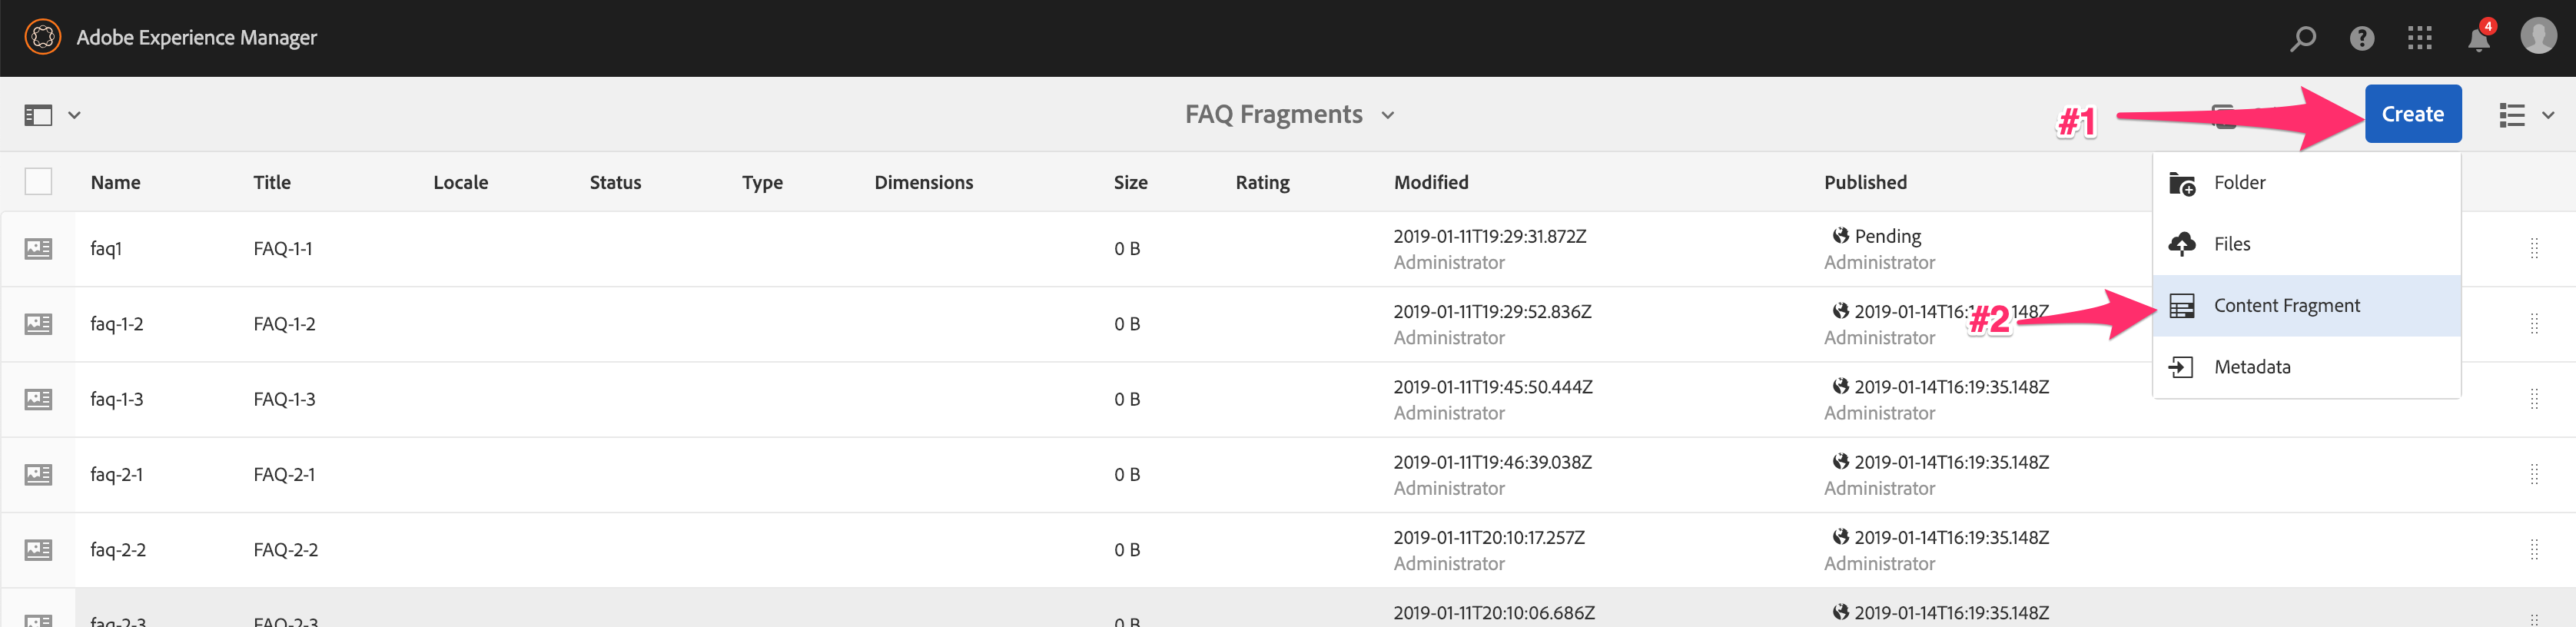
There are two ways you can get to the content fragments:
Navigate to: http://localhost:4502/editor.html/content/we-retail/us/en/api/speakers.html
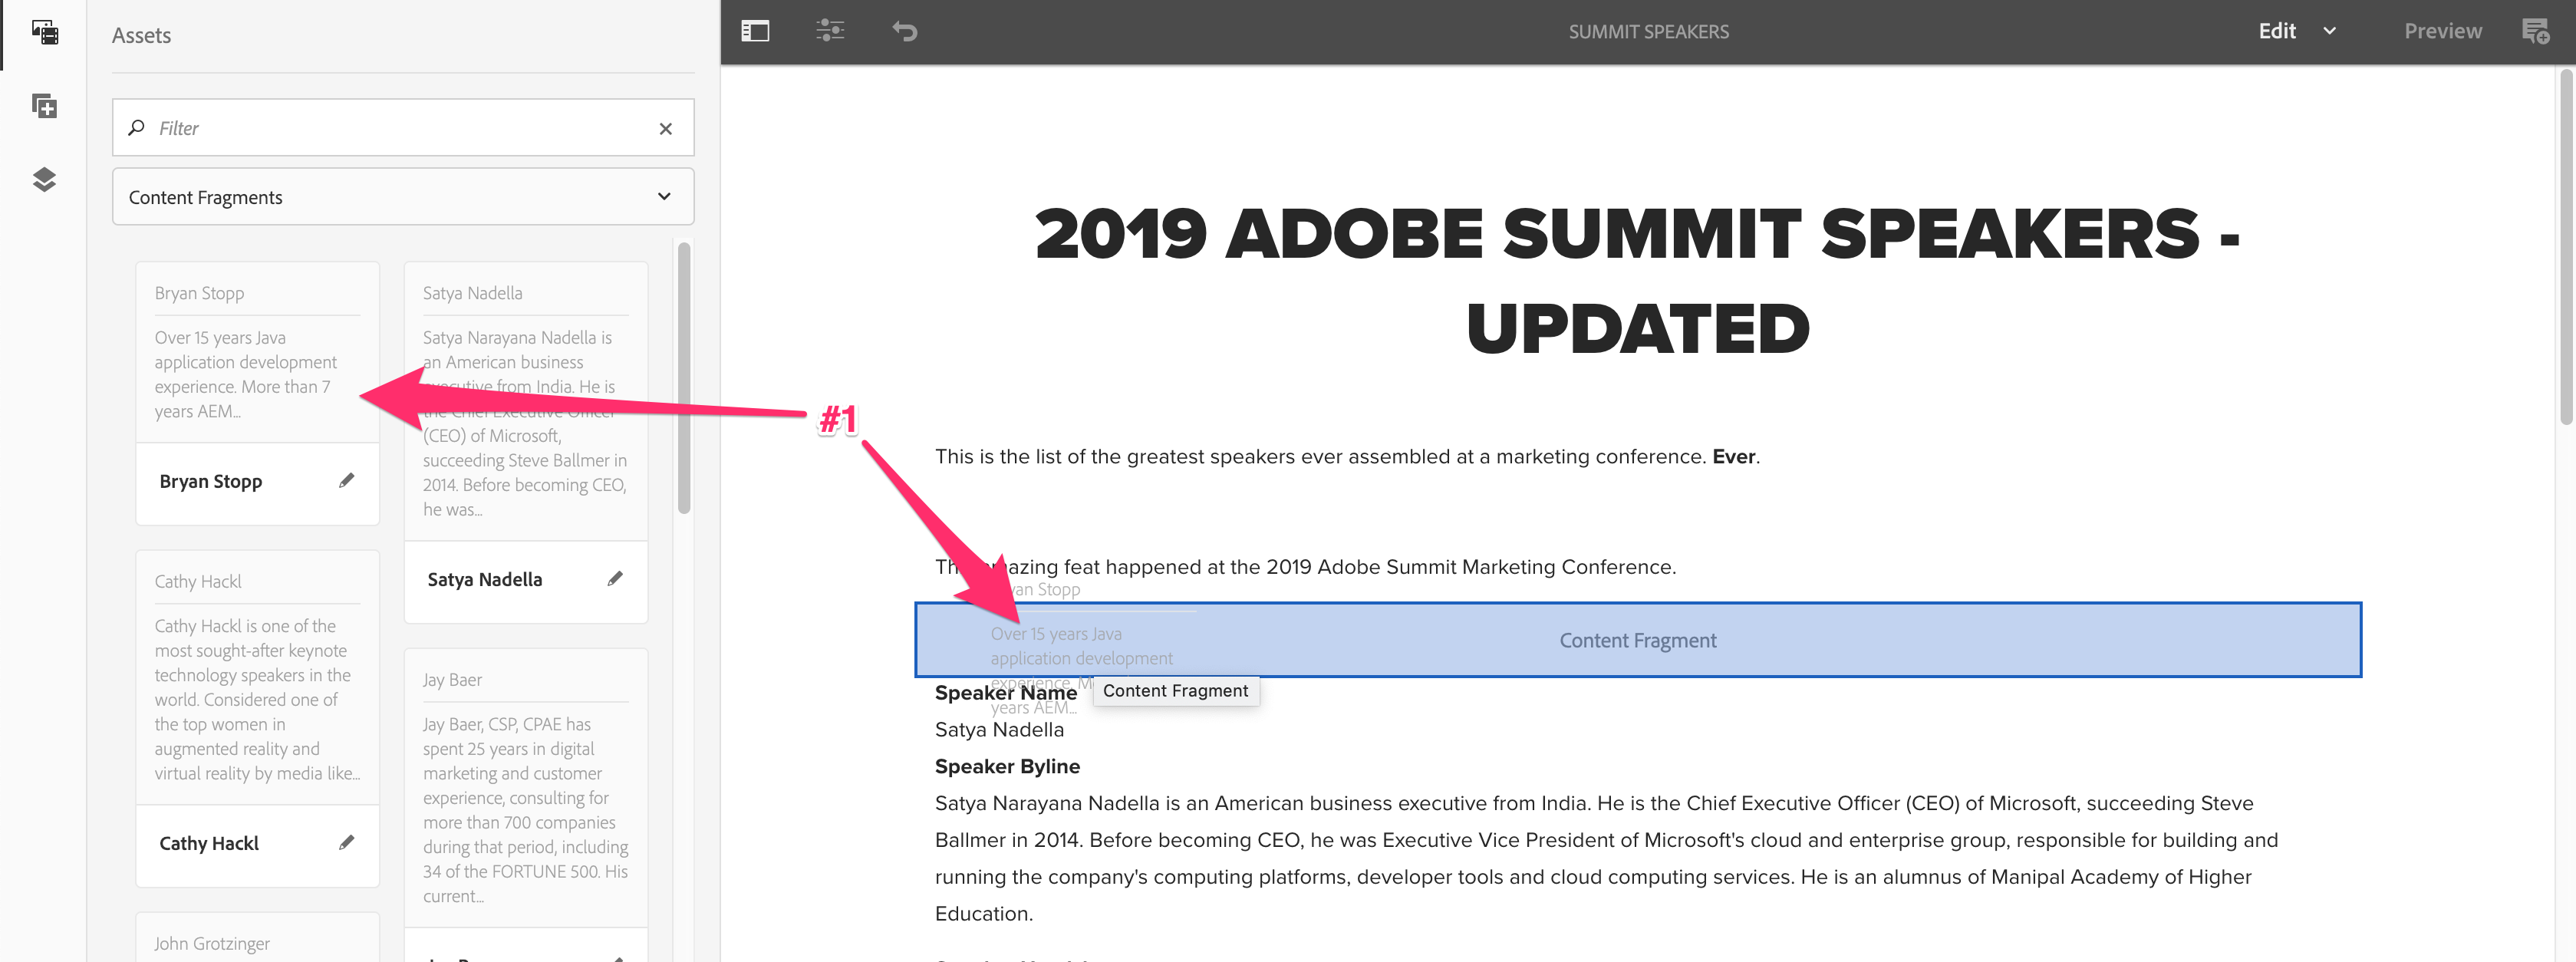
To make any changes, you need to first be in Edit Mode in the Authoring interface:

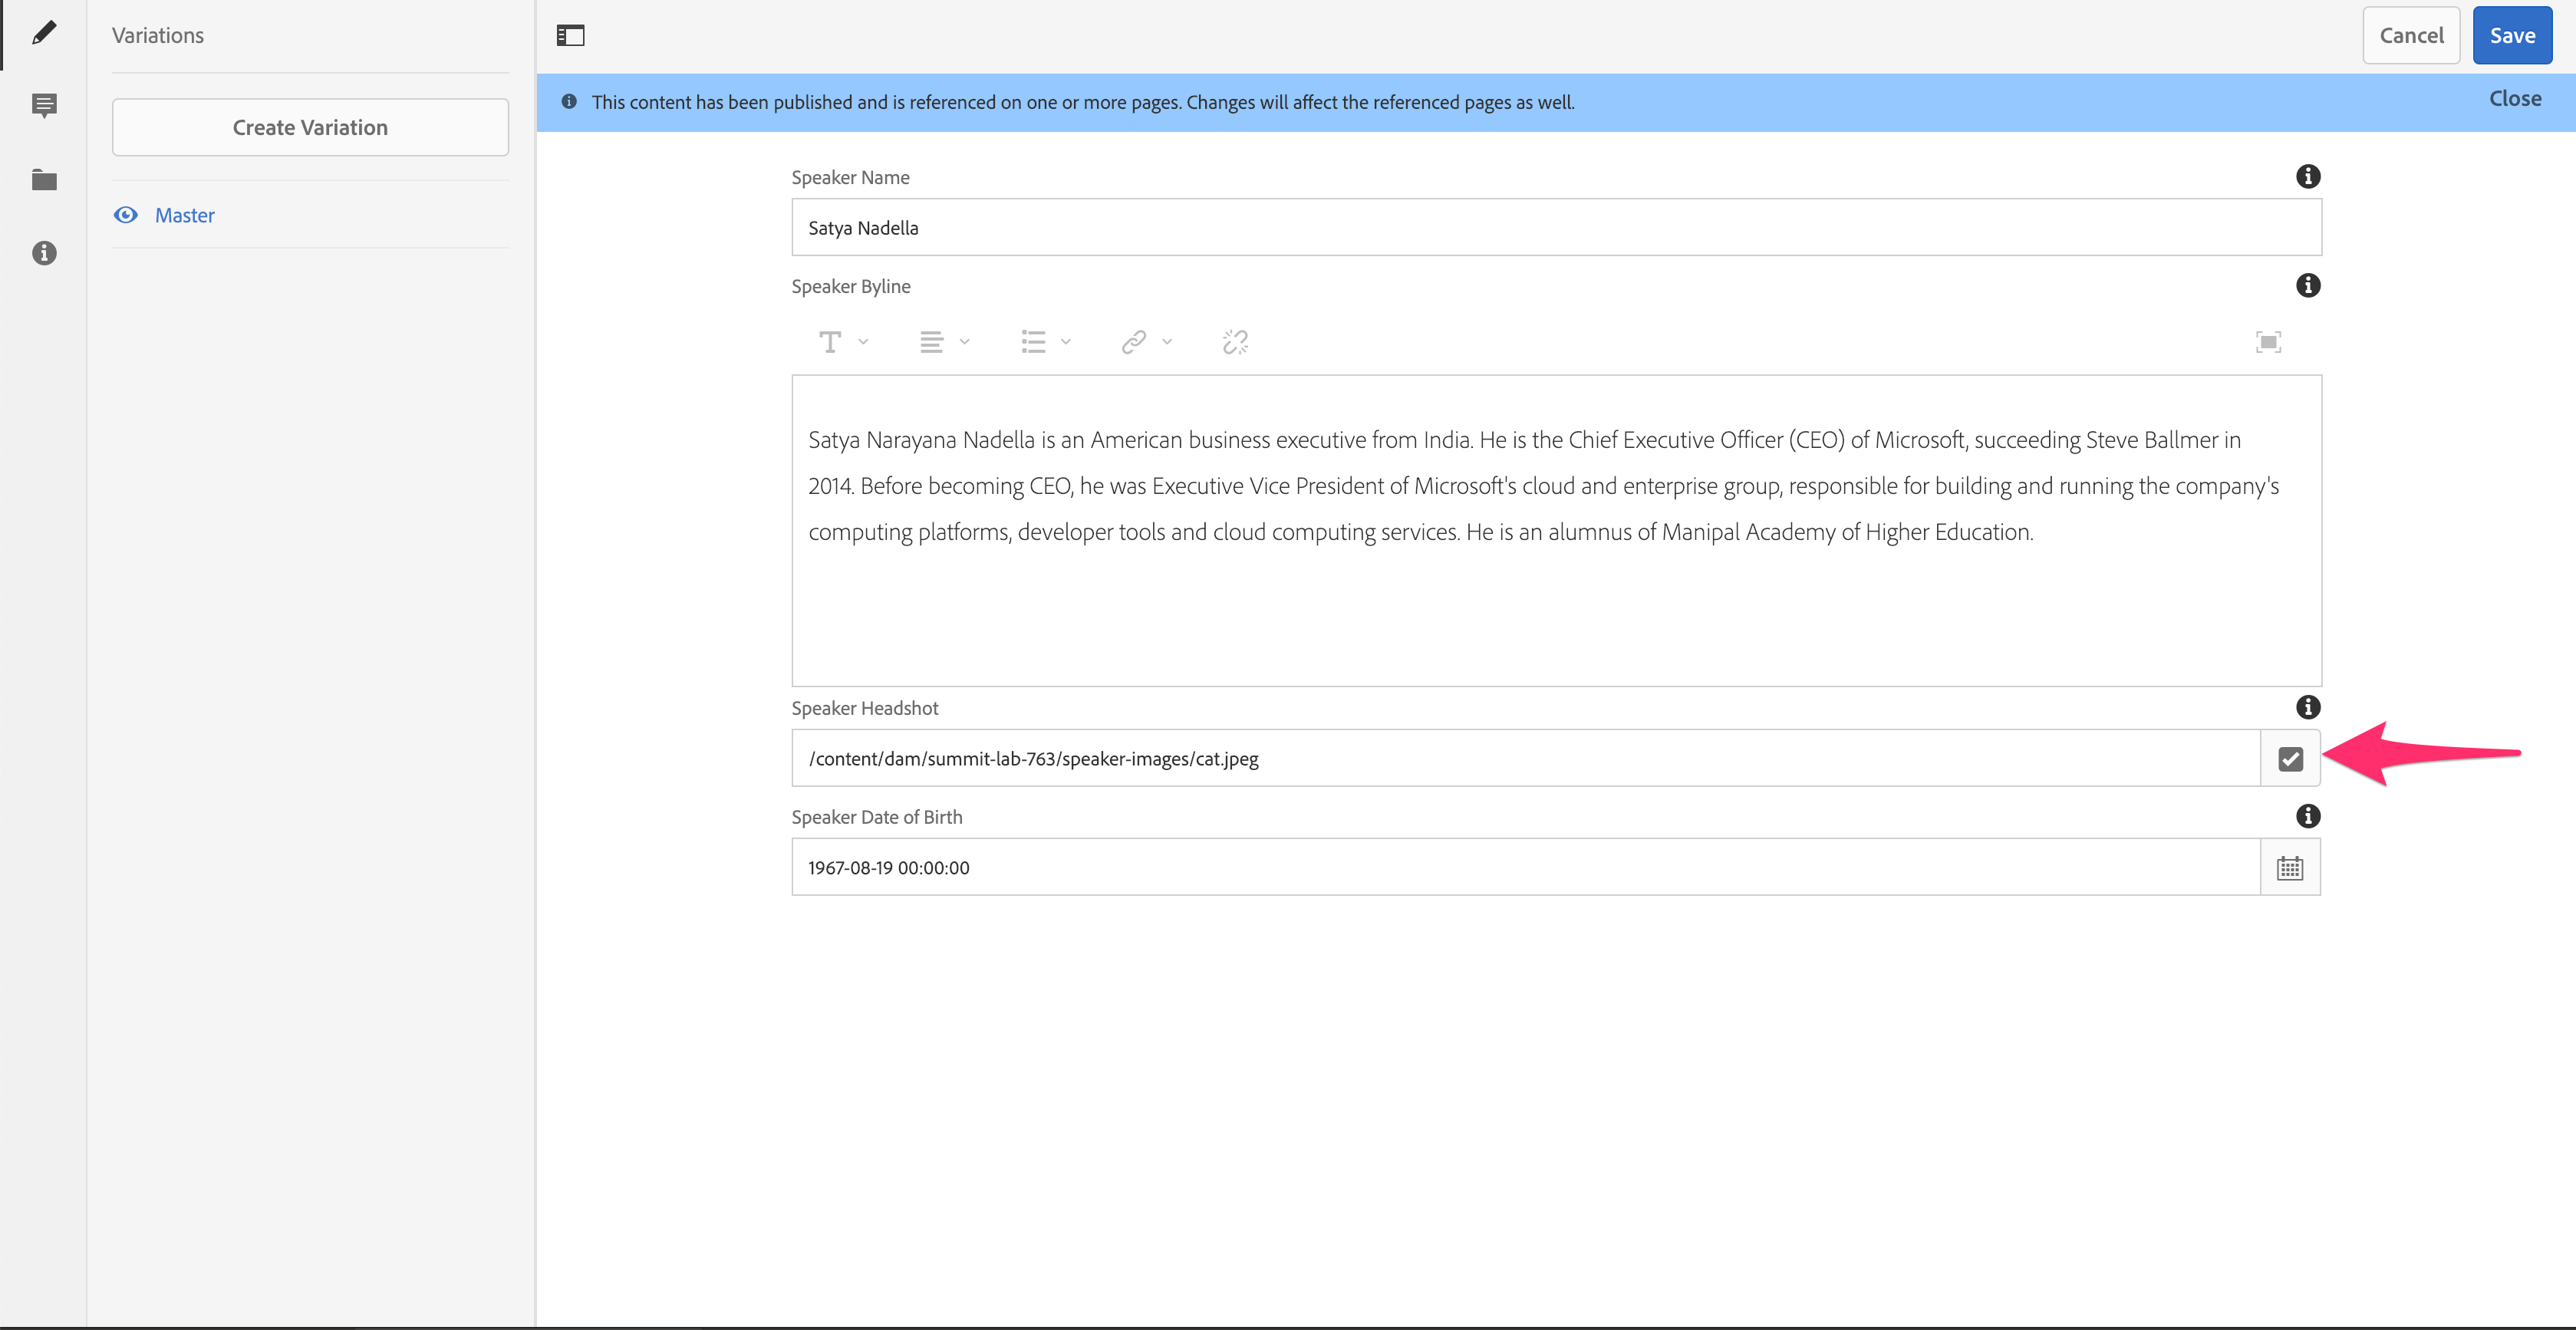
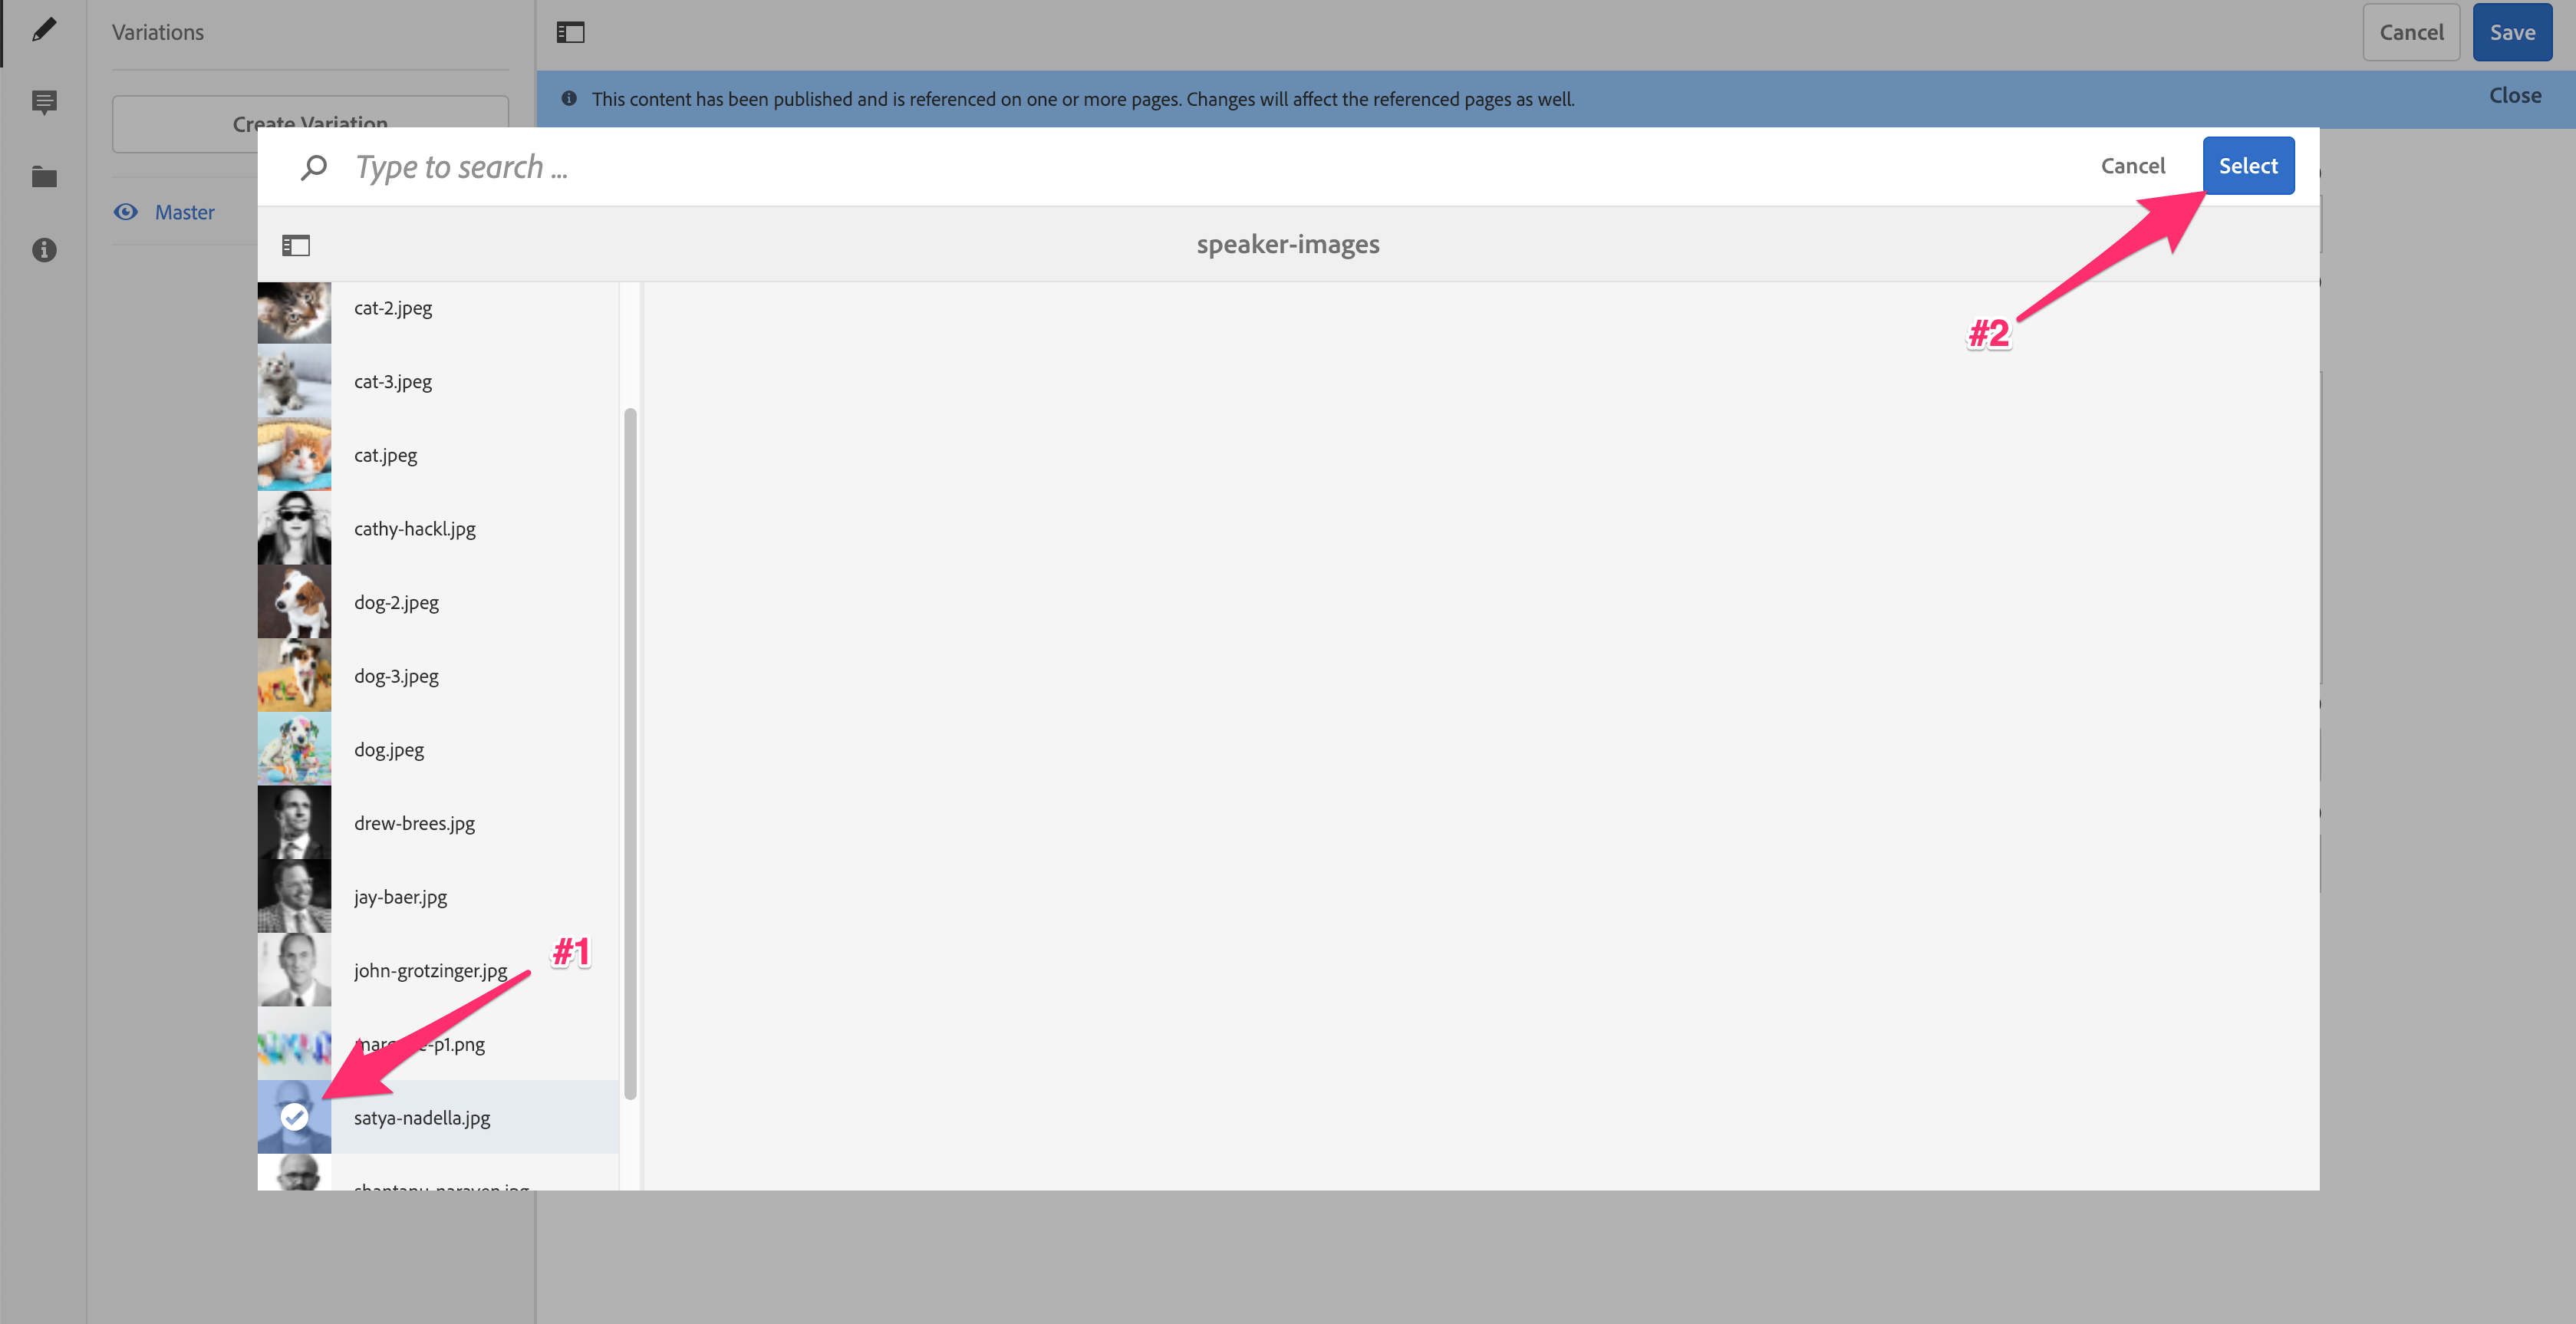
Note: When selecting the image, please click on the thumbnail of the image and then click on "Select" button located in the top right corner of the modal.

From the top-left menu, publish your changes by clicking on "Publish Page" menu option as shown below:
Now you should see right images show up in the mobile app when you navigate to the Summit Speakers Menu item as shown below:
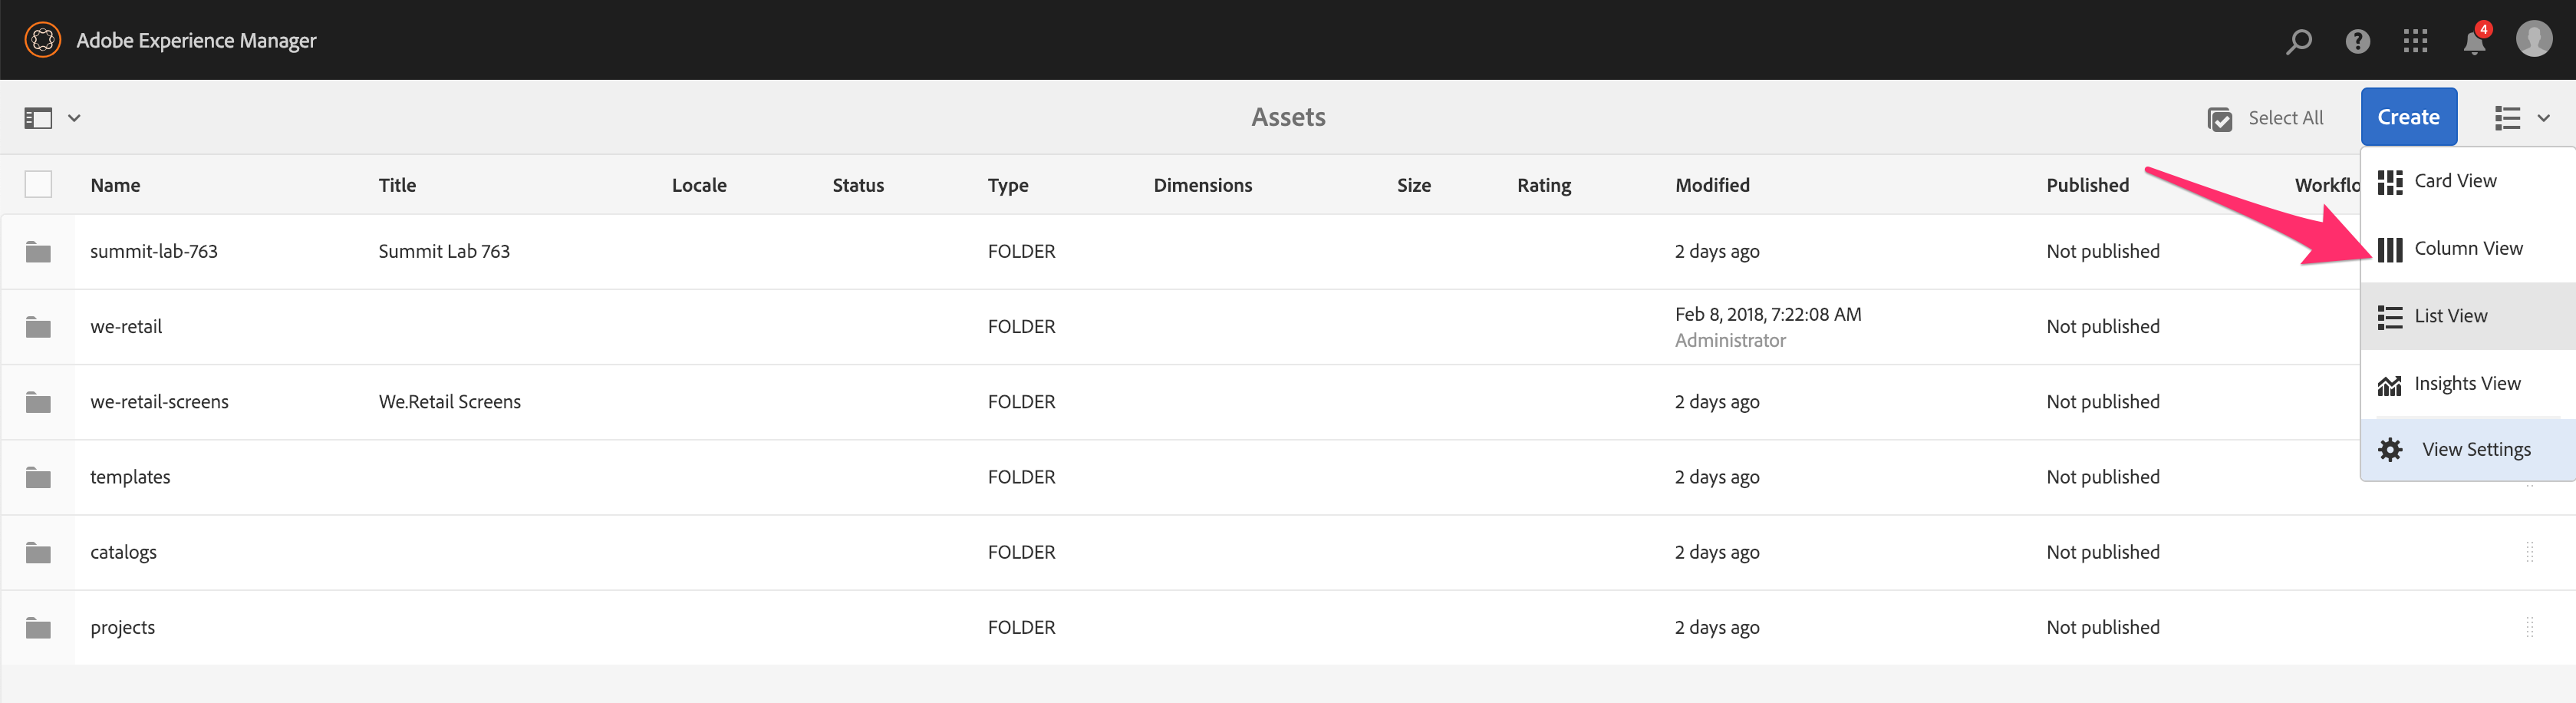
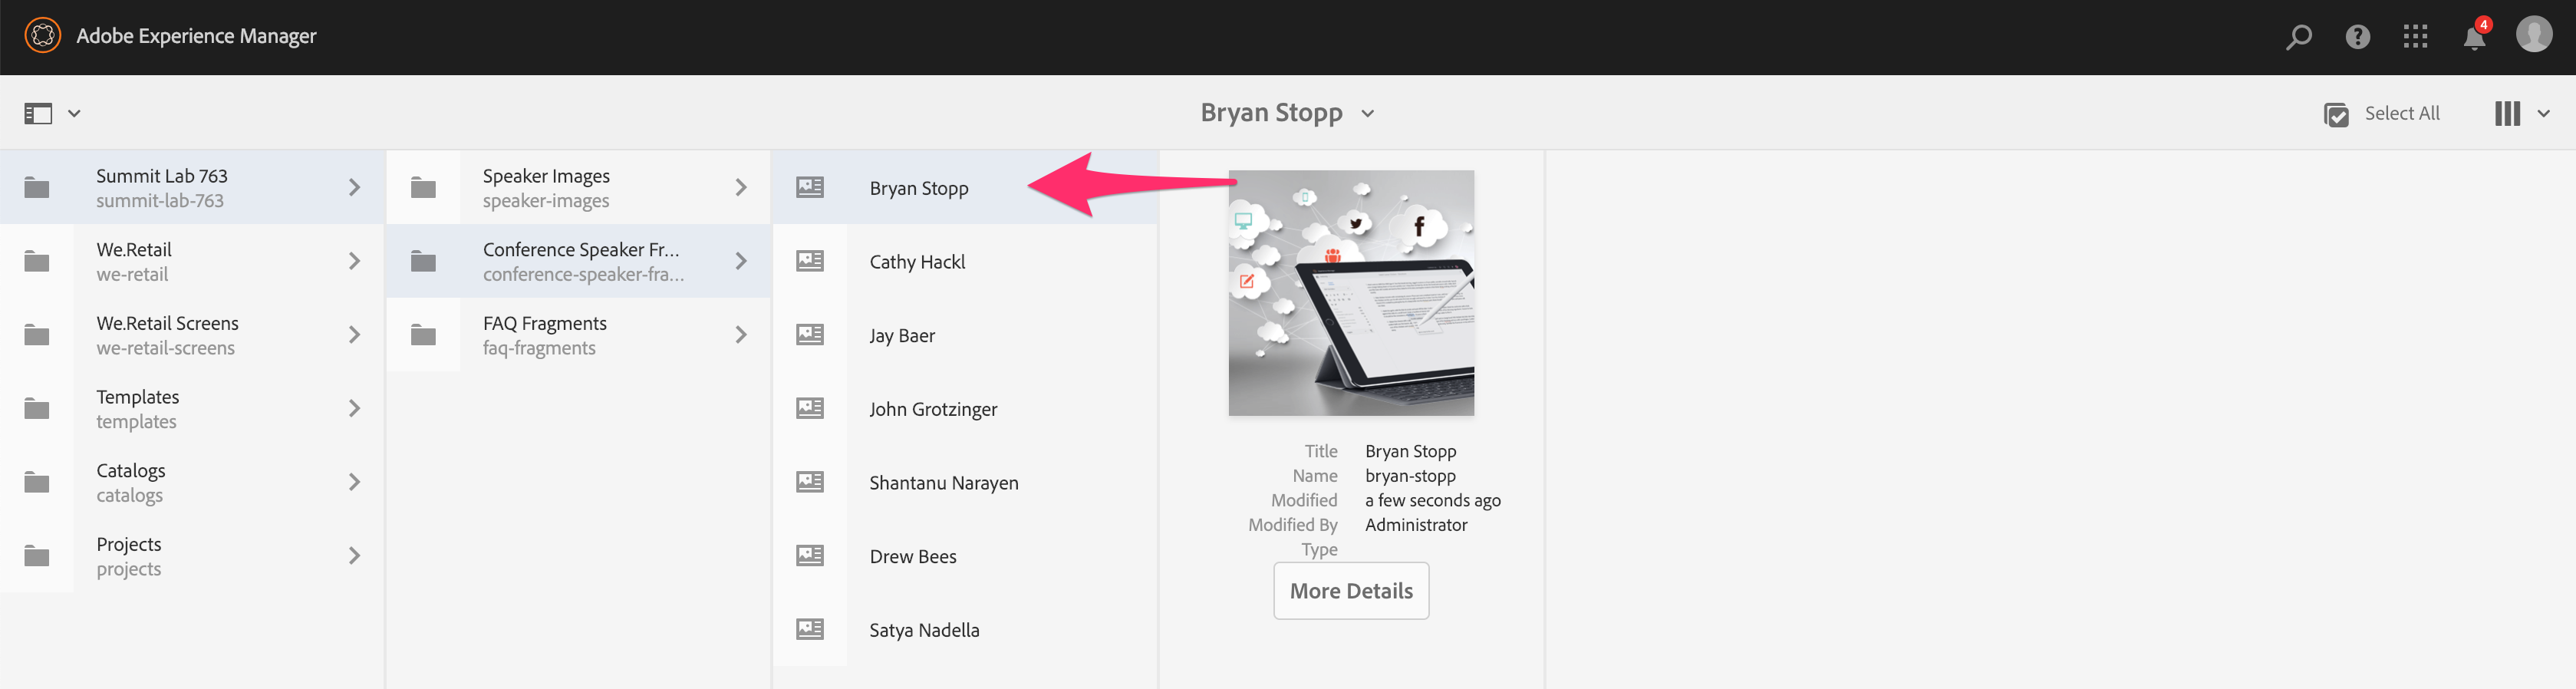
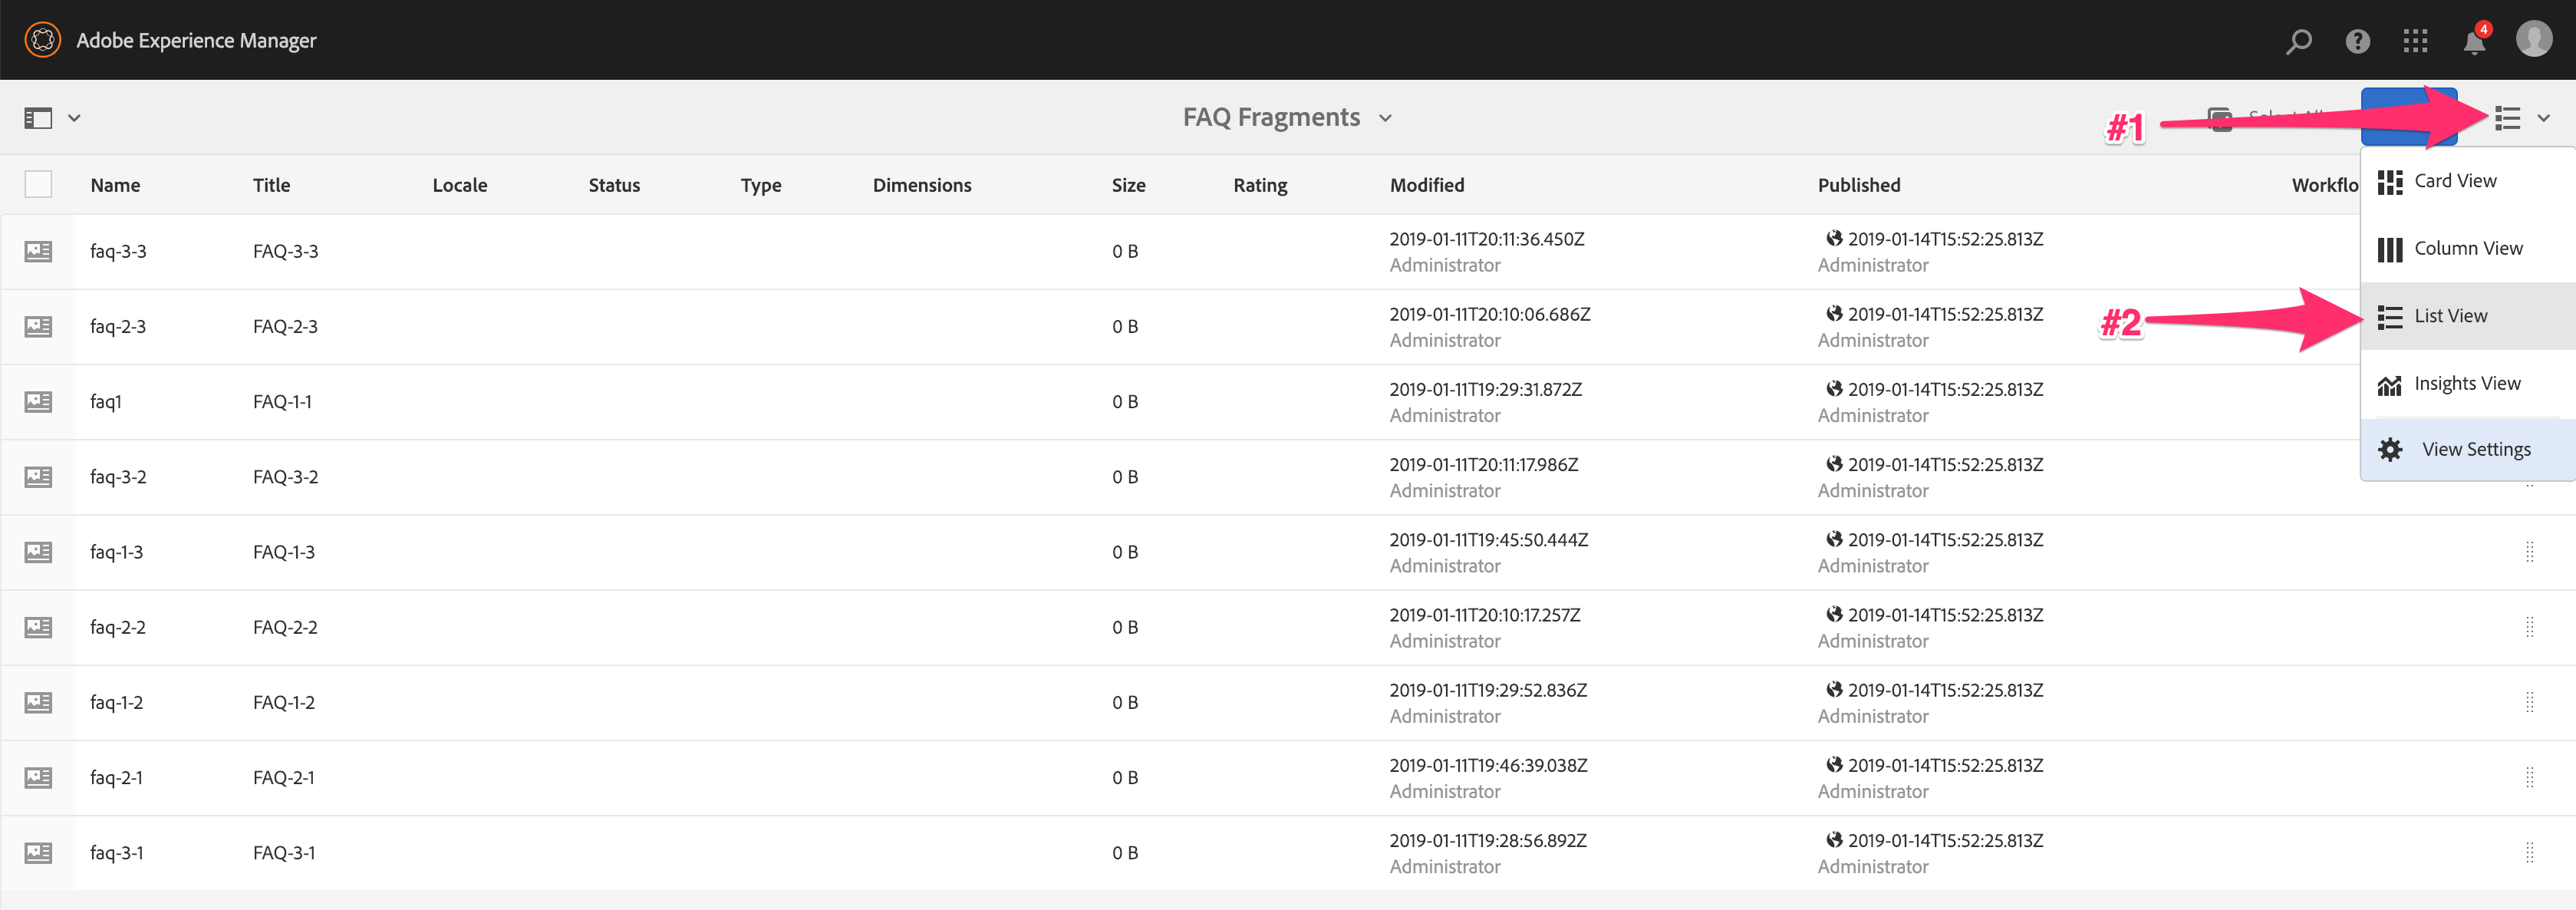
Alternately, you can browse to the folder in the Assets console and edit the content fragments directly there as shown below:

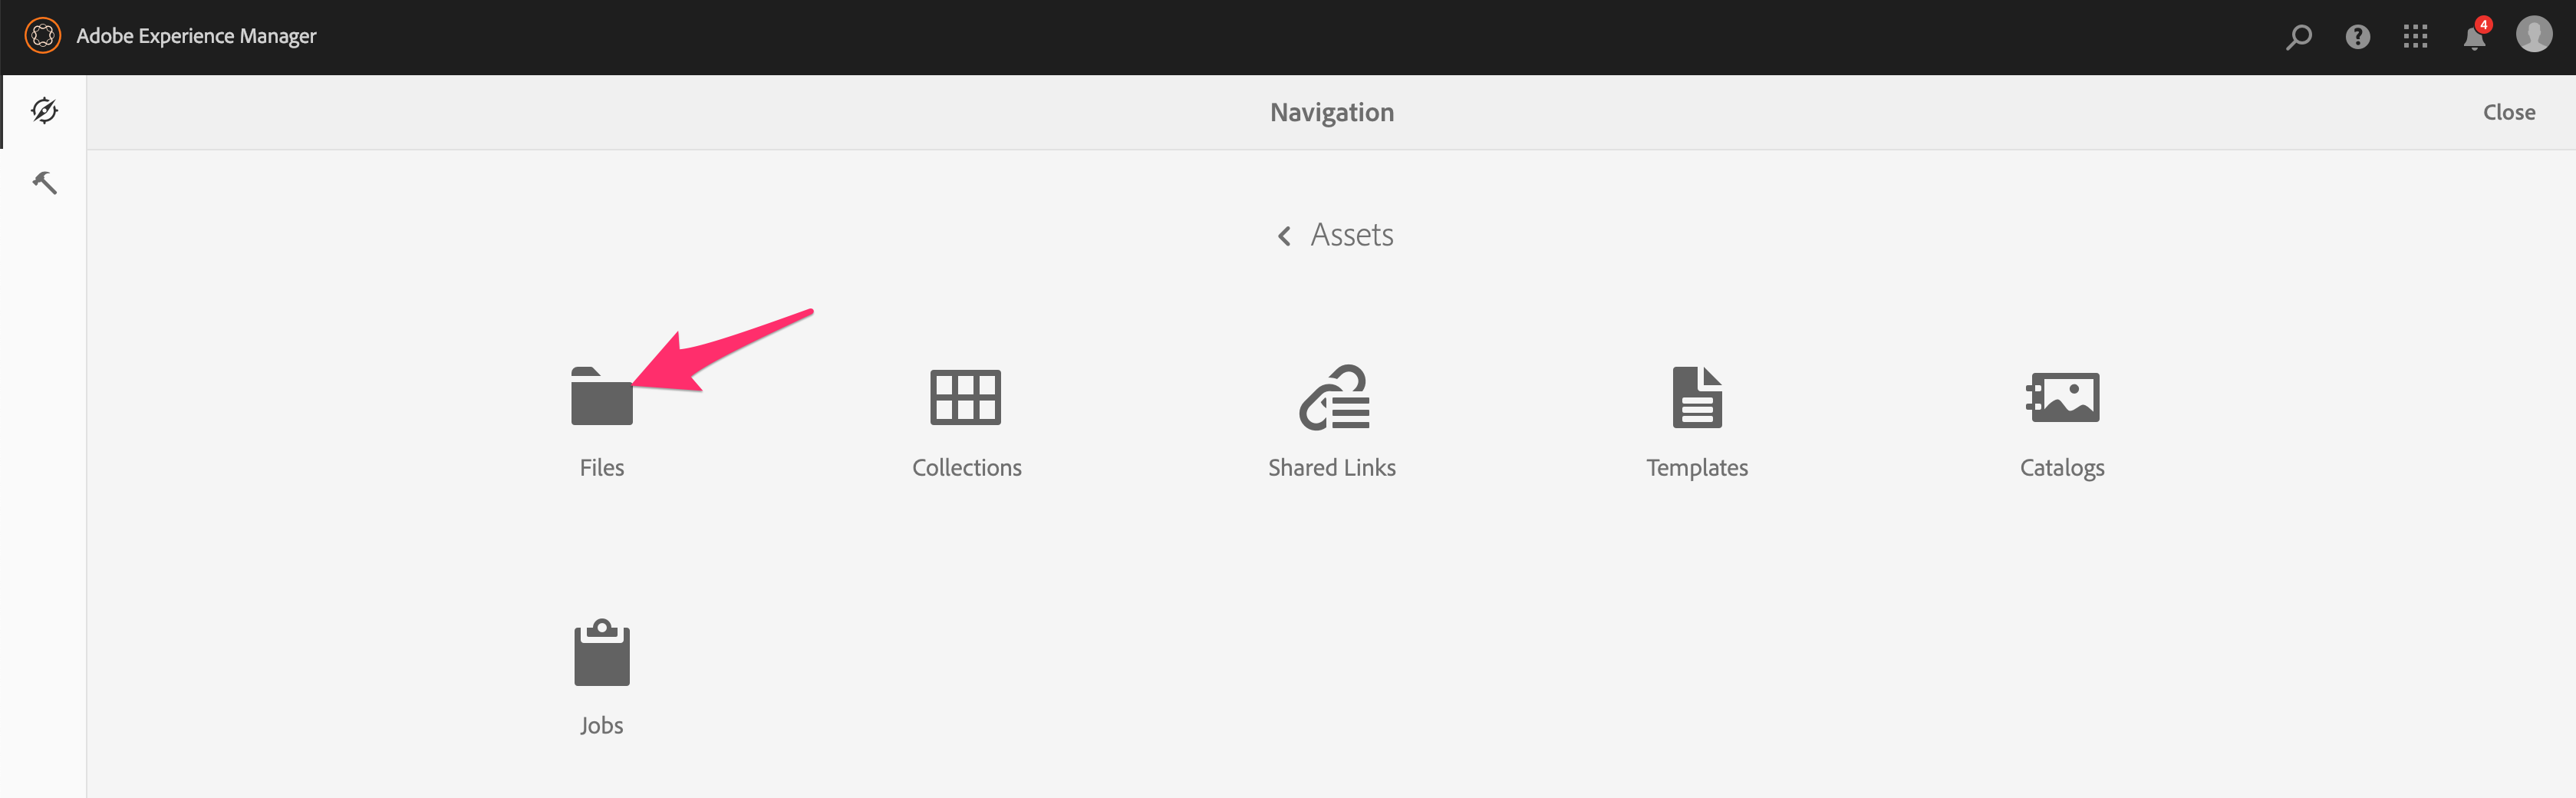
Note: The fastest way around content in AEM is using column view. Select Column View in your view options as shown below:
Now you should see right images show up in the mobile app when you navigate to the Summit Speakers Menu item as shown below:
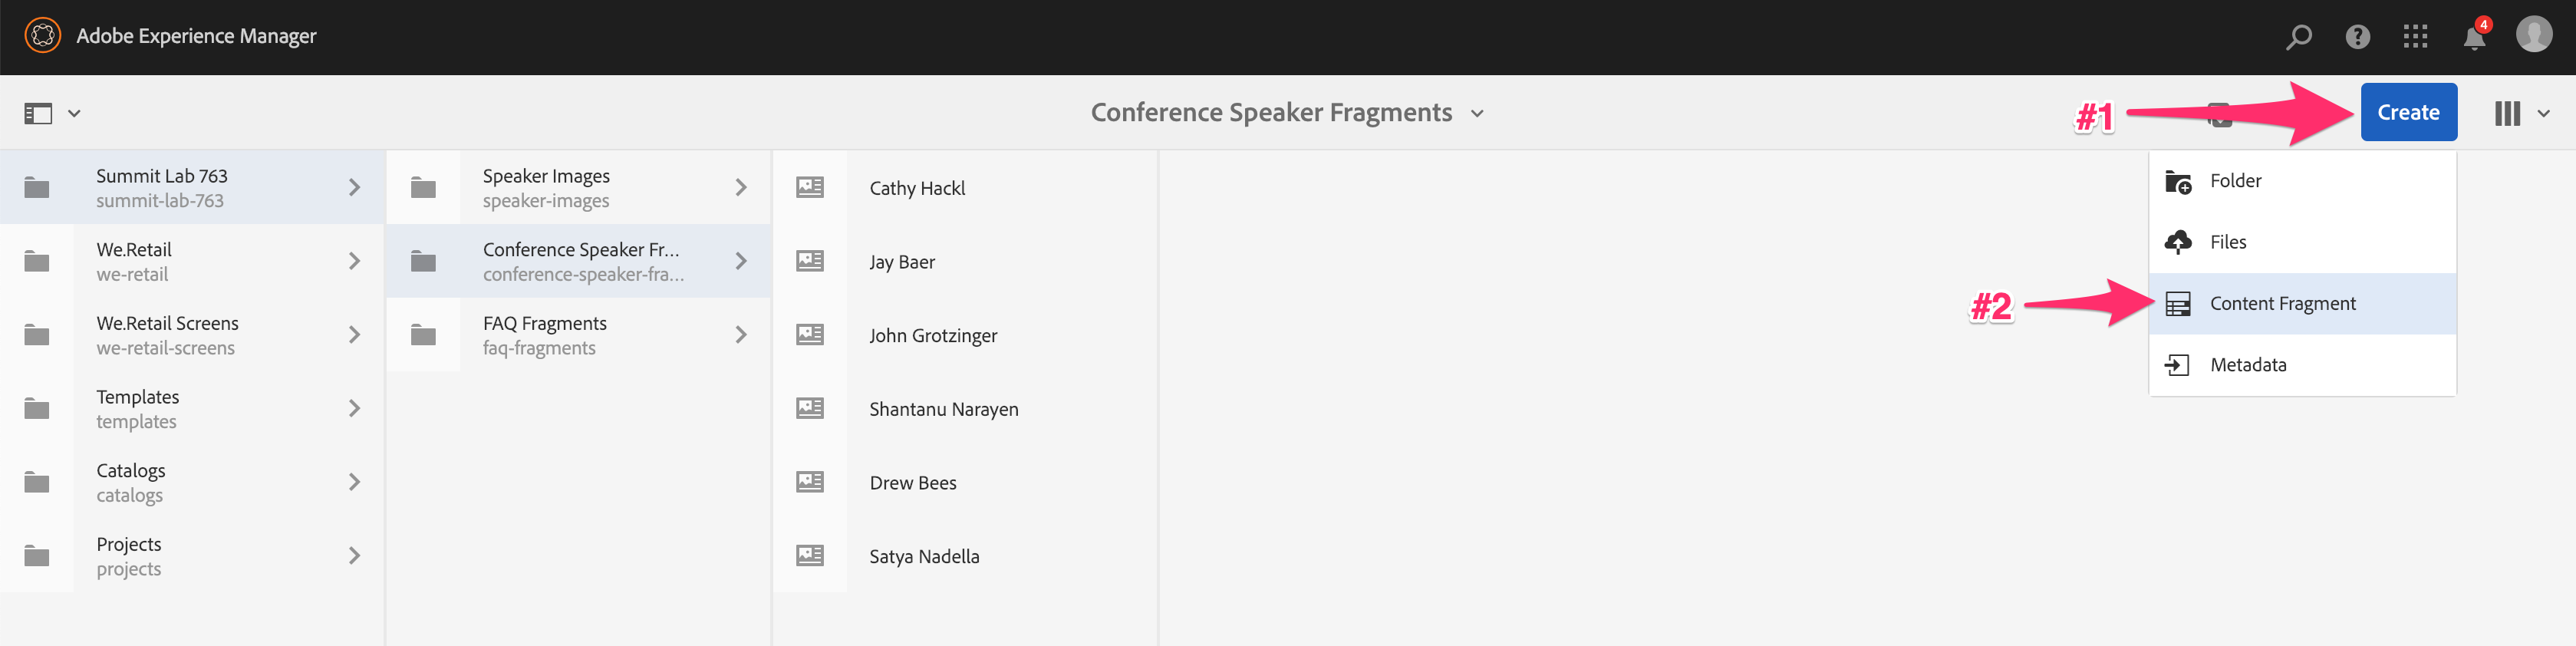
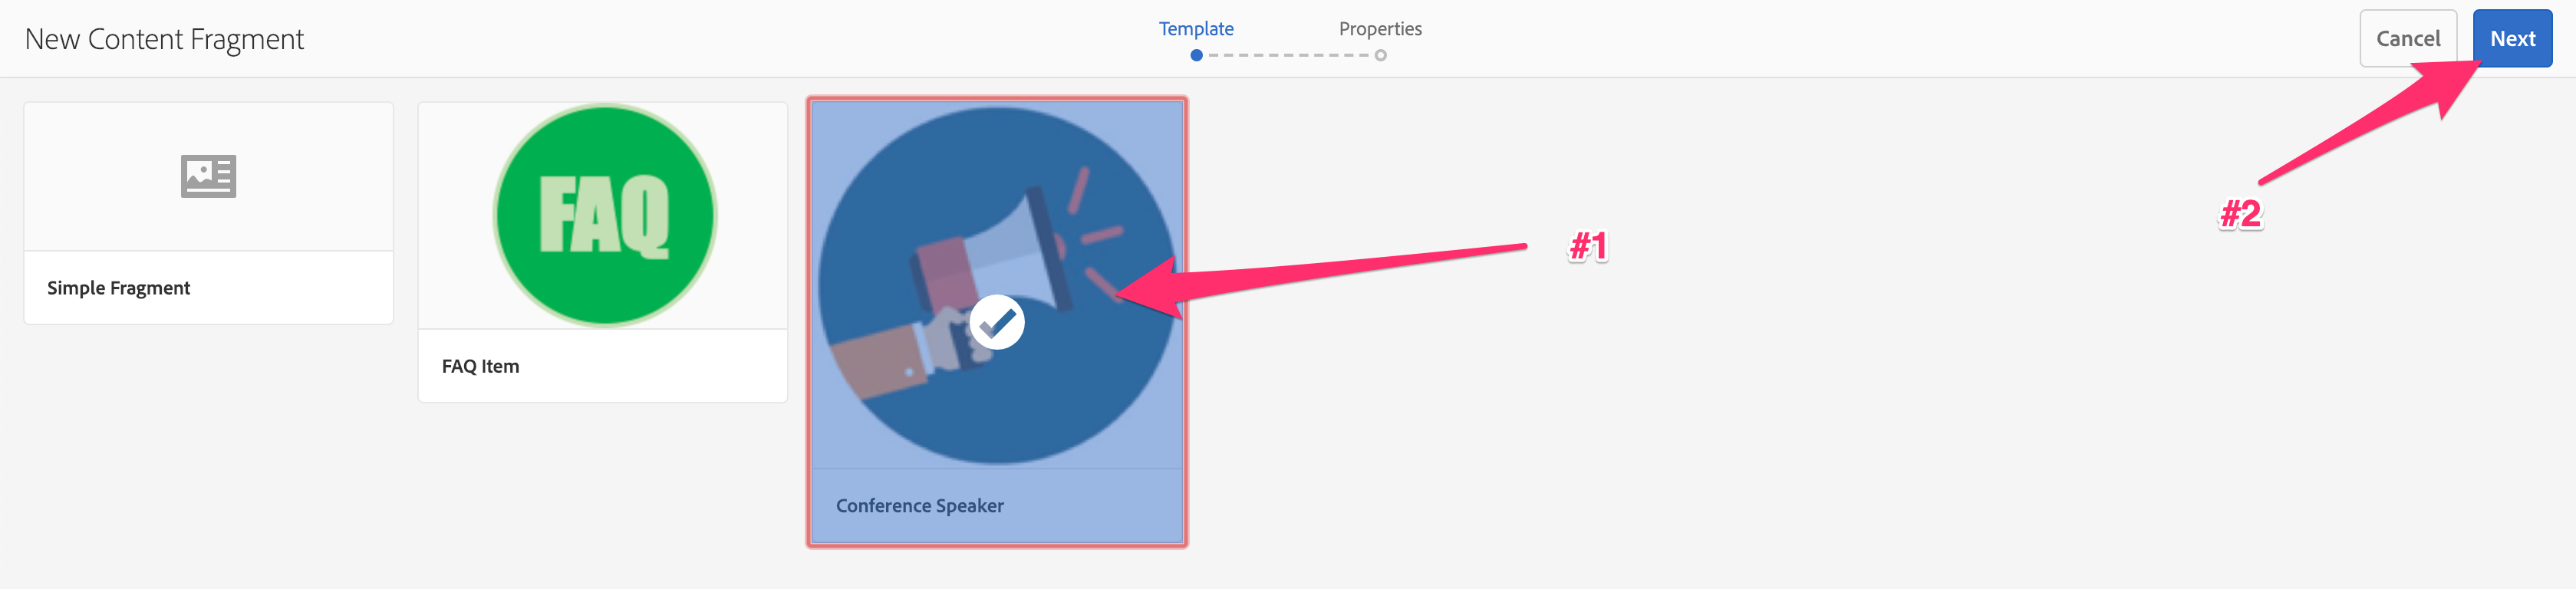
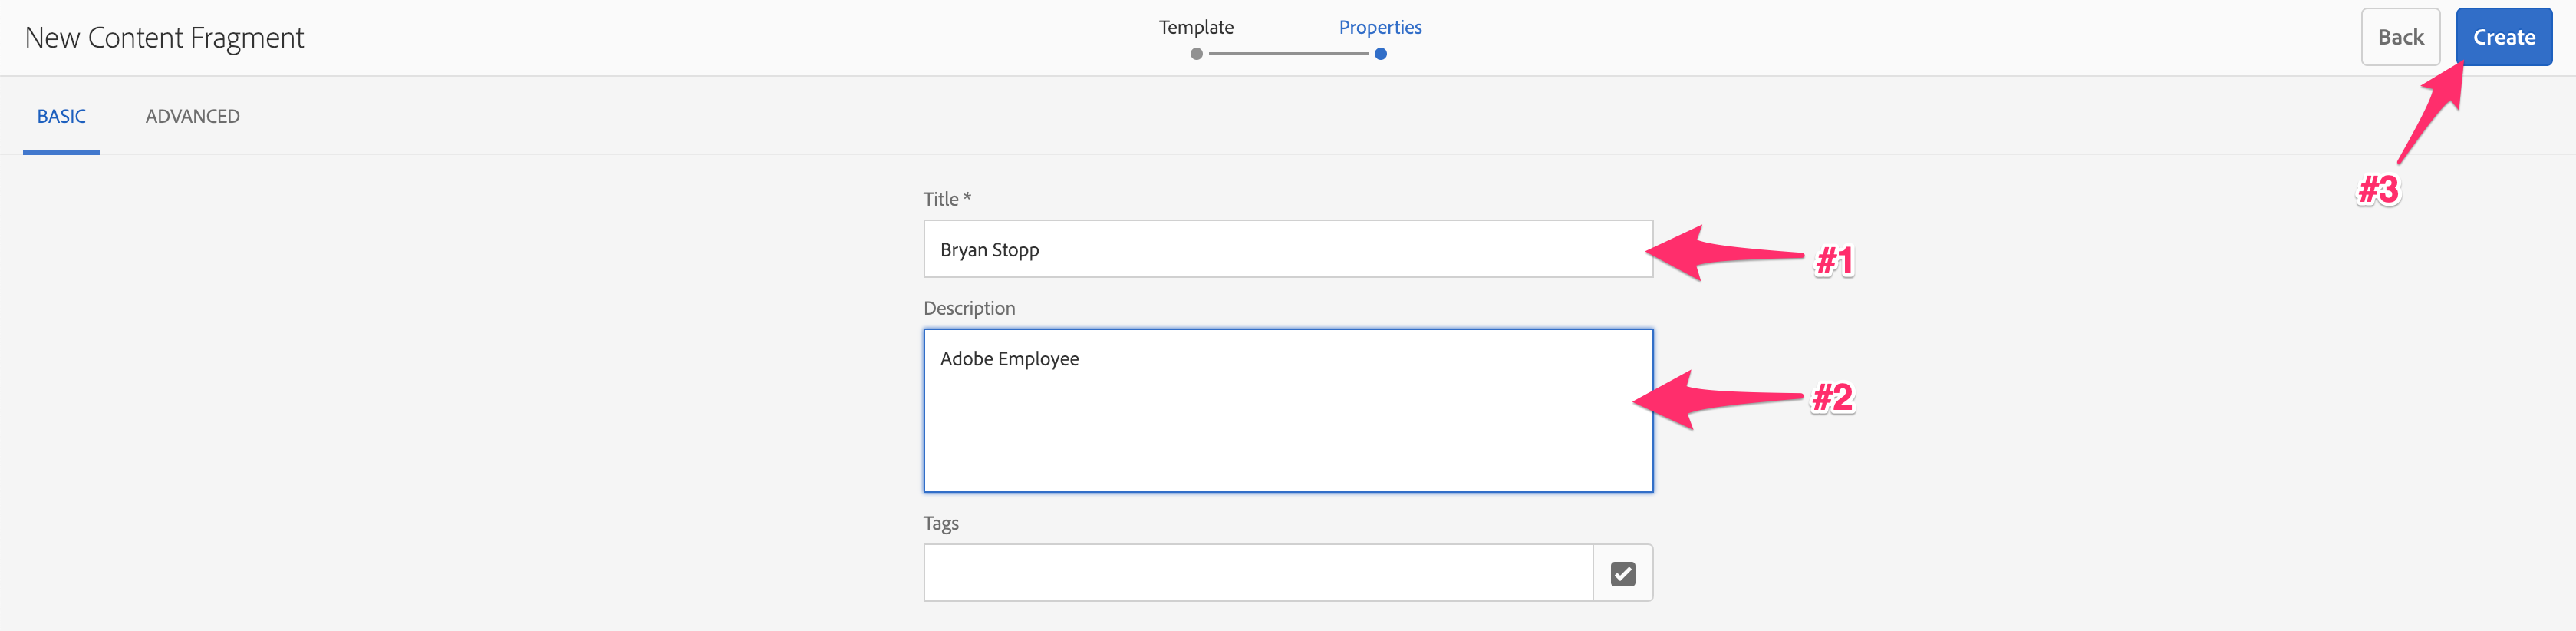
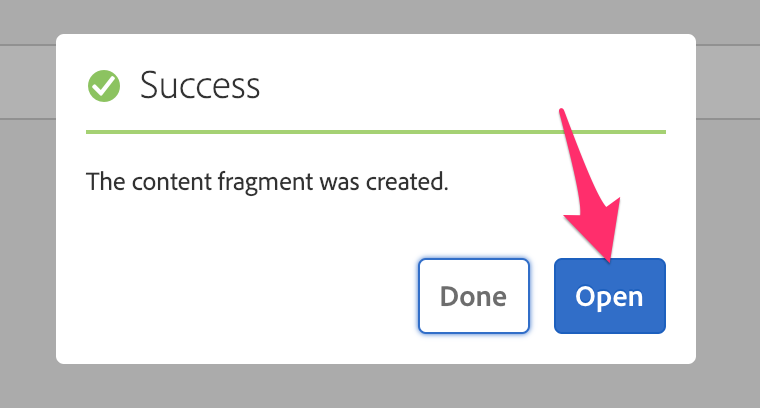
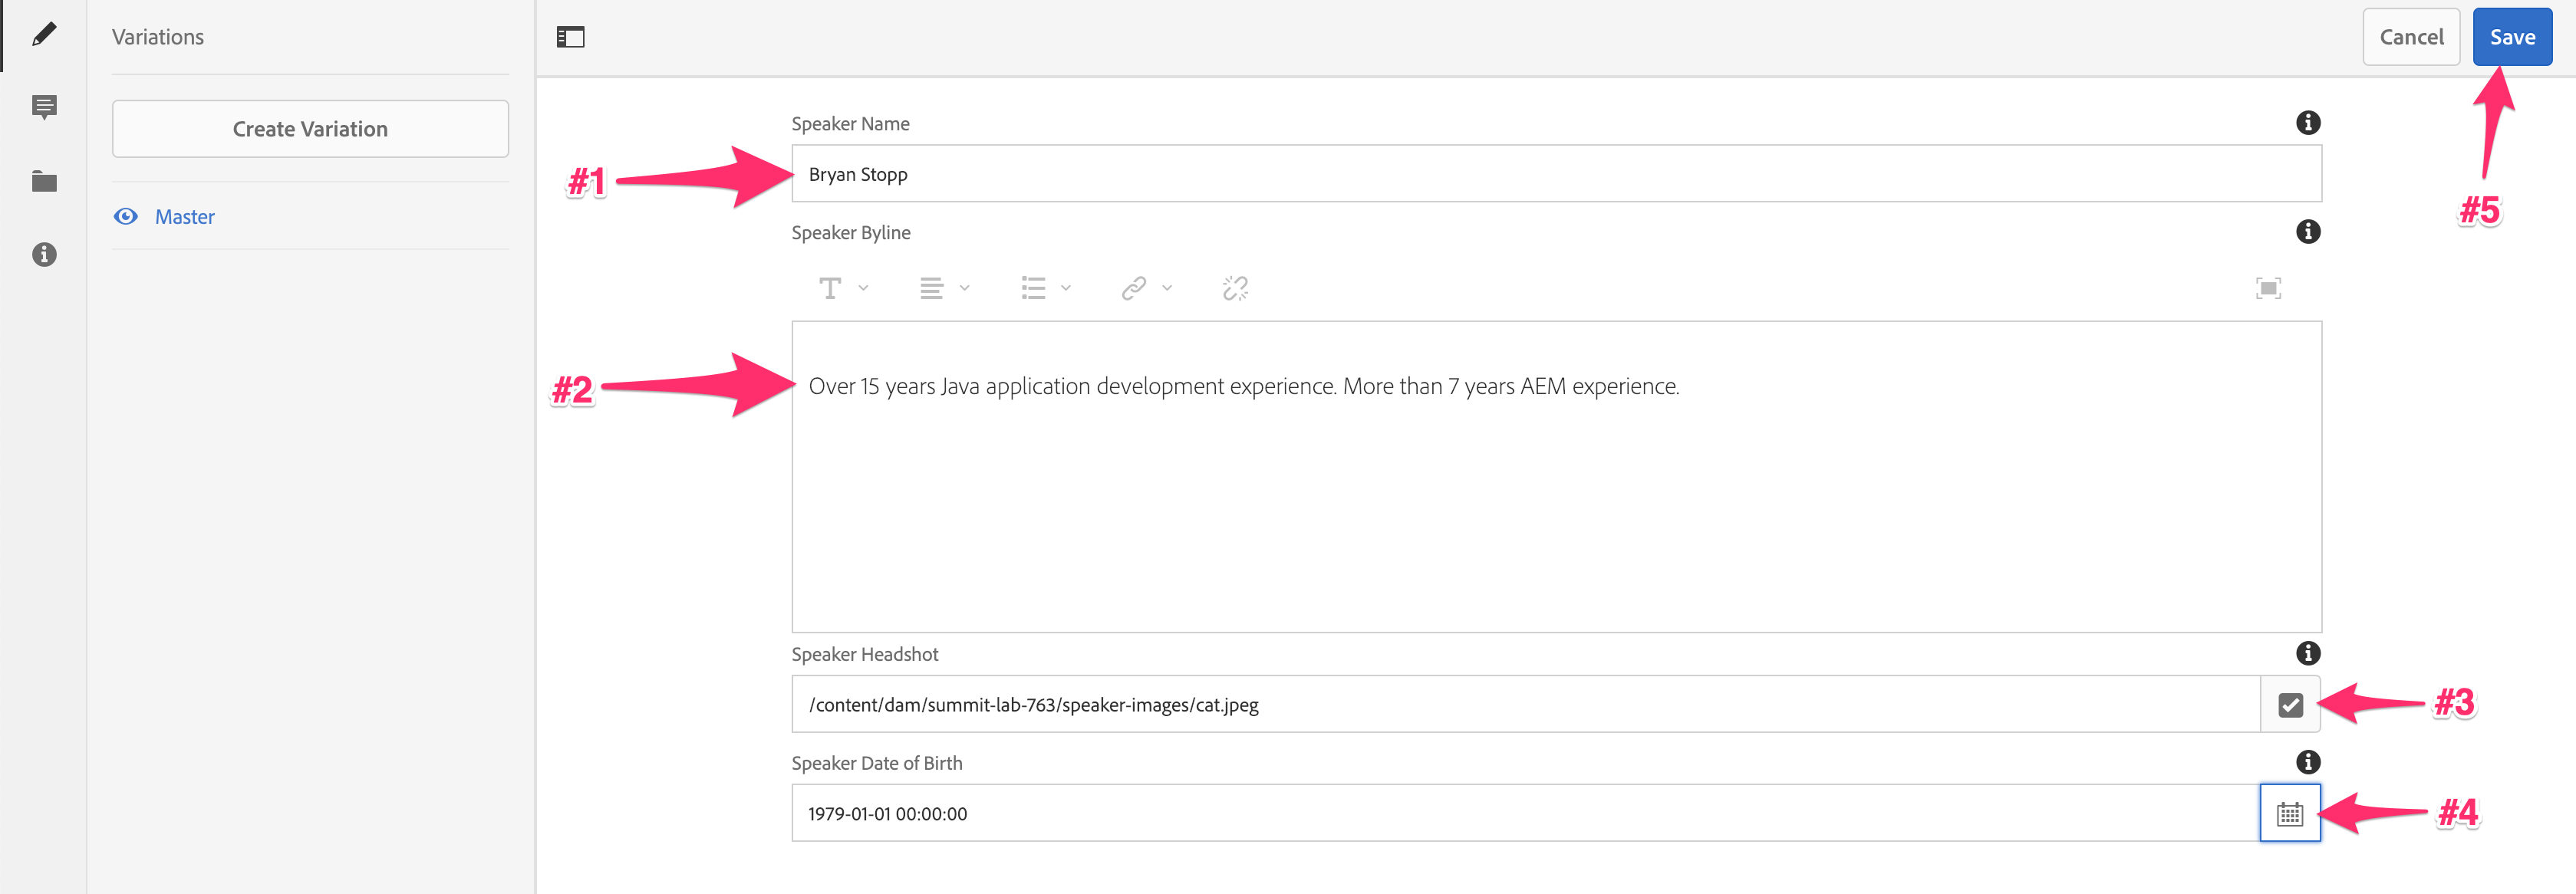
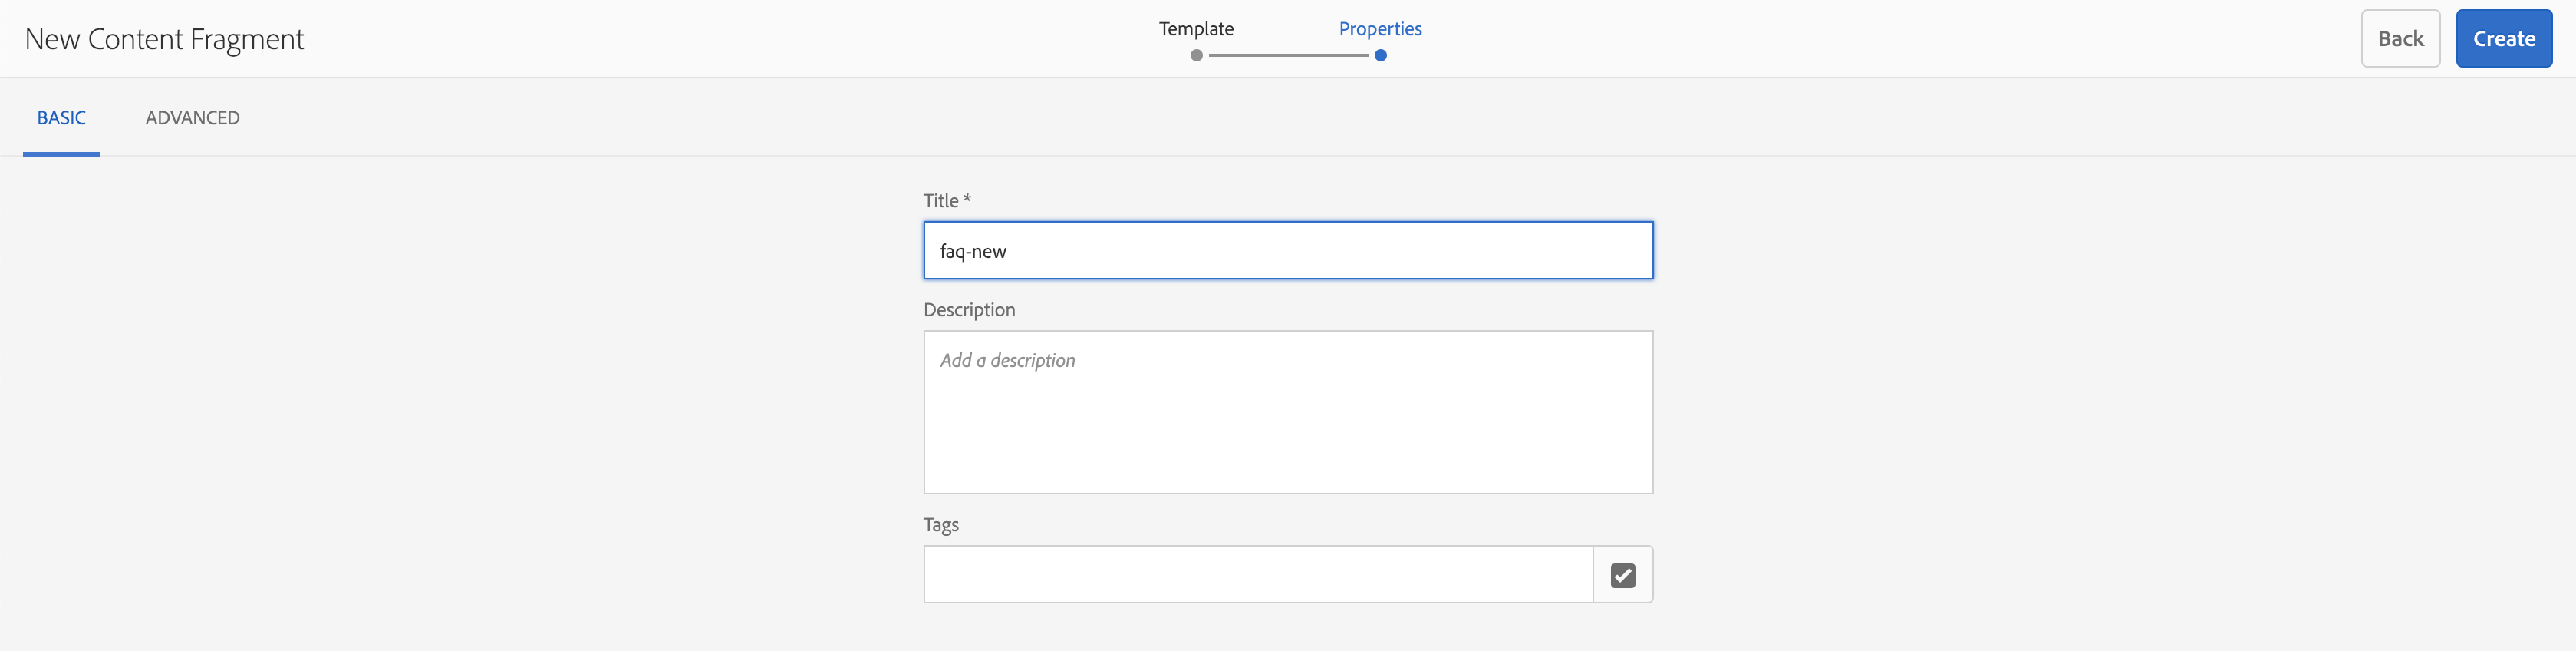
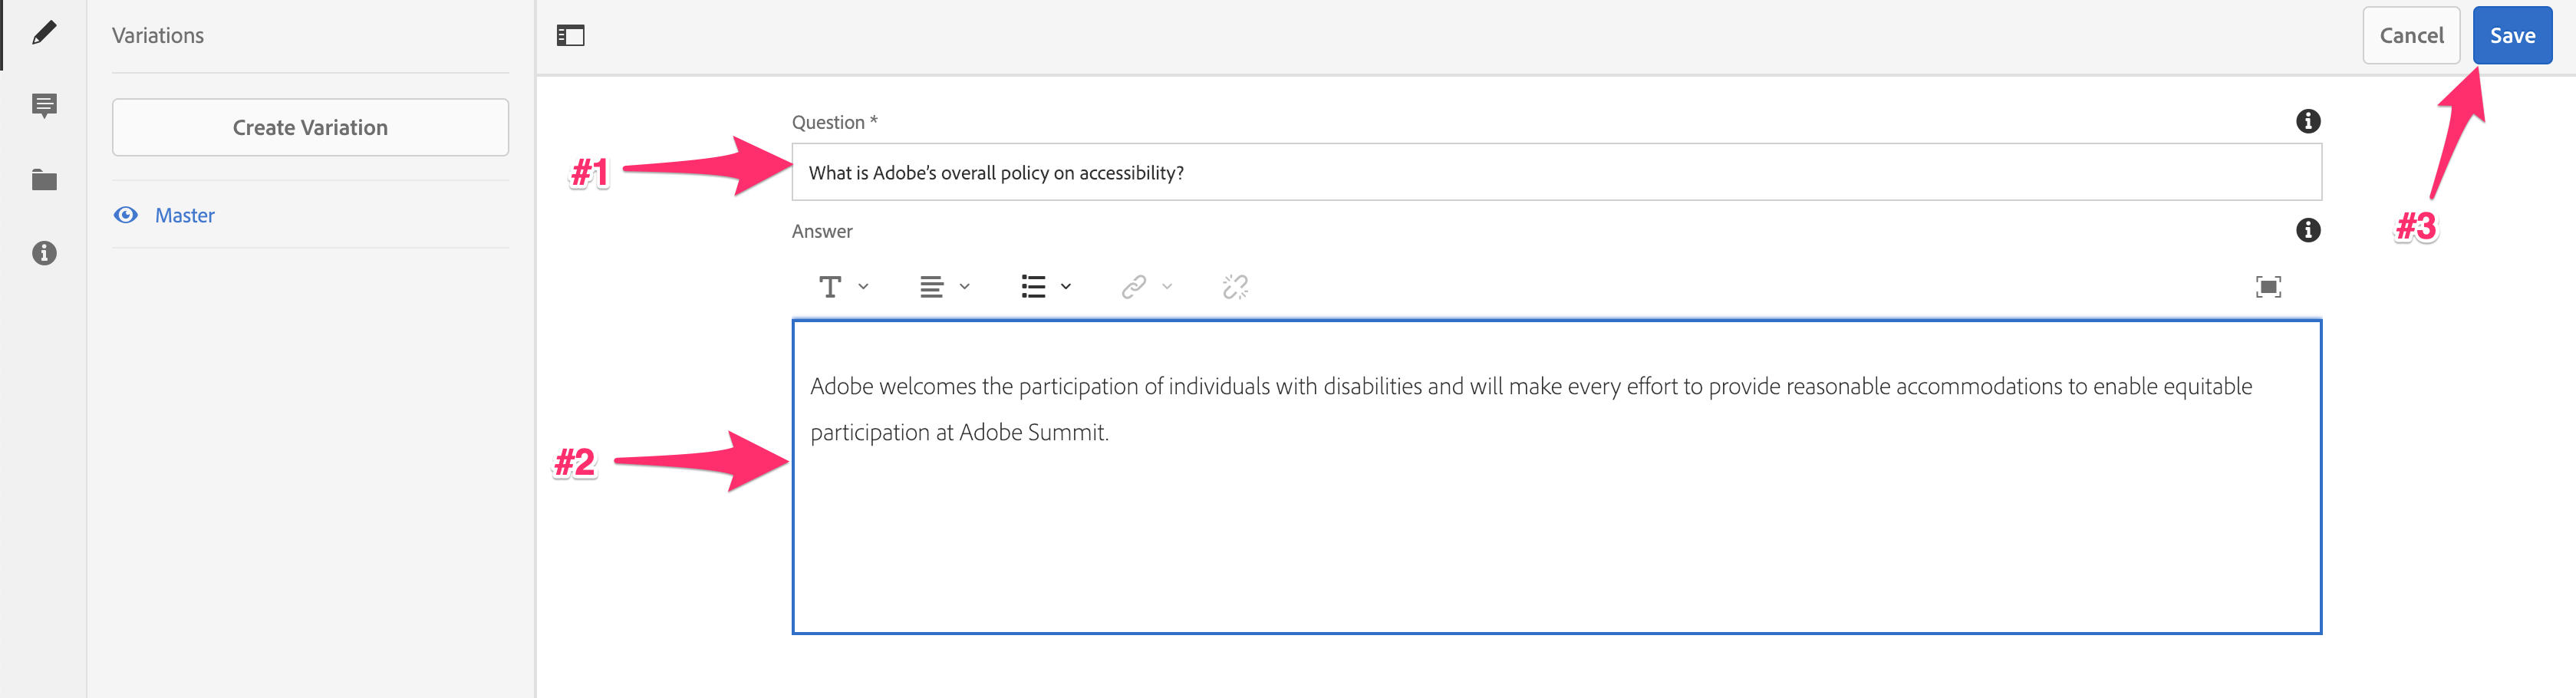
Have you ever wanted to be a Summit Speaker?? Today is your lucky day! This activity involves the following steps:
From the top-left menu, publish your changes by clicking on "Publish Page" menu option as shown below:

Now when you preview the changes in the mobile app, you should see the latest speaker show up on top.
This lesson covers headless delivery of content in AEM Assets via the Assets HTTP API. In this case we will explore the differences between the Content Fragment API page exposed model and the Assets API model.
Assets HTTP API - The Adobe Experience Manager (AEM) Assets HTTP API allows developers to access content (stored in AEM) directly over the HTTP API, via CRUD operations (Create, Read, Update, Delete).
The API allows you to operate AEM as a headless CMS (Content Management System) by providing Content Services to a JavaScript front end application. Or any other application that can execute HTTP requests and handle JSON responses.
Compare the Content Fragment API Page model JSON with JSON exposed by the Assets REST API and view the differences.
First let's look at the content we are trying to expose in HTML. Follow the link below to look at the FAQ HTML.
Follow the link below to look at the FAQ API Page JSON.
Note: Look at all of the additional properties of the page and it's children Content Fragment components. These are properties of the page and components, which aren't necessary for most consuming applications.
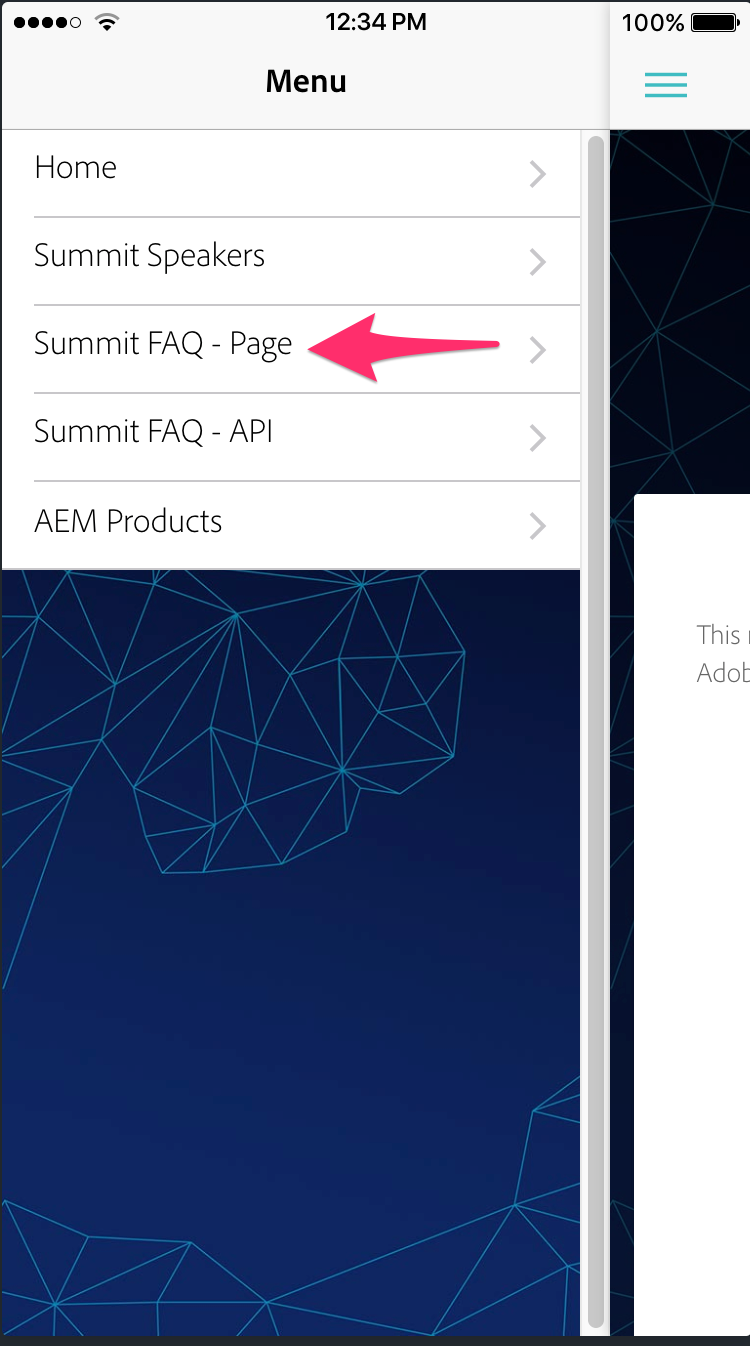
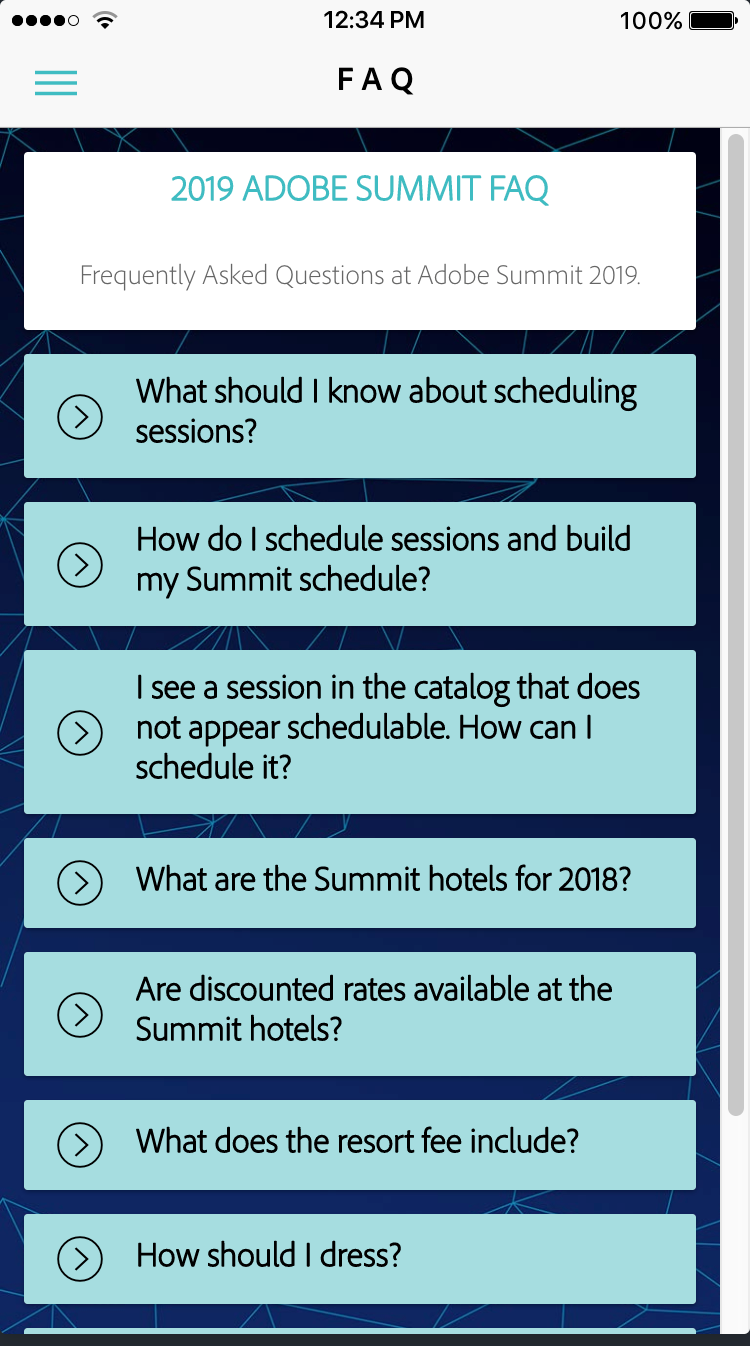
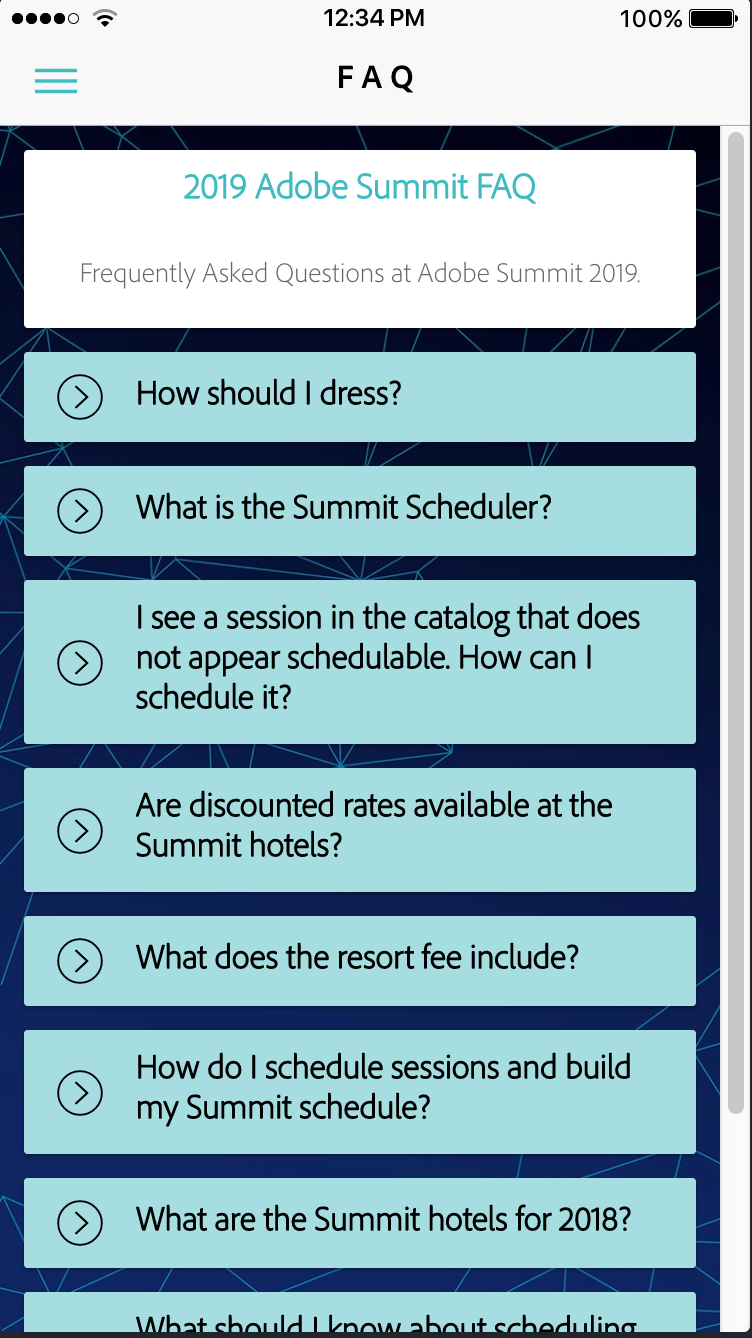
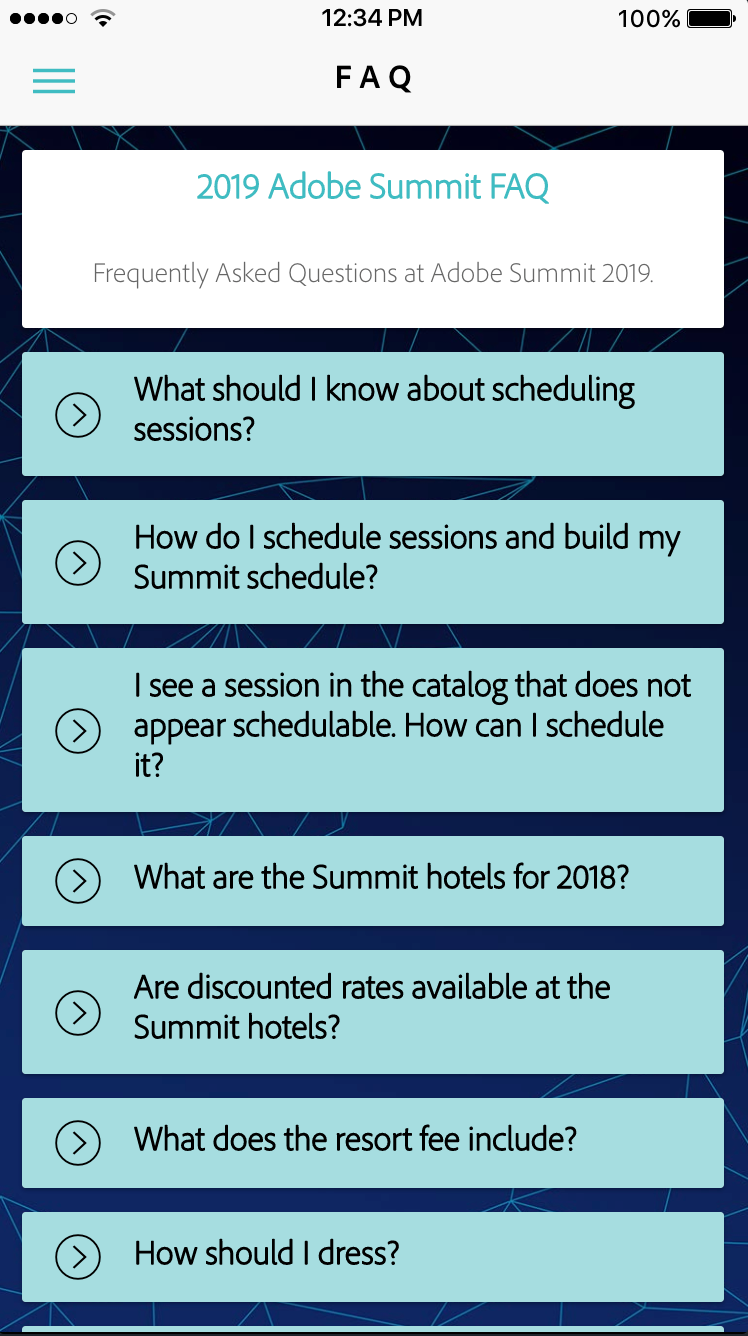
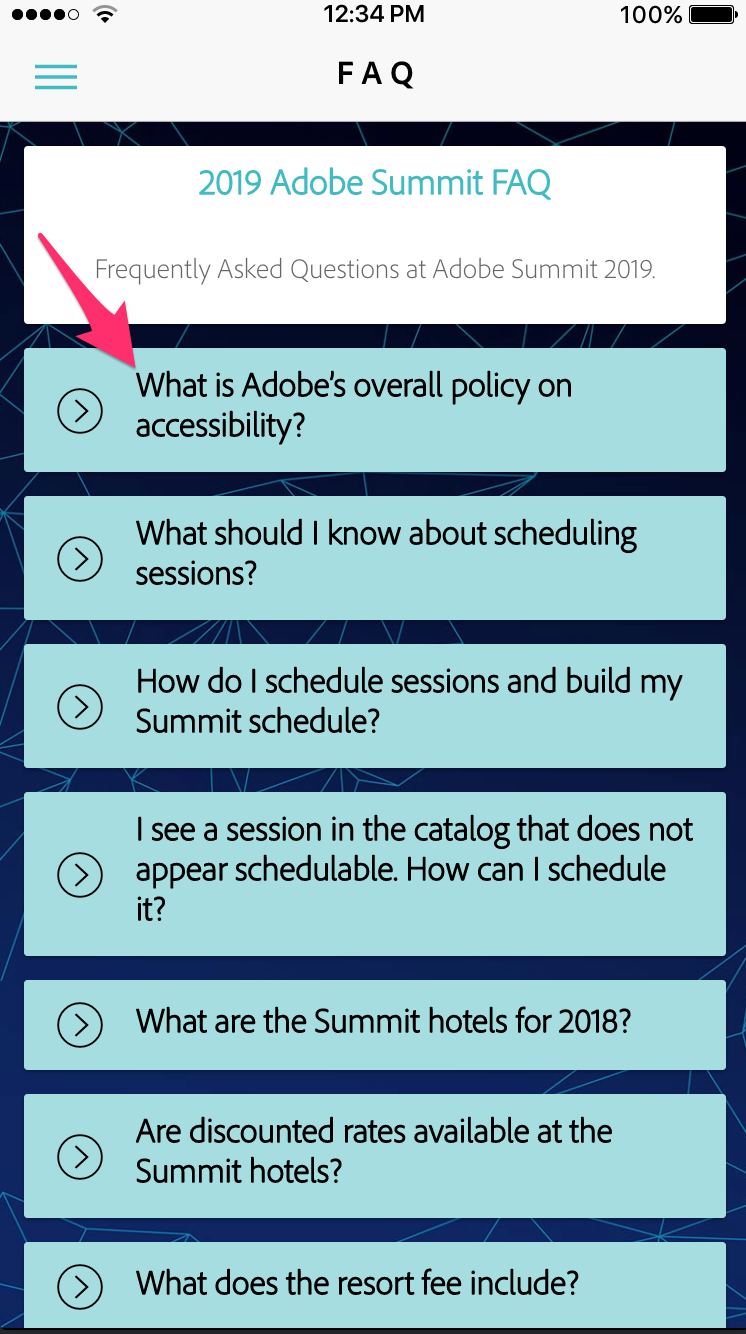
Finally, let's take a look at the view of these FAQs in the mobile application. Select the FAQ - Page option:
Now let's compare the API Page's JSON to the new Content Fragment REST API JSON. You can see much less information listed here. All that exists is the information about the individual FAQs. Do you notice anything not available on this API that is on the other one?
Note: You will see that the response is missing associated information that was on the API Page. The title and description are no longer able to be pulled from AEM, and must now either be hard-coded or extracted from another source. Keep this in mind when using the Assets REST API.
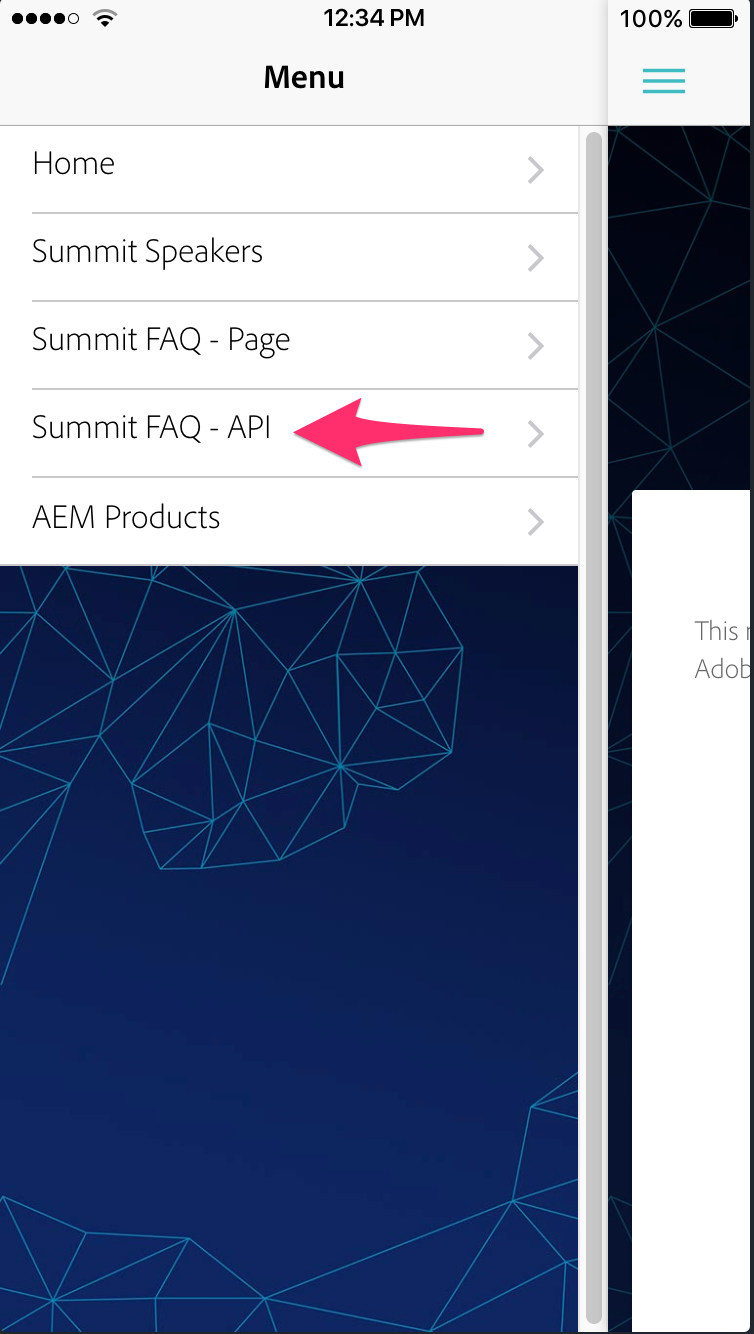
Now, look at the FAQ list of displayed using the Assets REST API.
Now let's look at the difference in the code for the consuming application. Navigate to this file and open the PhoneGap code which consumes the JSON response:
~/Desktop/summit-L763/summit-L763-aem/app/src/pages/faq-cf-page/faq-cf-page.ts
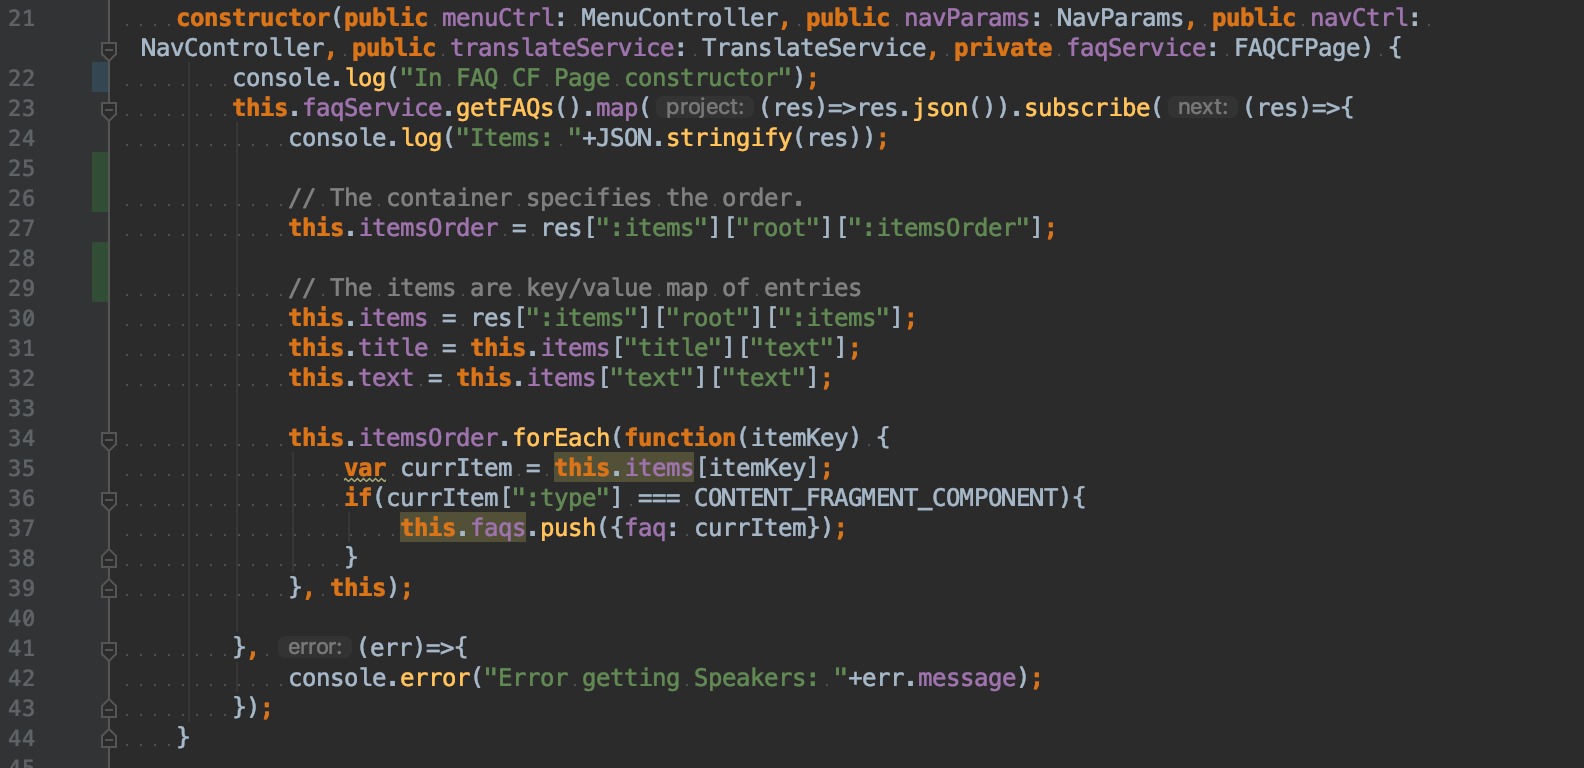
You'll notice on lines 27-32, the application must navigate to the necessary properties in the JSON output in order to make them available for rendering.
Additionally on lines 34-39, the developer must create the list of items in the correct order.
Compare the previous consumer code against the mobile app using the Assets REST API.
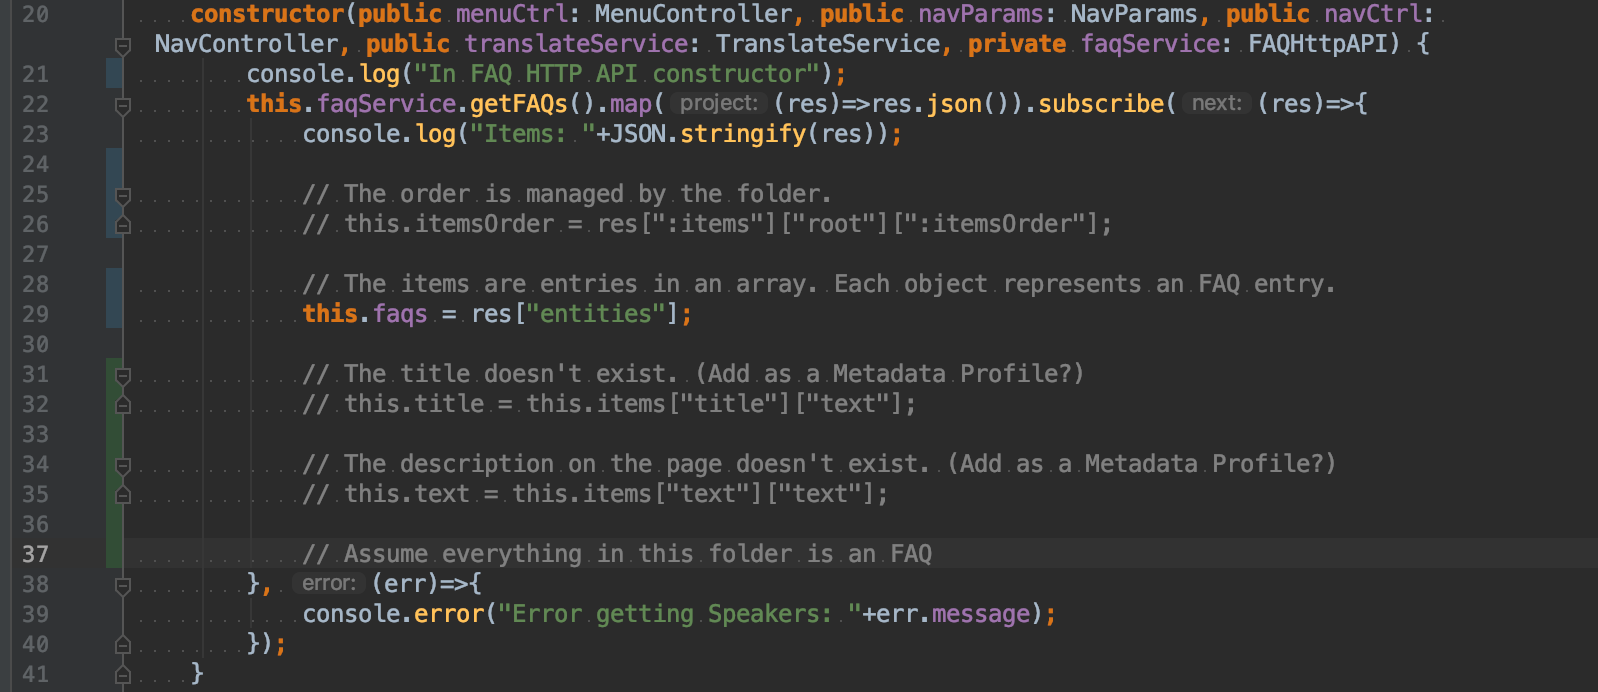
As you can see, there is much less logic necessary. The consumer can pull in the entries directly off of the response.
If you noticed, the order of the FAQs listed using the Assets HTTP API is not in the same order as the items using the API Page. Let's reorder them into the correct order.
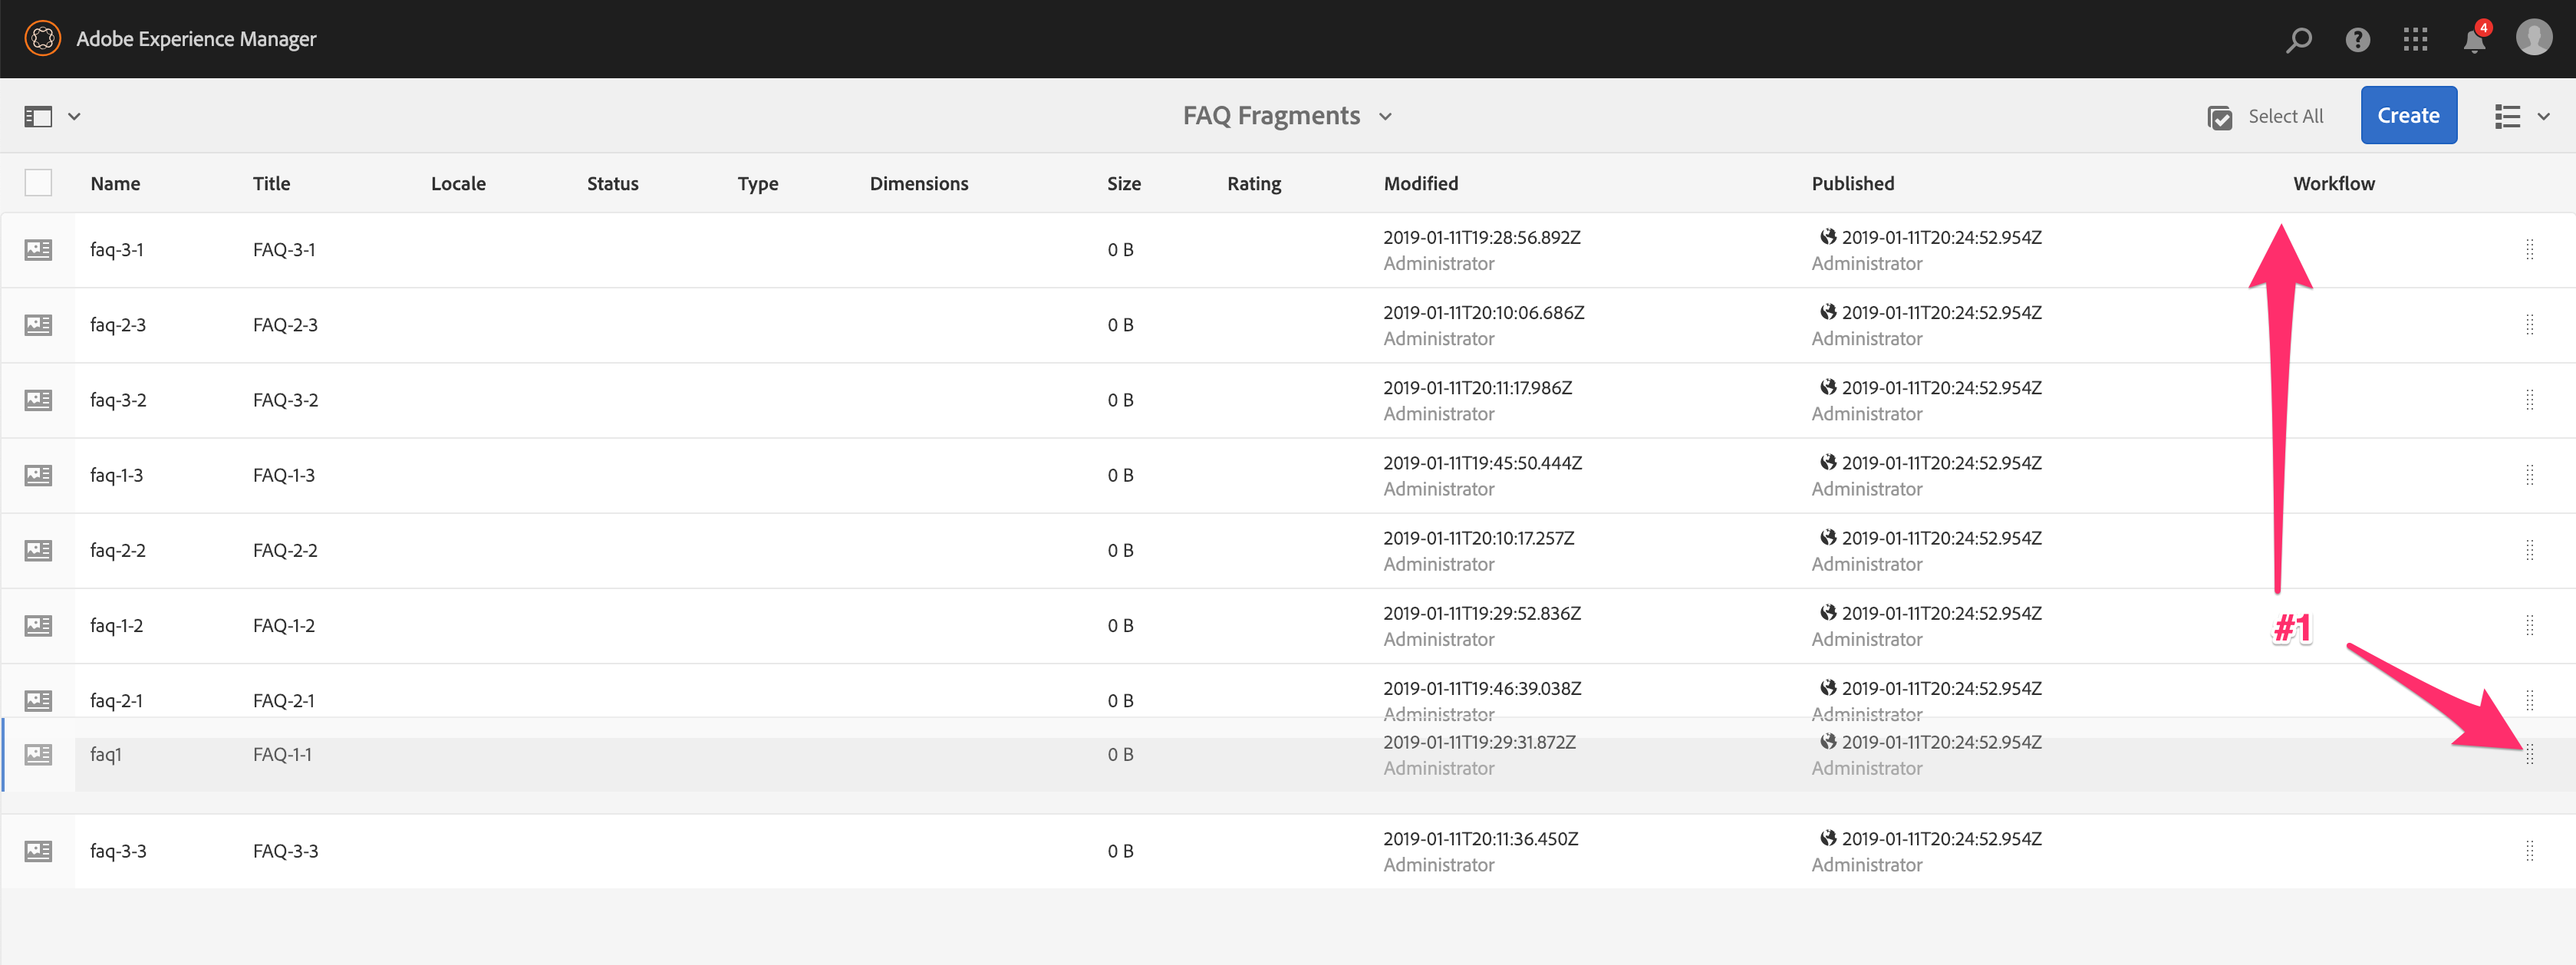

Since the entries are built off of the content in the Assets folder, adding a new one will make it immediately available on the mobile app.


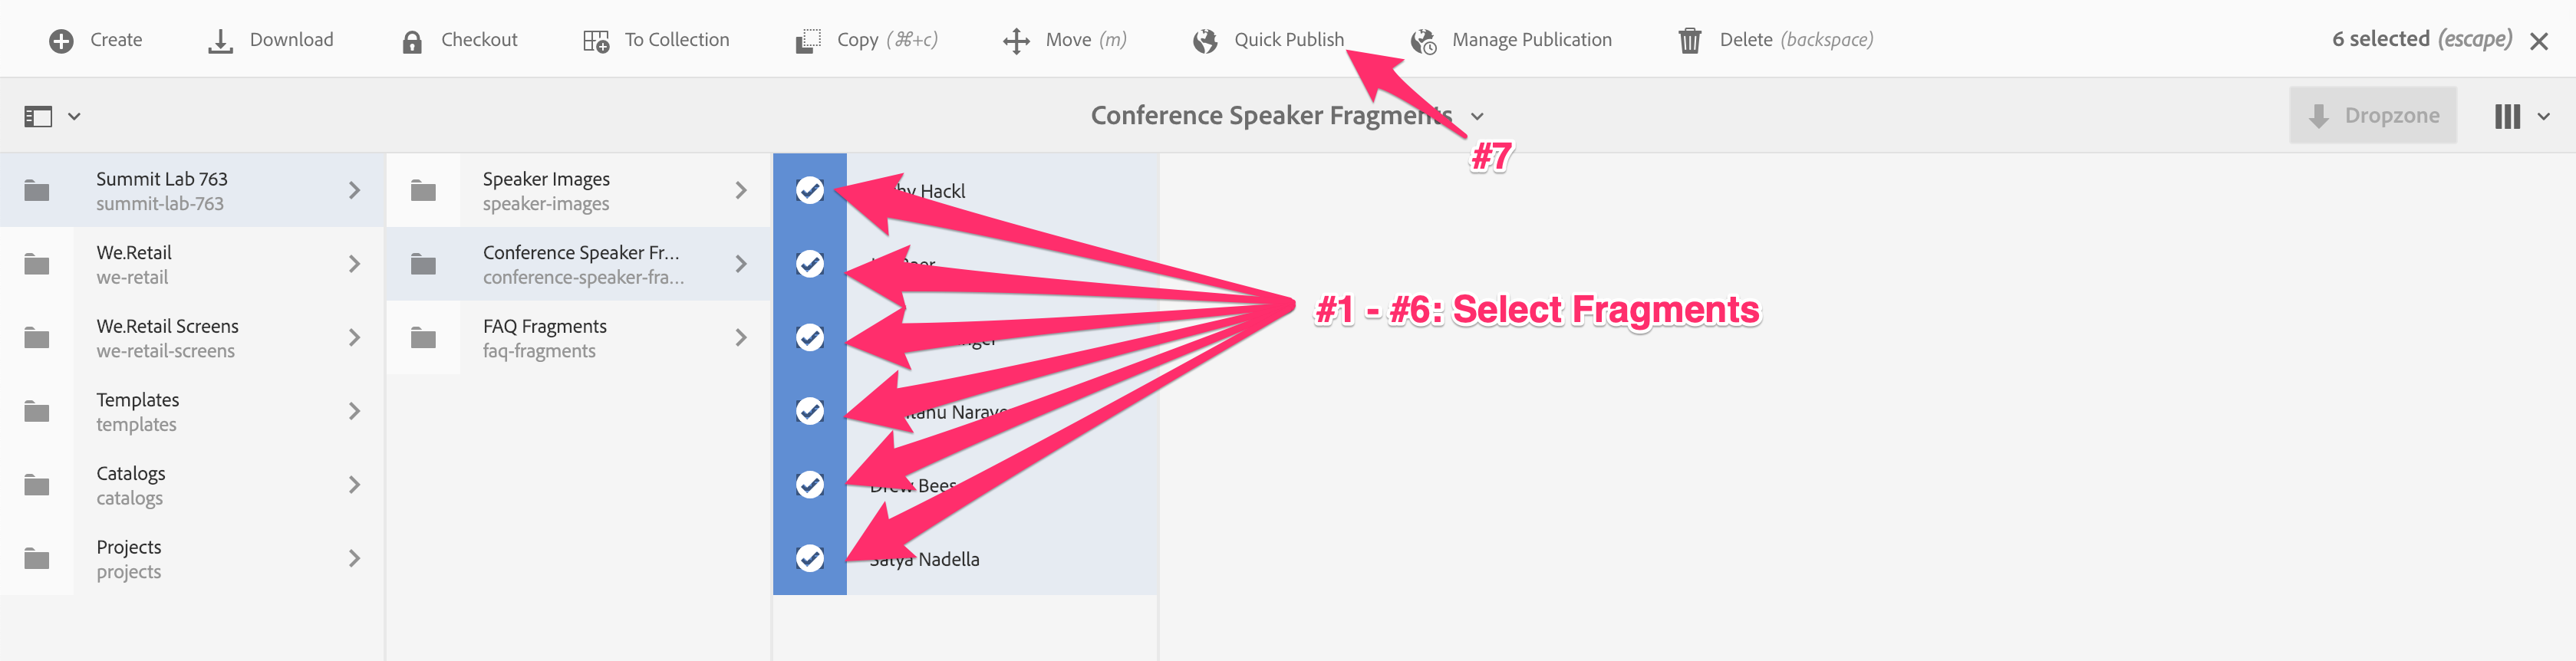
Reorder the FAQ Items, so the newest one is first.
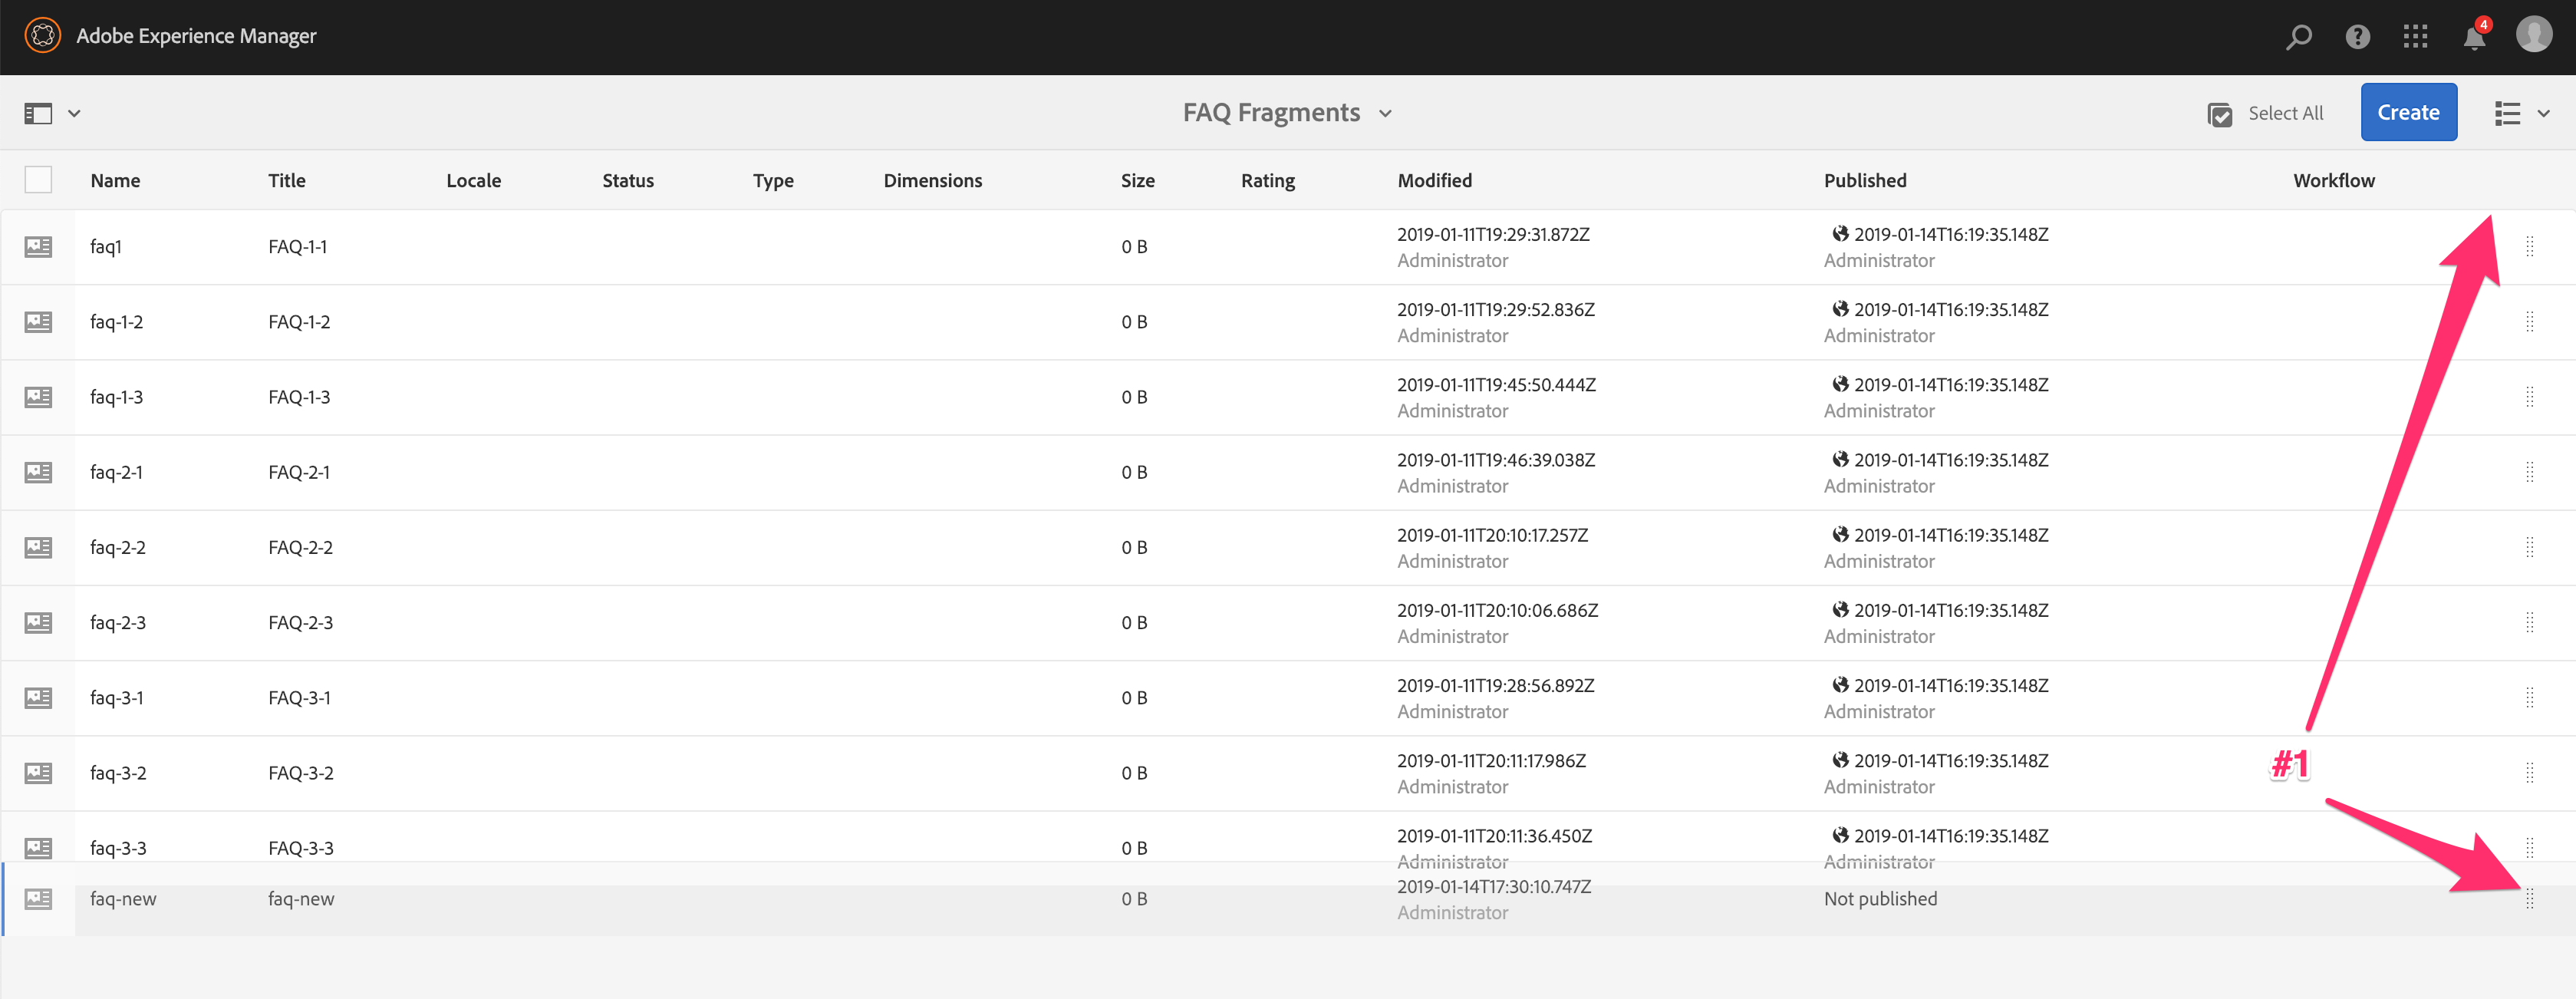
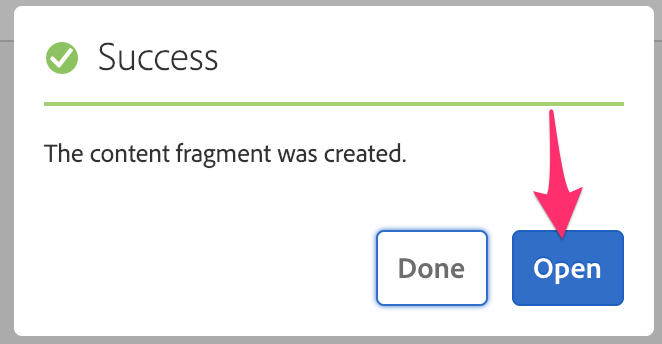
Select the new FAQ item, and publish it.

Now the new FAQ item should be displayed first in the REST API list. You can also view the API Page version and see that it is not there, as it is not referenced on the API Page.
This lesson covers headless delivery of existing content in AEM using Sling Model Exporter (SME) . In this case we will try to expose Product Category Hierarchy as JSON so that our mobile app can consume that and display a mobile-first view to browsing products.
Sling Model Exporter (SME) - Apache Sling Models 1.3.0 introduces Sling Model Exporter, an elegant way to export or serialize Sling Model objects into custom abstractions
Compare the OOTB JSON from AEM with JSON created by a custom Sling Model Exporter and view the differences.
First let's look at the content we are trying to expose in HTML. Follow the link below to look at the products HTML
Follow the link below to look at the products OOTB JSON:
Note: The Default JSON output in AEM only gives information about the particular resource in question. You can get more information if you append a selector like .4.json or .5.json to go 4 to 5 levels deep from the particular resource.
Follow the link below to look at the products OOTB JSON 5 levels deep:
Pro Tip: From a security standpoint, we advise you not to use the .4.json or .infinity.json selectors because it could potentially slow down the server trying to output a whole lot of content un-intentionally. So if your Dispatcher was setup securely, you would not be able to view this URL from the publish side. This is just for educational purposes. For a more readable JSON you can use the 'tidy' selector as follows: http://localhost:4503/content/we-retail/us/en/products.tidy.5.json
Now let's compare the existing JSON output to the JSON output from our custom Sling Model Exporter as shown below:
Now compare this JSON with the JSON from the previous step. What a world of difference some custom code can make.
Note: Sling Model Exporter attaches itself to a resource type and automatically gives us the ability to pick and choose any property available at that resource level. It also allows us to run some business logic and maybe even get related content not located at that particular resource. This is a very powerful and custom tool that can be used to navigate tricky content and still expose well-structured JSON to be used by 3rd party applications in a headless manner.
Let's navigate to and open up the Sling Model Exporter Java Class that is allowing us to expose all this information.
~/Desktop/Summit-2019/summit-L763-aem/core/src/main/java/com/adobe/summit/l763/models/ProductListModel.java
Look at the Resource Type it attaches to. In this case resourceType = "weretail/components/structure/page"
Look at the Exporter extension extensions = "json"
Look at the Exporter selector selector = "api"
Pro-Tip 1: If you don't specify a selector, the default selector is "model" which is also the default selector for the Core Components and templates we used in Chapter 2. Best Practice is to specify a selector so you can have multiple JSON outputs for the same resource and avoid clashing with the OOTB .model.json selector.
Pro-Tip 2: If you already have custom components that use Sling Models, By adding the Exporter annotations, you can easily convert these components into Core-like components where we can get structured JSON output when we hit the .model.json on the page containing the custom components.
Open up the Mobile App preview on your browser and navigate to the Products tab in the menu to see all the products being served from AEM using our custom Sling Model Exporter.
Take a look at the code at the following location: ~/Desktop/Summit-2019/app/src/pages/sme-overview/sme-overview.html
Look for new HelpX and Tutorials on updates to the AEM Assets REST API!
Overview:
Develop: