
Integrating UX design with development and delivery is critical to create compelling, quality experiences through Adobe Experience Cloud solutions, including AEM, Campaign and Target. Adobe can now bring the worlds of UX design and experience delivery together. In this lab, we’ll show you how to design and develop the full customer journey, from brand to demand, using Adobe XD, for brand and experience design, prototyping, and collaboration with internal and external stakeholders. Quickly create high fidelity customer experiences that include voice interactions, animation and responsive designs across the channels that matter most.
Let's learn how XD can help you design, prototype and share user experiences for feedback gathering, fast. Then we can learn to make necessary changes with ease. Once your iterations are complete and it's all validated, you can share your work with a developer using Design Specs.
Before we start, please open file L7720start.xd located in resources/Part0-Before you start/
First, let's learn the basics of Design Mode in XD.
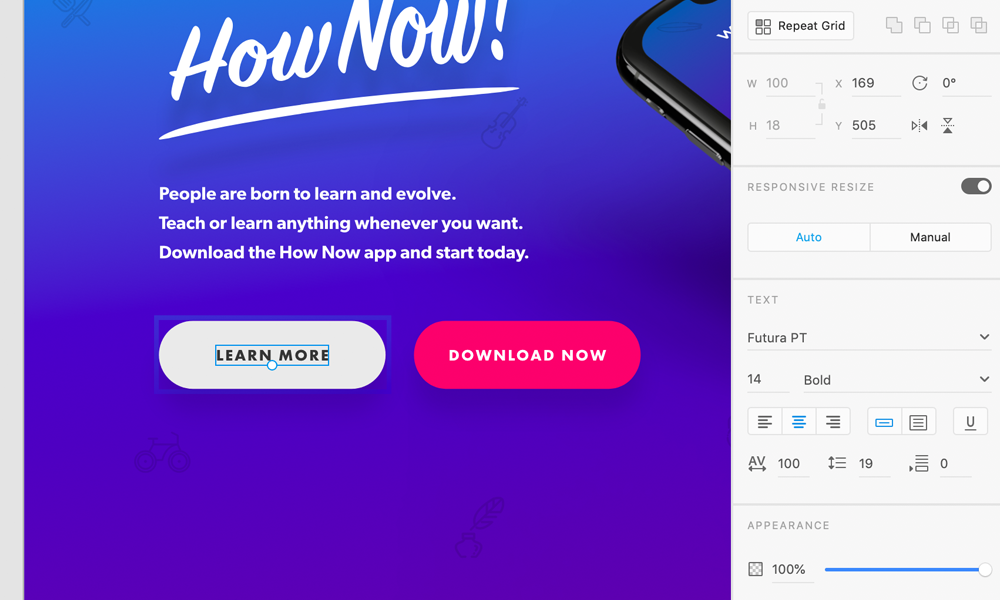
Using the rectangle tool, draw a rectangle and set the corner radius to 40. Change the color to gray and add the text element reading "Learn More".
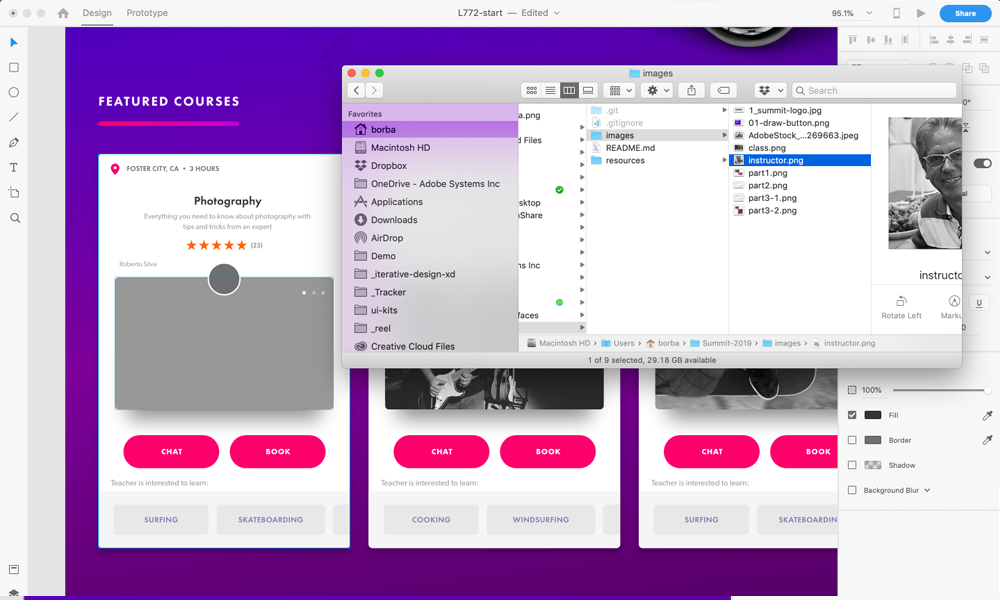
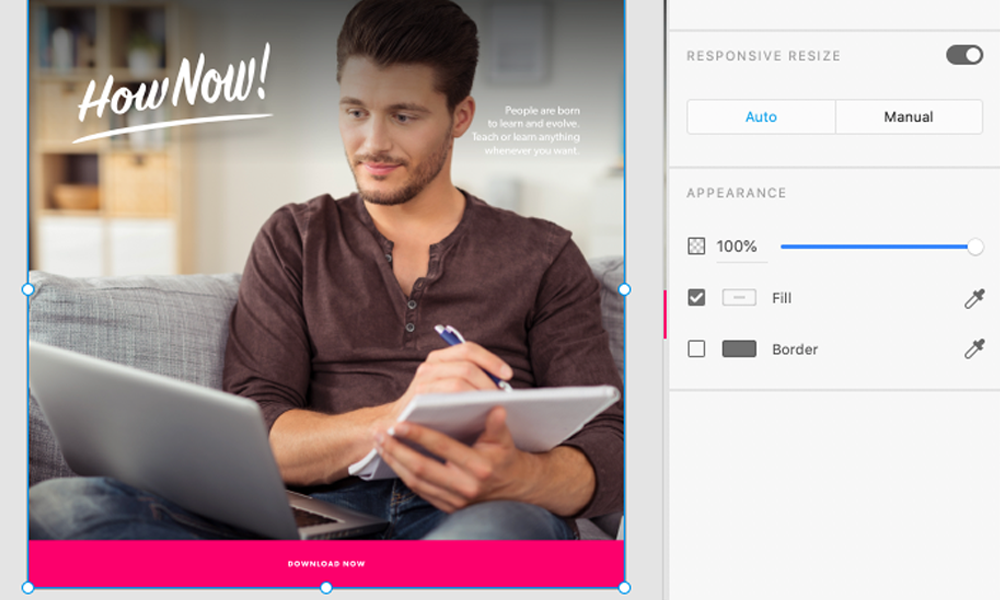
You can add images to shapes just by dragging them into any shape in XD. The image becomes the fill of the object. Double click to adjust positioning as needed. Let's drag images class.png and instructor.png from the /images folder. You can drag images from Finder (macOS) or Windows Explorer (Windows 10), as well as from a browser like Google Chrome.
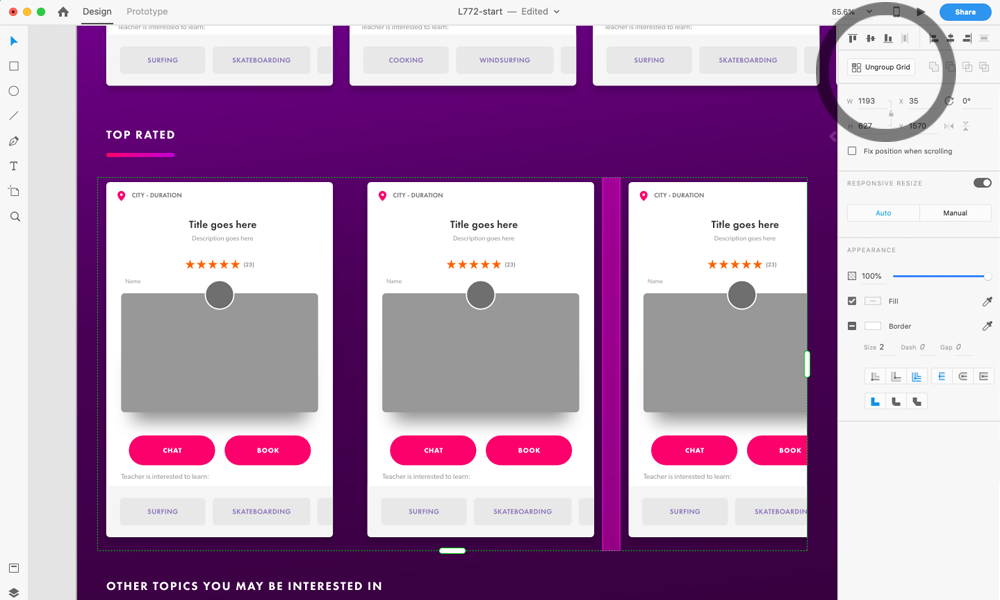
To repeat elements in XD, instead of copying and pasting then remembering how many times you hit shift to change the padding, use the powerful Repeat Grid tool. Select the element (or elements) you want to repeat and click on Repeat Grid. Then repeat visually horizontally or vertically. All property changes are reflected with all elements in the grid, but content can be unique for text or images.
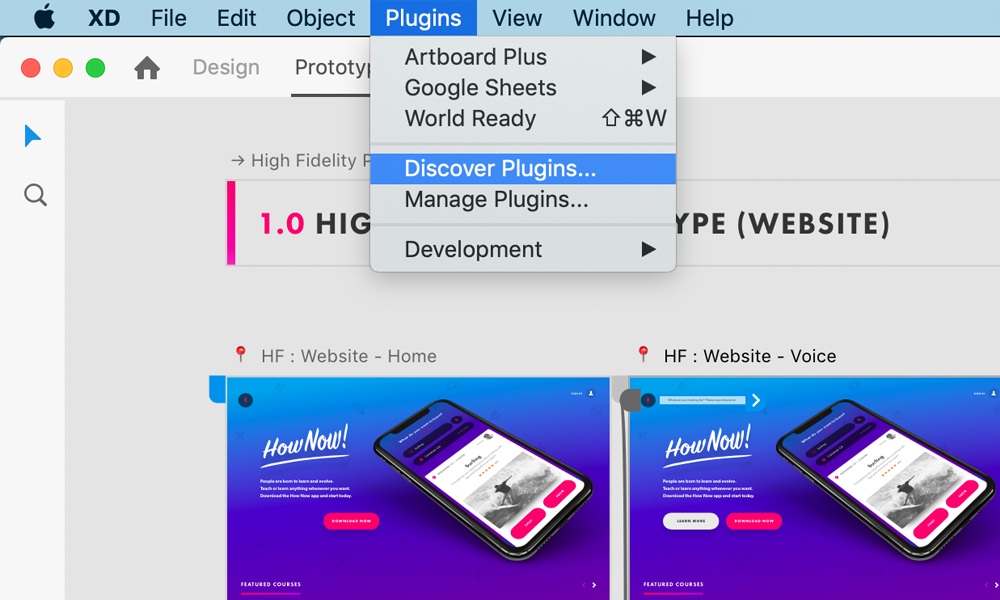
If a feature you need is not in XD yet, chances are there is a plugin for it. To find plugins, open the Plugins menu item and choose Discover Plugins, search and install the ones you want. We'll be using Google Sheets to bring text and images from a Google Sheet directly into XD.
XD can help you resize entire collections of elements with ease. Just group them to help XD understand hierarchy, and it'll look for groups and positioning to adjust the properties as you resize a selection. If you need granular control, just go from Auto to Manual and define specific constraints to fine-tune resizing behaviors.
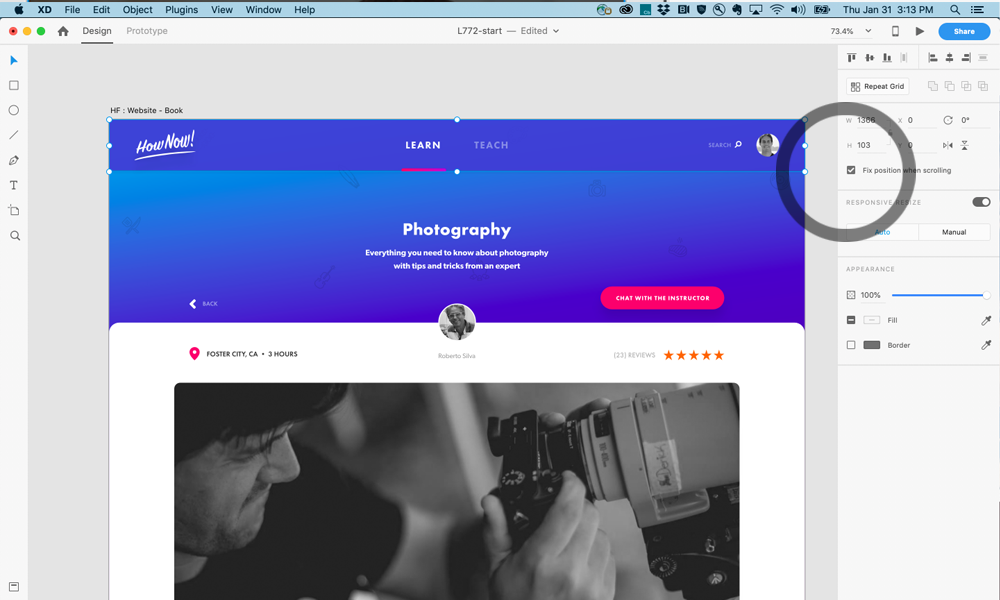
When users play with your prototype, you can define an element or whole sets of elements to stay fixed as users scroll vertically. You can fix elements in different z-order as well, to create richer scrolling experiences.
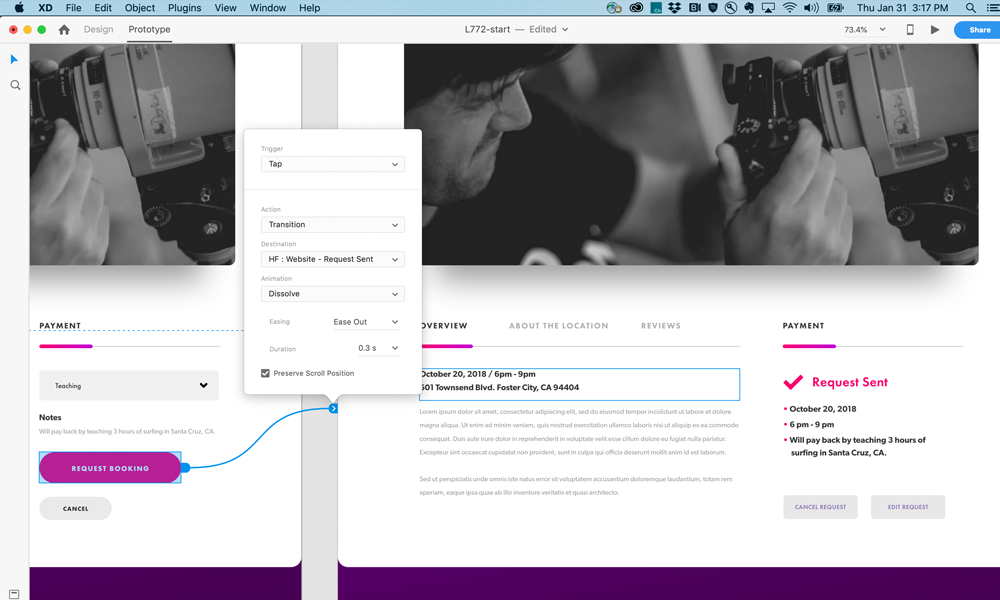
You don't have to switch to another tool to create prototypes. Just jump into Prototype Mode and start prototyping. You can define triggers such as Tap or Time to help users navigate from one artboard to another, simulating the experience to validate entire flows.

If users scroll down vertically and click to go to another artboard, you might need to preserve scrolling position to create a seamless experience.
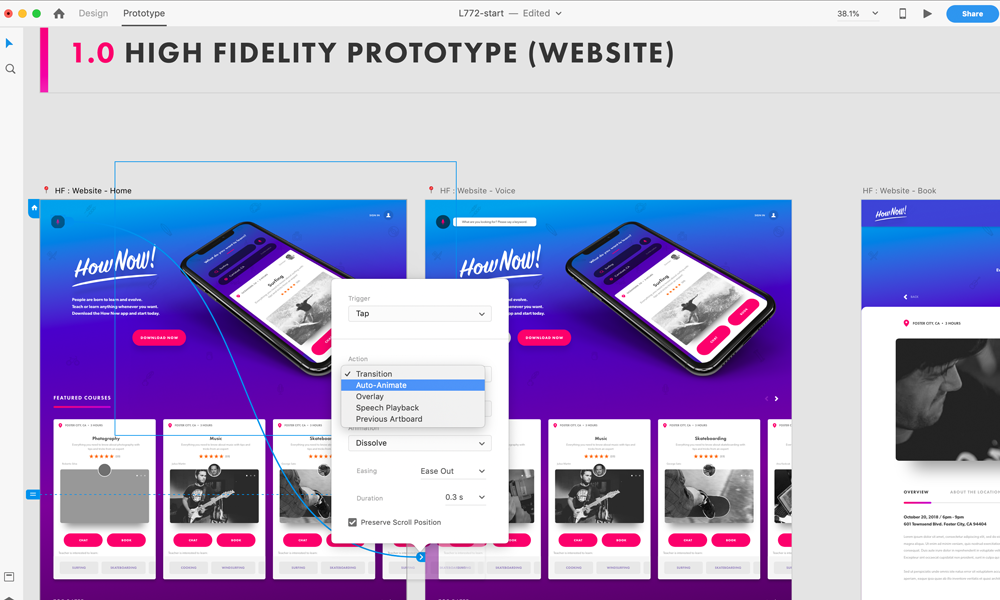
XD allows you to create very rich prototypes that go way beyond artboard-to-artboard transitions. Let's see how Auto-animate and Voice can take your prototypes into a whole new level.
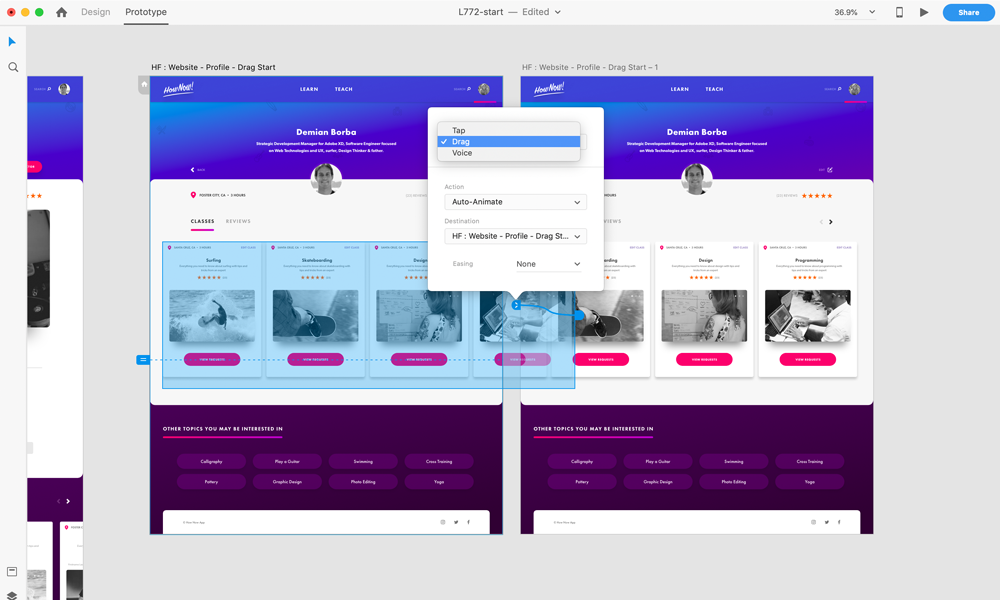
Now that you know Tap, Time and Voice, how about creating interactions based on a Drag trigger? Let's create a horizontal scrolling experience based on dragging.
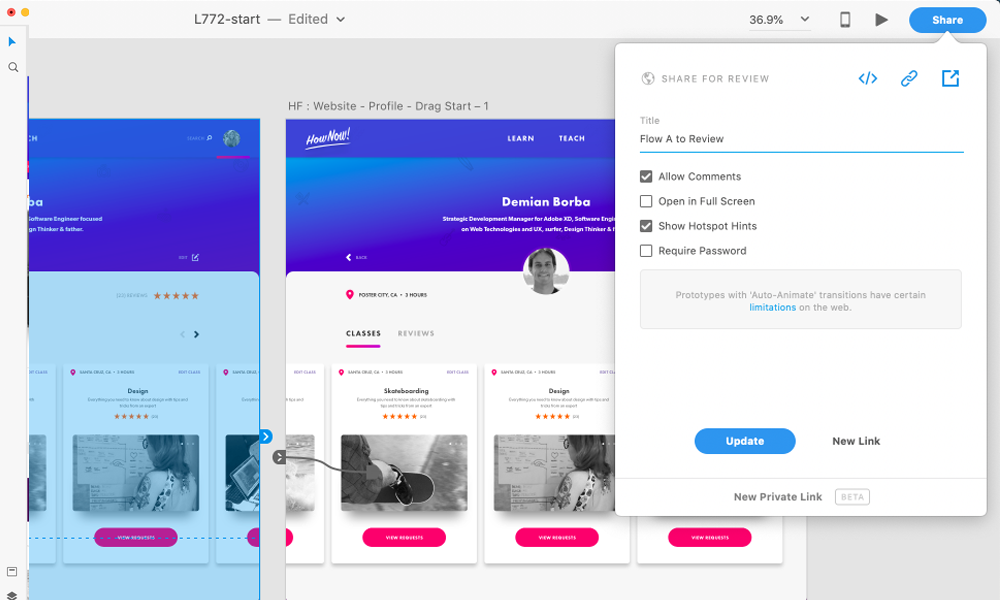
When your design or prototype is ready to be shared, XD helps with a prototype link for stakeholders to review your work, where they can add comments and pins. You can have discussions, learn fast and iterate.
You can also record a video of your interaction to share an mp4 file and gather feedback.
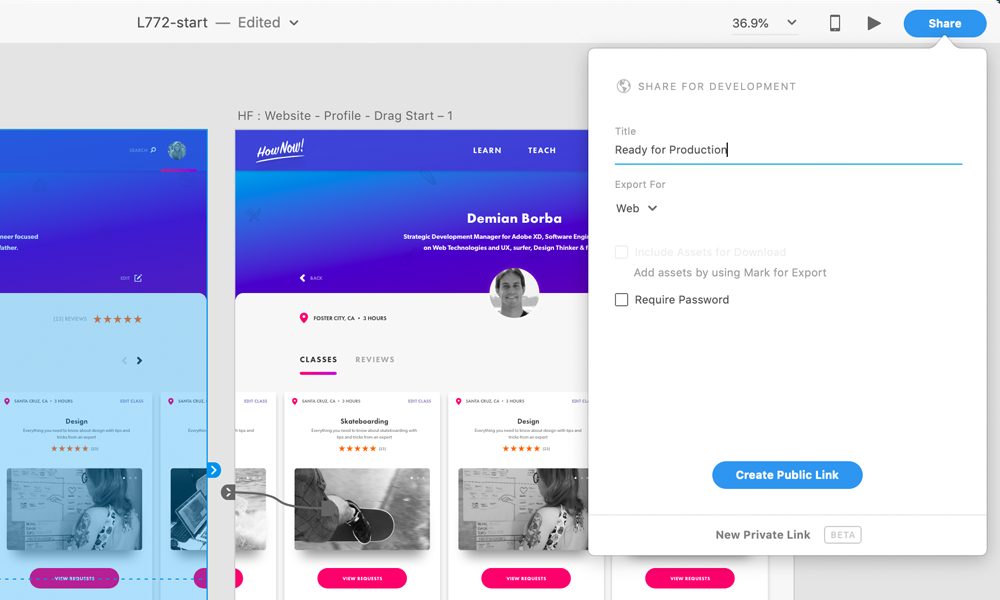
And finally, when your design or prototype is all validated and ready to be produced, you can share a Design Spec link with developers for them to inspect colors, character styles, measurements and even download assets without having to have XD installed.
If you have questions, please reach out to us on Twitter or Facebook.
Happy prototyping!!
This lab is an interactive session designed to help you get started building Adobe XD plugins. The plugins are very easy to build and can help you automate your everyday workflows. During the lab, you will have an opportunity to create a small XD plugin that automates resizing banners with responsive design. Here is the high-level agenda:
Let’s walk through creating your first Adobe XD plugin together. We'll keep things simple in this getting started step. Once you're done, you'll have a solid grasp of the steps to take when starting to create your own XD plugin.
Before you start, you'll want to create a plugin on the Adobe I/O Developer Console.
We'll use this plugin ID in one of the next steps.
Adobe XD loads plugins that are in development from a develop folder in specific location on your machine. To get to that folder, simply go to this menu item: Plugins > Development > Show Develop Folder.
This will open the develop folder, which we'll use in the next step.
Next, you'll need to make a new folder within the develop folder to store the plugin files that you'll create below. Name your new plugin folder anything you like.
Now, let's create your plugin files. Open your favorite text editor and create two files inside of your new plugin folder with these exact names:
manifest.json is your plugin’s manifest.
This file includes information about the plugin, such as its name, the menu item(s) it adds to XD, and so on.
main.js is your plugin’s code.
This file contains your JavaScript code that implements the logic for your plugin.
These two files go into your plugin's parent directory. When you have the right structure, it will look like this:
my-plugin-folder
├── main.js
└── manifest.json
It's possible to have more files if you want, but these files are the bare minimum requirement for your plugin to work, and are all we'll need for this step.
In the previous step, you created a file named manifest.json. Open that file and paste in this JSON object:
{
    "id": "ID_FROM_IO_CONSOLE",
    "name": "banner plugin",
    "host": {
        "app": "XD",
        "minVersion": "8.0"
    },
    "version": "0.0.1",
    "uiEntryPoints": [
        {
            "type": "menu",
            "label": "Part1-Create banner without UI",
            "commandId": "createCustomBanner"
        }
    ]
}
Be sure to replace the id value with the unique plugin ID you got from the I/O Console in the first step:
Next, we need to create the JavaScript code for our plugin. The code lives in a file named main.js.
Paste this code into main.js:
const commands = require("commands");  // [1]

function createCustomBanner(selection) { // [2]
    const width = 800; // [3]
    const height = 400;

    commands.duplicate() // [4]
    const duplicated = selection.items[0]; // [5]

    duplicated.resize(width, height); // [6]
    duplicated.moveInParentCoordinates(600, 600); // [7]
}

module.exports = { // [8]
    commands: {
        createCustomBanner
    }
};
This code does the following:
commands class.width and height constants to define width and height of the new banner. Let's hardcode these values for this step.duplicate method creates a copy of the selected object (the original banner).duplicate method is run, the first item of the selection becomes the duplicated object. Let's declare a constant for it.resize method resizes the duplicated banner with the hardcoded width and height value.moveInParentCoordinates moves the new banner 300 pixels off the top and 300 pixels off the left side of the original object.createCustomBanner) with the commandId property declared in the manifest earlier. The command ID must match the commandId value declared in your manifest exactly.So you’ve written a plugin! How do we run it?
If you haven’t already done so, launch XD and open a new document. Then navigate to the Plugins > Part1-Create banner without UI menu item.
Alternatively, if XD was already open, select Plugins > Development > Reload Plugins.

Congratulations! You’ve built your first plugin for Adobe XD!
Hopefully, now you have a solid grasp of creating your own XD plugin. Let's take a step further and create a dialog UI. In this step, let's create only a dialog UI.
manifest.json fileA new plugin means a new manifest.json file. Go head and copy and paste the following code:
{
    "id": "ID_FROM_IO_CONSOLE",
    "name": "Banner plugin",
    "host": {
        "app": "XD",
        "minVersion": "8.0"
    },
    "version": "0.0.1",
    "uiEntryPoints": [
        {
            "type": "menu",
            "label": "Part2-Fit banners UI only",
            "commandId": "myPluginCommand"
        }
    ]
}Next, we need to create the JavaScript code for this second plugin. The code lives in a file named main.js.
Paste this code into main.js:
const yourHtml = // [1]
    `<style>
        .visible {
            display: flex;
        }
        .hidden {
            display: none;
        }
        .dialog {
            height: 170px;
            width: 300px;
        }
    </style>
    <form method="dialog" class="dialog">
        <h1 class="h1">Create Custom Size Post</h1>
        <hr>
        <label>
            <span>Choose Platform</span>
            <select id="platform">
                <option value="facebook">Facebook</option>
                <option value="instagram">Instagram</option>
                <option value="pinterest">Pinterest</option>
                <option value="custom" selected>Custom</option>
            </select>
        </label>
        <div id="custom" class="hidden">
            <input type="text" uxp-quiet="true" id="width"
                placeholder="width" />
            <input type="text" uxp-quiet="true" id="height"
                placeholder="height" />
        </div>
        <footer>
            <button id="cancel" type="reset" uxp-variant="primary">Cancel</button>
            <button id="ok" type="submit" uxp-variant="cta">OK</button>
        </footer>
    </form>`;

function myPluginCommand() {
    let dialog = document.createElement("dialog"); // [3]
    dialog.innerHTML = yourHtml; // [4]
    const cancelButton = dialog.querySelector("#cancel"); // [5]
    const platformSelect = dialog.querySelector("#platform");
    const customInput = dialog.querySelector("#custom");

    cancelButton.onclick = () => dialog.close("reasonCanceled"); // [6]

    platformSelect.onchange = () => { // [7]
        customInput.className = "hidden";
        switch (platformSelect.value) {
            case "facebook":
                dialog.querySelector("#width").value = 1200;
                dialog.querySelector("#height").value = 628;
                break;
            case "instagram":
                dialog.querySelector("#width").value = 1080;
                dialog.querySelector("#height").value = 1080;
                break;
            case "pinterest":
                dialog.querySelector("#width").value = 735;
                dialog.querySelector("#height").value = 1102;
                break;
            default:
                customInput.className = "visible";
        }
    }

    document.appendChild(dialog); // [8]
    return dialog.showModal() // [9]
}

module.exports = {
    commands: {
        myPluginCommand
    }
};
This code does the following:
yourHtml.innerHTML property of the dialog element with the HTML code you wrote.dialog object to the document.showModal method to pop the modal open.If you haven’t already done so, launch XD and open a new document. Then navigate to the Plugins > Part2-Fit banners UI only menu item.
Alternatively, if XD was already open, select Plugins > Development > Reload Plugins.

We have covered how to create a custom banner without UI and reviwed how to create a UI. Now, let's put those two together to create a complete plugin.
manifest.json fileAgain, a new plugin means a new manifest.json file. Go head and copy and paste the following code:
{
    "id": "ID_FROM_IO_CONSOLE",
    "name": "Banner plugin",
    "host": {
        "app": "XD",
        "minVersion": "8.0"
    },
    "version": "0.0.1",
    "uiEntryPoints": [
        {
            "type": "menu",
            "label": "Part3-Banners all together",
            "commandId": "myPluginCommand"
        }
    ]
}Next, we need to create the JavaScript code for this second plugin. The code lives in a file named main.js.
Paste this code into main.js:
var commands = require("commands");

let dialog;

const yourHtml =
    `<style>
        .visible {
            display: flex;
        }
        .hidden {
            display: none;
        }
        .dialog {
            height: 170px;
            width: 300px;
        }
    </style>
    <form method="dialog" class="dialog">
        <h1 class="h1">Create Custom Size Post</h1>
        <hr>
        <label>
            <span>Choose Platform</span>
            <select id="platform">
                <option value="facebook">Facebook</option>
                <option value="instagram">Instagram</option>
                <option value="pinterest">Pinterest</option>
                <option value="custom" selected>Custom</option>
            </select>
        </label>
        <div id="custom" class="hidden">
            <input type="text" uxp-quiet="true" id="width"
                placeholder="width" />
            <input type="text" uxp-quiet="true" id="height"
                placeholder="height" />
        </div>
        <footer>
            <button id="cancel" type="reset" uxp-variant="primary">Cancel</button>
            <button id="ok" type="submit" uxp-variant="cta">OK</button>
        </footer>
    </form>`;

function createDialog() {
    dialog = document.createElement("dialog");
    dialog.innerHTML = yourHtml;

    const cancelButton = dialog.querySelector("#cancel");
    const platformSelect = dialog.querySelector("#platform");
    const customInput = dialog.querySelector("#custom");

    cancelButton.onclick = () => dialog.close("reasonCanceled");

    platformSelect.onchange = () => {
        customInput.className = "hidden";
        switch (platformSelect.value) {
            case "facebook":
                dialog.querySelector("#width").value = 1200;
                dialog.querySelector("#height").value = 628;
                break;
            case "instagram":
                dialog.querySelector("#width").value = 1080;
                dialog.querySelector("#height").value = 1080;
                break;
            case "pinterest":
                dialog.querySelector("#width").value = 735;
                dialog.querySelector("#height").value = 1102;
                break;
            default:
                customInput.className = "visible";
        }
    }
    document.appendChild(dialog);
}


function createCustomBanner(selection, width, height) {
    commands.duplicate()
    const duplicated = selection.items[0];

    duplicated.resize(width, height);
    duplicated.moveInParentCoordinates(600, 600);
}

function myPluginCommand(selection) {  // [1]
    if (!dialog) createDialog(); // [2]
    return dialog.showModal().then(function (result) { // [3]
        if (result !== "reasonCanceled") { // [4]
            createCustomBanner(
                selection,
                Number(dialog.querySelector("#width").value),
                Number(dialog.querySelector("#height").value)
            );
        }
    });
}

module.exports = {
    commands: {
        myPluginCommand
    }
};
This code does the following:
createDialog helper function created in part #2.showModal method returns a Promise object which can be chained with .then. Code written inside .then will be invoked when the dialog closes.result of showModal explains the reason for closing the dialog. If the reason is not reasonCanceled, meaning user hit the "submit" button, the createCustomBanner function reviewed in part #1 is invoked to create a custom banner based on user's inputs.If you haven’t already done so, launch XD and open a new document. Then navigate to the Plugins > Part3-Banners all together menu item.
Alternatively, if XD was already open, select Plugins > Development > Reload Plugins.

