Table of Contents
Lab Abstract
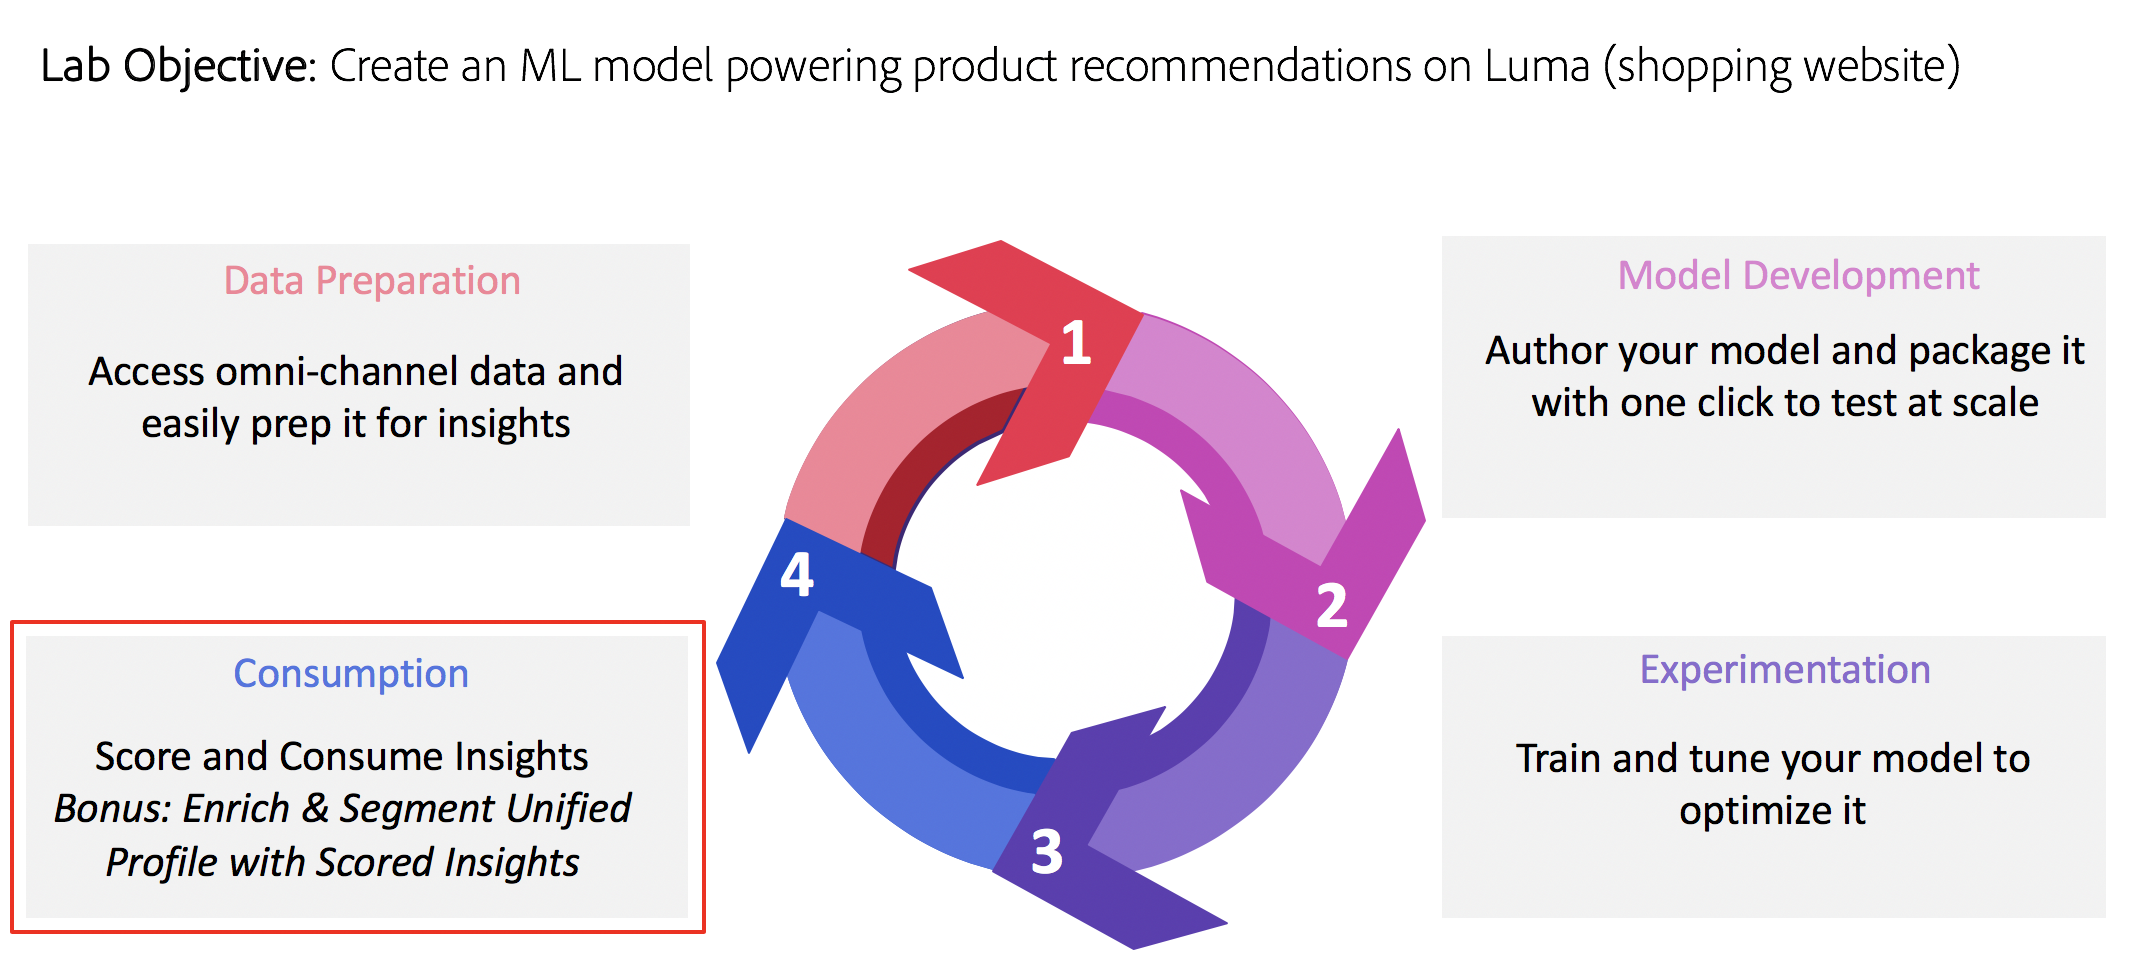
The core of the next generation of digital experiences is a consolidated view of your customer and experience data combined with intelligent services to power rich experiences at scale. Get an early preview and learn how use the Adobe Experience Platform and work with your data, standardize it using Adobe Experience Data Model (XDM), and apply Artificial Intelligence and Machine Learning to automate your brand's digital experience.
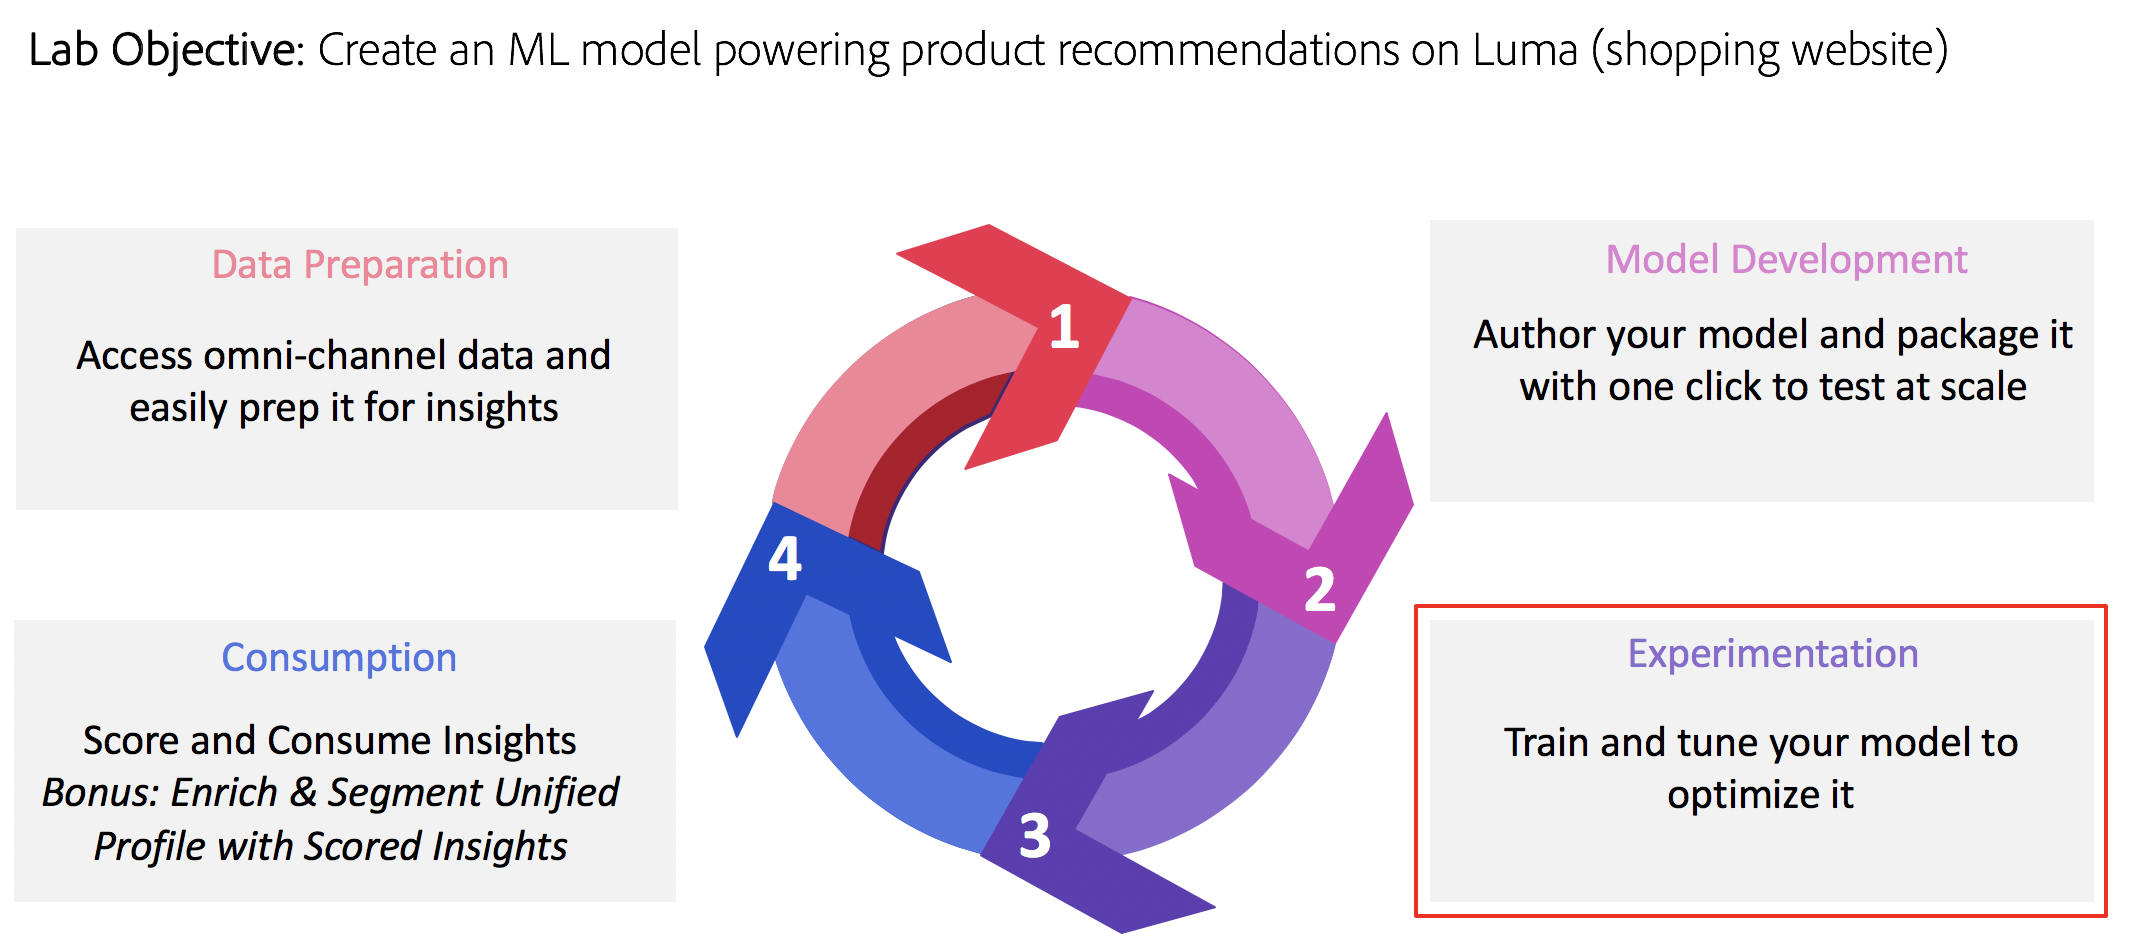
Objective
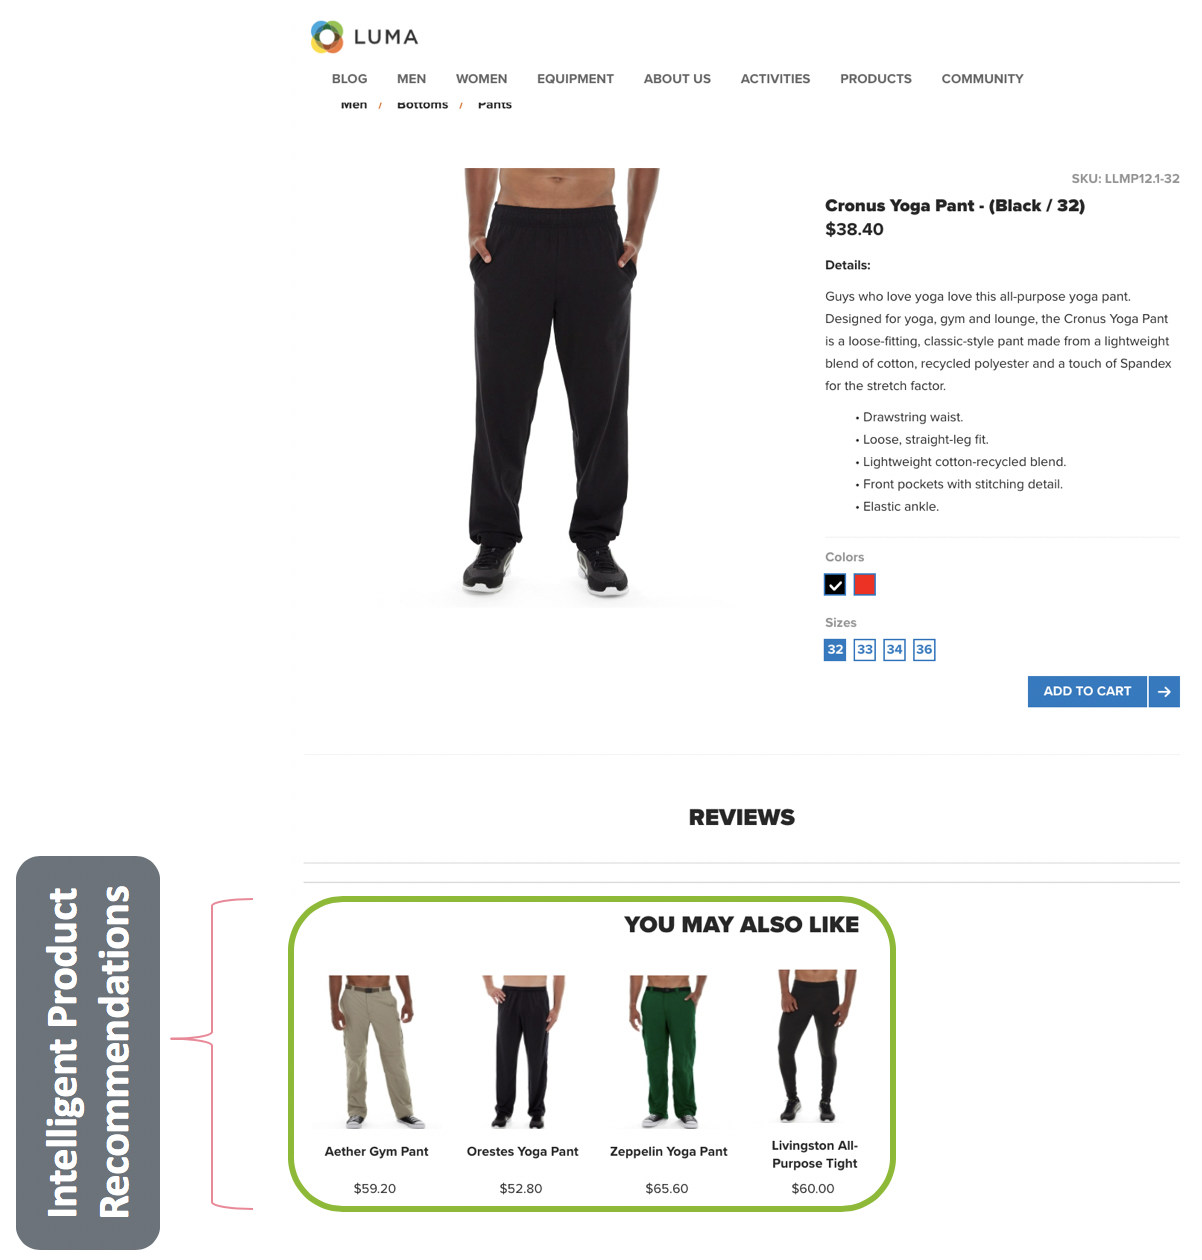
We have created a website called Luma (http://showmetheplatform.com), a fitness retailer. When customers shop at the website and click on a product, they are presented with personalized product recommendations.
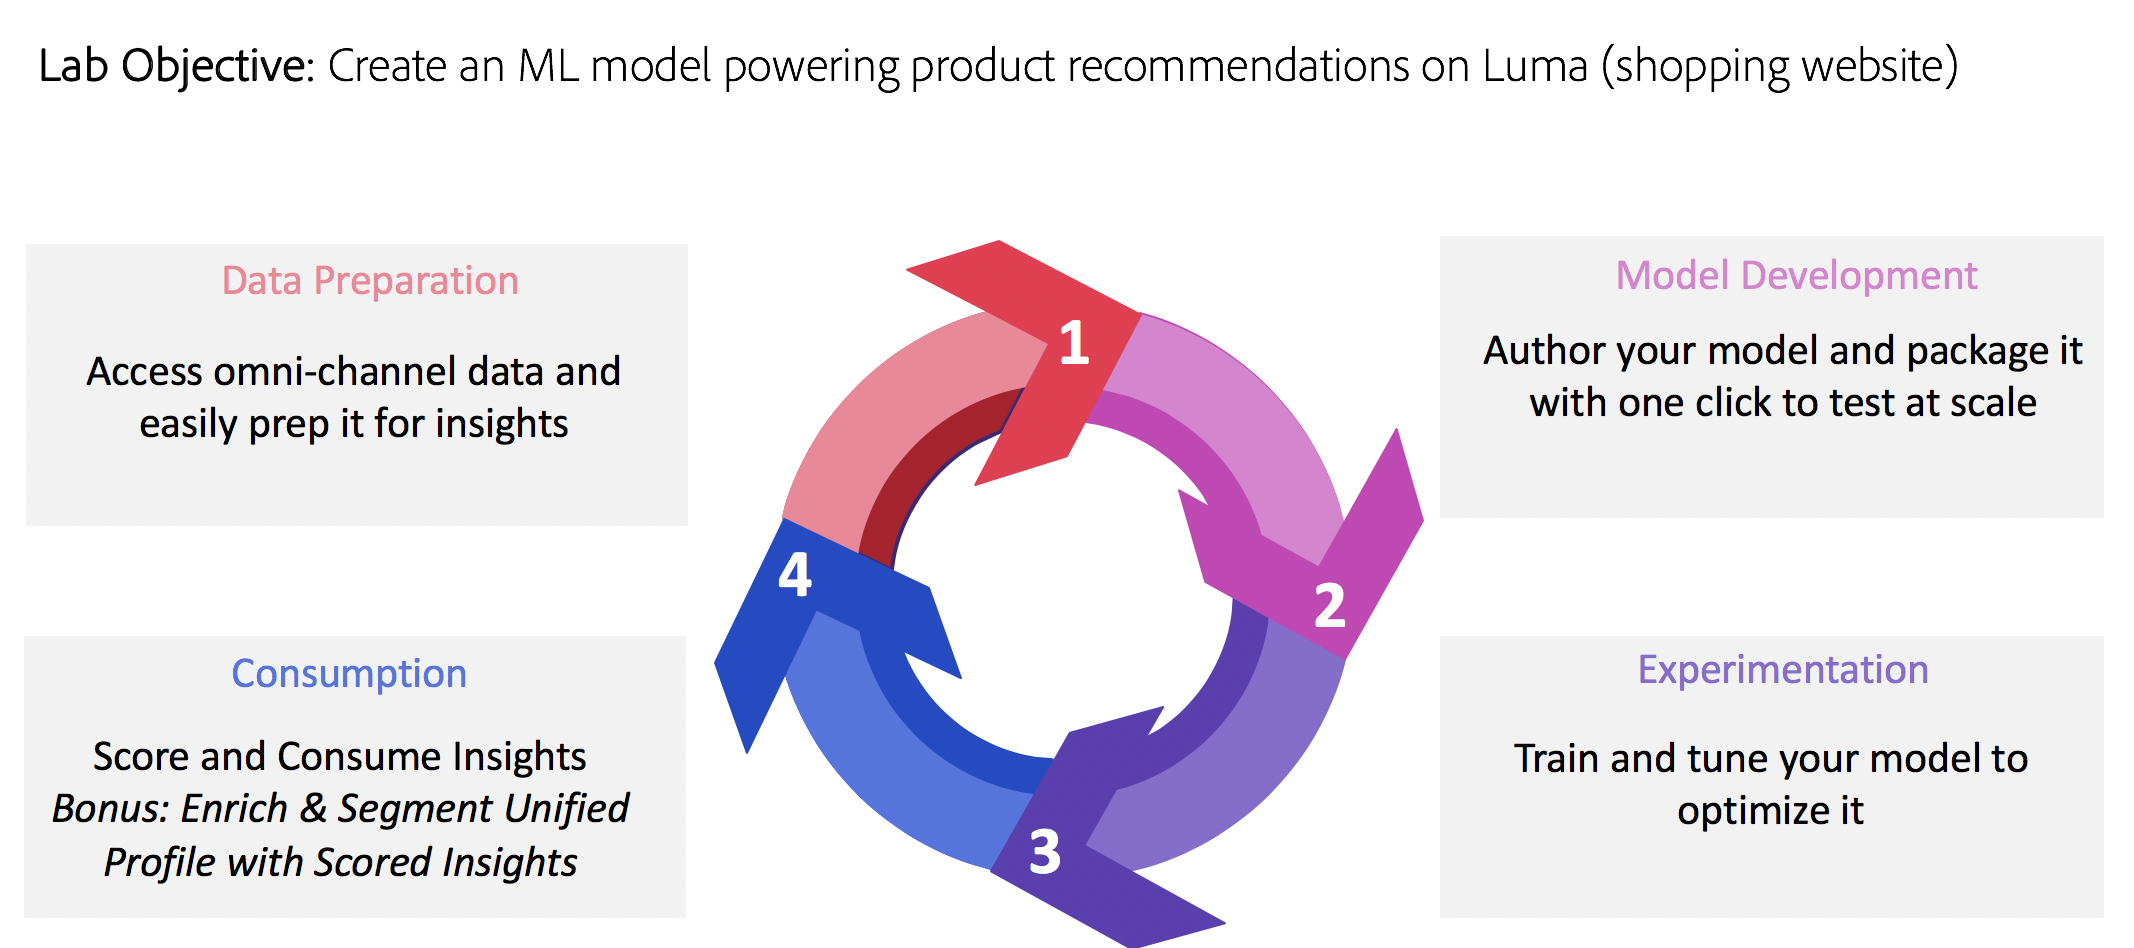
This lab will enable you to create a simple Machine Learning model that generates product recommendations for this website using Data Science Workspace.
Lab Presenters
- Ashok Poothiyot (Product Manager, Experience Platform Data Science Workspace)
- Kumar Sangareddi (Sr Mgr, Engineering, Experience Platform Data Science Workspace)
Adobe Solutions Used in This Lab
- Adobe Experience Platform
Resources
- Adobe Experience Platform home: https://platform.adobe.com/
- Digital Lab Manual - Navigate to adobe.com/go/summit2019-l777 and click the digital lab manual link to open it in your browser
- 3 notebooks that will be used during the Lab. These can be downloaded by following instructions here (you can do this later within Lesson 1 as well)
- Feature Transformation Notebook: recommendations-feature-transformation.ipynb
- Data Exploration Notebook: recommendations-data-exploration.ipynb
- Product Recommendations Notebook: recommendations-popularity-recipe.ipynb
General Prerequisites
- Google Chrome Browser (for best experience)
- Adobe Experience Platform credentials: (Provided by Instructors)
- Your user must be in a Product Profile that has Data Science Workspace enabled
- Download the zip containing all 3 notebooks required for the Lab from your lab resources link (instructions in Lesson 1)
Languages
The following languages and frameworks are supported:
- Spark
- PySpark
- R
- Tensorflow
- Python
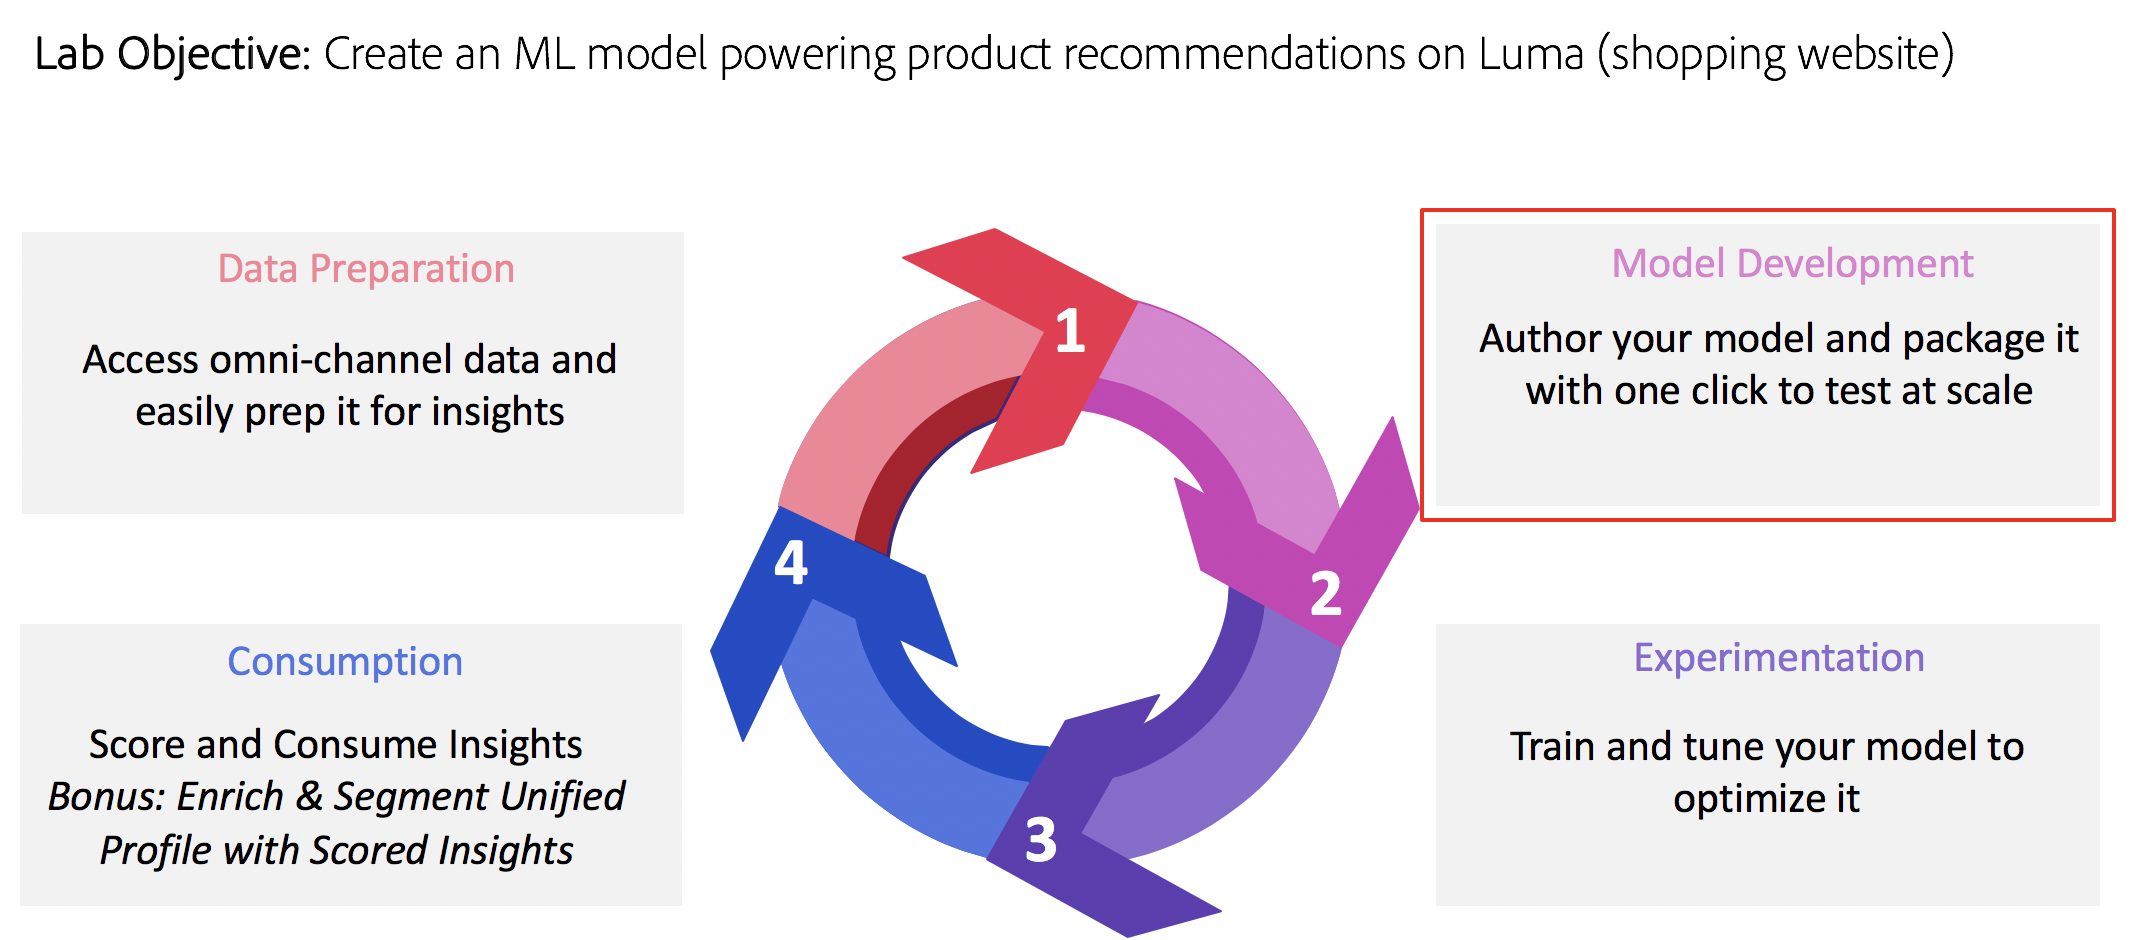
This lab will focus on:
⏳ Time Allocated: 30 minutes
So let’s start with the first lesson. To create a machine learning model that will recommend products that users might like when they are looking at a particular product, you need to analyze previous purchases made by users on the website. In this lesson, you will explore purchase data flowing via Adobe Analytics to the Platform and transform that data into a Feature DataSet that can help train your machine learning model.
Objectives:
- Explore the Data
- Understand the Schemas
- Transform Analytics Source Data into Features using Notebooks
Concepts Introduced:
- XDM: Experience Data Model is the common language for the experience business.
- Datasets: Adobe Experience Platform is an open system. A Dataset is a collection of data that includes schema and fields. Datasets available in the platform can be read and exported.
- Batches: Datasets are made up of batches. A Batch is a set of data collected over a period of time and processed together as a single unit. New batches are created when data is added to a Dataset.
- JupyterLab: JupyterLab is the next-generation web-based interface for Project Jupyter, and is tightly integrated into Adobe Experience Platform.
- Data Access SDK: The Data Access SDK (integrated in Data Science Workspace) is used to read and write data to the platform at scale.
- Pipeline Notebook: A JupyterLab Notebook template to easily transform raw data into actionable features.
- Navigate to: https://platform.adobe.com/
- Sign in with the following credentials
- If your Session is on Wednesday:
- User Name: L777+[your station number]@adobeeventlab.com
- Password: Adobe2019!
- If your Session is on Thursday:
- User Name: L777-2+[your station number]@adobeeventlab.com
- Password: Adobe2019!
Explore the Data and XDM Schemas to be used throughout the Lab
Experience Data Models (XDM) on the Adobe Experience Platform help standardize your data so that it can be used efficiently across your organization.
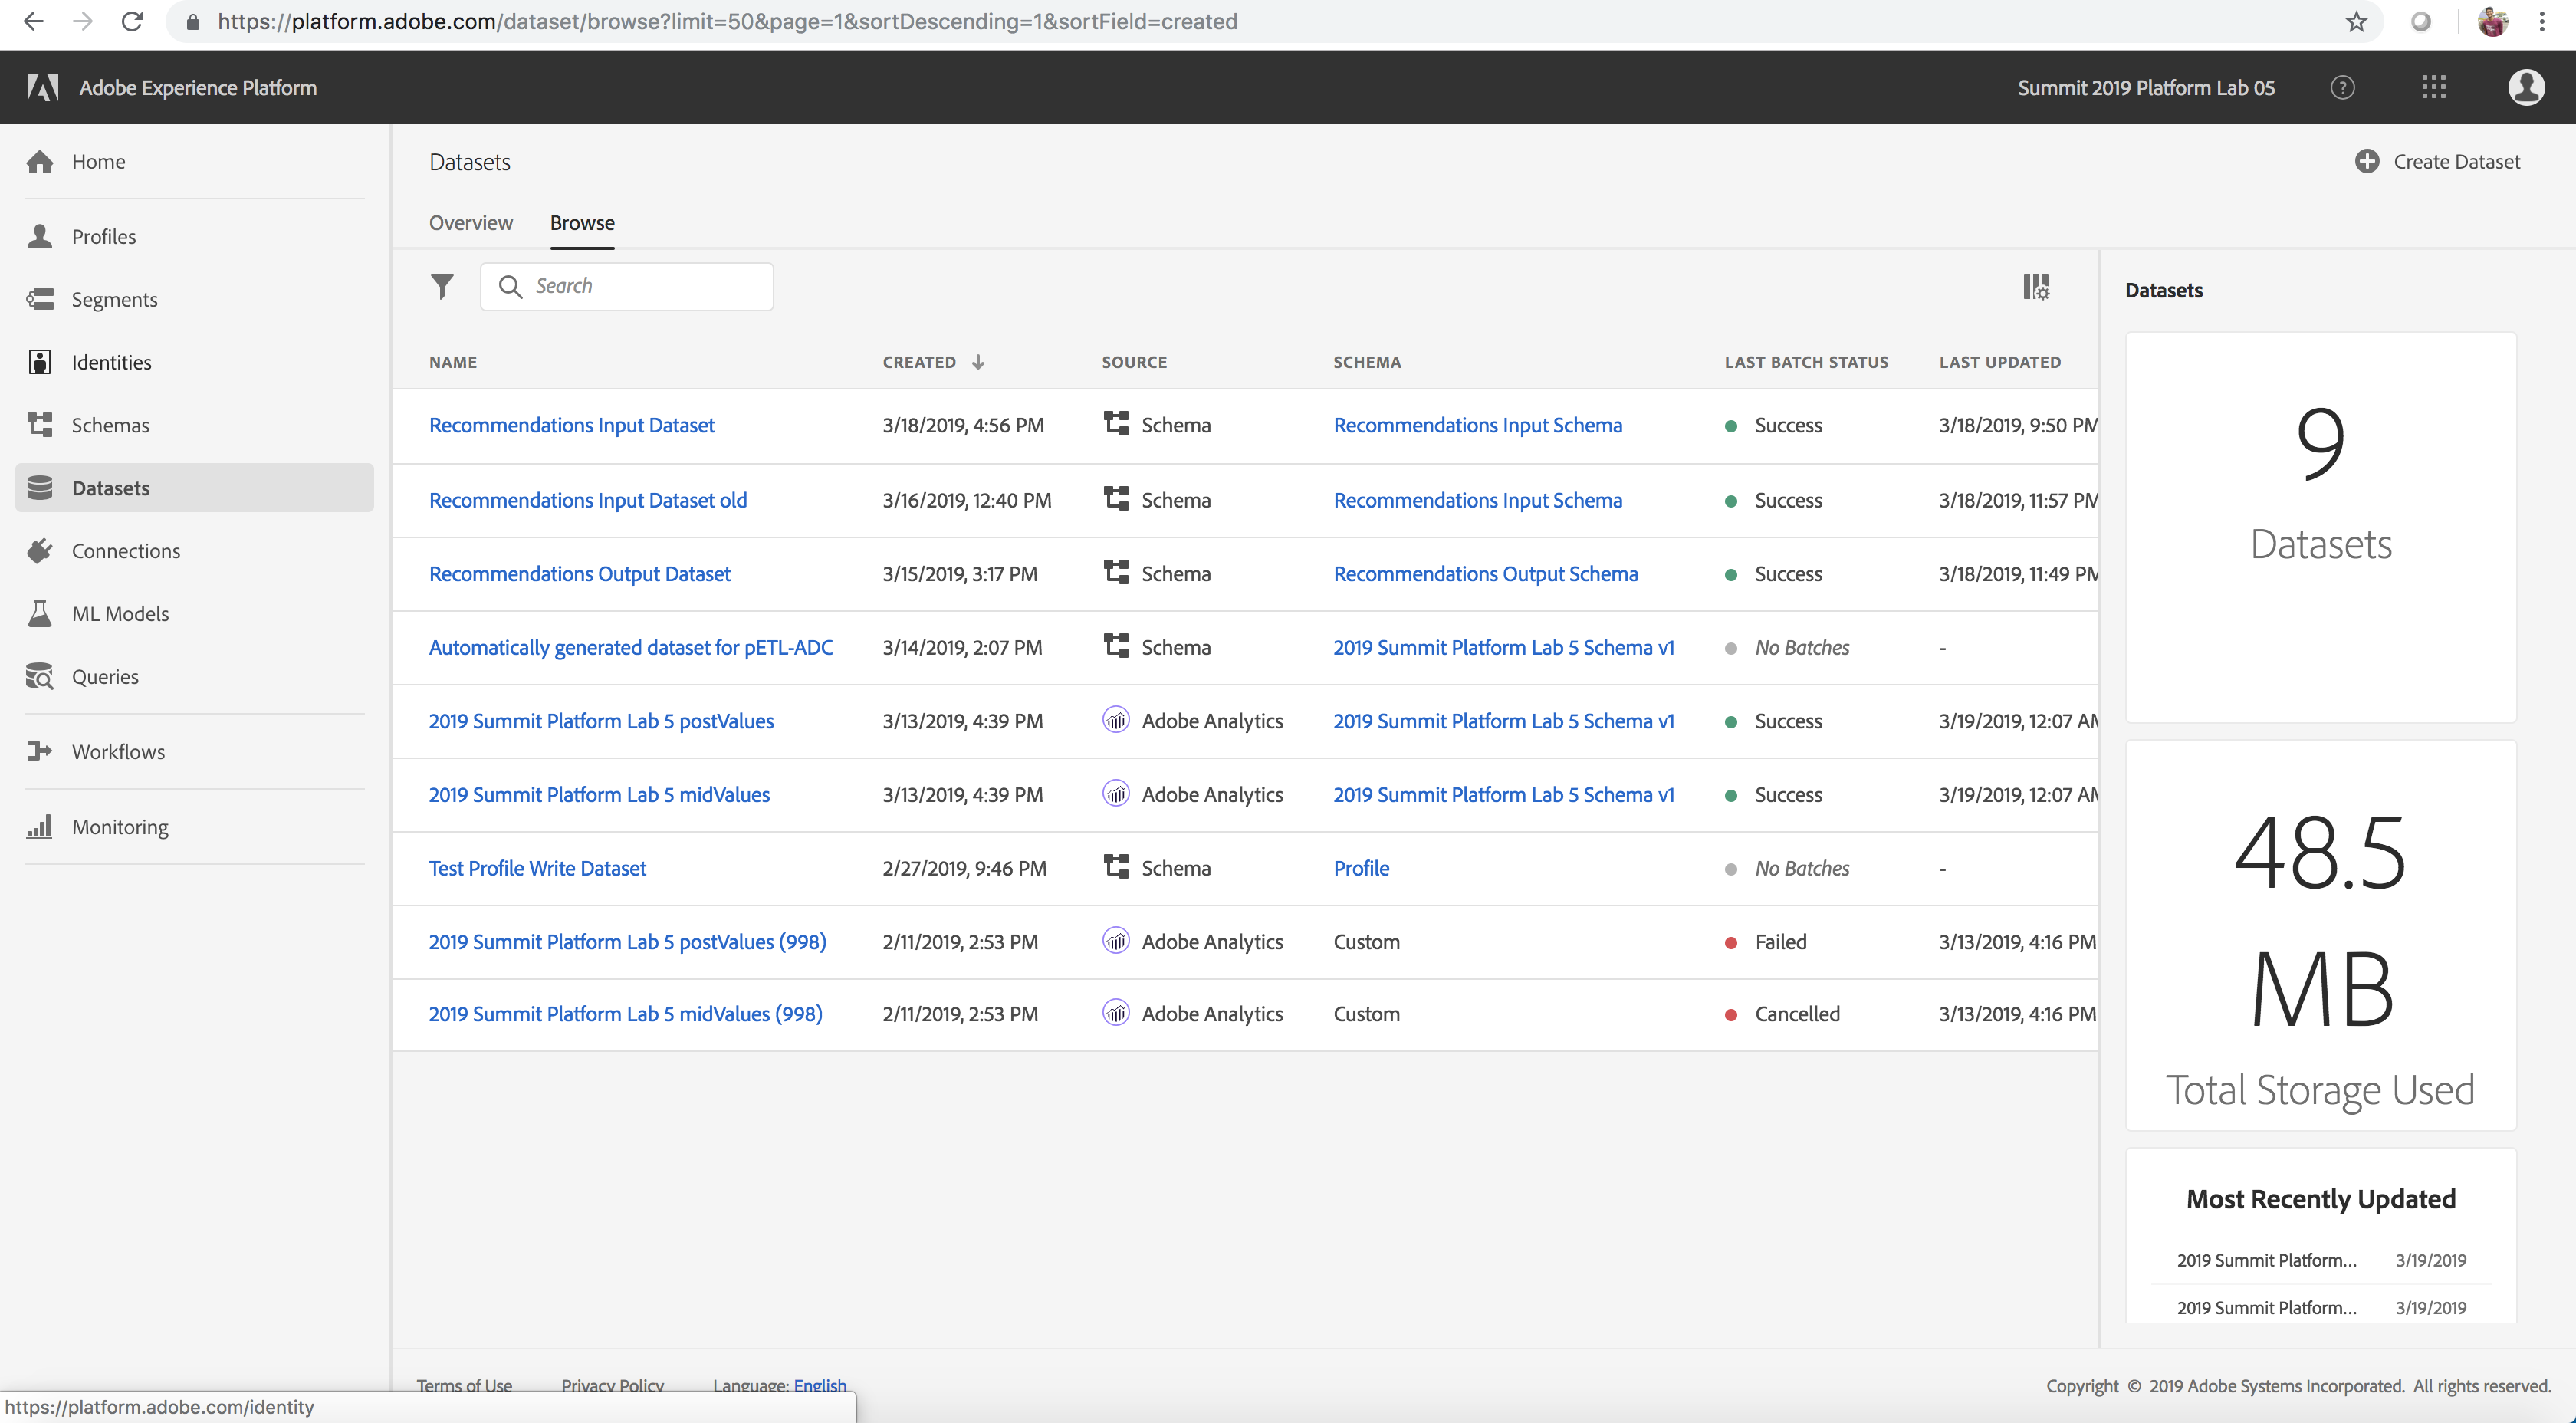
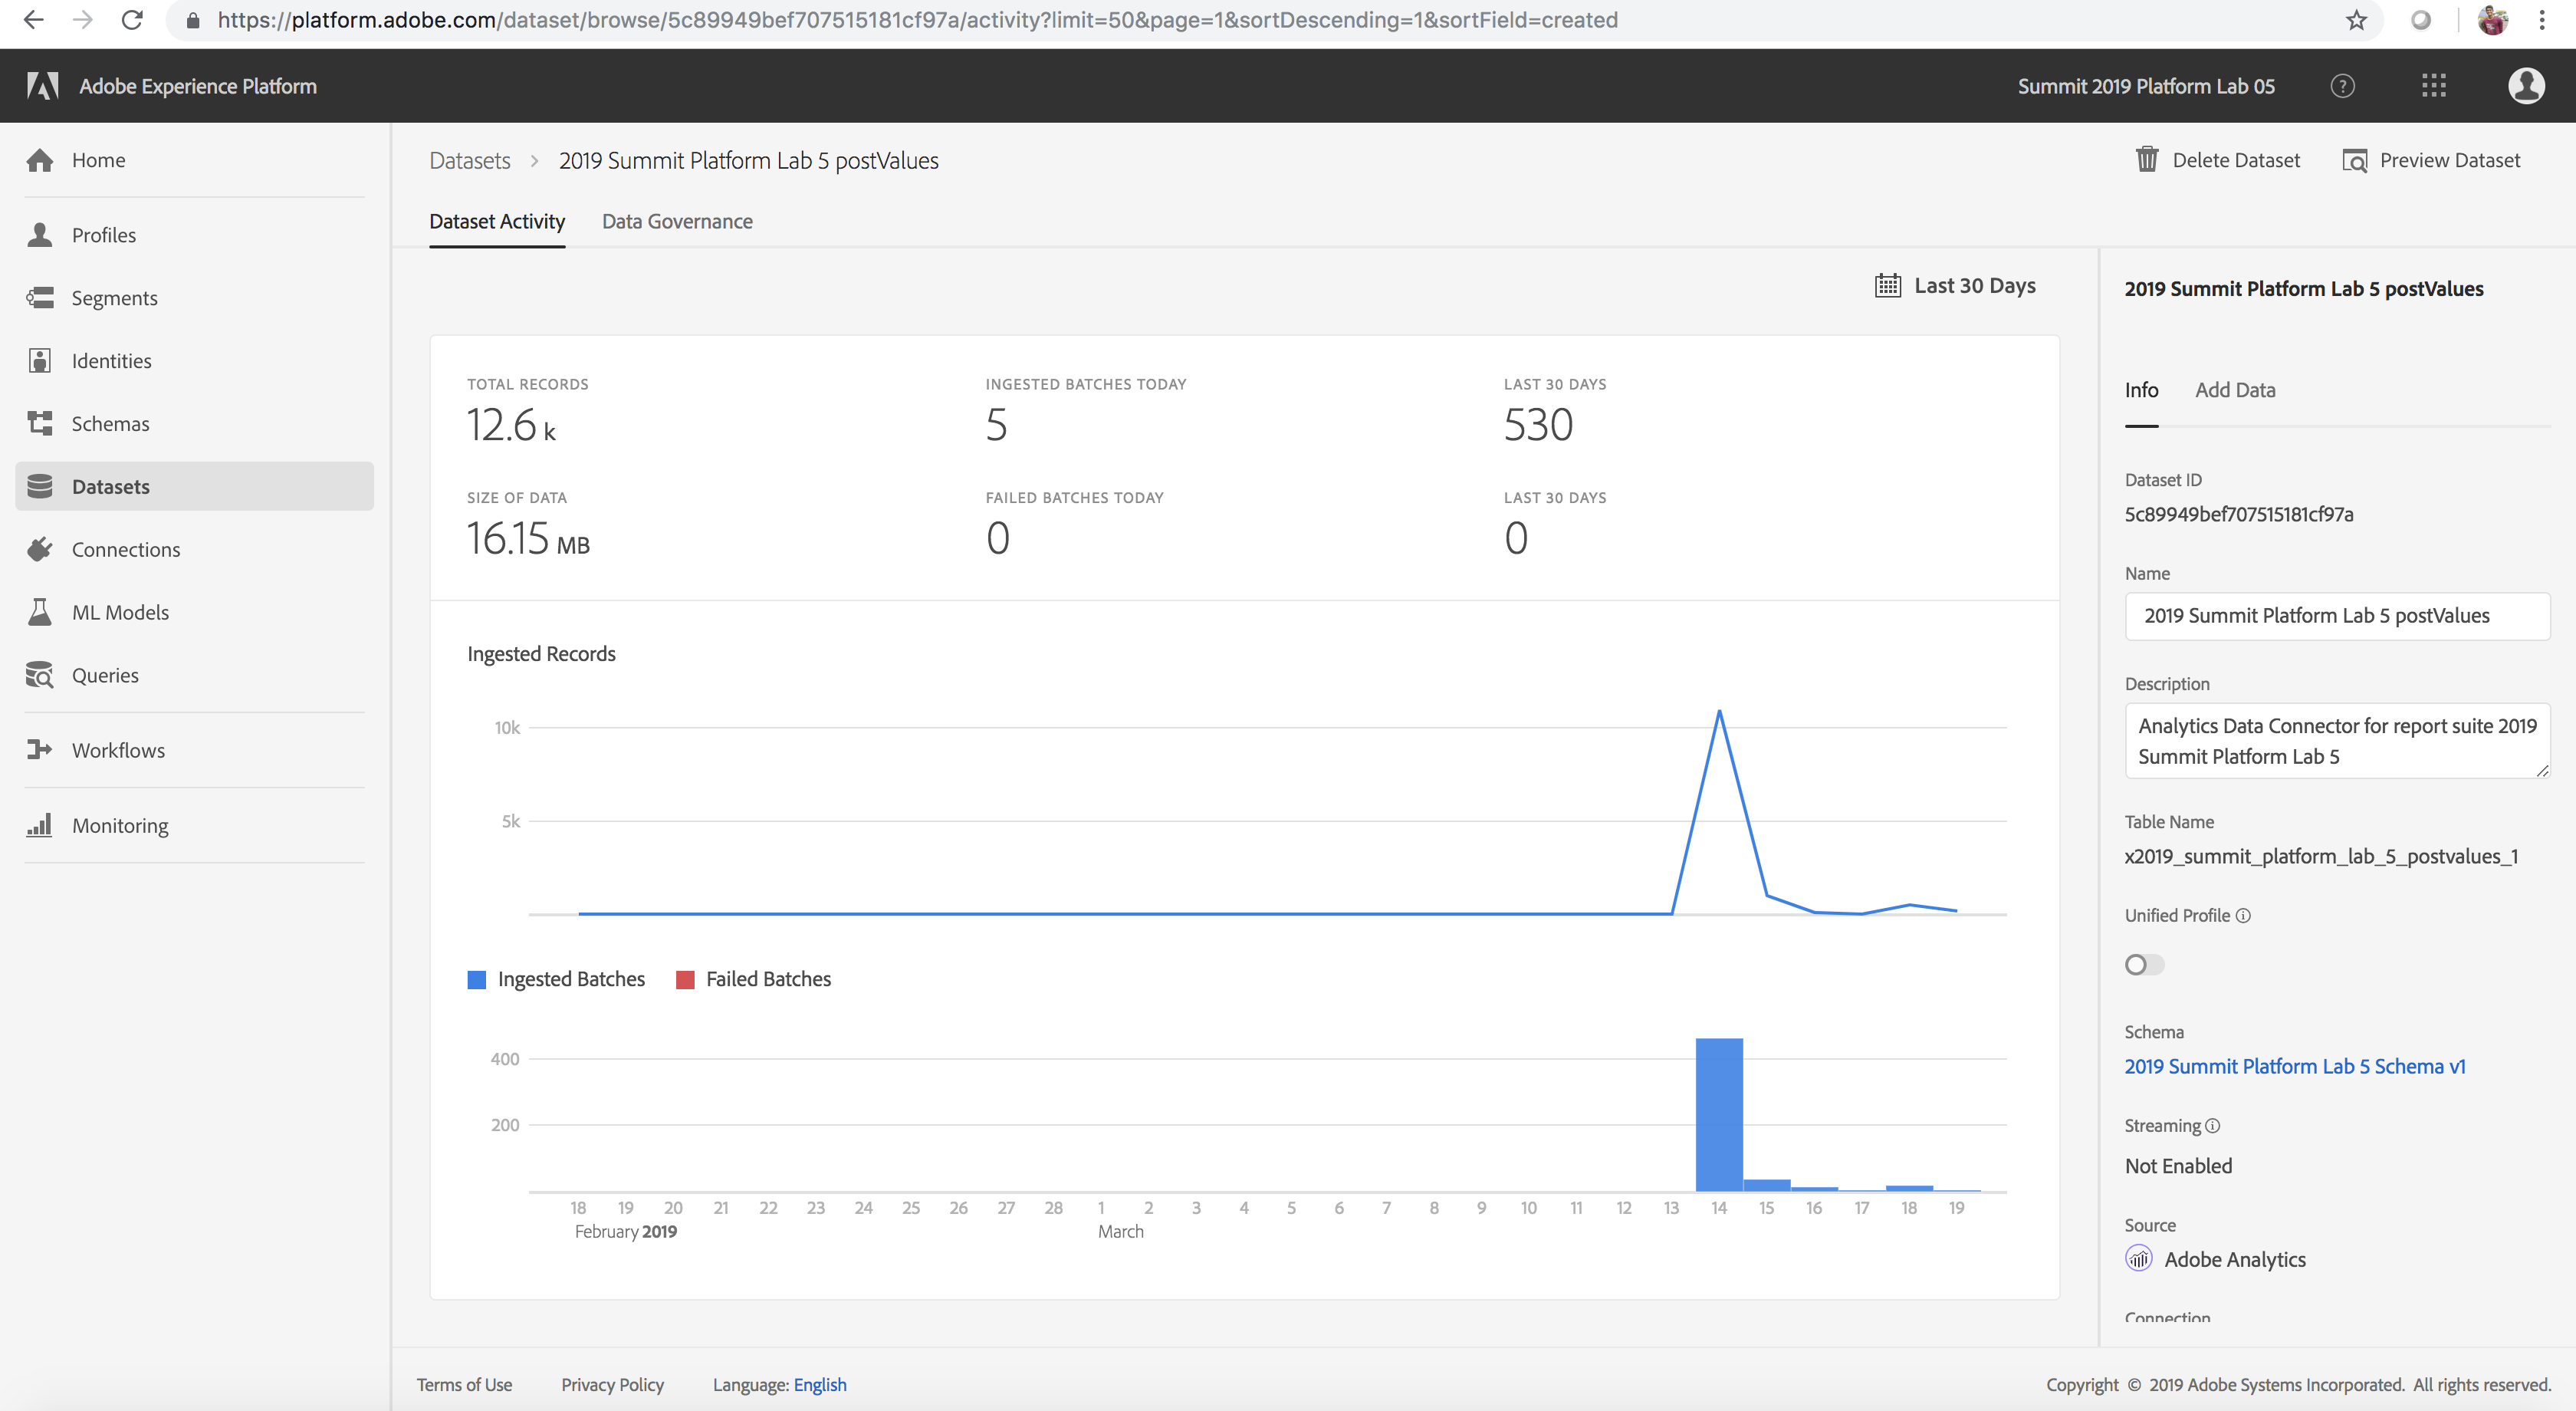
All interactions that are tracked on the Luma website by Adobe Analytics are streamed to the Experience Platform. For our lab, this data is flowing into the 2019 Summit Platform Lab 5 postValues dataset. Let’s explore this data.
- On the Datasets tab select the dataset that you would like to explore - the Analytics dataset 2019 Summit Platform Lab 5 postValues, in this case
- Select the Preview Dataset option to examine sample records. Then click Close.
- Select the link to the schema for the dataset under the Schema field from the right rail and explore the schema for the dataset and then go back to the dataset details page
- Optionally, explore the other datasets (these have been pre-filled with batches for preview) listed below by repeating steps 1-3 for those datasets
Source Datasets
| 2019 Summit Platform Lab 5 postValues |
2019 Summit Platform Lab 5 Schema v1 |
Analytics source data from the Luma website |
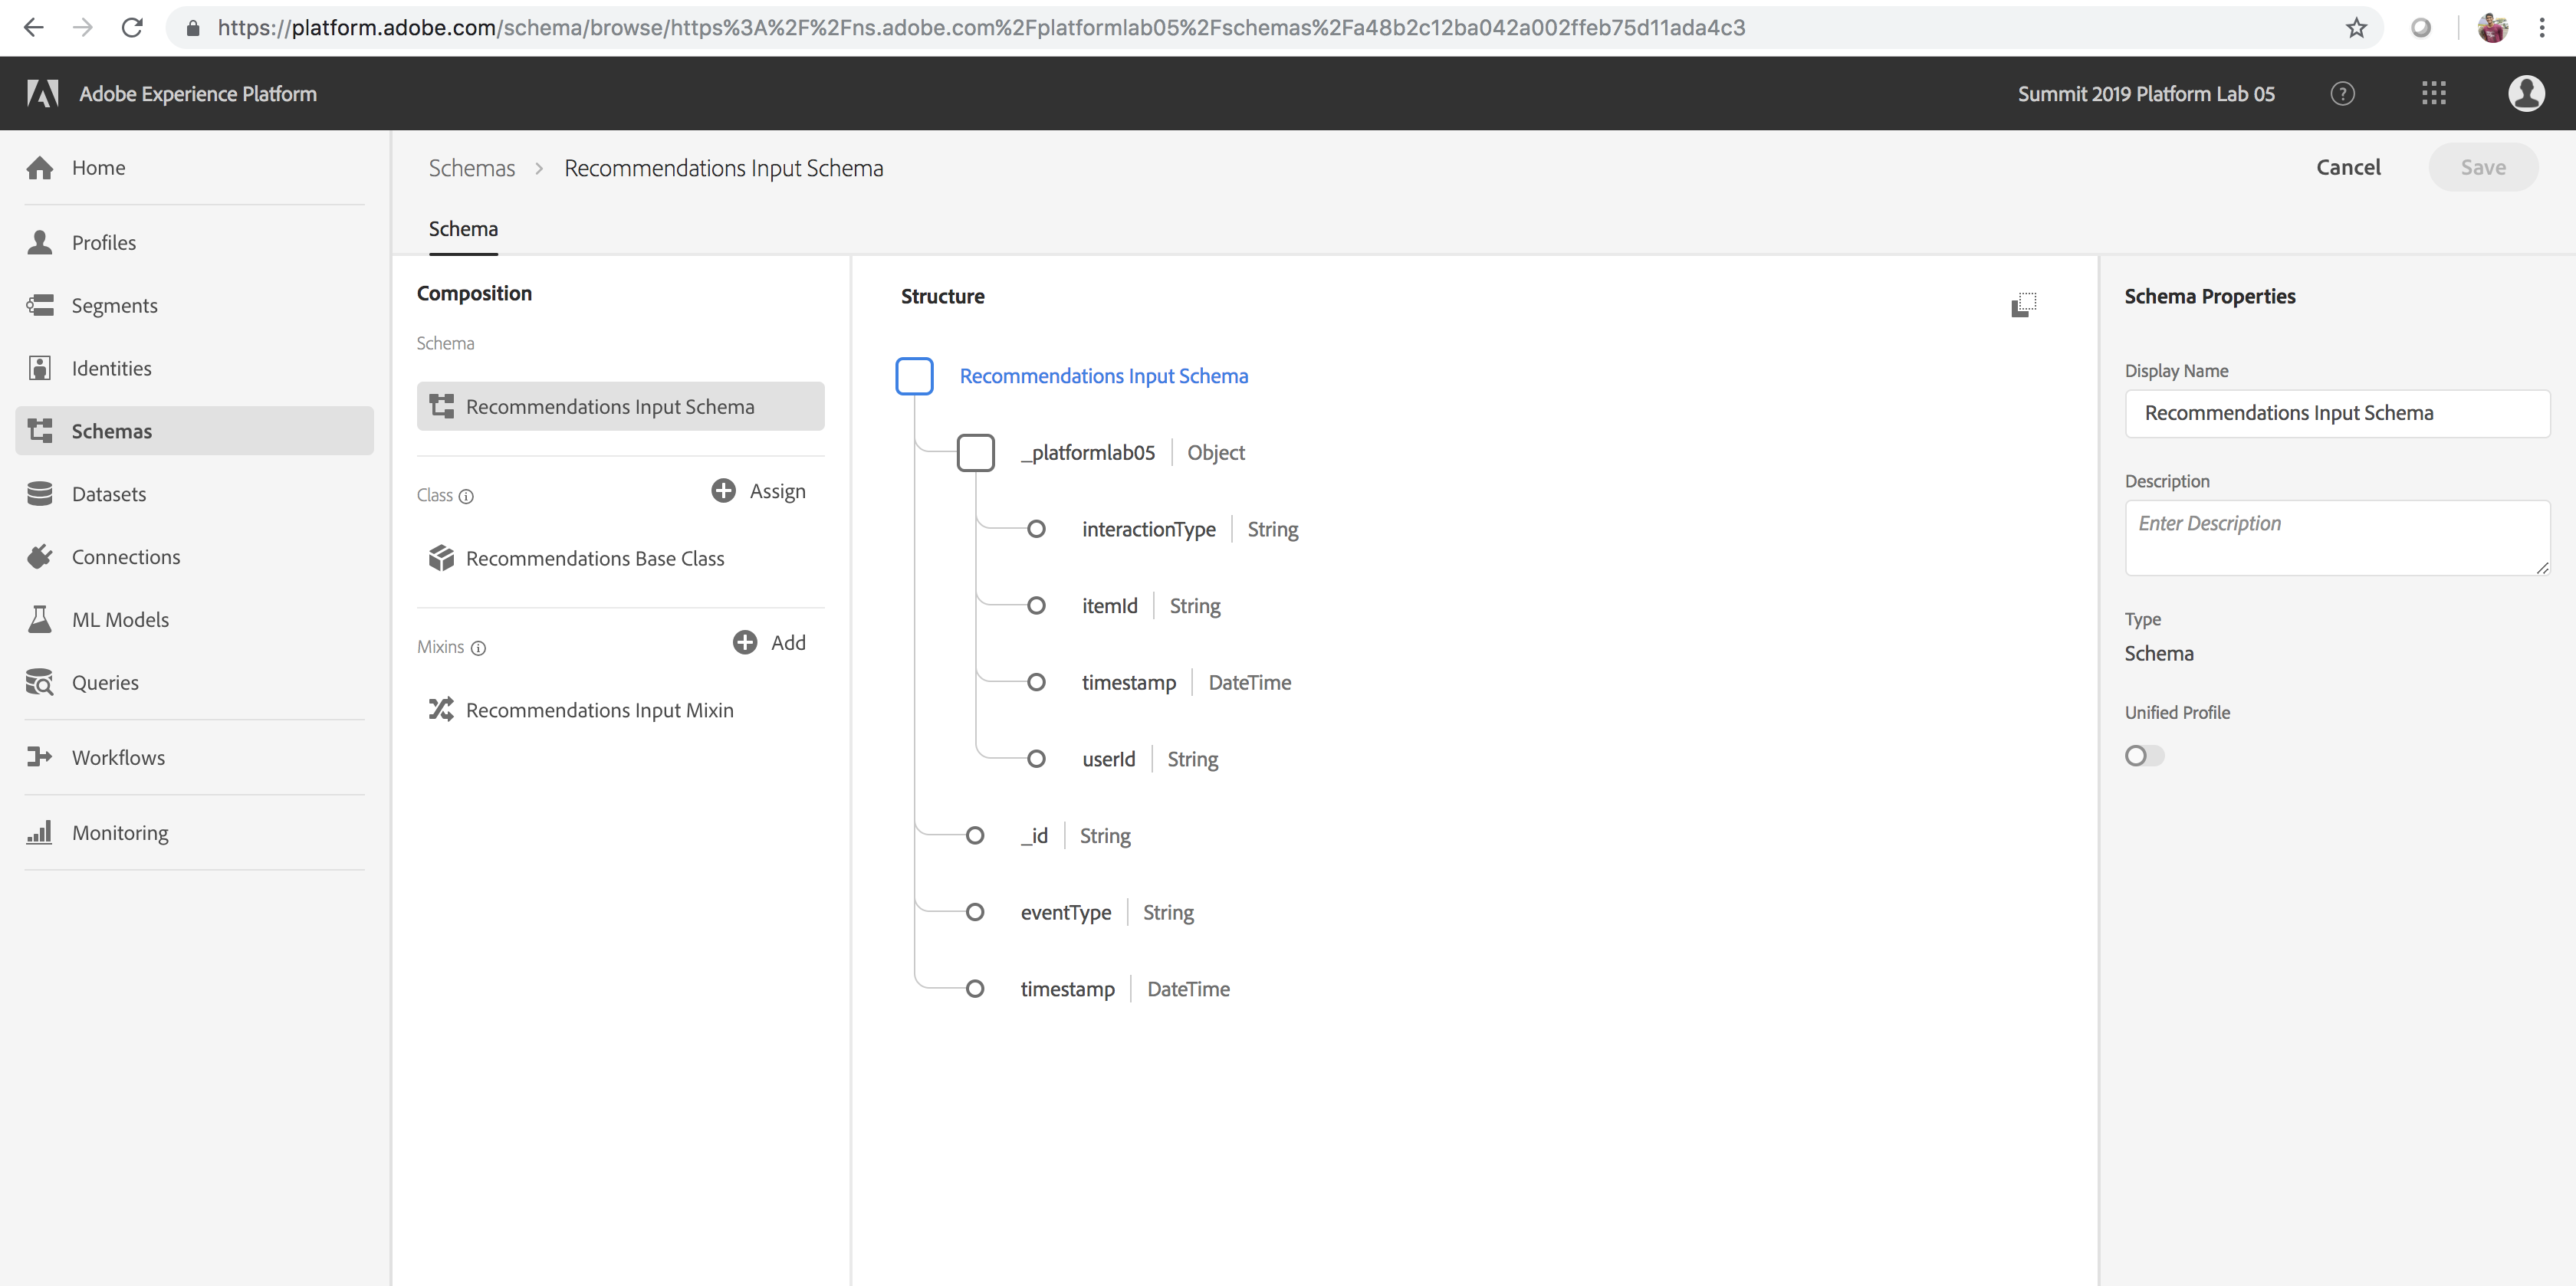
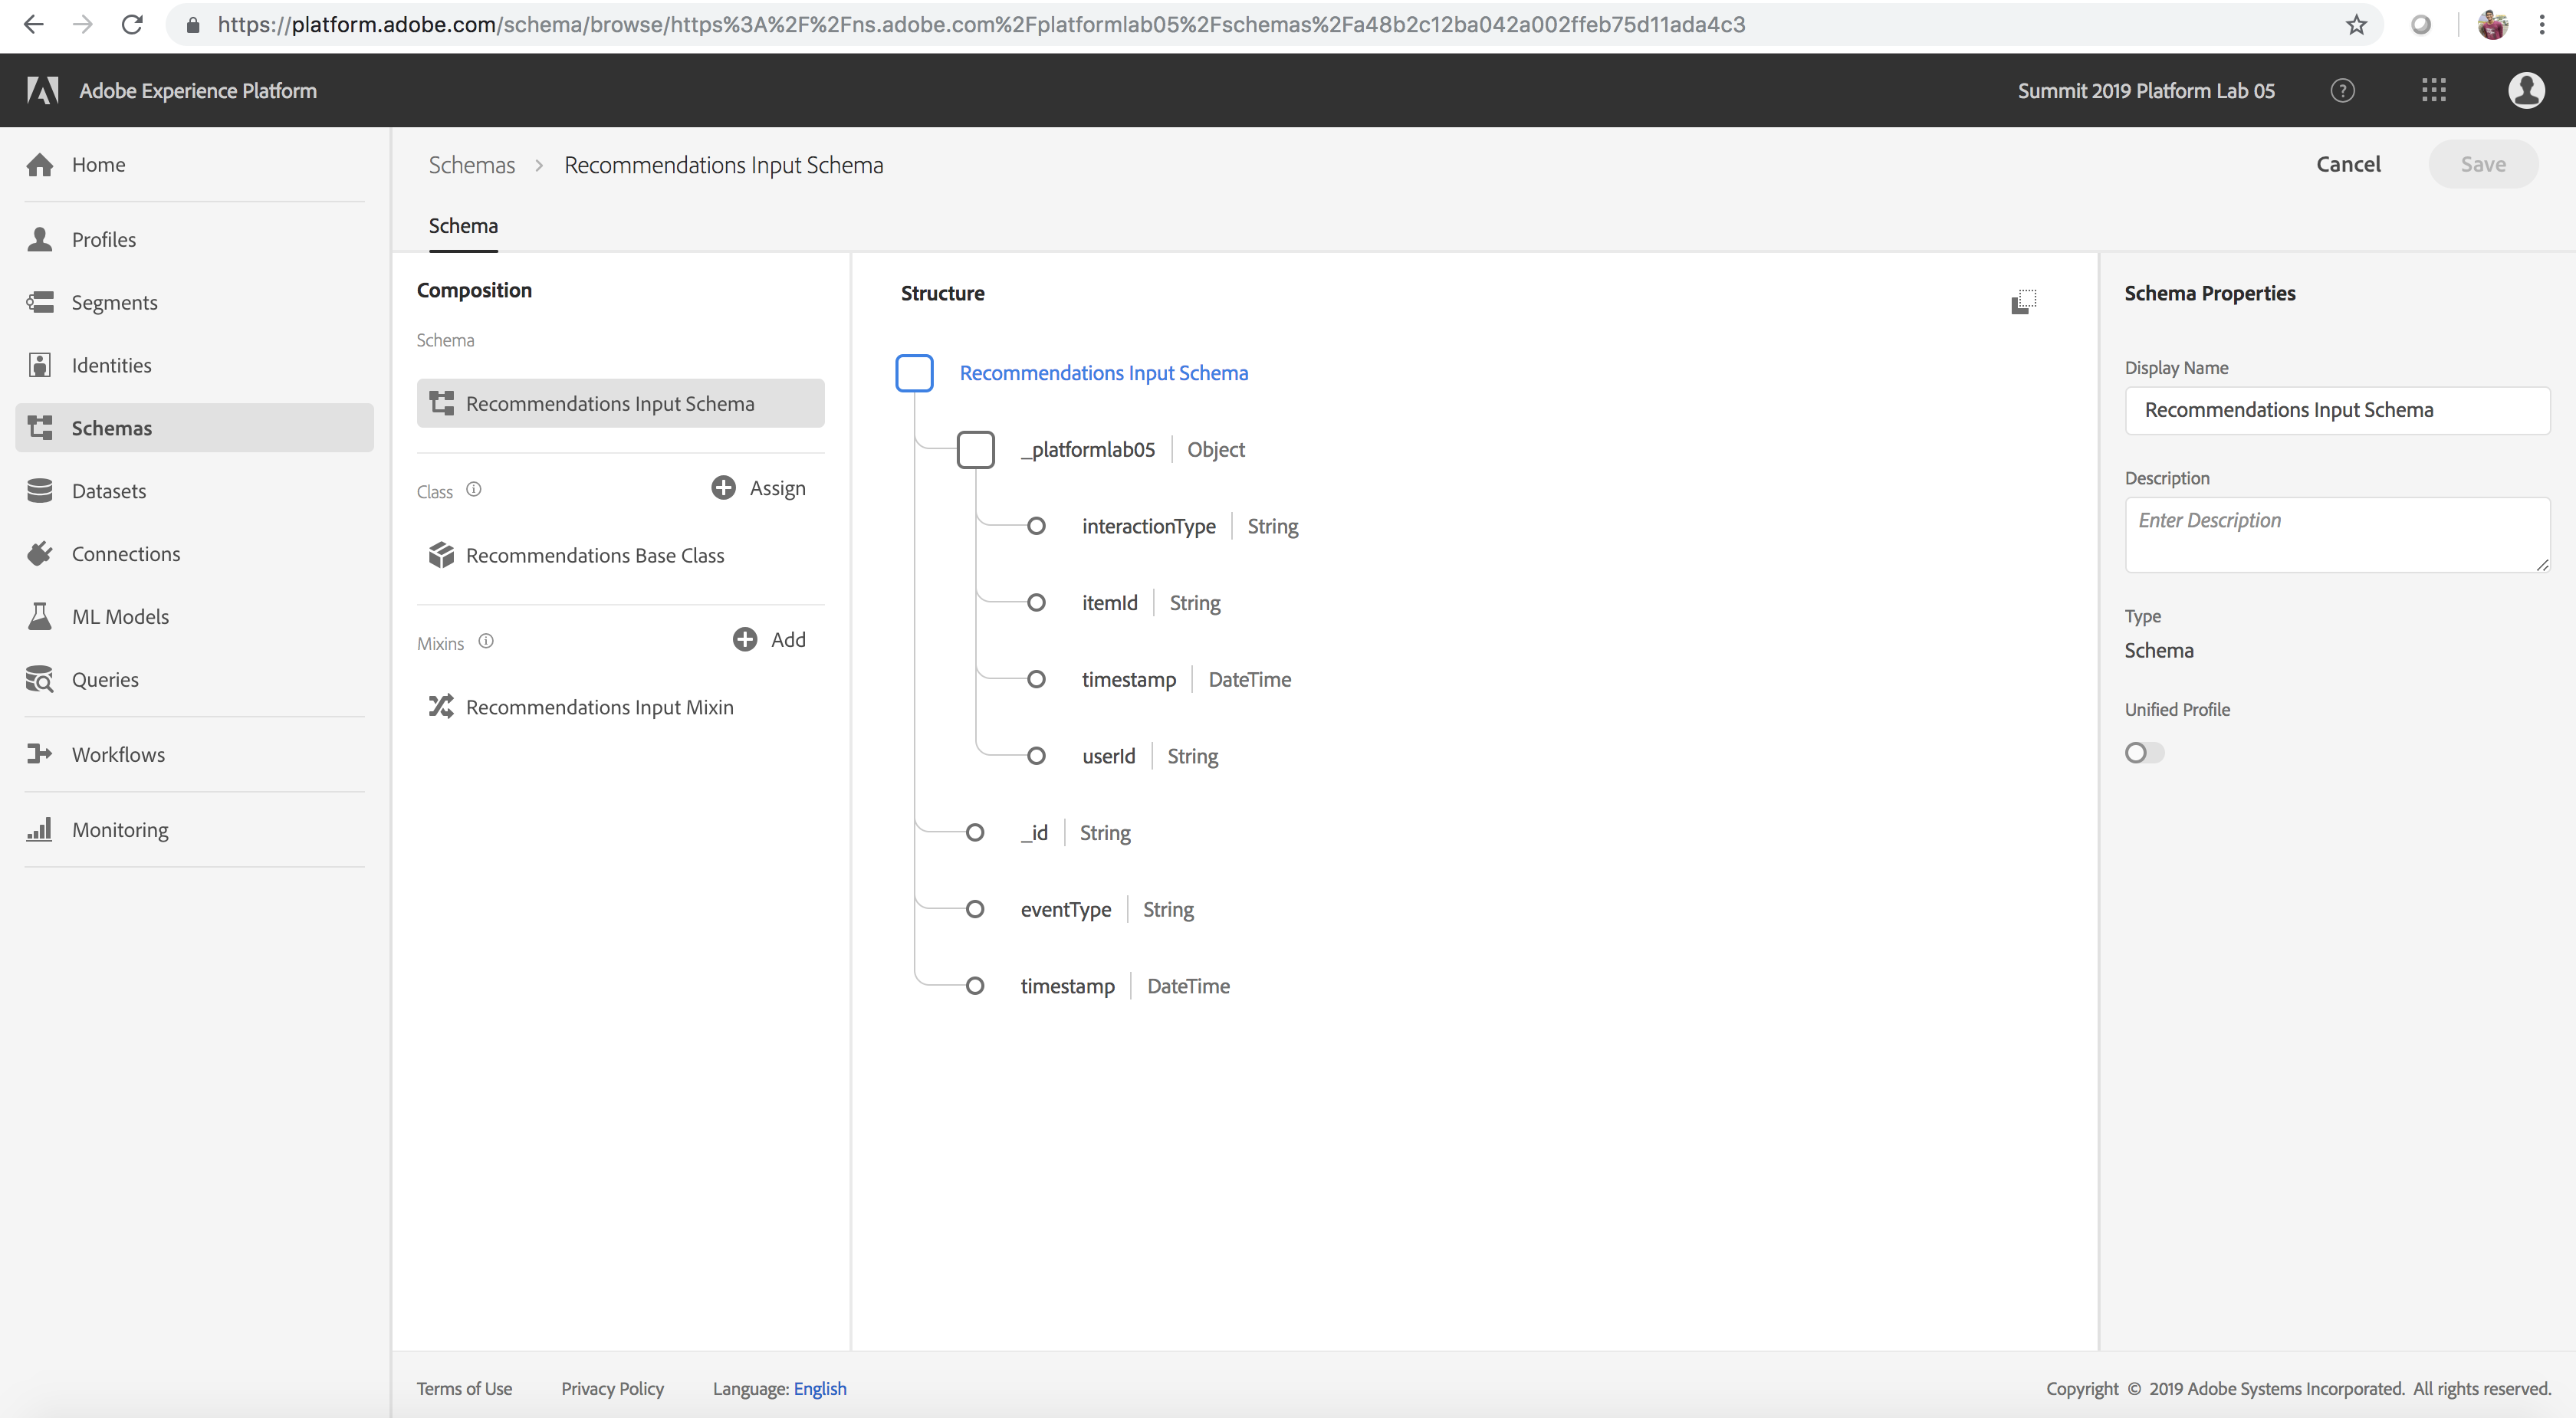
To develop a product recommendations machine learning model, we are interested in products that users have purchased previously on the Luma Website. To streamline the data required to train our machine learning model, we have created a simple schema called Recommendations Input Schema as outlined in the table below (key fields: userid – the user who interacted with the Luma Website, timestamp – time of interaction, interactiontype – Purchase, itemid – product that the user interacted with). In the optional section below titled Explore and Execute the Notebook to Transform Analytics Data to Features, we will create a Dataset that will conform to the above schema.
Training Datasets
| Recommendations Input Dataset |
Recommendations Input Schema |
The Analytics data is converted into a feature/training dataset using a feature pipeline. This data is used to train the Product Recommendations machine learning model. itemid and userid correspond to a product purchased by that user at time timestamp |
Scored Results Datasets
| Recommendations Output Dataset |
Recommendations Output Schema |
This is the dataset that you would obtain after scoring. This contains the list of recommended products for each user |
Datasets Available
Luma Analytics Source Dataset
Luma Analytics Schema

Schema used for Training
Download Notebooks Required for Lab
If you haven't done so yet, here we will download the notebooks that would come handy for the rest of the lab.
- First, navigate to adobe.com/go/summit2019-l777
- Click the link to download all lab resources
- Then navigate into:
- 'Notebooks-Wed' if your session is on Wednesday
- 'Notebooks-Thurs' if your session is on Thursday
- Navigate to the ML Models tab on the left rail of the Adobe Experience Platform UI
- Navigate to the Notebooks tab on top (Note: The first time you load Jupyter it may take up to 20 seconds)
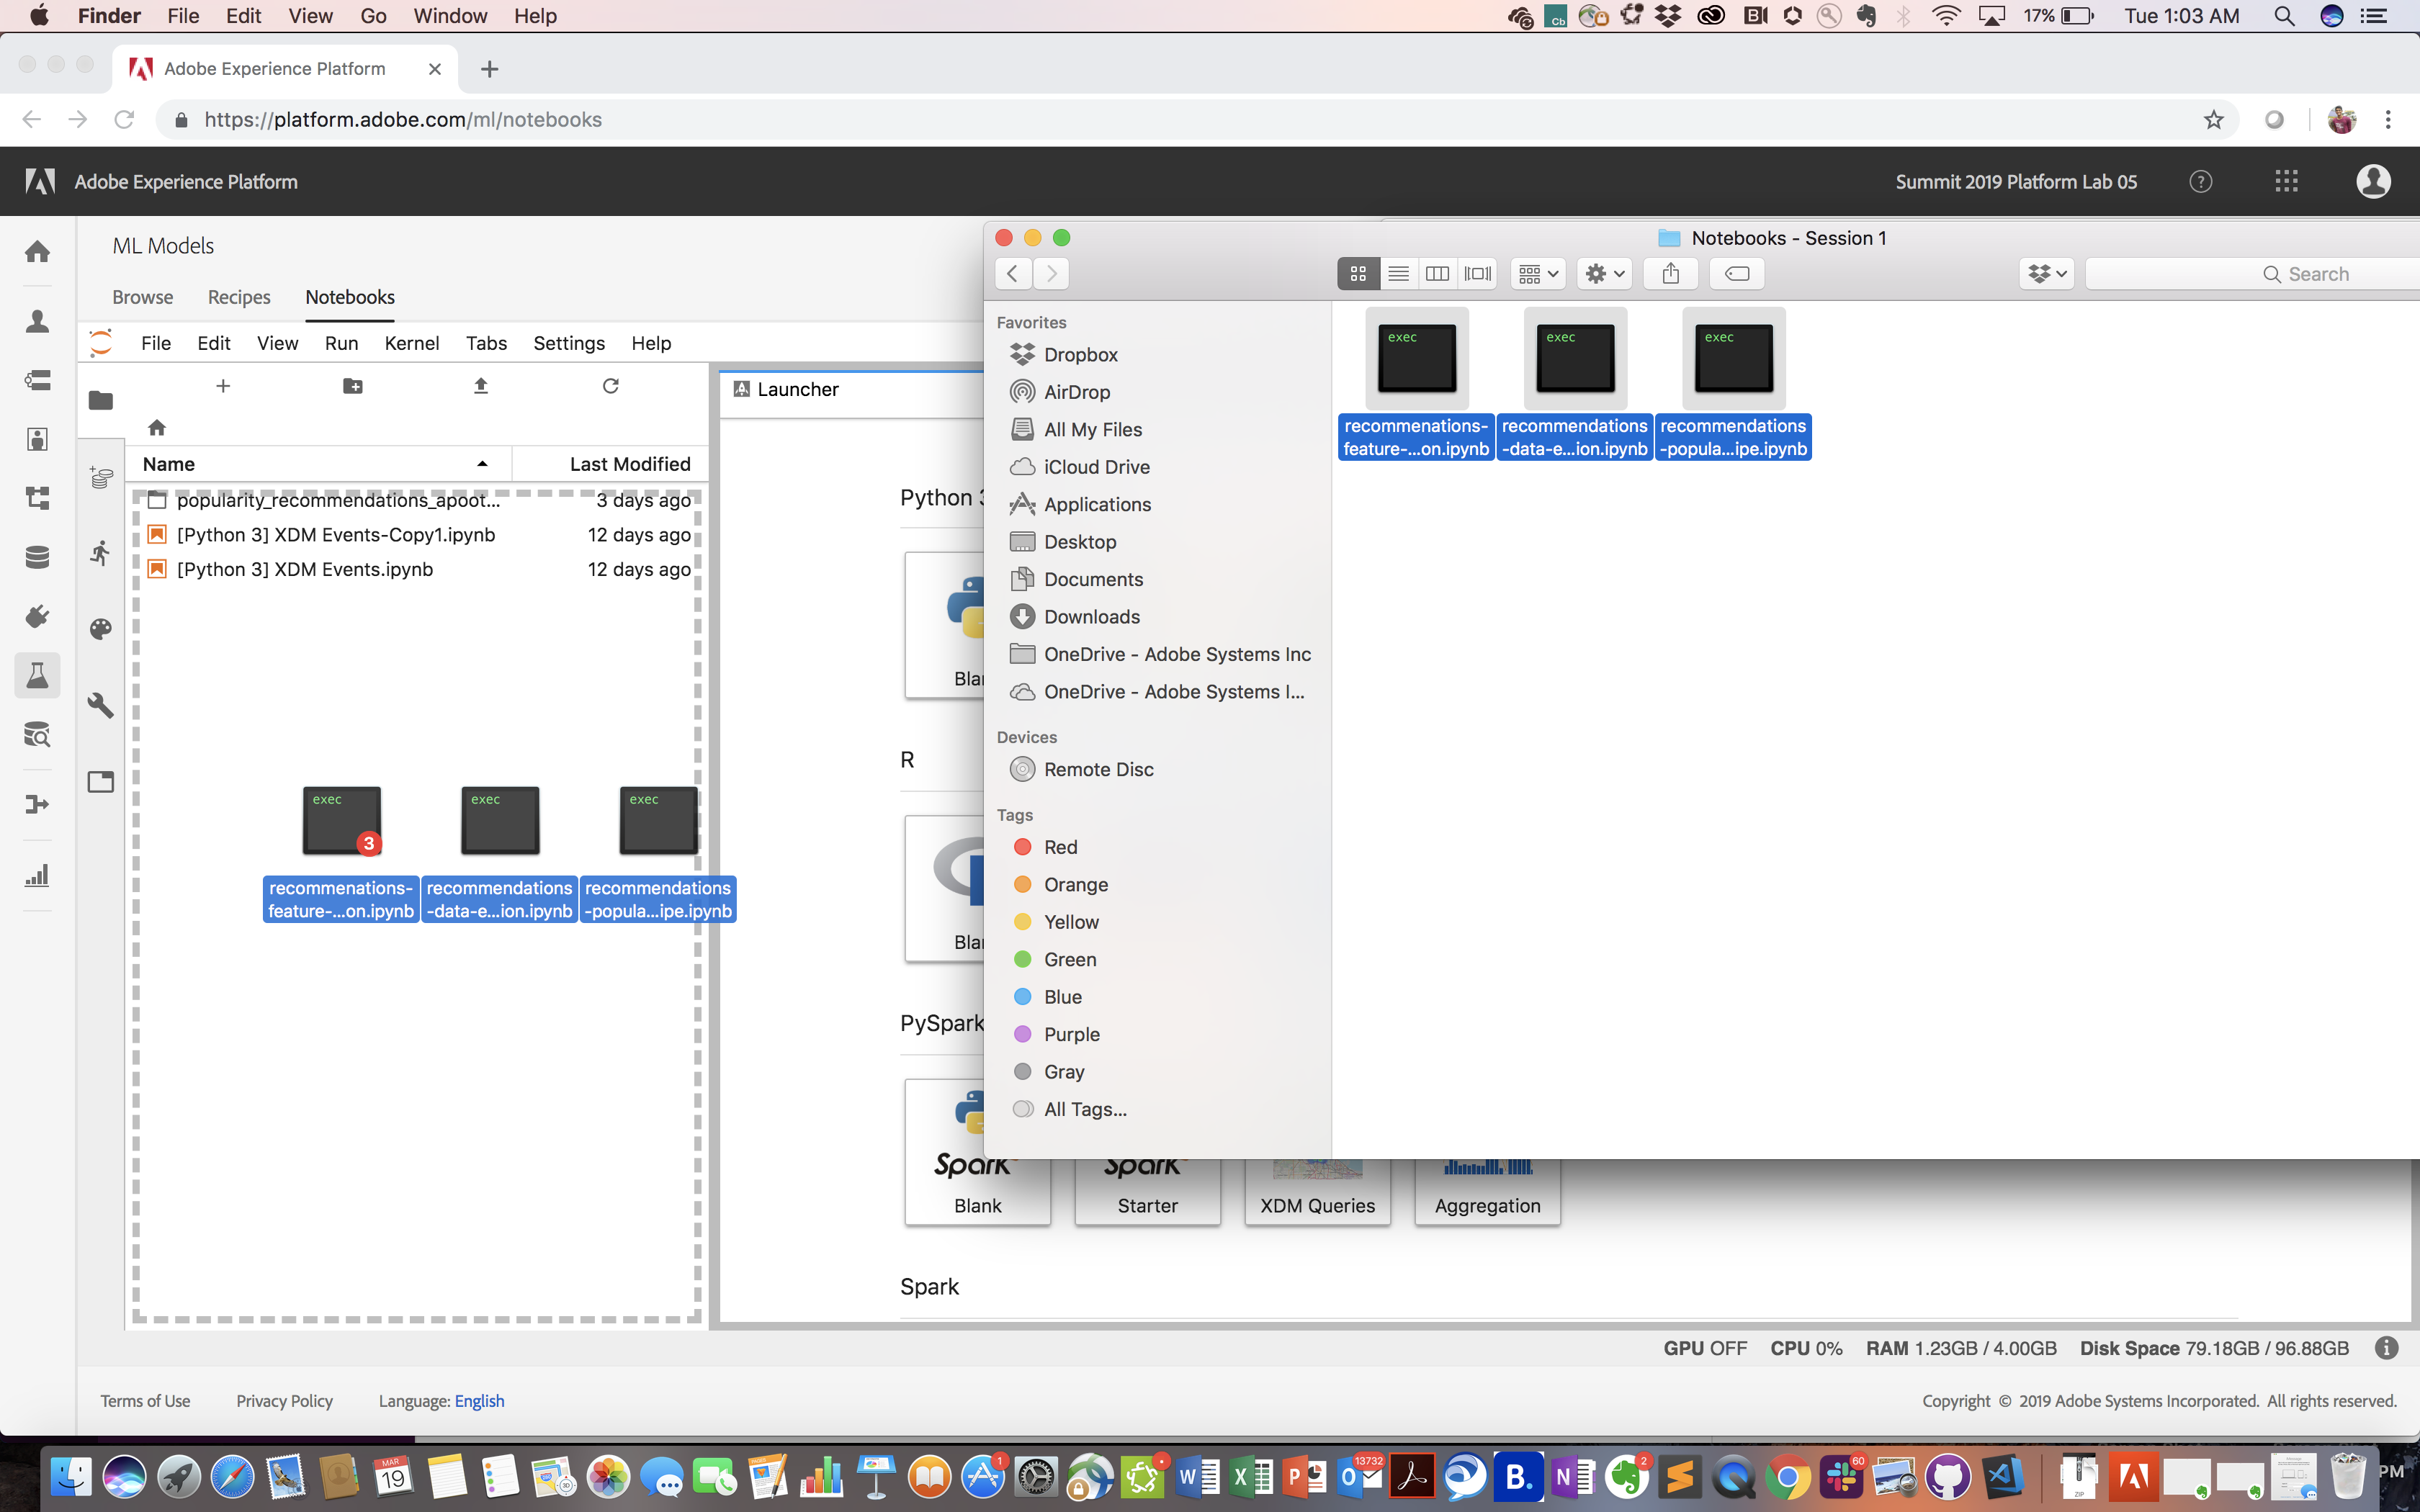
- Select all 3 notebooks (with extension .ipynb) from the 'Notebooks - Session 1' folder in your github project and drag these into the left pane within the Notebooks UI under the pre-installed XDM Events notebooks (alternatively, click the upload icon on the top pane within Jupyter Notebooks and navigate to the notebook files)
- Confirm all 3 notebooks now show up in the left pane
Upload Lab Notebooks
Next, let’s take the source data provided through Adobe Analytics and transform it to an optimized feature dataset using a PySpark notebook. Running this notebook triggers a PySpark job which enables us to work with and transform big data from within the Jupyter notebook environment. Given the computational cost of executing the PySpark notebook for 100+ users simultaneously, we encourage you to explore and without executing it.
Click here for optional advanced steps to explore and execute the notebook!
Let's start by exploring the recommendations-feature-transformation notebook
- In the Notebooks UI left pane, double click the recommendations-feature-transformation.ipynb Notebook to open and explore it
- Place your cursor in the first cell and choose Run > Run All Cells from the menu
- Review the code and output of each cell as you create a new feature dataset batch through the notebook
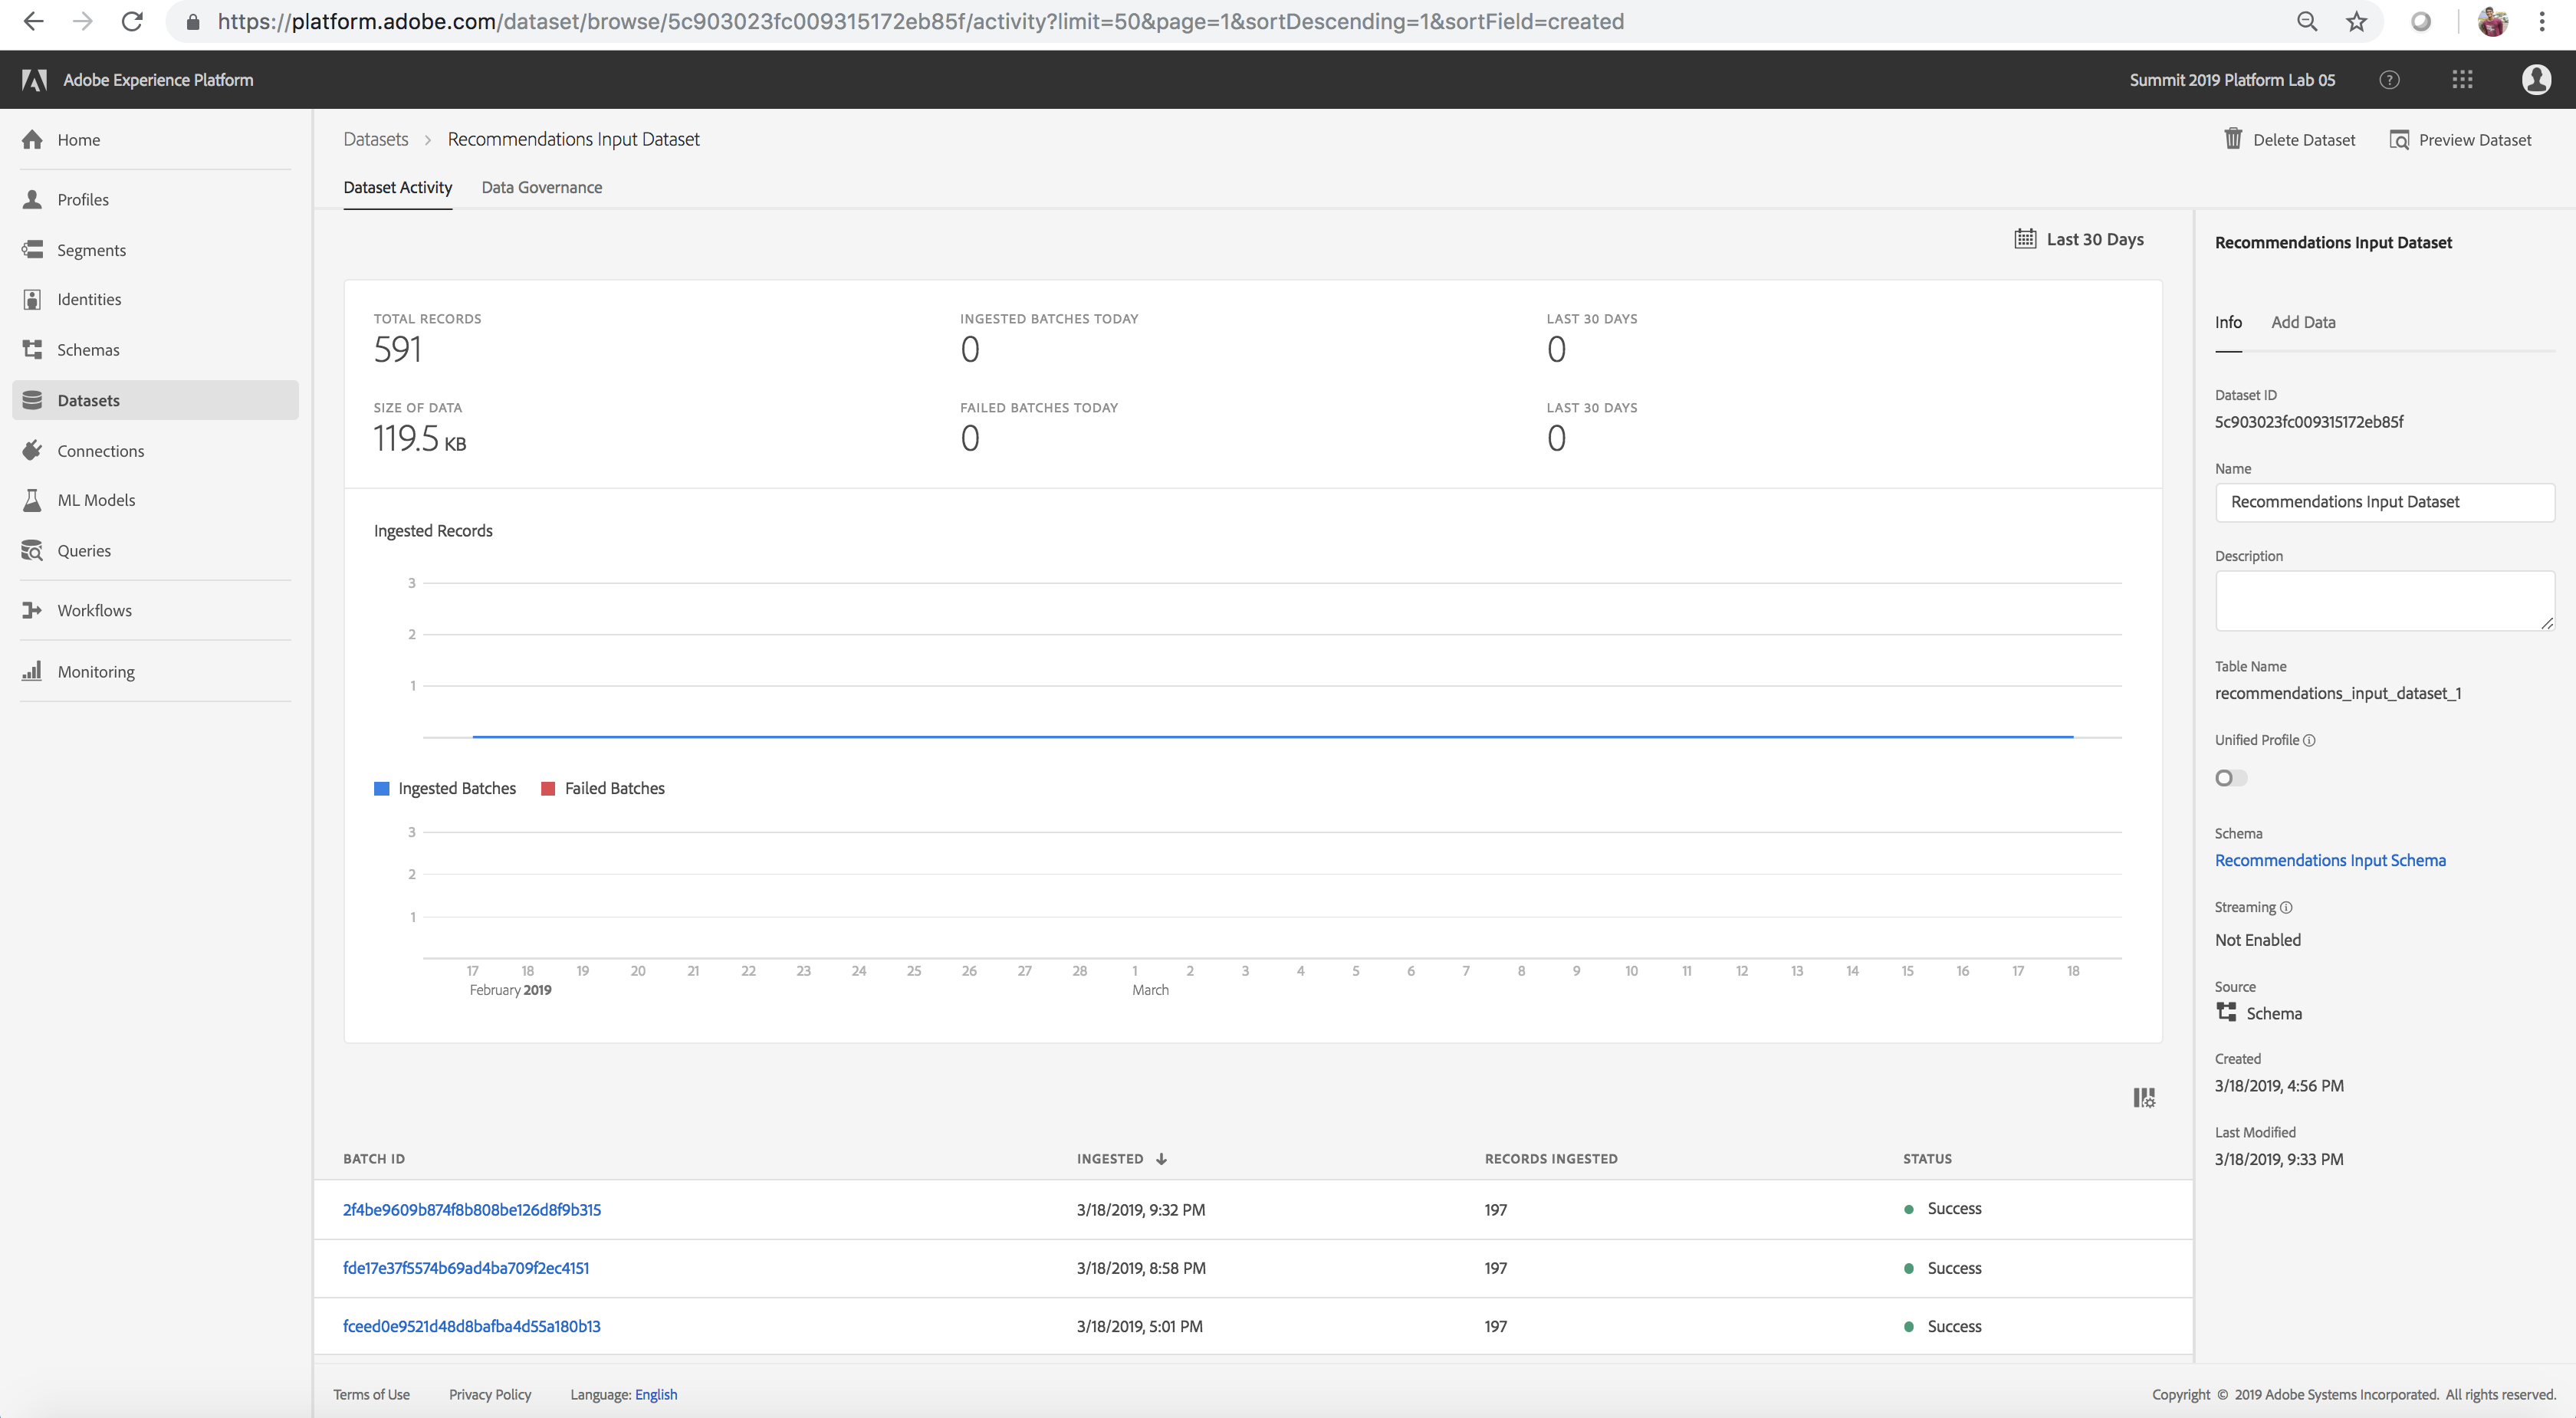
- A new batch should eventually be written by the PySpark job. Since these jobs might take a good chunk of time, let’s take a look at a feature dataset batch from a previous run
- Ensure a new feature Dataset batch is created for the dataset 'Recommendations Input Dataset' using the steps outlined here. A new batch entry shows up at the bottom of the Datasets page (feel free to move on to the next lesson now and verify this later once the notebook execution finishes)
- Examine the schema for the dataset
New Batch Added
Schema for Transformed Data
Next Steps
In the next lesson you will be exploring an end-to-end machine learning use case in JupyterLab and then operationalize your model as a recipe.
Lesson 2 - Model Authoring and Operationalization
⏳ Time Allocated: 20 minutes
In the previous lesson we created the Training Data required to power our Machine Learning model. In this lesson we will show you how you can use this data and author a machine learning model. In the real world, creating a dataset and a machine learning model will be an iterative process.
Objectives:
- Analyze your training data using Notebooks
- Explore the Product Recommendations Recipe
- Learn how the Product Recommendations Recipe can be created
Concepts Introduced:
- Recipe Builder Notebook: This notebook template is one of our recent innovations that templatises your model to automatically package and operationalize it. The notebook has multiple templatized cells that you fit your model code into:
- The requirements and configuration cells allow you to add additional libraries and configure datasets and tuning parameters for your model
- The evaluator cell enables you to split your data and evaluate the performance of your model
- The training and scoring data loader cells allow you to load the data you need for training and scoring
- Finally, the pipeline cell contains logic required for both training and scoring your model.
- JupyterLab: JupyterLab is the next-generation web-based interface for Project Jupyter. It is tightly integrated into Adobe Experience Platform.
- Pre-Installed Libraries: There are over 100 pre-installed Python libraries.
You may skip this step if you are already logged in.
- Navigate to: https://platform.adobe.com/
- Sign in with the following credentials
- If your Session is on Wednesday:
- User Name: L777+[your station number]@adobeeventlab.com
- Password: Adobe2019!
- If your Session is on Thursday:
- User Name: L777-2+[your station number]@adobeeventlab.com
- Password: Adobe2019!
(Optional) Analyze the Data
We can also explore the generated training data (Recommendations Input Dataset) to get quick insights using the data exploration notebook (recommendations-data-exploration.ipynb)
Click here for optional advanced steps to execute the notebook!
- Click the File Browser icon tab above the Data icon tab on the inner left rail
- In the Notebooks UI left pane, double click the recommendations-data-exploration.ipynb Notebook to open it
- Place your cursor in the first cell and choose Run > Run All Cells from the menu
- Review the code and output of each cell as you summarize and analyze the data through the notebook
Explore the Product Recommendations Recipe
To power product recommendations at scale using past purchase data and machine learning, we'll make use of the Product Recommendations Recipe. Recipes enable you to test your model at scale. More importantly, it also empowers you to democratize machine learning across your organization to enable others to use it for disparate use cases without writing any code. Let's now take a look at the Product Recommendations Recipe
- Navigate to the ML Models tab on the left rail
- Navigate to the Recipes tab from above
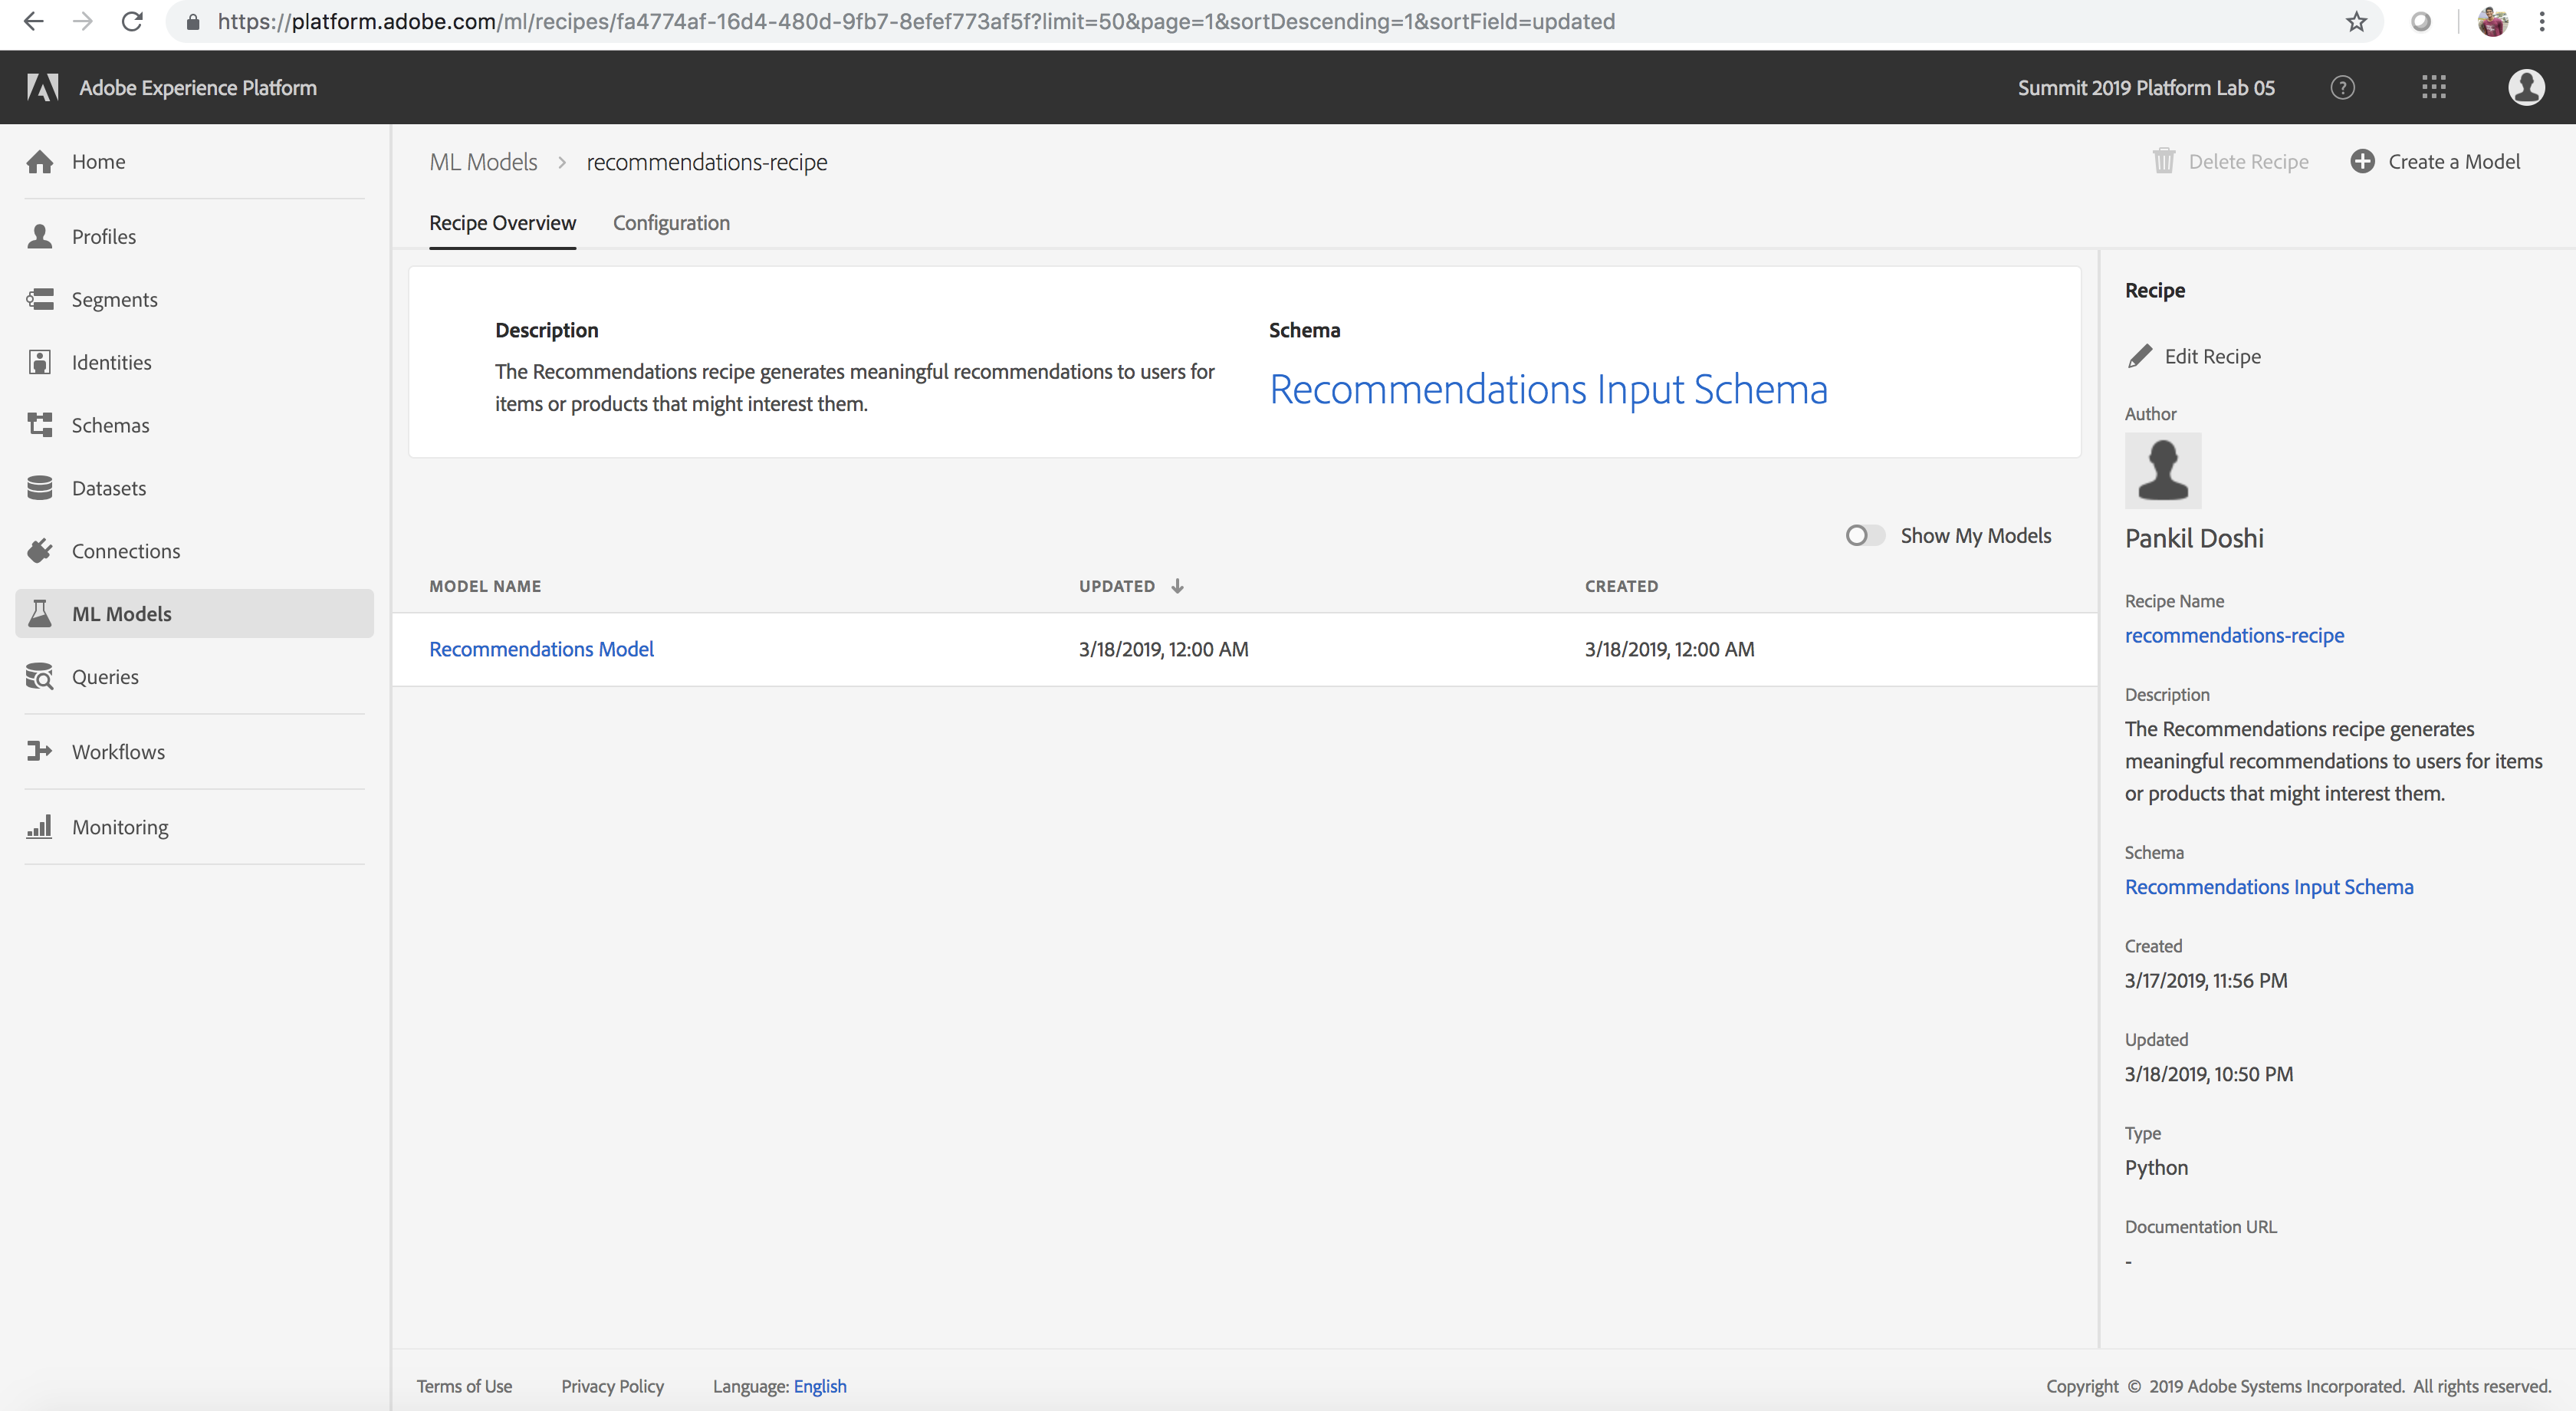
- Locate and open the pre-created recipe named recommendations-recipe
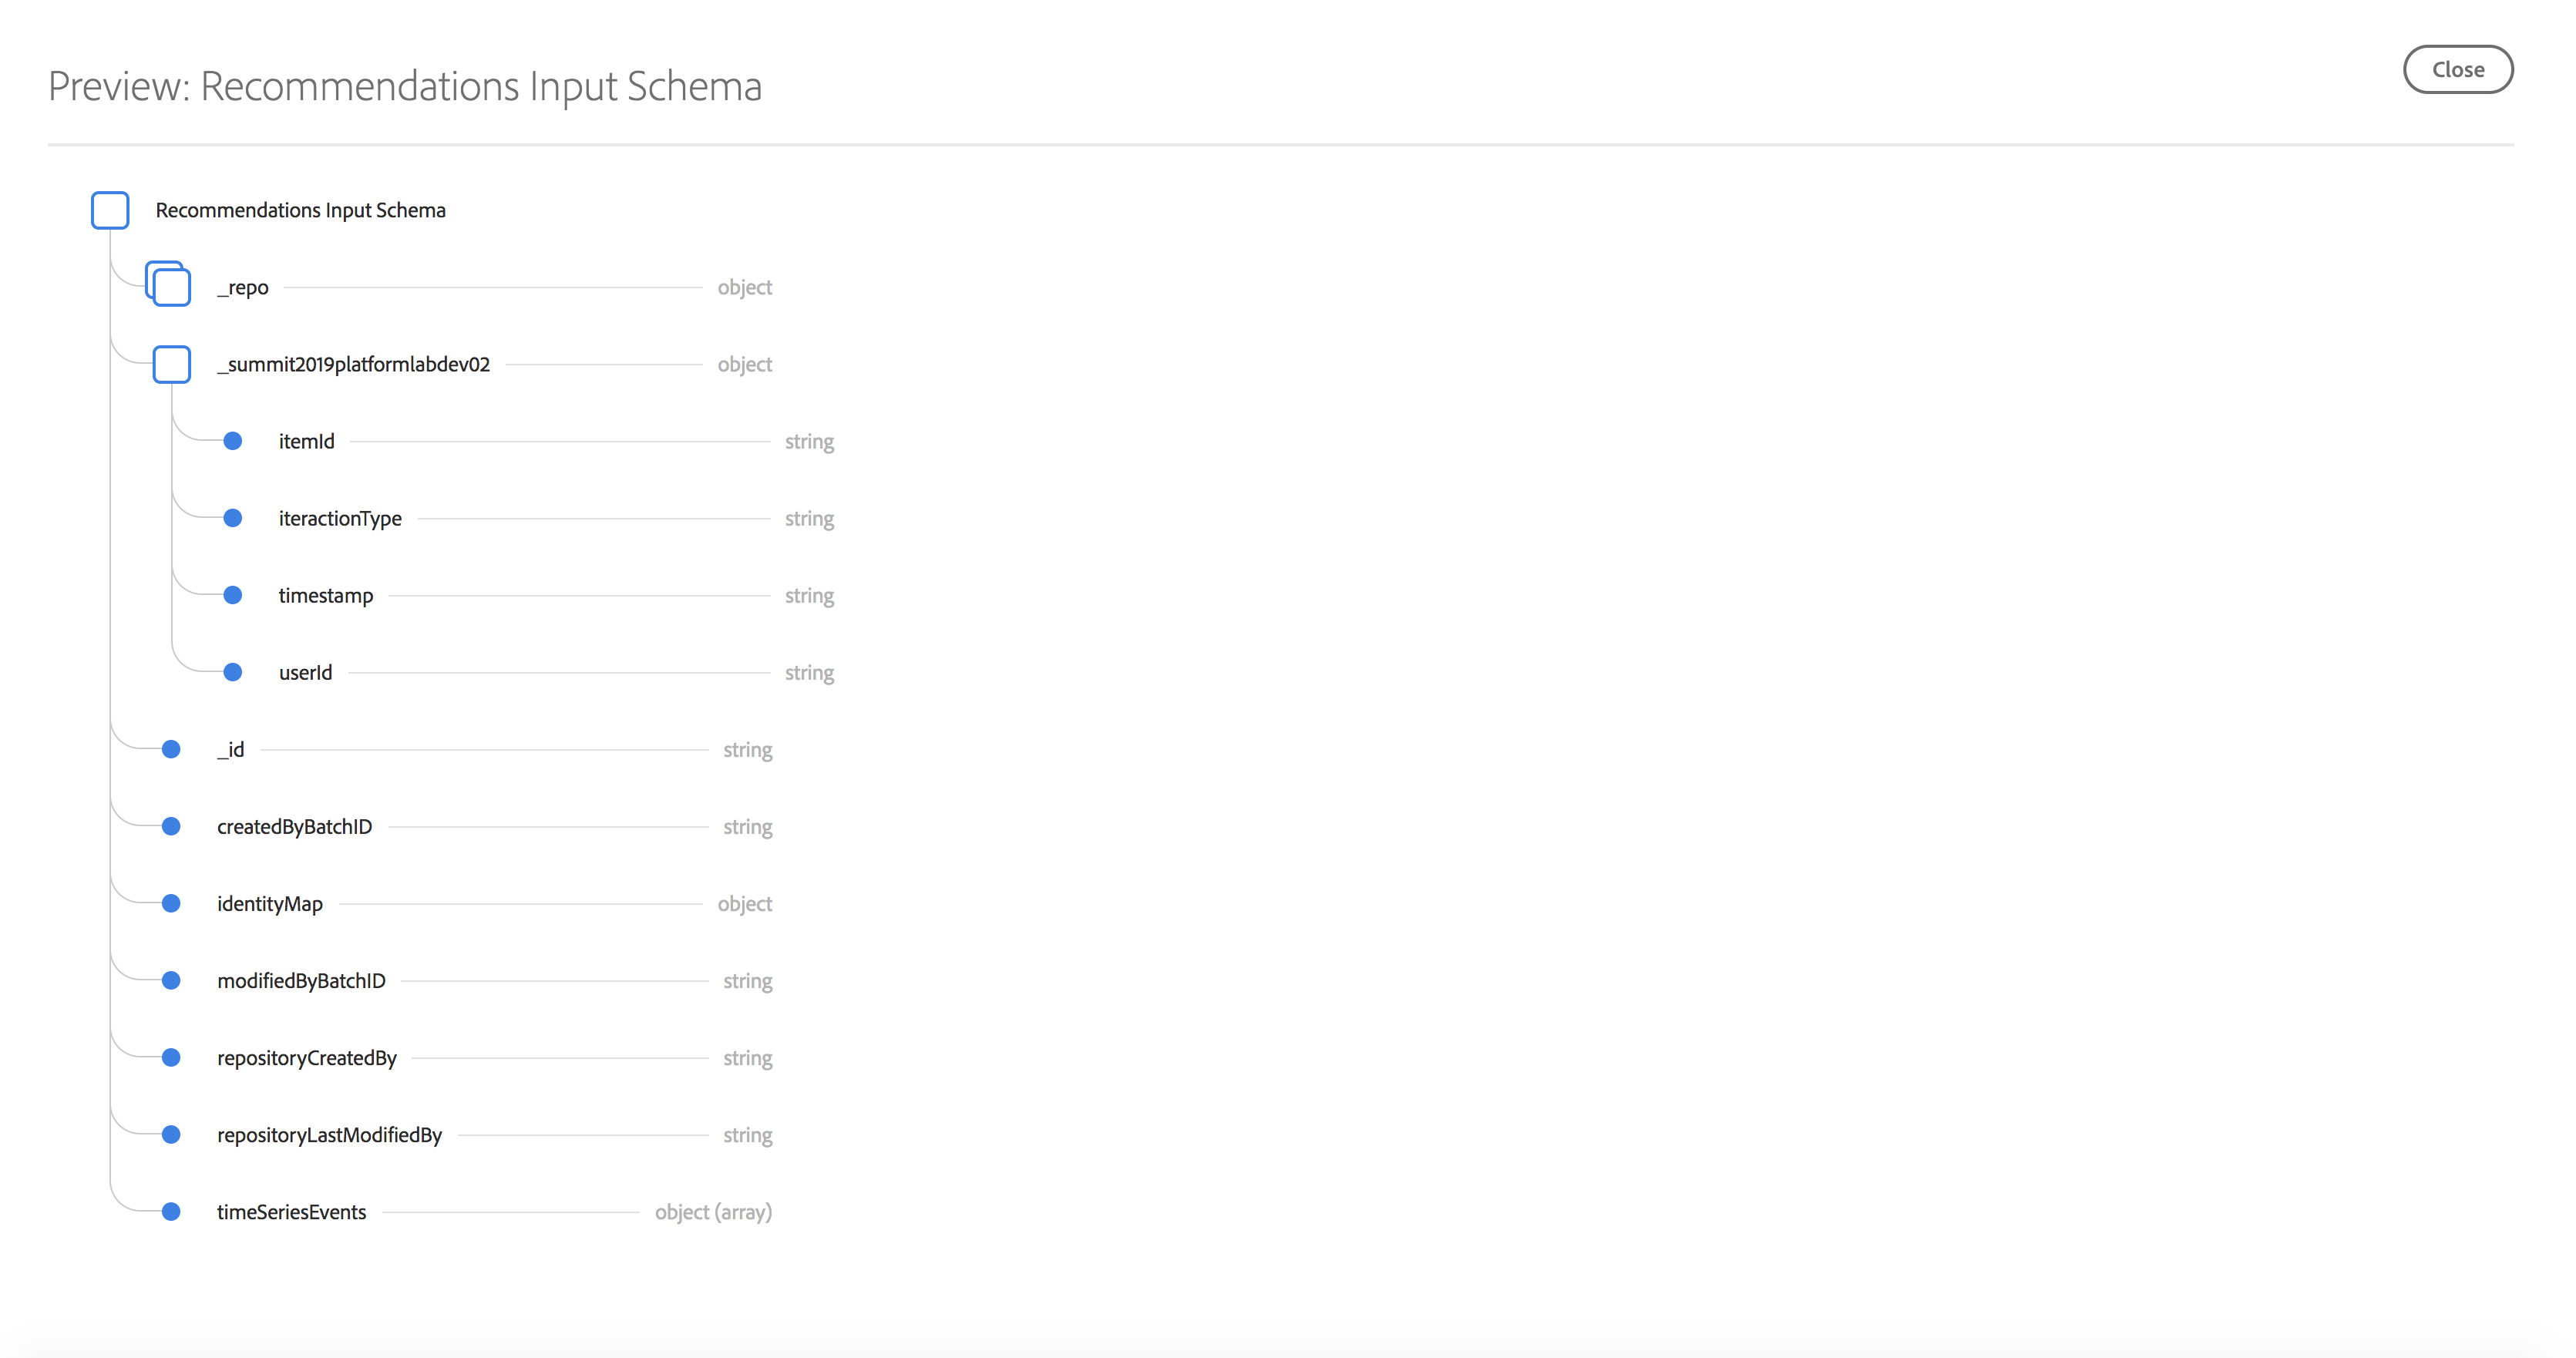
- Click the Recommendations Input Schema link under the Schema field on the right rail to view the schema powering the recipe. The schema fields itemId and userId correspond to a product purchased (interactionType) by that user at time timestamp
Product Recommendations Recipe
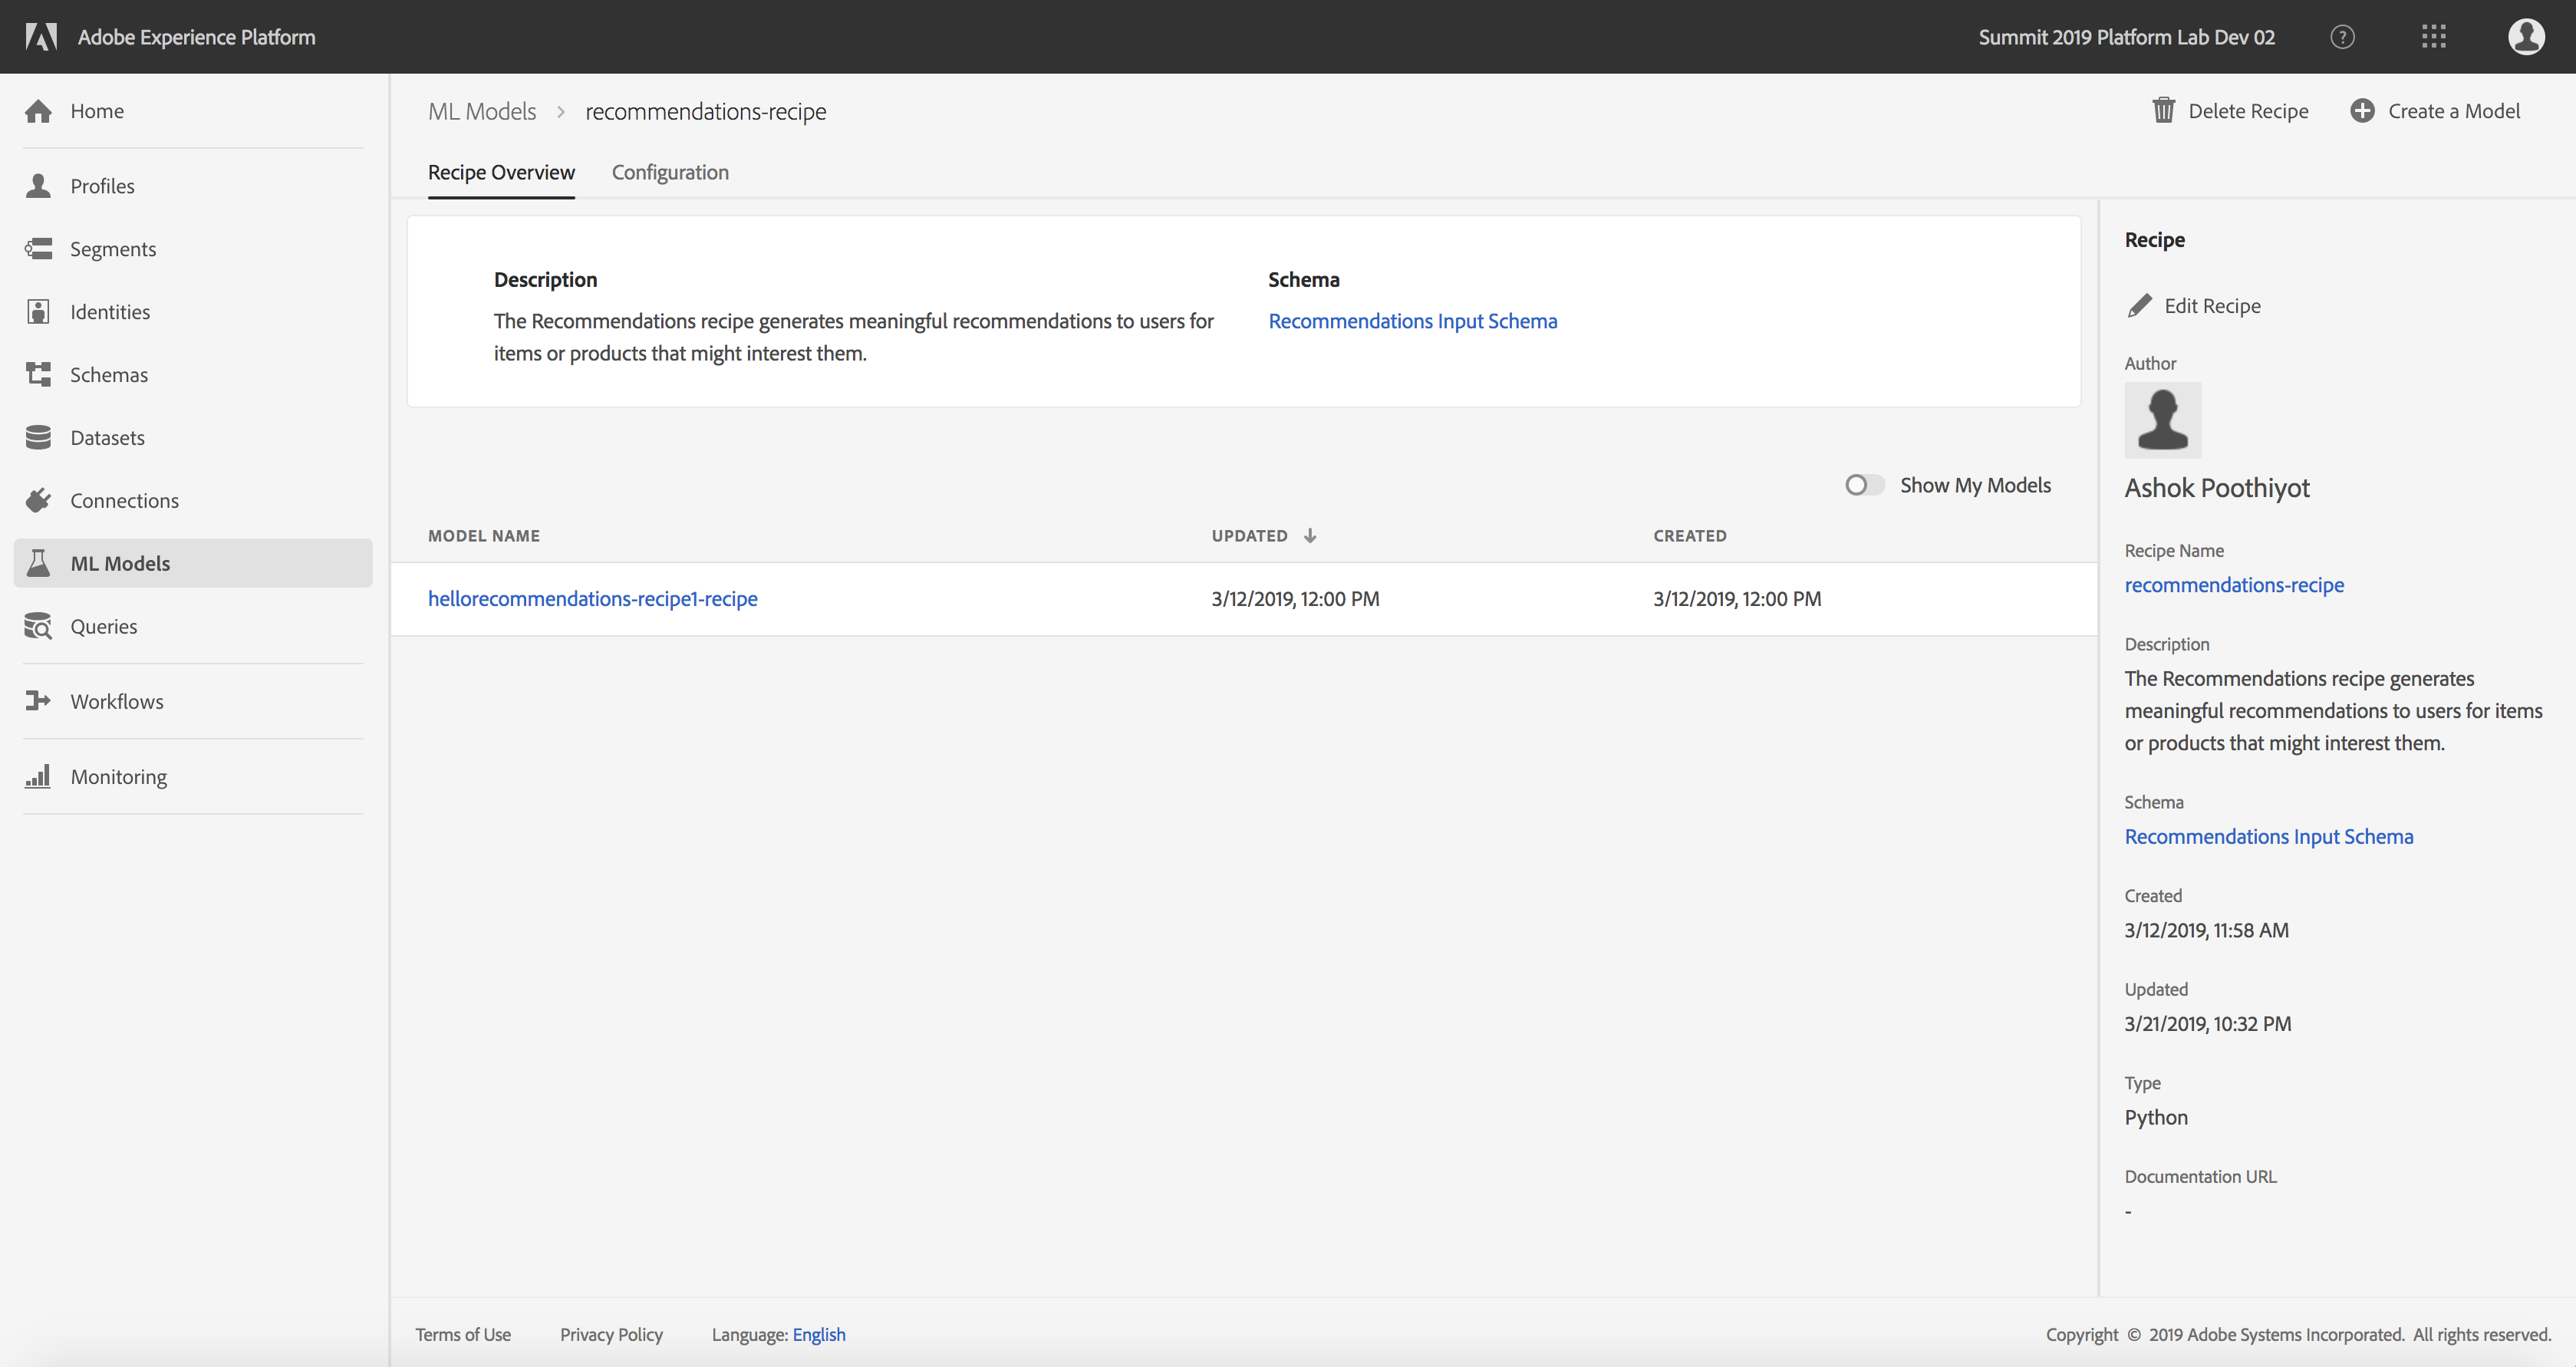
Product Recommendations Recipe Schema
Learn how the Product Recommendations Recipe can be Created
The Product Recommendations Recipe that we just explored can be created using a notebook - this recommendations-popularity-recipe.ipynb notebook allows us to explore the code powering the model. This is built off of one of our recent innovations (a recipe builder notebook template) that templatises your model to automatically package and operationalize it. See Concepts Introduced to understand the recipe builder notebook template better
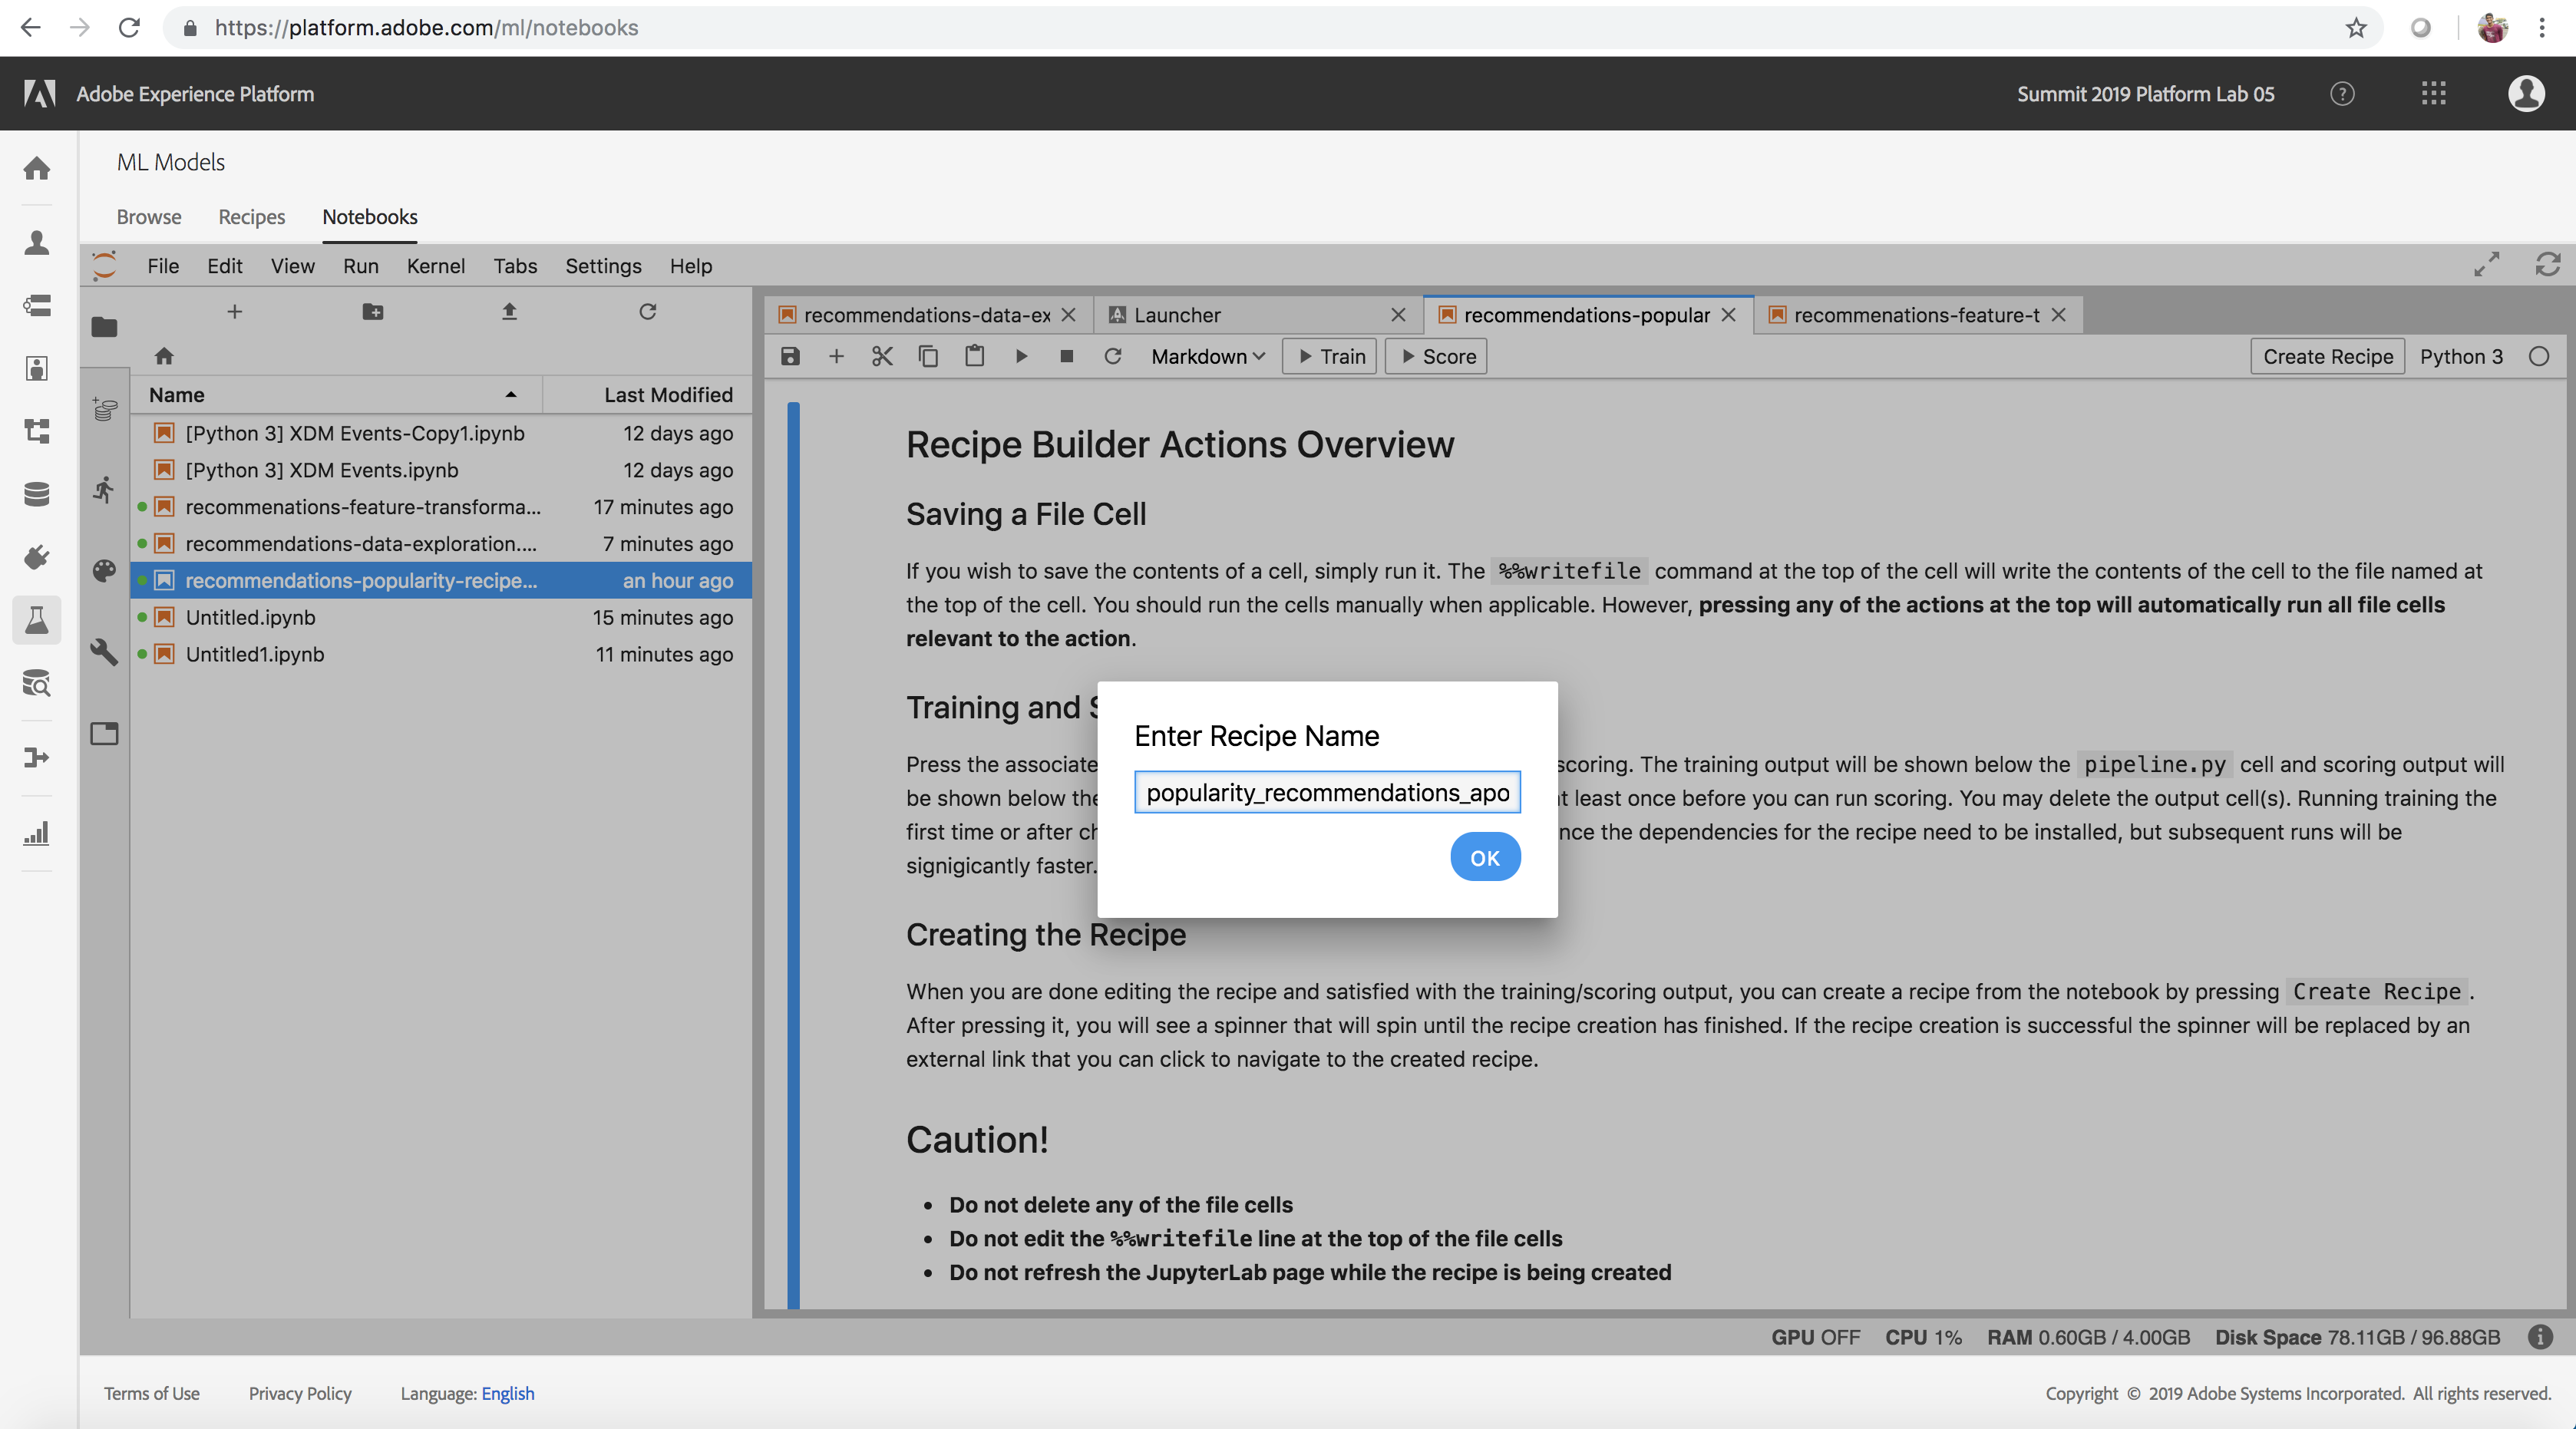
- In the Notebooks UI left pane, double click the recommendations-popularity-recipe.ipynb notebook to open it
- The notebook is opened and you will be prompted to enter a Recipe name. Enter the name popularity_recommendations_myadobeid where myadobeid corresponds to your adobe user id as a unique identifier. Please ensure you don't use capital letters, spaces or special characters in your recipe name.
- The notebook will be renamed and a folder of the same name will be created with all the recipe files in it. You can view the files in the sidebar on the left in JupyterLab.
- Explore the notebook and review the code in it
- This concludes the mandatory parts of this lesson. You can now move to the next lesson (or explore the remaining optional sections if time permits)
Enter Recipe Name
(Optional) Package the Notebook into a Recipe to test at scale
We have streamlined the steps needed to operationalize a model by giving you the ability to train, evaluate and score it at scale and then package it in one seamless flow on the Experience Platform. Packaging to a Recipe also allows you to use the same code with different datasets to power different use cases in your organizations. Our specific use case revolves around using the recommendations model code for users searching for products to purchase on the Luma Website.
Click here for optional advanced steps to execute the notebook!
- Review the cells within the notebook
- Click 'Train' on the top toolbar to create a training run in the cell. This executes the training data loader, pipeline and evaluator cells and generates evaluation metrics to gauge model performance. A log of commands and outputs from the training script will appear in the notebook (under the pipeline.py cell)
- Now that training is complete, click 'Score' on the upper panel to create a scoring run in the cell (you must run training at least once before you can run scoring) and review results. Results show up under the Data Saver file cell
- When you are satisfied with the outputs of training and scoring, you can create a recipe by clicking "Create Recipe". This enables you to test your model at scale. A dialog titled 'Recipe Creation Started' pops up. A progress bar also indicates that the recipe creation is in progress. (Note: The process might take 1-3 minutes)
- Click View Recipes (if you click Dismiss by mistake, you can always navigate to the Recipes UI by clicking the Recipes tab from above - however recipe creation would be hampered) to view the Recipes UI in new tab.
Train, Score and Create Recipe

Click to expand!
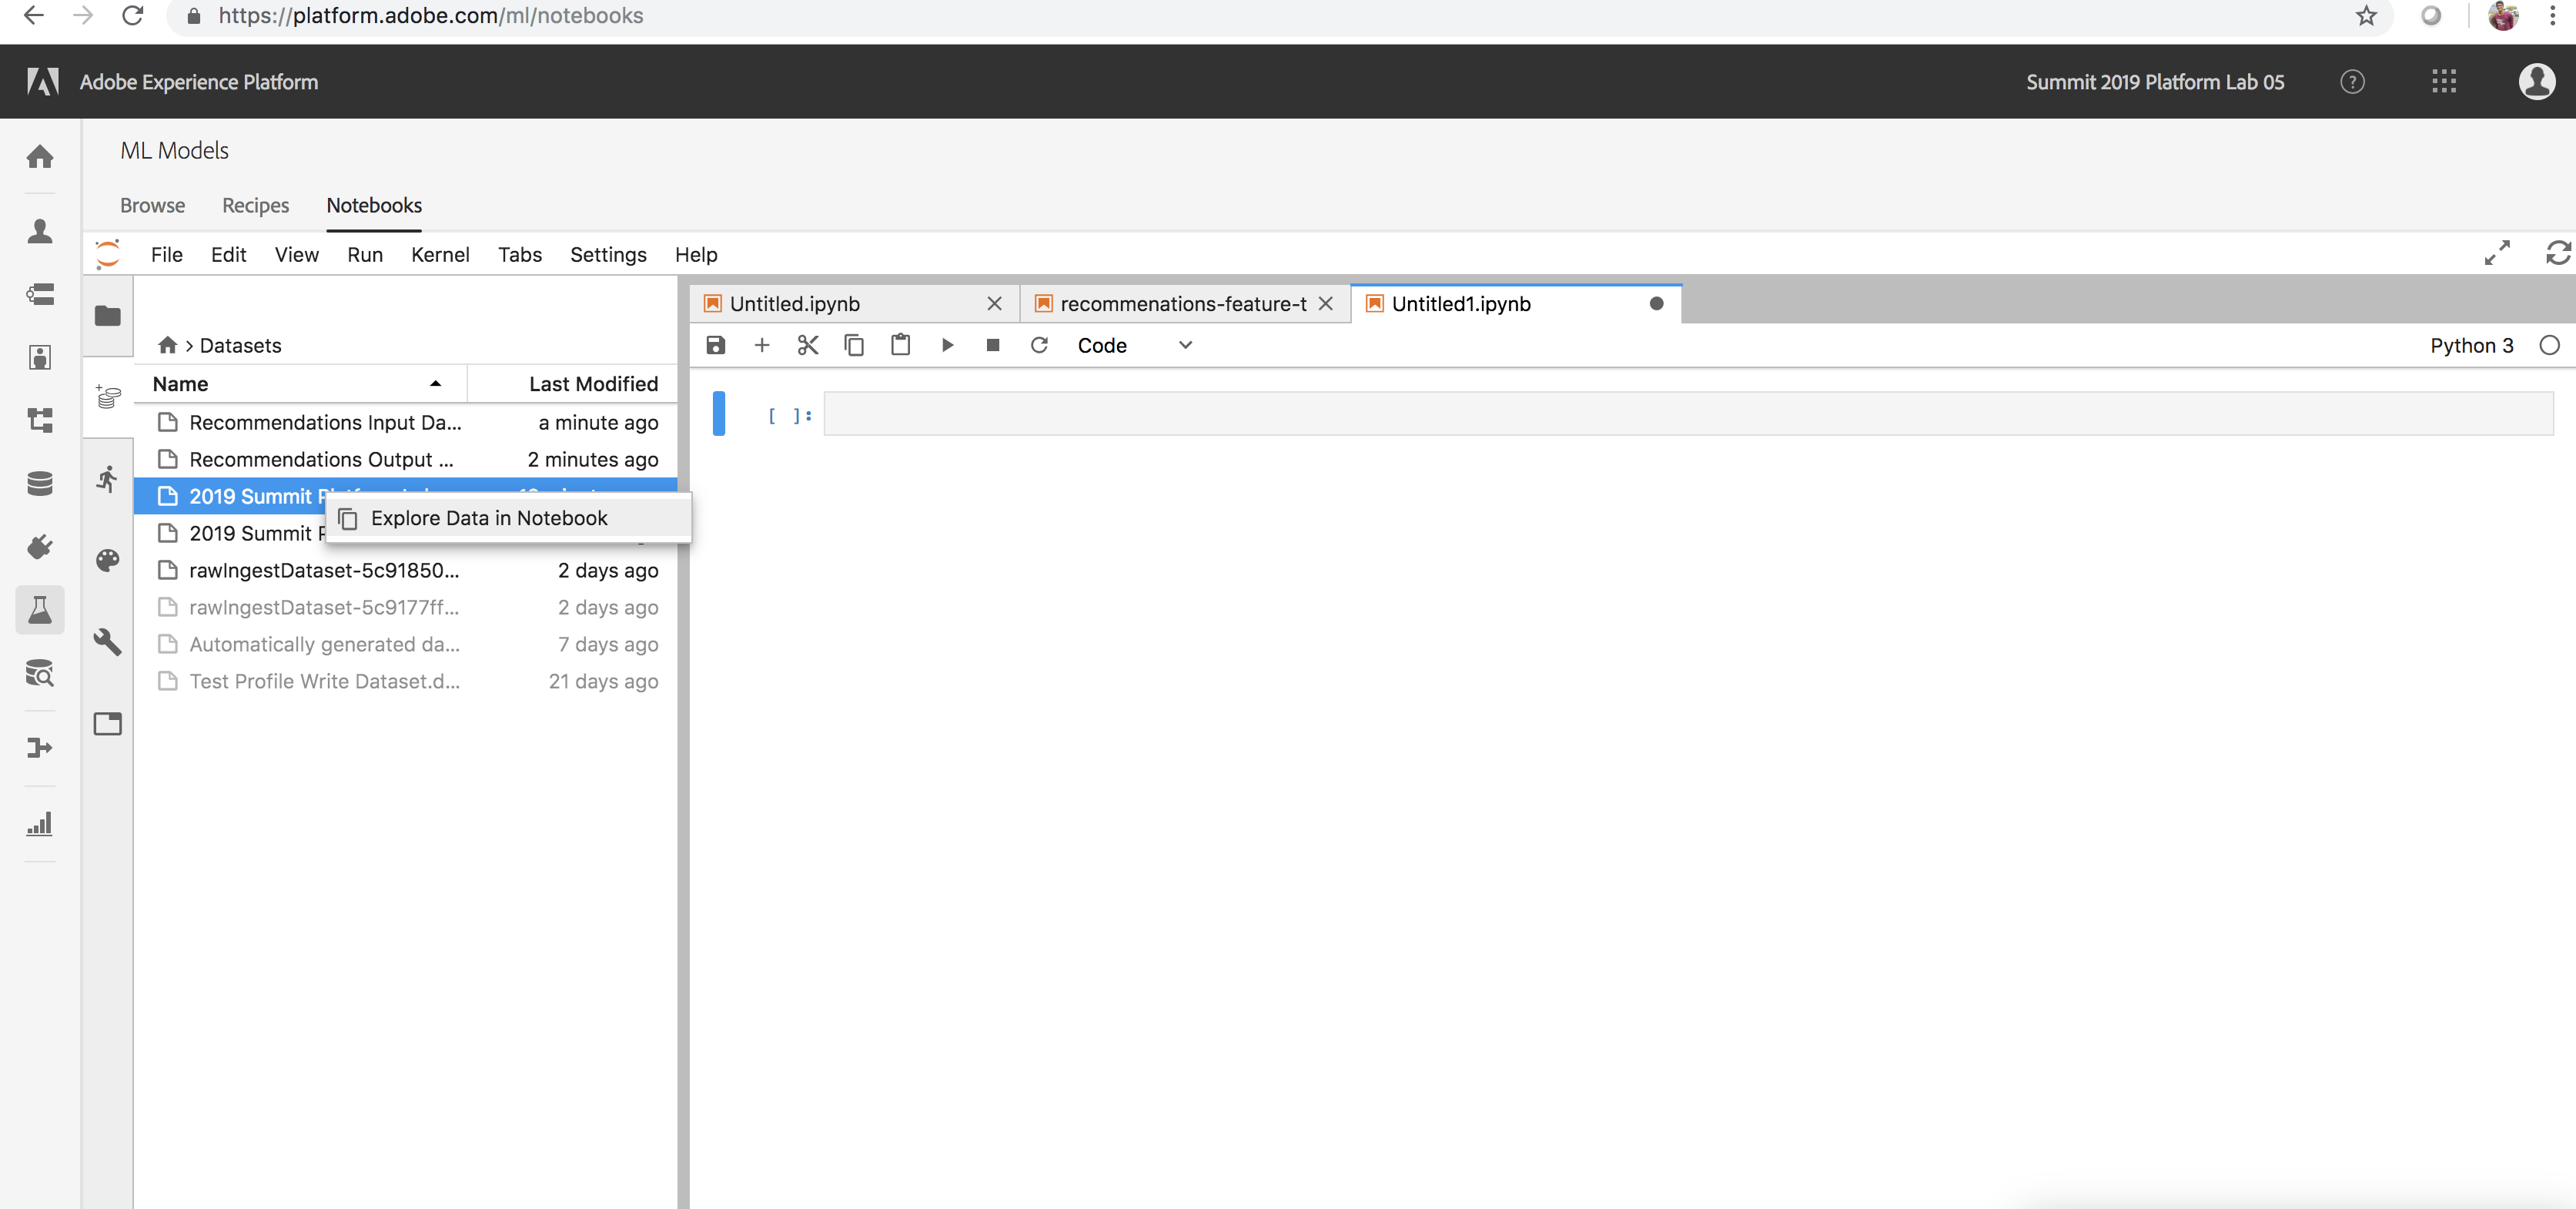
- Create a new Python 3 notebook (You can access the launcher at any time by clicking the + button (or) File New Launcher)
- Load one of the datasets that you created using the following steps:
- Select the Data icon on the inner left rail within Jupyter (not the outer left rail Datasets tab)
- Double-click the Datasets folder to view contents
- In the Data tab, locate and right-click one of the datasets you explored in Lesson 1 (Eg: 2019 Summit Platform Lab 5 postValues)
- Choose the option to Explore Data in Notebook
- Execute the cell by selecting it and clicking the play icon in JupyerLab
- Review the pre-installed libraries (List the Available Python Libraries)
- Choose a library and experiment
Explore Data from a Notebook
List the Available Python Libraries
!pip list --format=columns
💎 There are over 100 pre-installed Python libraries! Including:
Seaborn
import seaborn as sns
A Python data visualization library based on matplotlib. 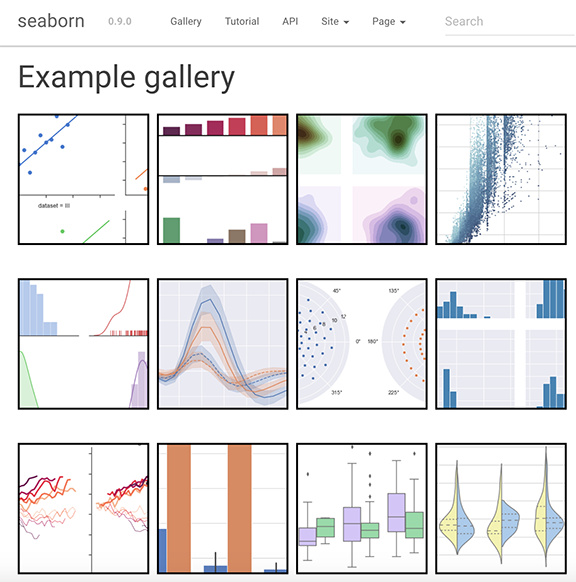
Matplotlib
import matplotlib.pyplot as plt
Matplotlib is a Python 2D plotting library which produces publication quality figures 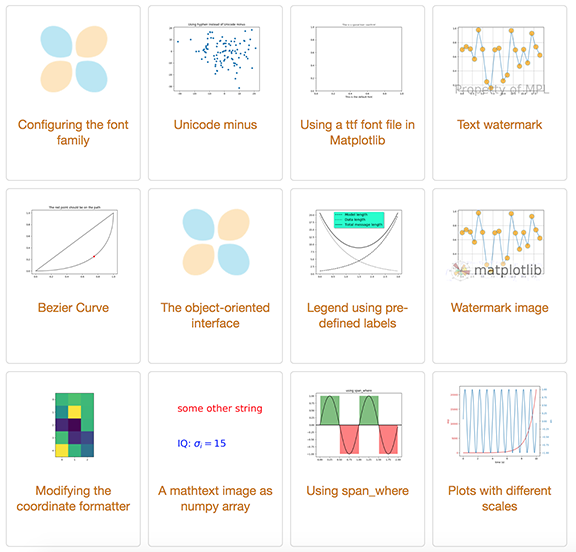
Next Steps
In the next lesson you will leverage this recipe and the datasets to begin making predictions.
Lesson 3 - Model Training and Experimentation
⏳ Time Allocated: 15 minutes
So we’ve prepared our data, authored our model and packaged it to test it at scale as a recipe. Now let’s go ahead and train and test the model at scale.
Objectives:
- Machine Learning Recipes
- Create and Train your Model
- Evaluate the Accuracy of your Model
- Optimize your Model
Concepts Introduced:
- Recipe - A recipe is a proprietary machine learning or AI algorithm, or an ensemble of machine learning or AI algorithms, to help solve specific business problems.
- Instance: A Recipe Instance is an occurrence of a Recipe with a specific configuration.
- Experiment: An experiment is the process of creating a trained model by training the instance.
- Trained Model: A trained model is an instance (of the Recipe) that is trained using historical data.
- Hyperparameter: Hyperparameters are model parameters, adjusting which may change the accuracy of the Trained Model.
You may skip this step if you are already logged in.
- Navigate to: https://platform.adobe.com/
- Sign in with the following credentials
- If your Session is on Wednesday:
- User Name: L777+[your station number]@adobeeventlab.com
- Password: Adobe2019!
- If your Session is on Thursday:
- User Name: L777-2+[your station number]@adobeeventlab.com
- Password: Adobe2019!
Creating a Model from the Recipe
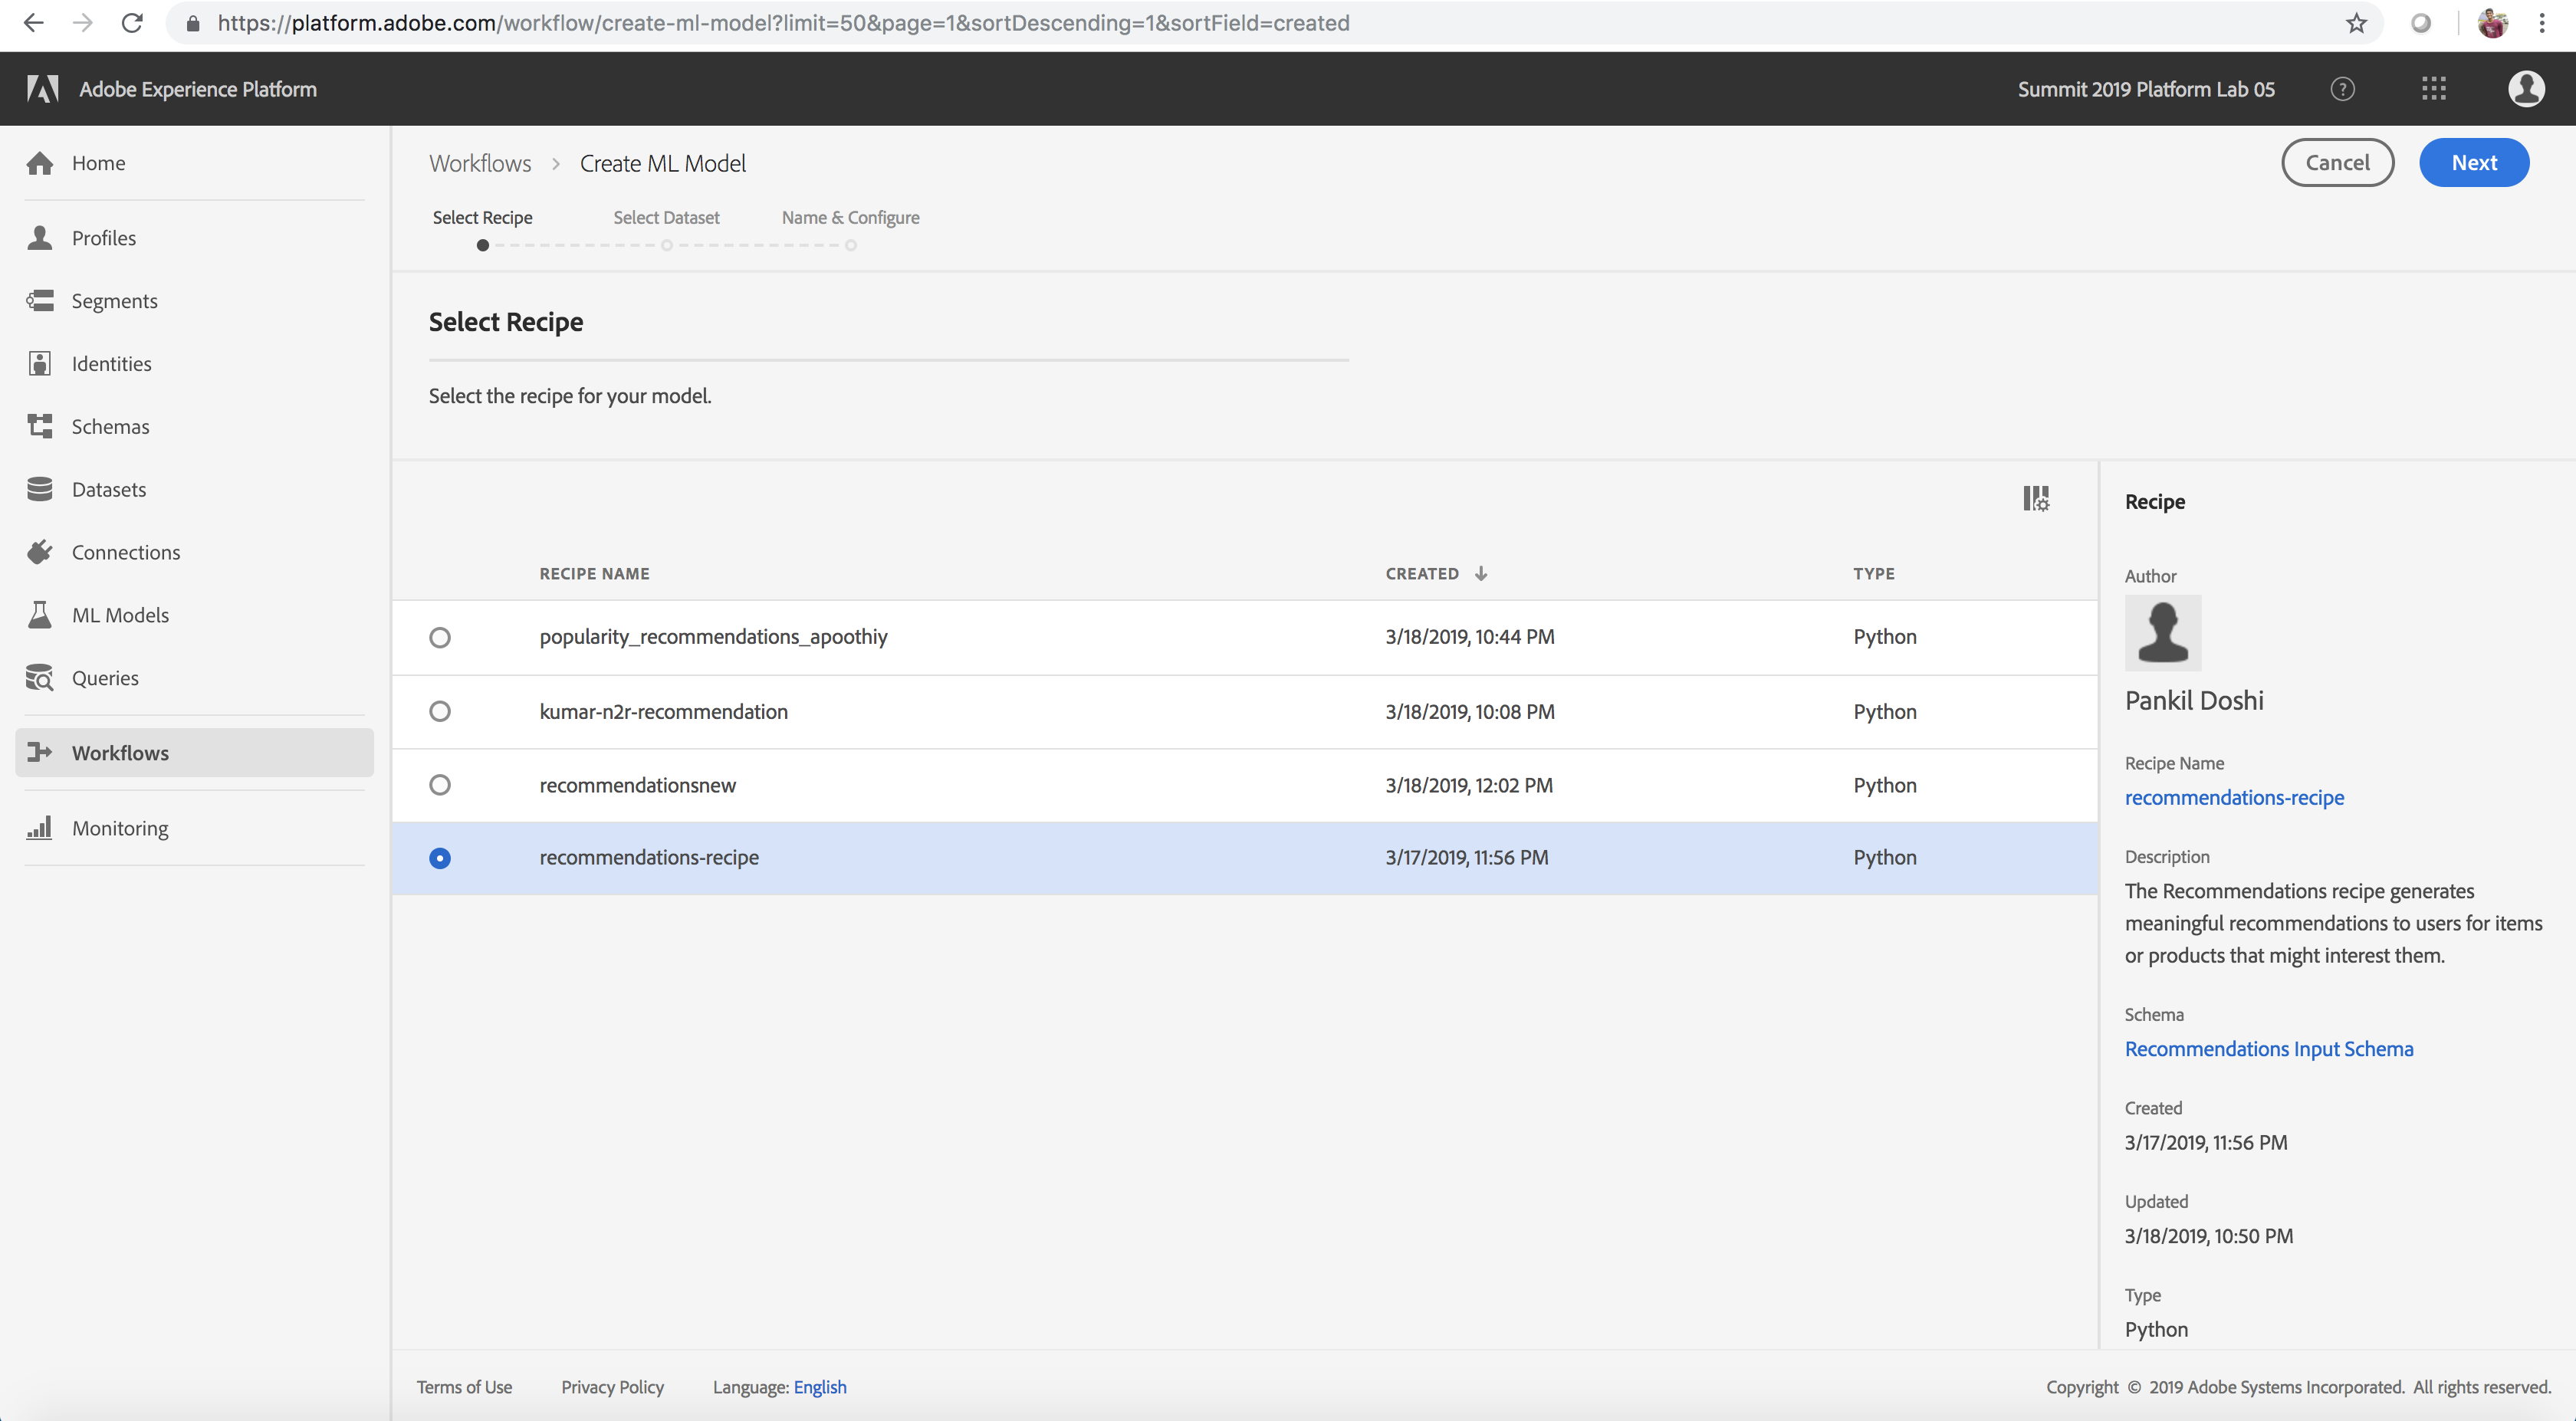
Let’s go ahead and create a model from the Popularity Based Recommendations Recipe that we (optionally) generated from the Product Recommendations Notebook in the previous lesson. This will enable us to train and score with data at scale to generate insights
- Navigate to the ML Models tab on the left rail
- Navigate to the Recipes tab from above
- Locate and Open the pre-created recipe named recommendations-recipe. If you created a recipe from the notebook in the optional section in the last lesson, you could also work off of and open that instead (named popularity_recommendations_myadobeid where myadobeid is the user id for your account)
- Select the option to Create a Model
- Select the appropriate recipe
- Select the training dataset Recommendations Input Dataset which was populated by you using the feature pipeline notebook in Lesson 1. Click Next (Note: The dataset might show up to be in processing status if the feature transformation notebook from the optional section in Lesson 1 for any user is still executing, but model creation should still work)
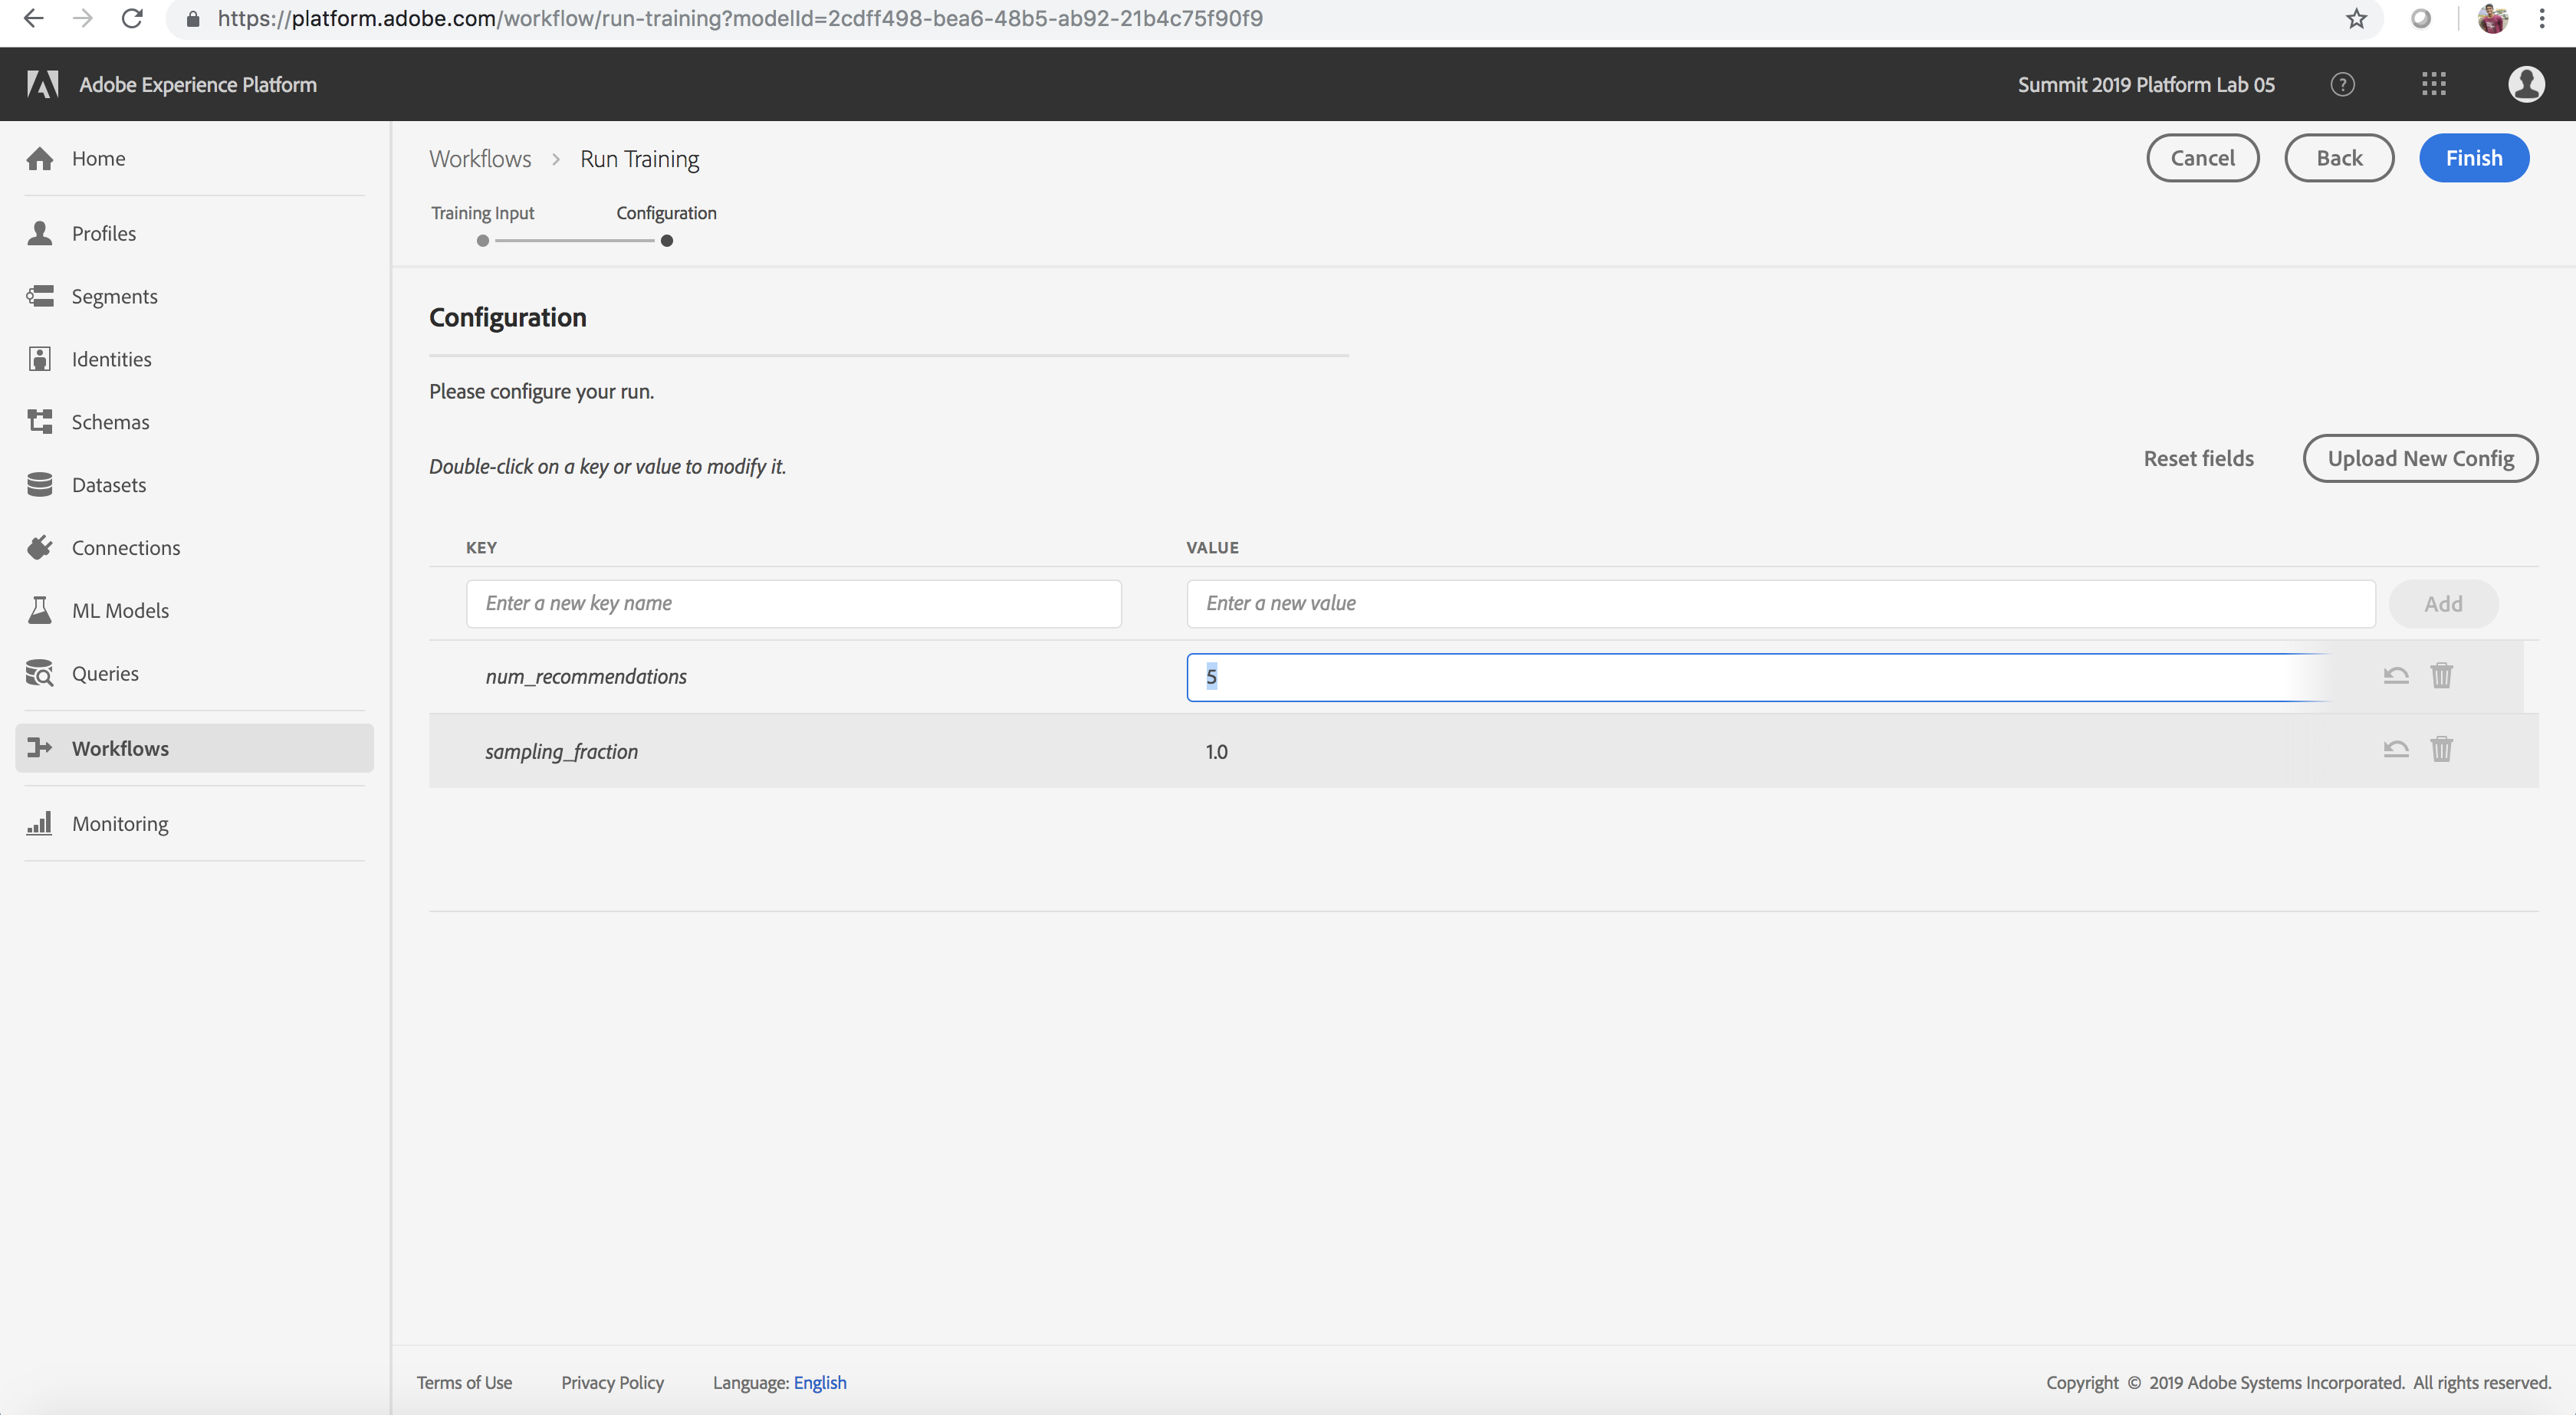
- Name the model model_myadobeid where myadobeid is the user id for your account. Notice that you can adjust the Training configuration values by double-clicking the value. This is especially useful for adjusting hyperparameters. Let's go ahead with defaults for now.
- Click Finish. This generates a model with a default training run automatically created
Product Recommendation Recipe
Model Creation
Model Evaluation Chart with Multiple Training Runs
Train the Model using Custom Hyperparameters
- Train: Create another training run by selecting Train on the Model page
- Data Source: Select the same Training dataset you used in the Default experiment
- Configuration: Double click the hyper-parameter values (num_recommendations and sampling_fraction) and adjust them using the guidance from the table below (suggested values num_recommendations=10, sampling_fraction=1.0)
- Click Finish. A new training run should be generated (this might take 1-2 minutes).
Adjusting training Hyper-Parameters
Product Recommendations Recipe Hyperparameters
Hyperparameters cannot be learned, they must be assigned before training of the model. Adjusting the parameters may change the accuracy of the Trained Model.
The Product Recommendations Recipe uses the following hyperparameters:
| num_recommendations |
The number of recommendations suggested by the model |
1 - 10 |
| sampling_fraction |
The fraction of input data sampled for training |
0.4 - 1.0 |
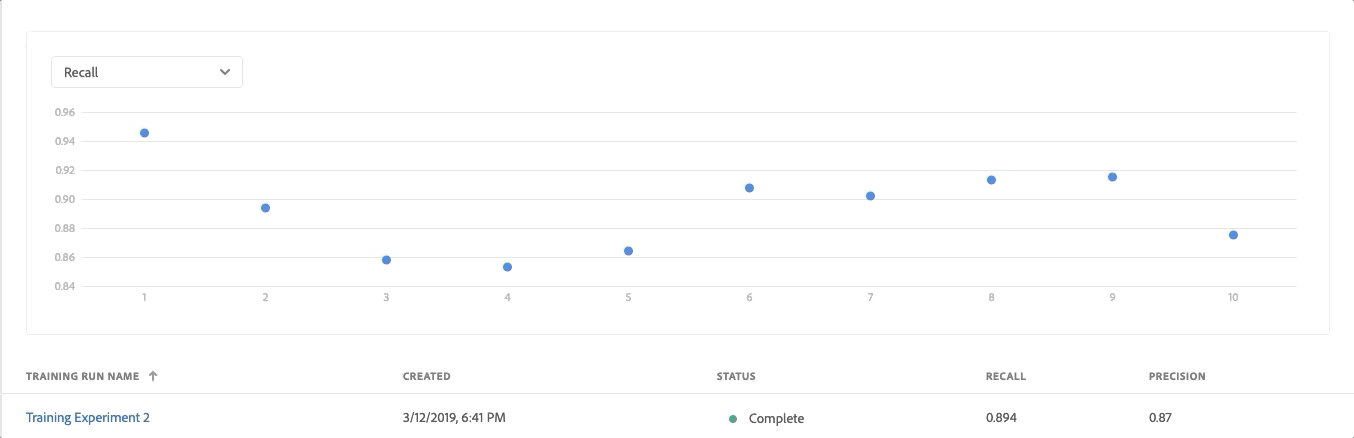
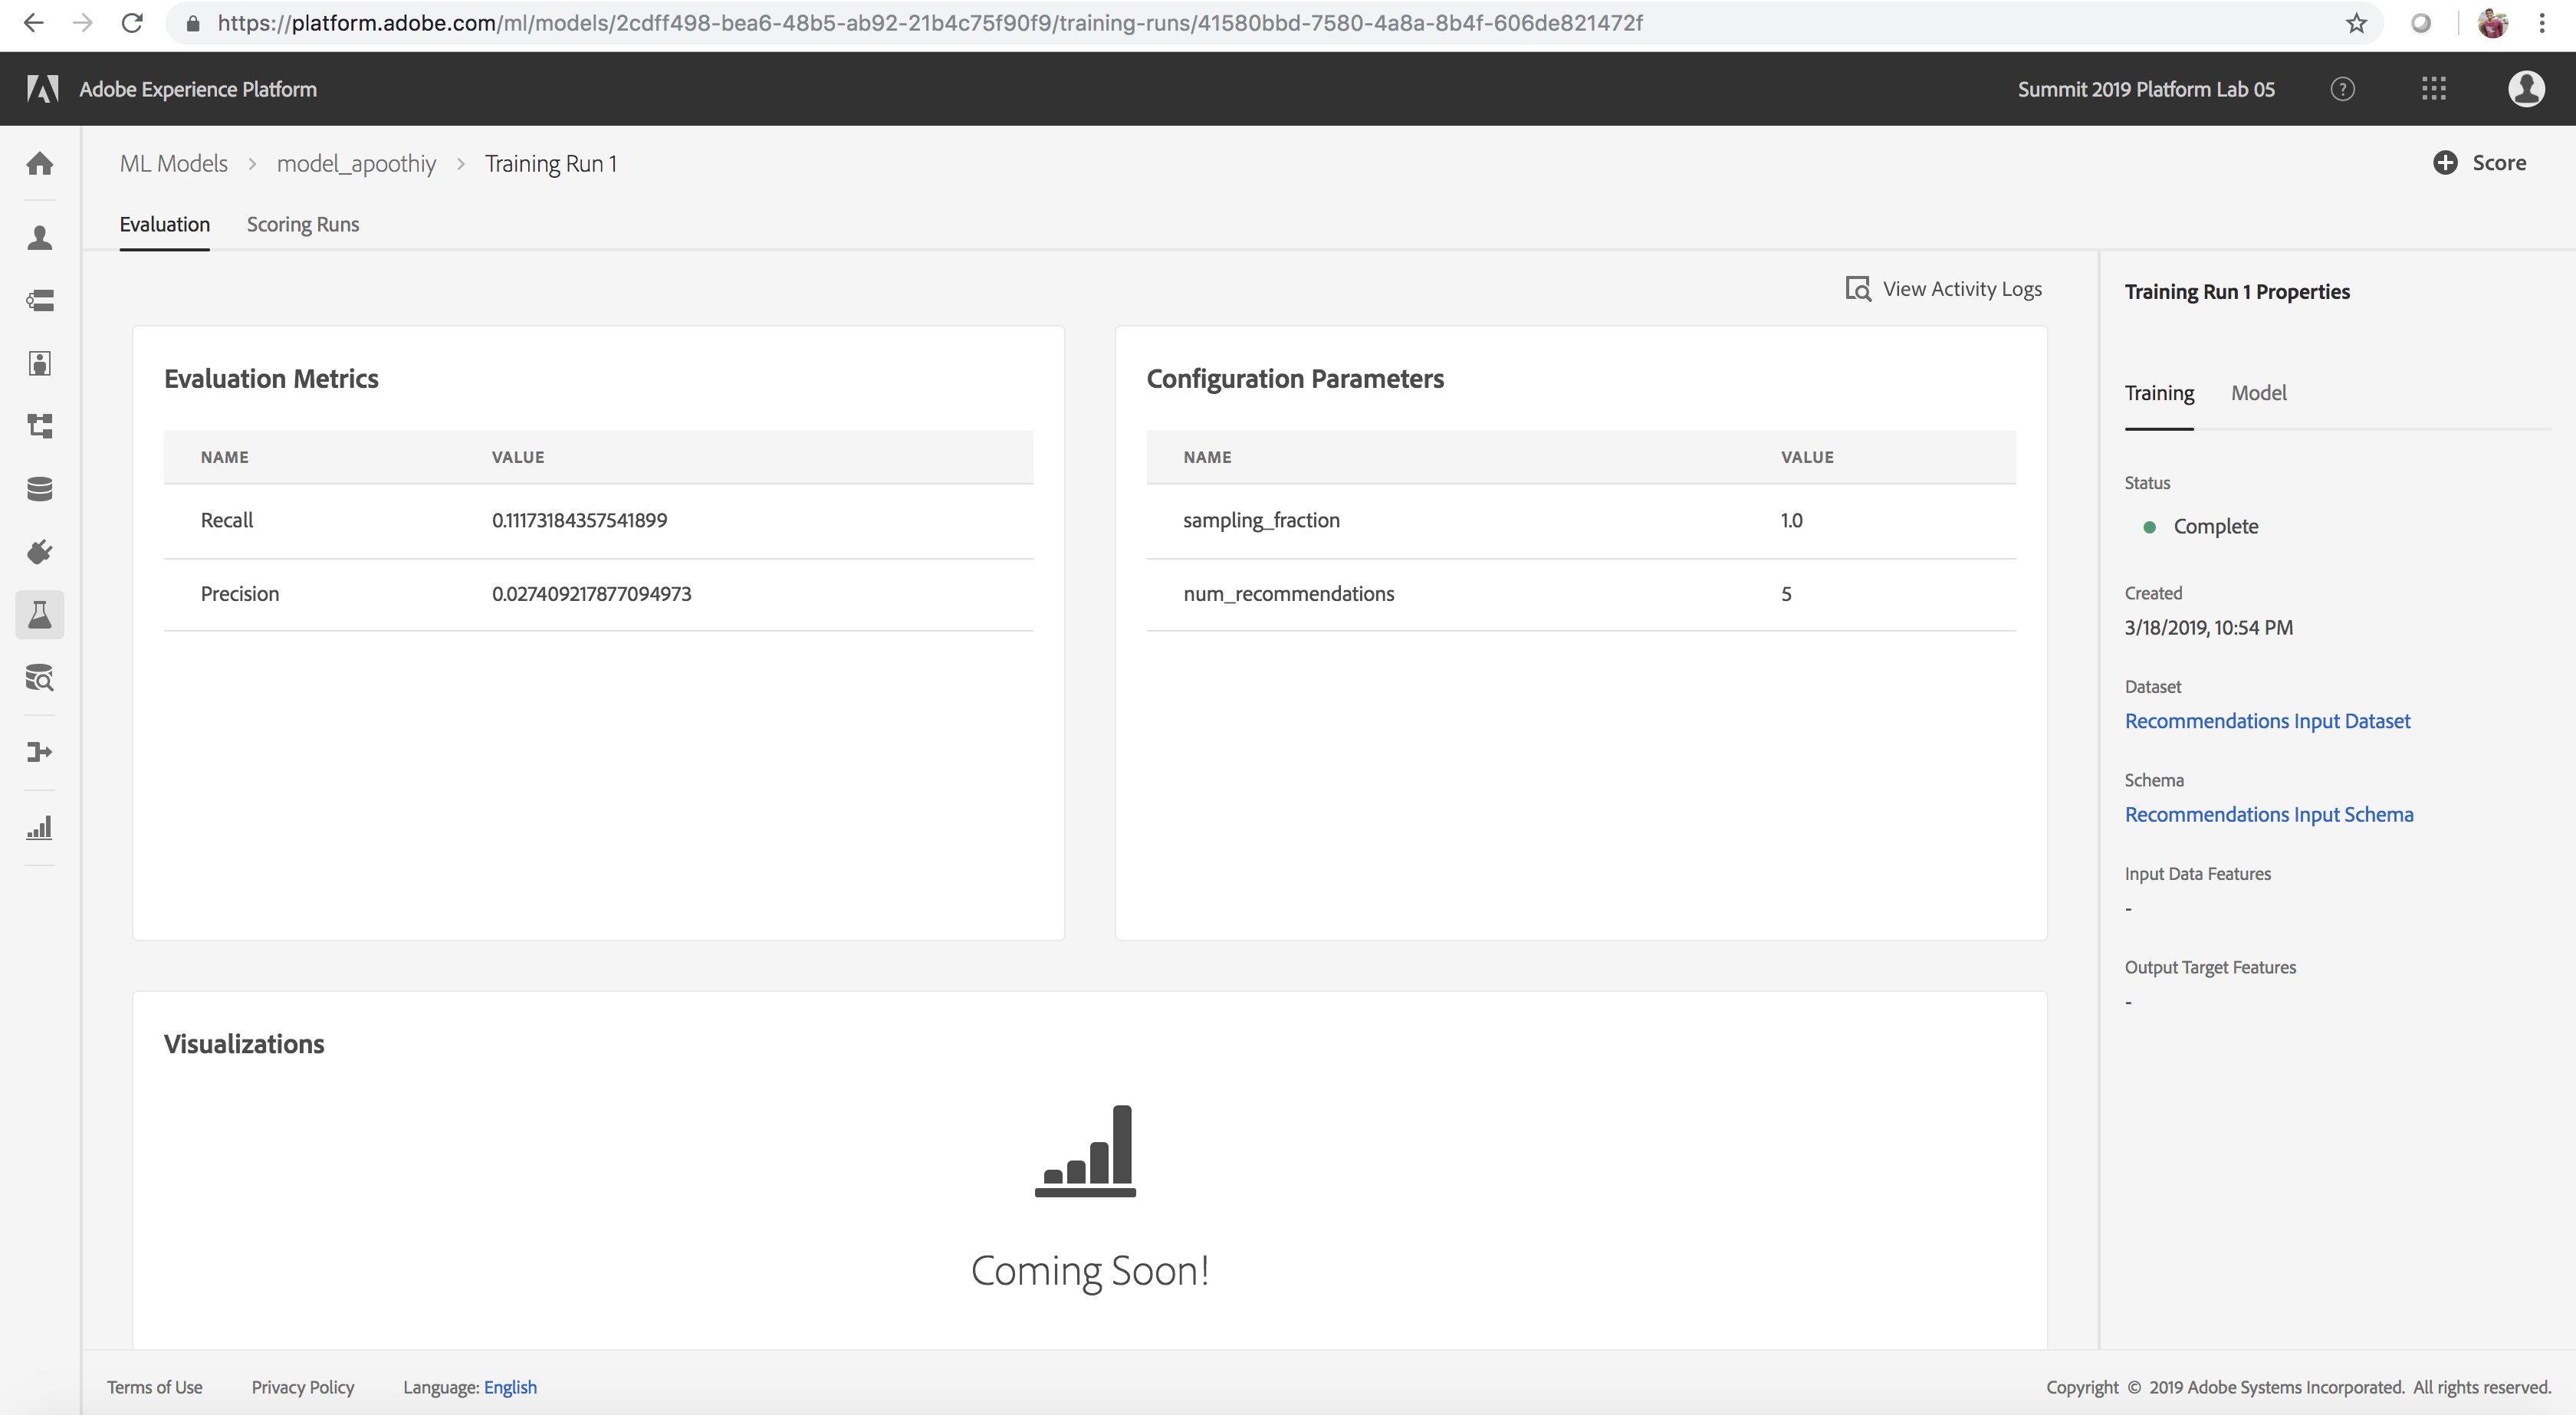
Evaluate the Model
- Review the Evaluation Metrics (Precision and Recall) for each training run by clicking on the training run
- Explore the information provided for each evaluation metric. The higher these metrics, the more accurate and better performing the training run
- You can see which configuration parameters were used for each training run along with dataset and schema used on the right rail
- Navigate back to the Model page and identify the top performing training run based on the evaluation metric values
Training Evaluation Page
(Optional) Review Activity(Job) Logs
Click to expand!
The ability to view the job logs is important if your job fails.
- Review the Activity Logs of Experiments by clicking on the training run, and then selecting View Activity Logs
- Select the log file you would like to examine
View Activity Logs

Next Steps
In the next lesson, you will be making predictions by Scoring a new dataset using the top performing trained model you have identified.
Lesson 4 - Scoring and Consumption of Insights
⏳ Time Allocated: 15 minutes
Now that we’ve experimented with our recommendations model and have determined the optimal run, we can move on to scoring the model to generate product recommendations insights for customers of the Luma shopping website.
Objectives:
- Score and Generate Insights
- View Scoring Results
- Enrich and Segment Unified Profile with Scored Insights
- Introduction to the Sensei Unified Machine Learning API
Concepts Introduced:
- Batch Scoring: Making predictions for a batch of records. Batch Scoring is typically an asynchronous process, whereas real-time scoring is generally executed as a synchronous process on a single record.
- Sensei Unified Machine Learning API: This API provides a mechanism for Data Scientists to organize and manage ML services from algorithm onboarding through experimentation and to service deployment.
- Unified Profile Service: Unified Profile Service is a centrally accessible data store that offers a comprehensive view of customers using online, offline, Adobe and non-Adobe data. The behavioral and attribute data are compiled to create an aggregate of profiles that can be used for segmentation.
- Unified Profile: A Unified Profile is an aggregate of behavioral data and attributes related to a person and or device.
- Segment: A segment is a set of rules that include attributes and event data that qualify a number of profiles to become an audience.
- Attribute: Attributes are specified characteristics and building blocks for creating segmentation rules, based on Profile schema.
- Segmentation UI: Segmentation component used in Adobe Experience Platform.
You may skip this step if you are already logged in.
- Navigate to: https://platform.adobe.com/
- Sign in with the following credentials
- If your Session is on Wednesday:
- User Name: L777+[your station number]@adobeeventlab.com
- Password: Adobe2019!
- If your Session is on Thursday:
- User Name: L777-2+[your station number]@adobeeventlab.com
- Password: Adobe2019!
Score and Generate Insights
In the previous lesson you were asked to examine a number of training runs, review the Evaluation Metrics for each, then identify the training run with the highest precision and recall values. Next, let's go ahead and score the model to generate insights.
- Select the training run you would like to use for scoring
- On the training run details page select the option to Score
- For the Scoring Input dataset select the Recommendations Input Dataset. Click Next (Note: The dataset might show up to be in processing status if the feature transformation notebook from Lesson-1 for any user is still executing, but model creation should still work)
- For the Scoring Results dataset select the Recommendations Output Dataset. Click Next
- Leave the configuration as is and click Finish
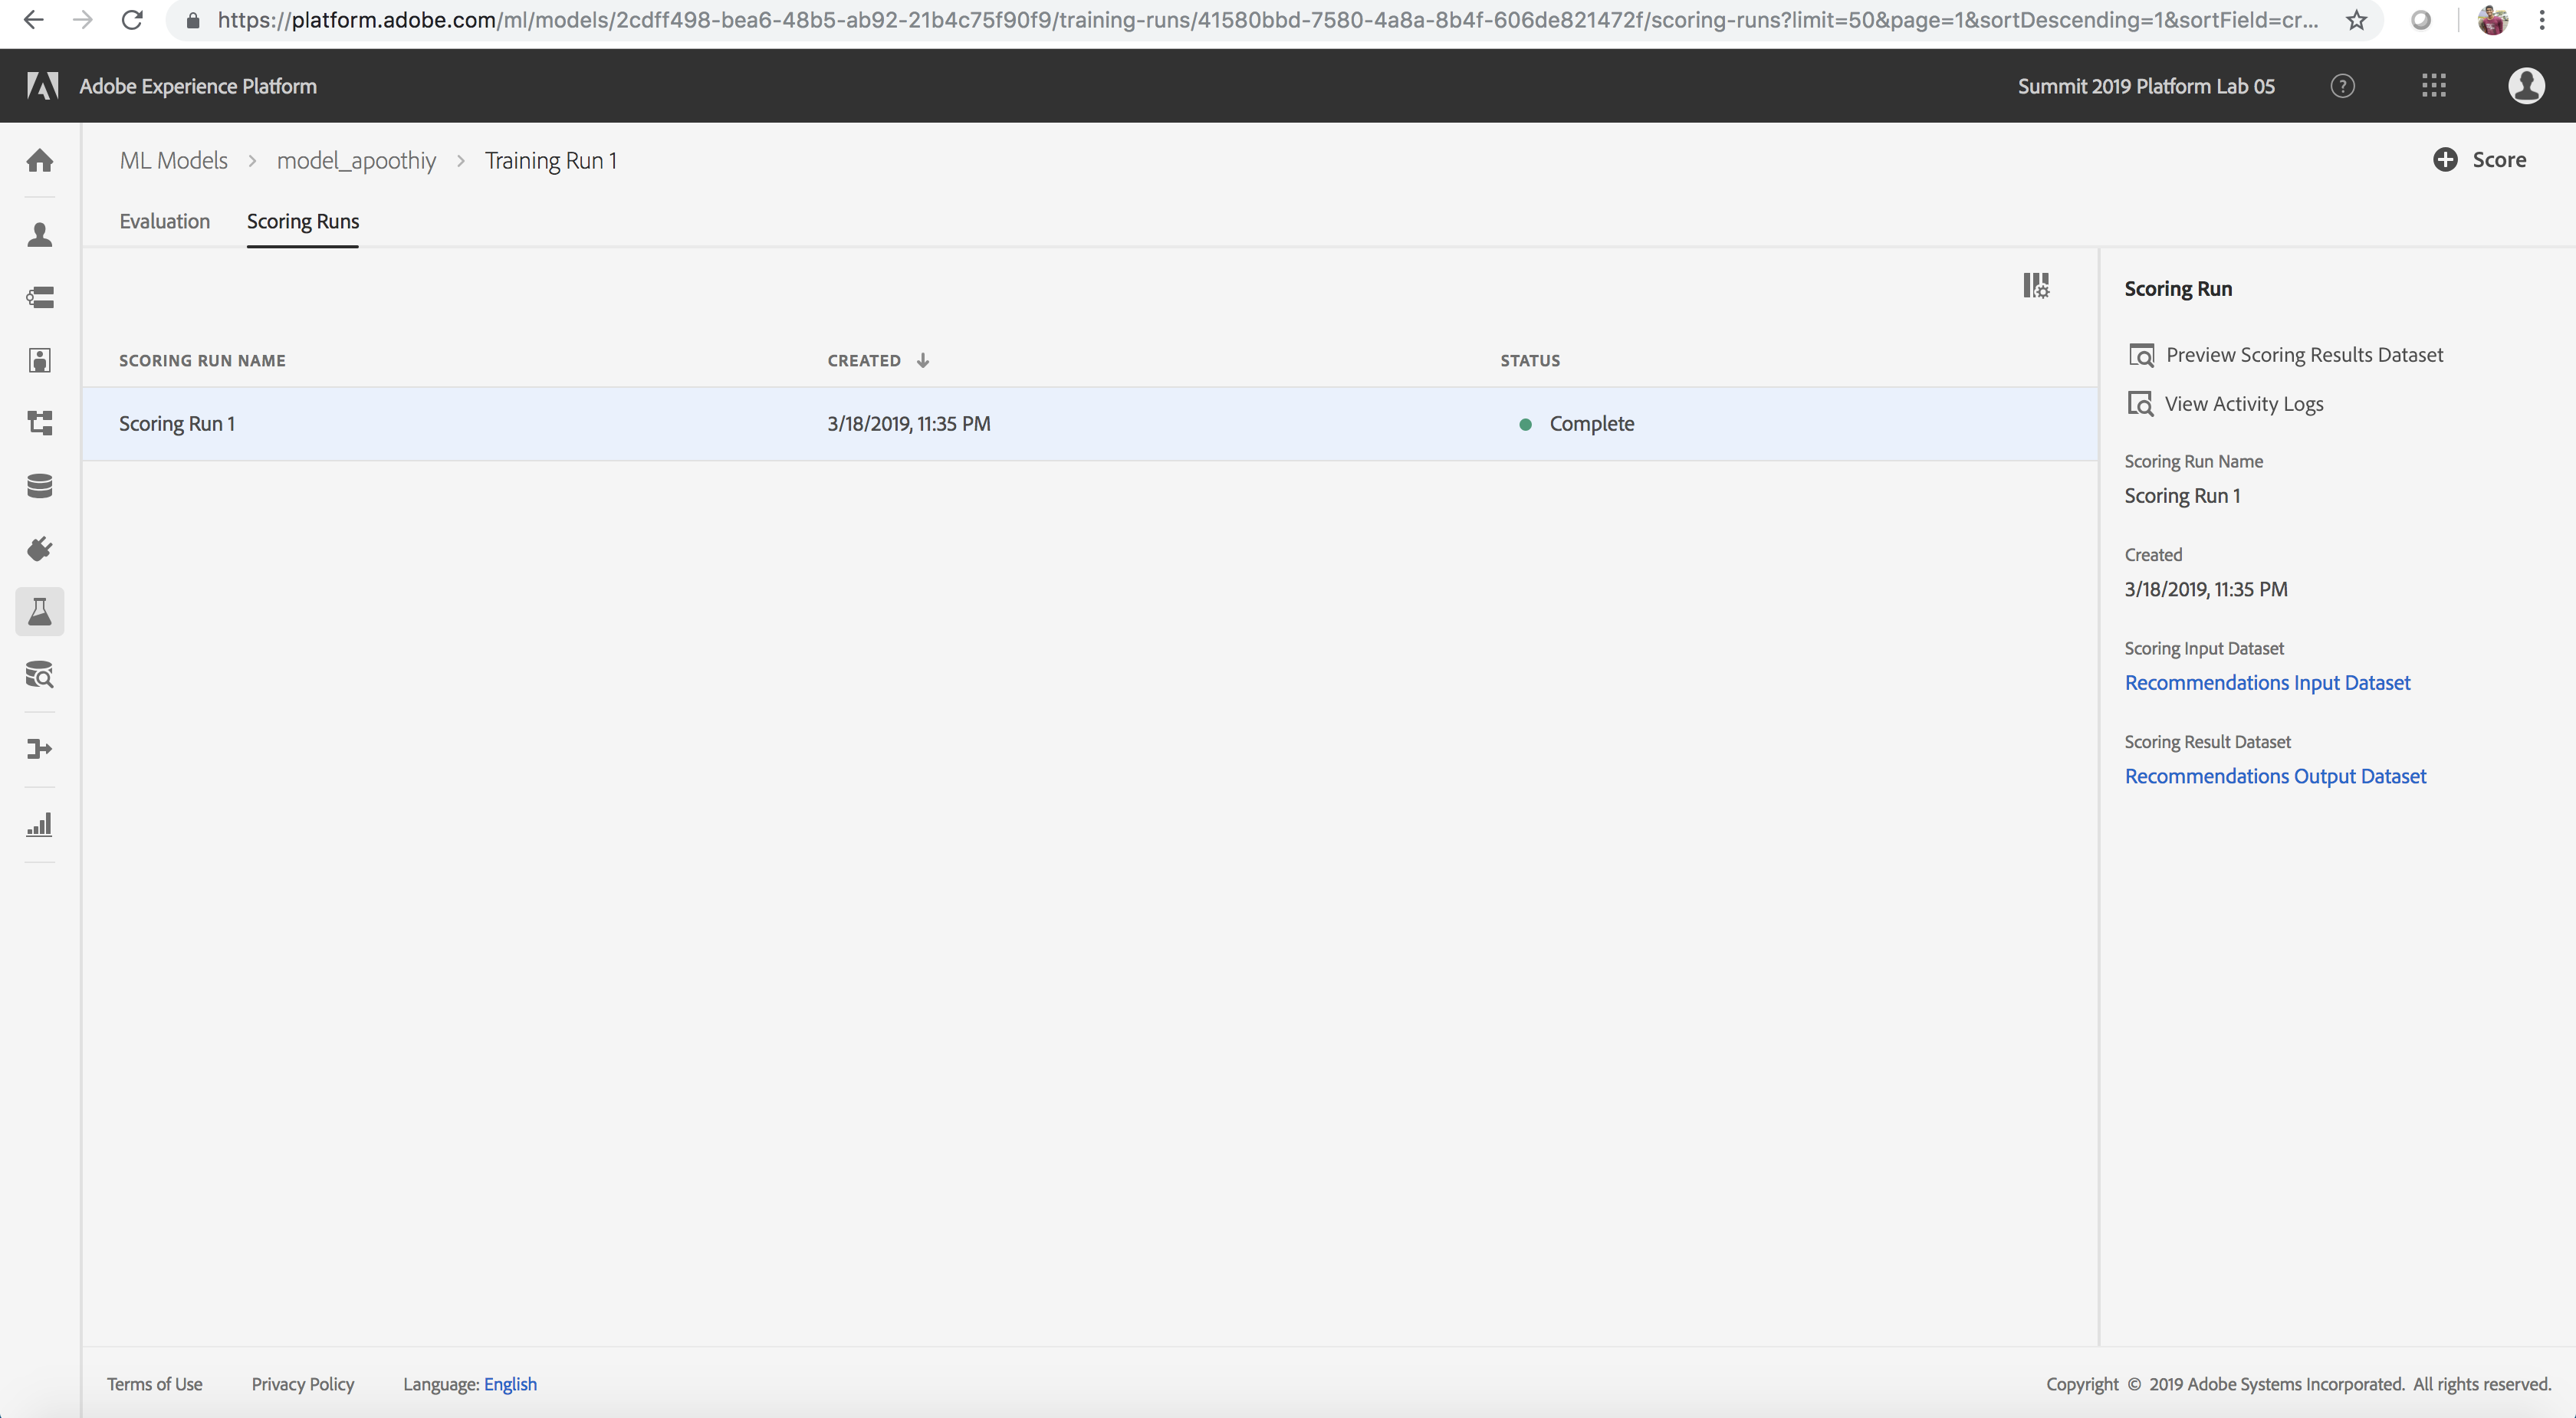
- This should generate a scoring run under the Scoring Runs tab (note: this might take 2-3 minutes to complete)
Scoring Run Created
View Scored Insights
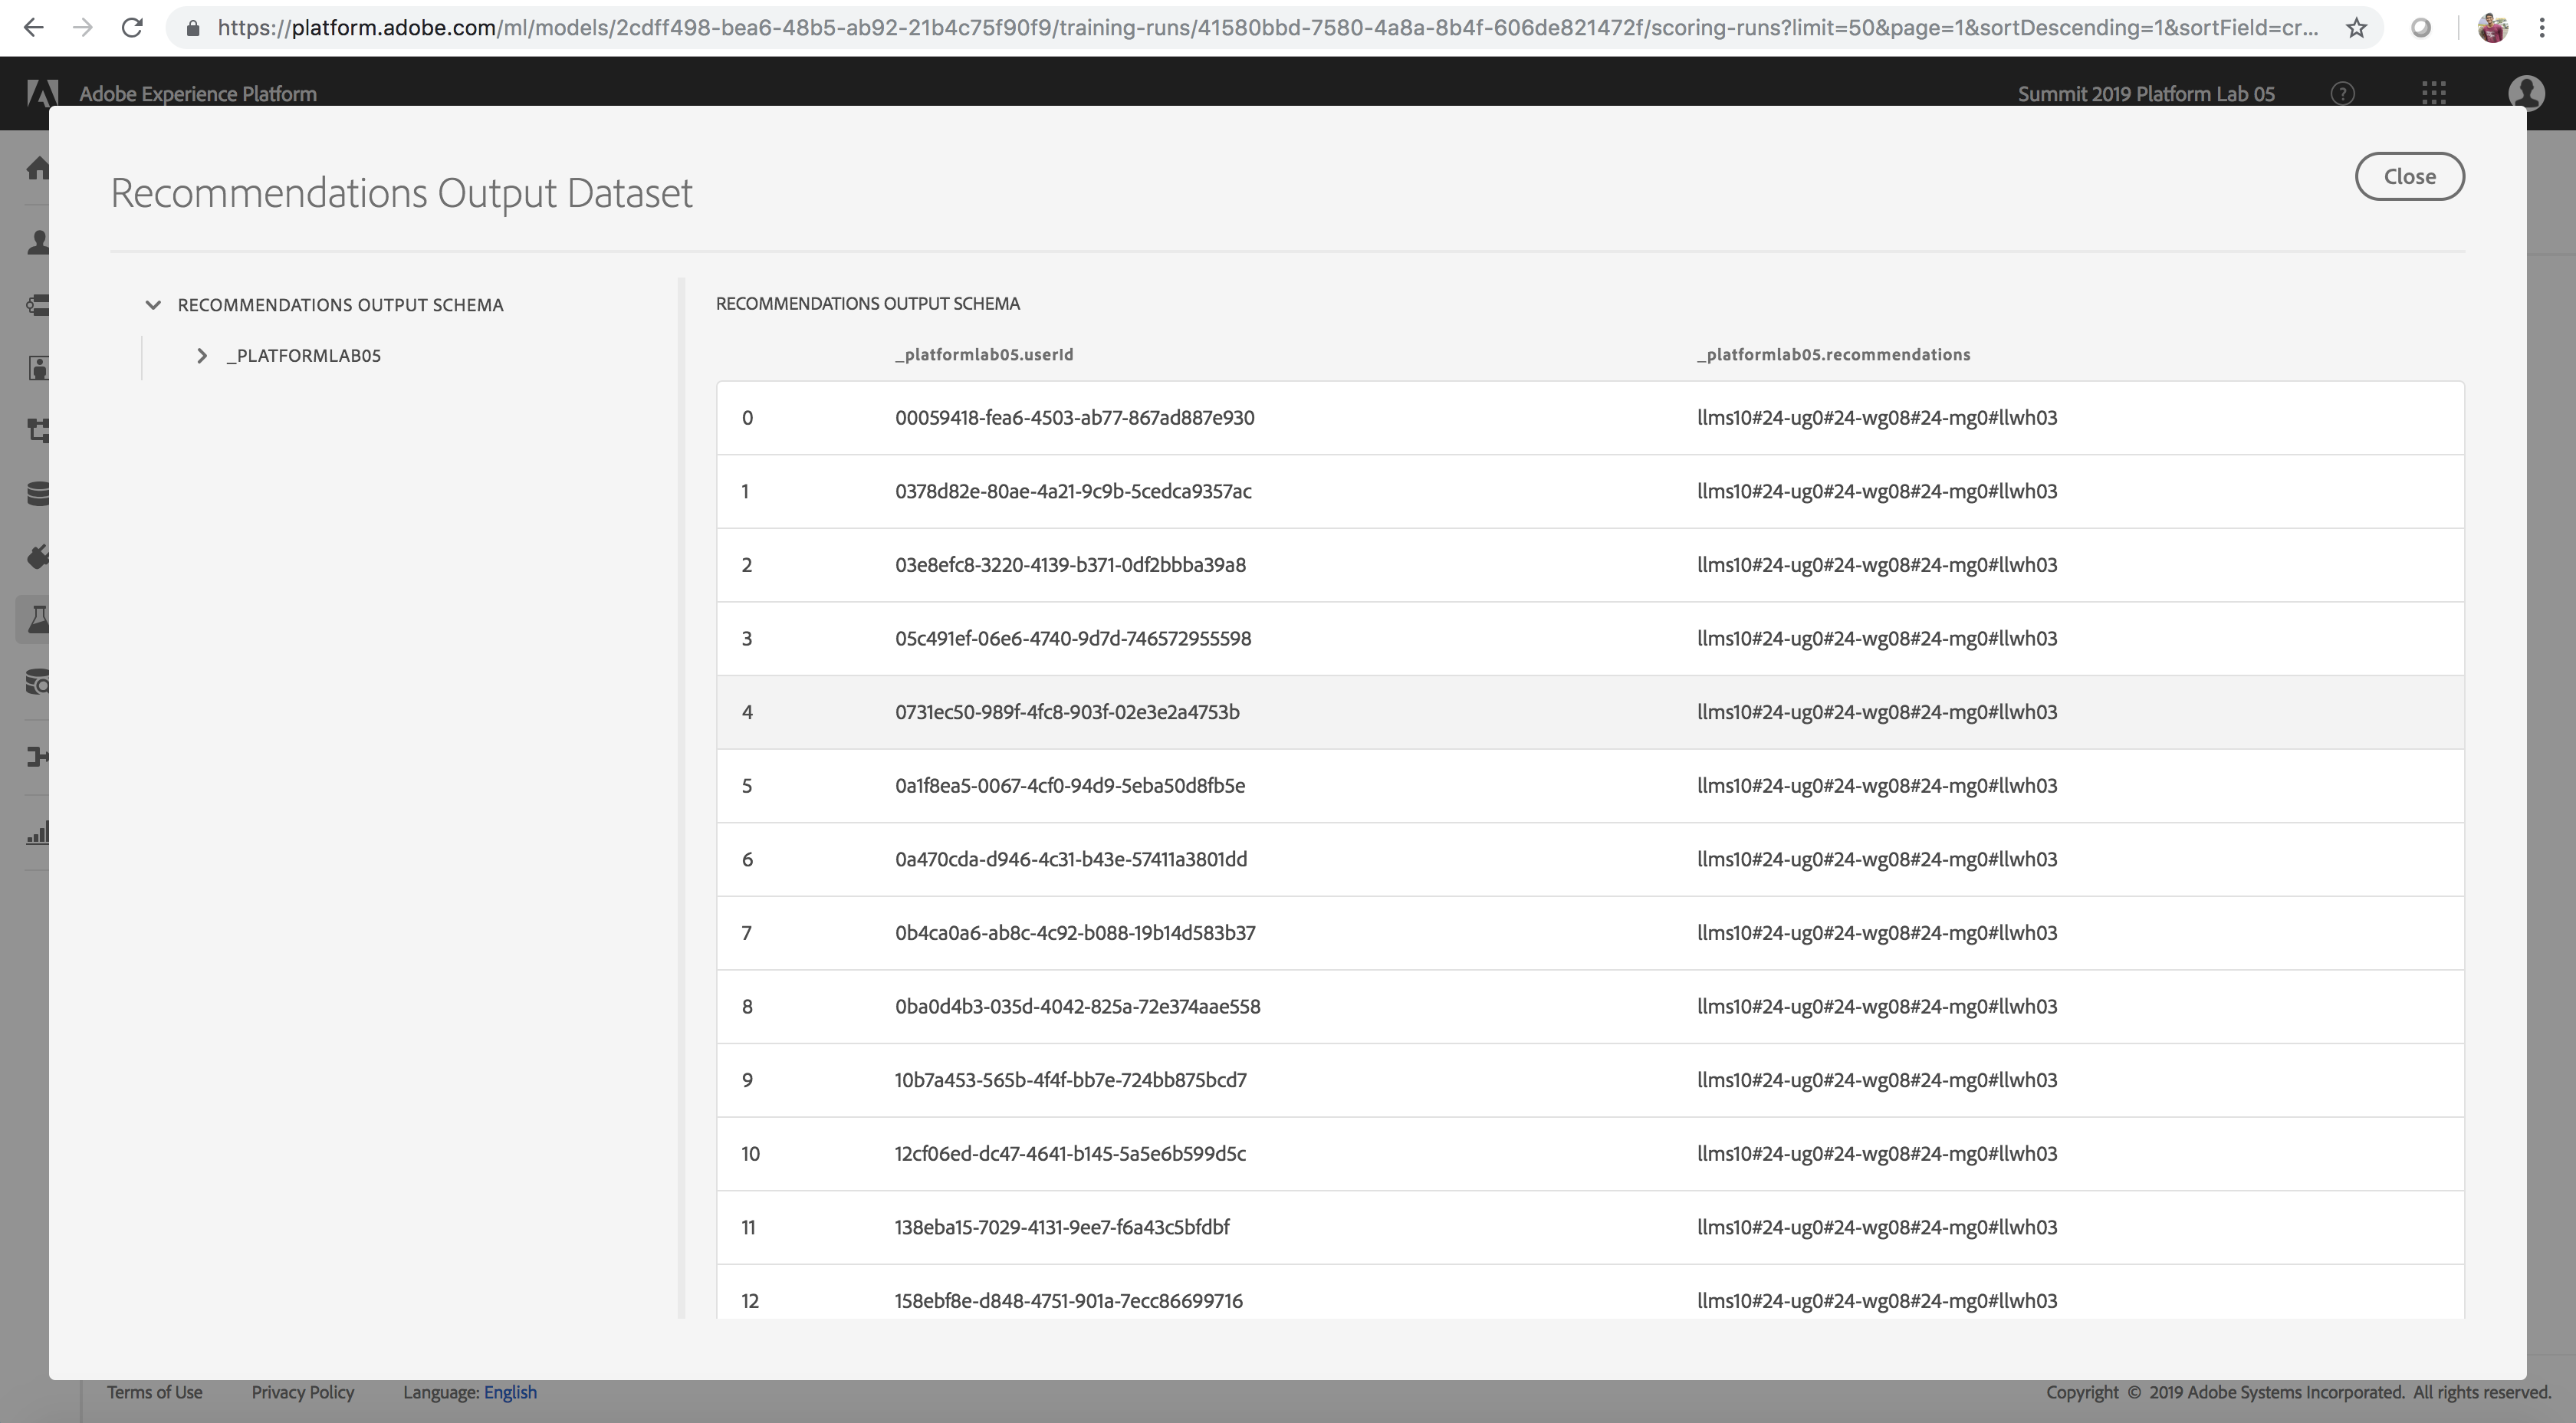
After successful completion of the scoring results, we are now able to preview scoring results and view the insights generated. Here we finally see the fruit of our labor, recommended products for each user id.
- On the Scoring Runs tab, hover over the completed scoring run and select it
- Click Preview Scoring Results Dataset on the right rail
- Preview the final scored results in a table. userId lists a website visitor/user and recommendations lists the products (separated by a # delimiter) that would be recommended to the user identified by userId.
These scored result insights are also automatically written to the Unified Profile since the schema for the scoring results dataset is of class Profile XDM.
Scoring Results
Enrich and Segment Unified Profile with Scored Insights
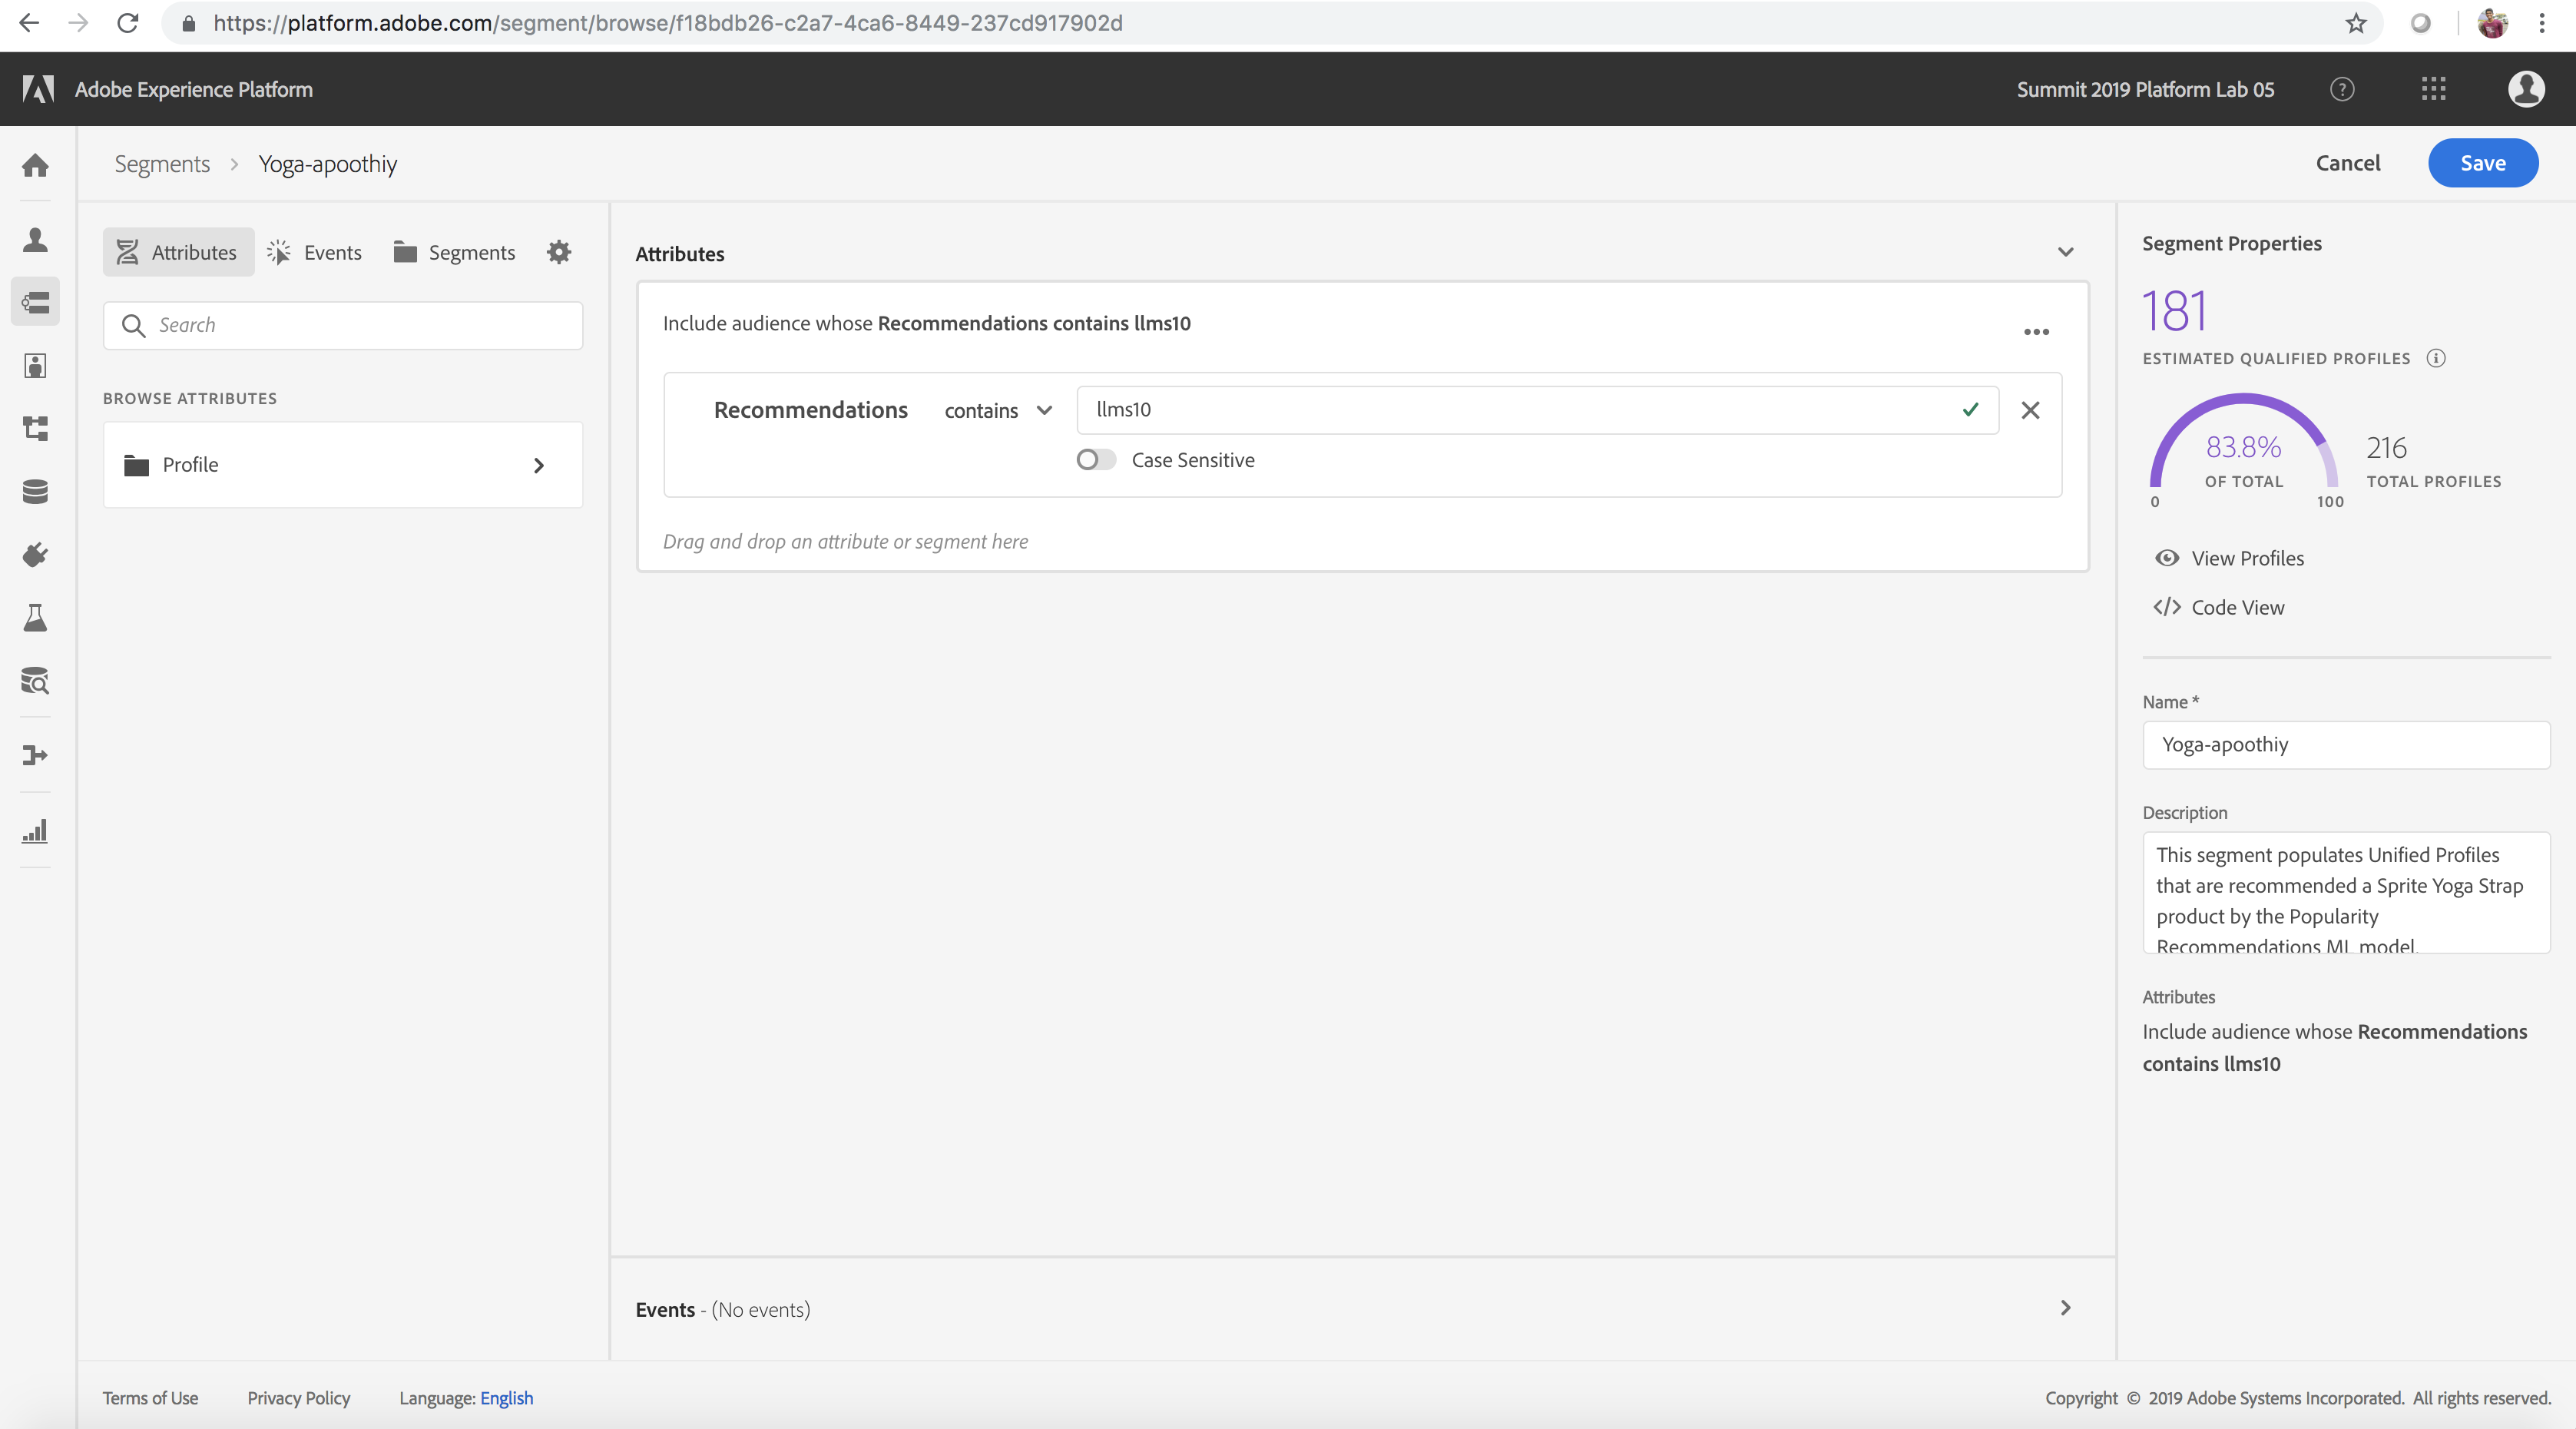
Now that we've generated insights using the machine learning model, let's move on to segmenting users using these insights. Here, we’ll use the Unified Profile and the Segmentation Service to create an audience segment of users that are recommended a specific product by our recommendation model.
- Navigate to Segments on the left rail navigation
- Click Create Segment
- Browse attributes and drill down into Profile and our predicted field called Recommendations (Profile > Platformlab 05 > Recommendations) on the inner left pane within the Segmentation UI and drag this into the Segmentation Service Rule engine in the center
- Modify the assertion condition from equals to contains and enter the value llms10 (this is the itemid for the product, Sprite Yoga Straps)
- Name the segment Yoga-myadobeid (where myadobeid corresponds to your account's user id) and click save. This creates a segment of all users who are recommended the Sprite Yoga Straps product by our ML model
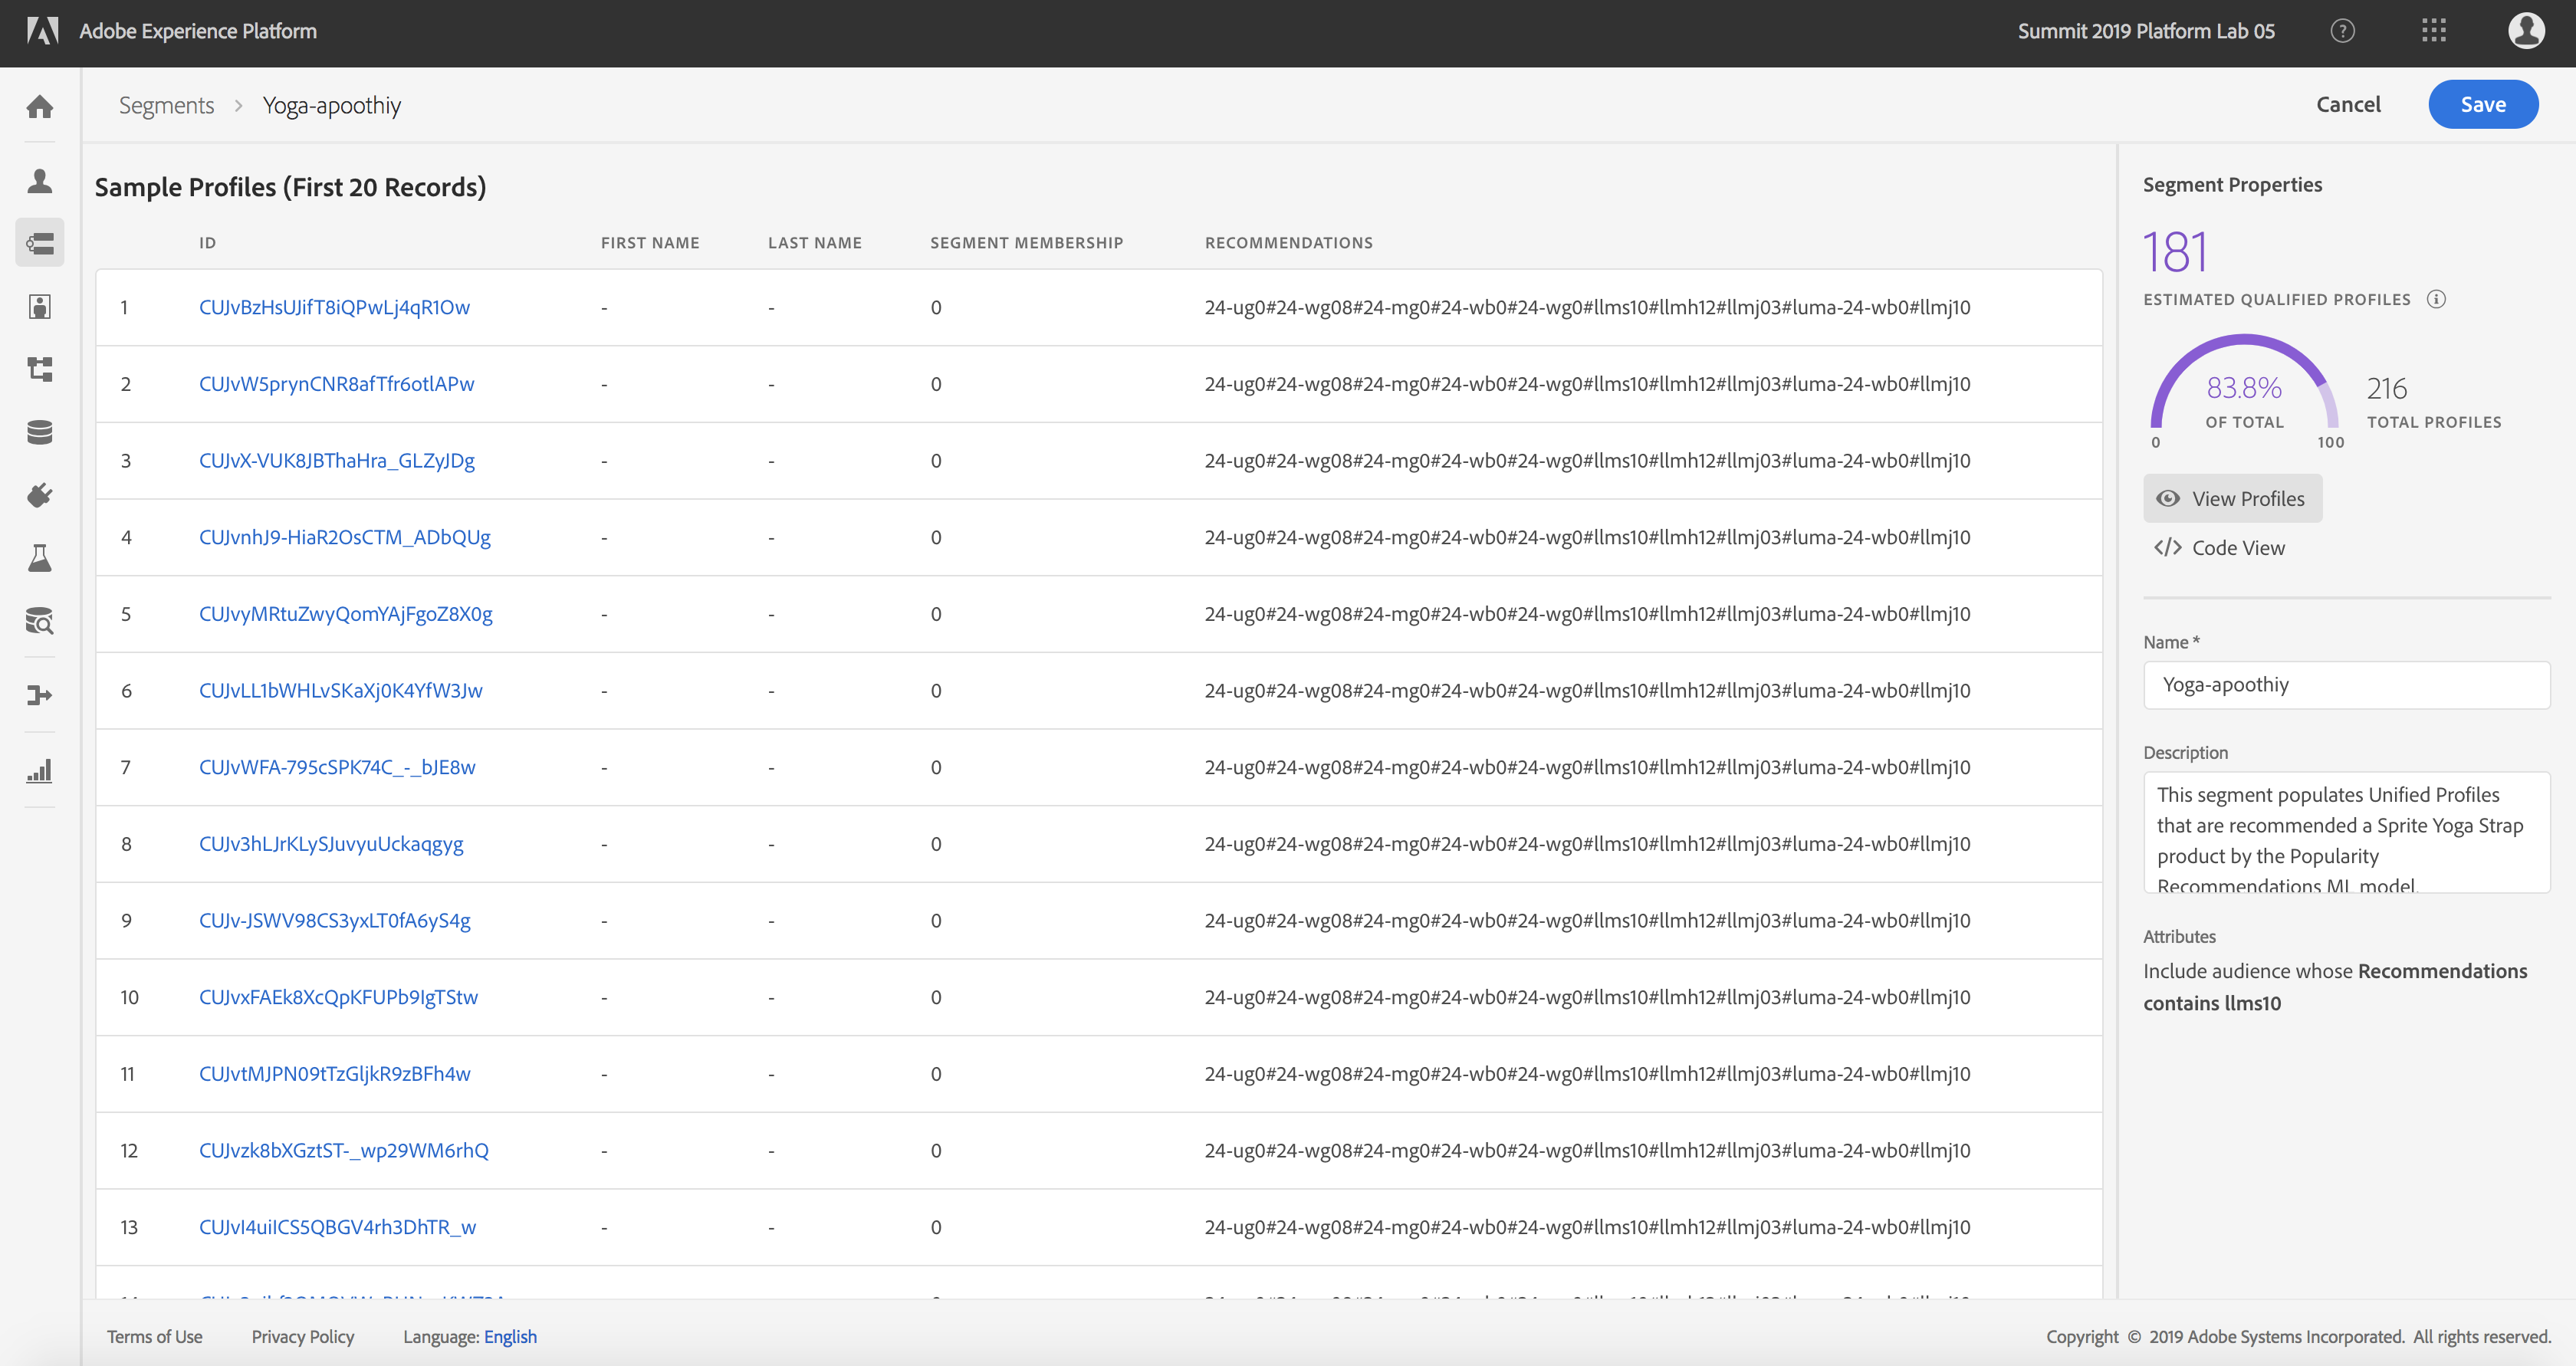
- Select the segment that you just created. This displays Profile summary statistics results (number of matching profiles) on the right rail
- Click View Profiles to see the scored insights records that matched the segment rule (Note: For this lab, we’re using a shared org for all users. As a result, the most recent scored results batch is what your results would correspond to on clicking View Profiles)
Profiles within Segment
Scored Insights matching Segment
(Optional) The Sensei Unified Machine Learning API
💎 Adobe Experience Platform and the Data Science Workspace have been developed in an API first approach. Everything that you have accomplished in this hands-on Lab can be done using the Sensei Unified Machine Learning API!
- Navigate to: https://www.adobe.io/apis/cloudplatform/dataservices/api-reference.html#!acpdr/swagger-specs/sensei-ml-api.yaml
- Take some time to review the API.
Additional Documentation and Tutorials
Completed
🏆 Congratulations - You made it!
We would really appreciate your feedback at the survey link below. Survey respondents will be entered into a drawing for a $50 Amazon gift card. The survey will remain active until Monday, April 1, 2019: https://bit.ly/2TgRNqZ
